- Launch Your First Autonomous Test
- Before you begin
- Step 1 & 2 : Review the introduction and Name Test
- Step 3: Define targets
- Step 4: Configure authentication and context
- Step 5: Review and launch
- Monitoring Your Test
- Review Your Test Results and Findings
Launch Your First Autonomous Test
Savant Pathseeker is Bugcrowd’s agentic penetration testing solution. AI agents probe your targets from an attacker’s perspective, then validate and exploit the vulnerabilities they find.
This guide walks through launching your first test.
Before you begin
- Permissions: You need to have a Test Operator or Owner role in the Bugcrowd Platform in order to run autonomous tests within a Program.
- Test allotment: Each test uses your plan’s available tests. The Autonomous Tests page within your program(s) shows your plan and the number of remaining tests.
-
Network allow lists: Pathseeker includes built-in bot detection and firewall evasion.
- Optionally, to avoid triggering security controls or alerts during testing, add Pathseeker’s IP ranges to your firewall, WAF, or other network allow lists before you launch. The ranges can also be found in the first step of the test wizard.
Step 1 & 2 : Review the introduction and Name Test
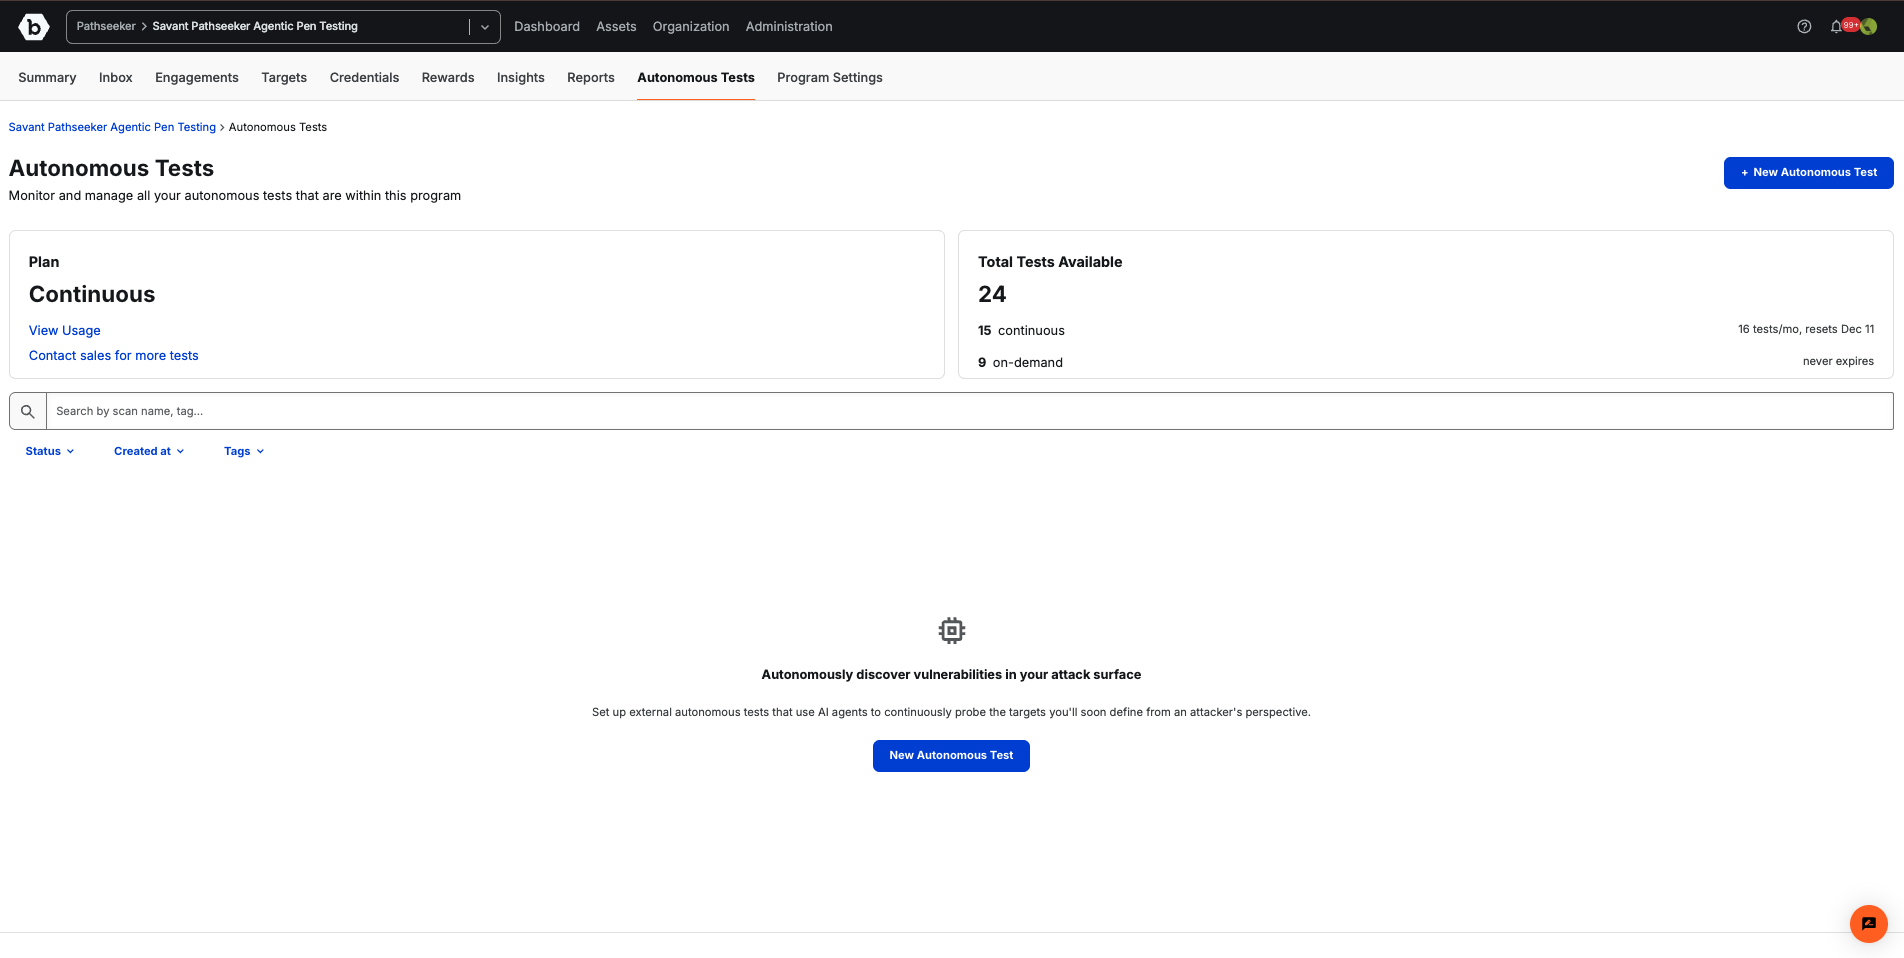
Go to your program and select the Autonomous Tests tab. Click New Autonomous Test.
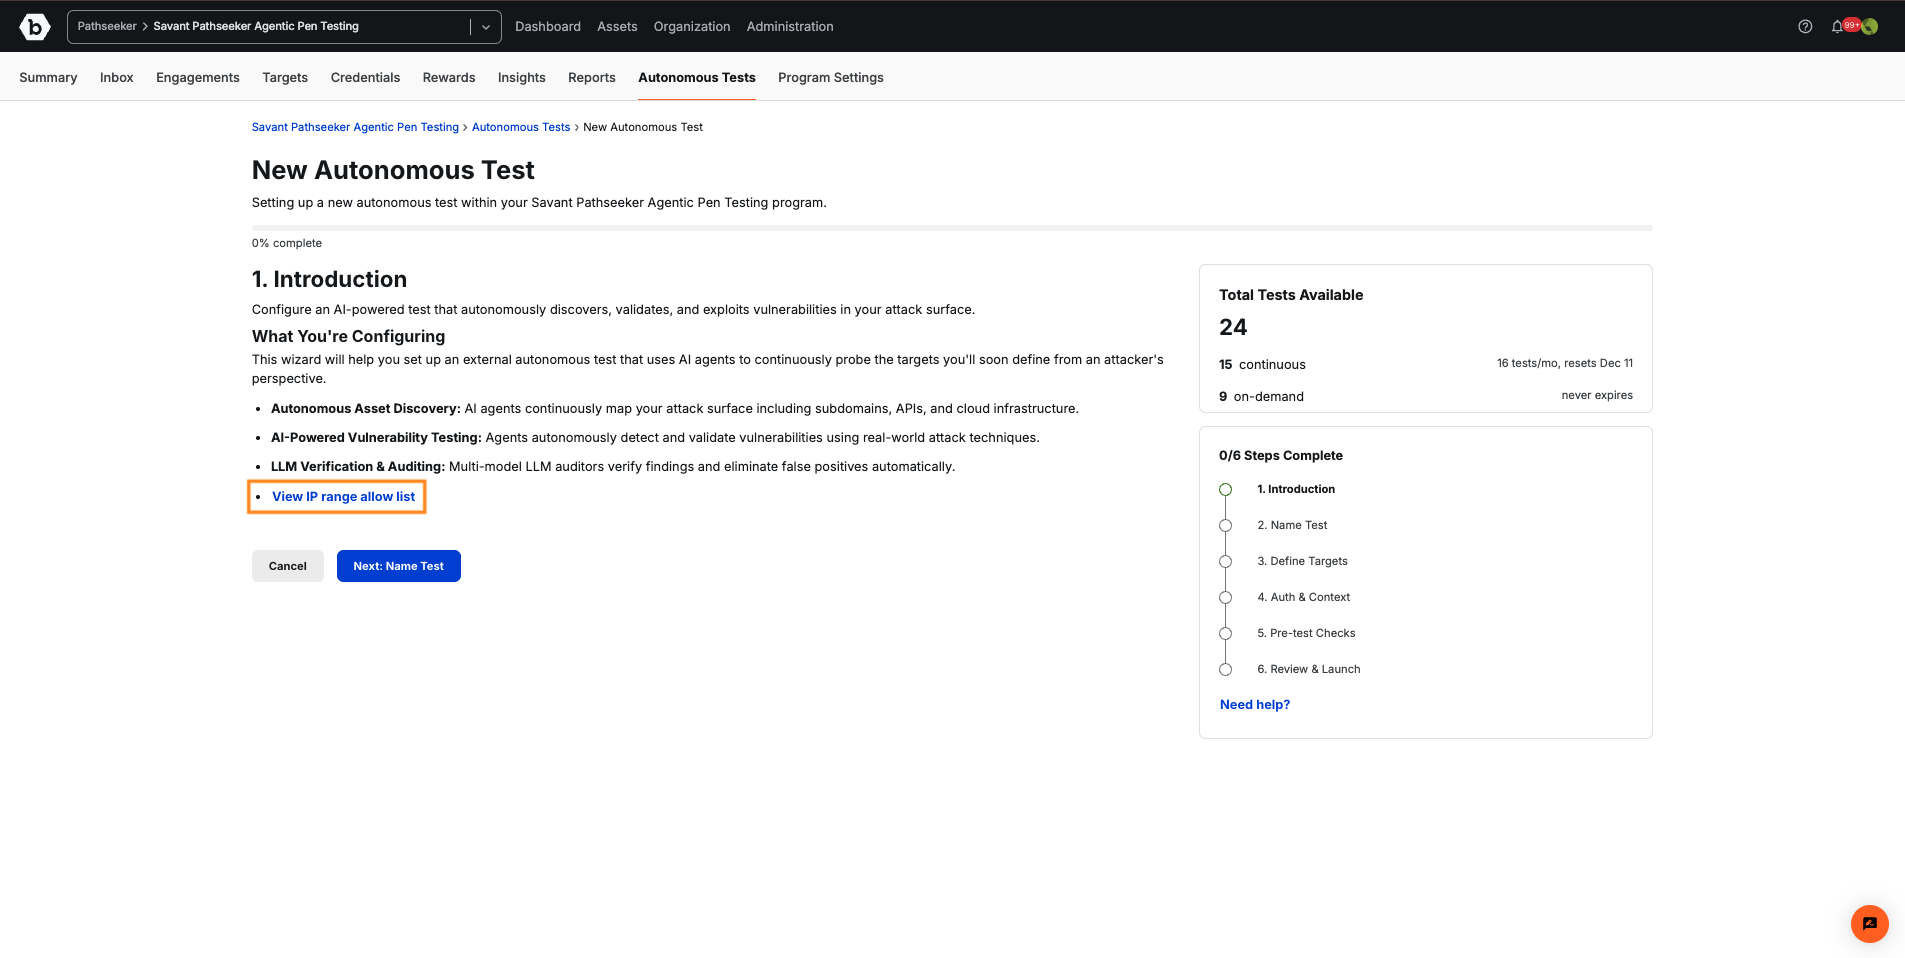
The first step in the test configuration summarizes what the test does. To get the IP ranges that test traffic originates from, simply click View IP range allow list.
Enter a name for the test. Optionally, add one or more tags to keep your tests organized.
Step 3: Define targets
Add targets in any combination of three ways: import asset groups, add existing assets individually, or create new assets. Targets come from your asset inventory within the Bugcrowd Platform, also known as Savant Vista.
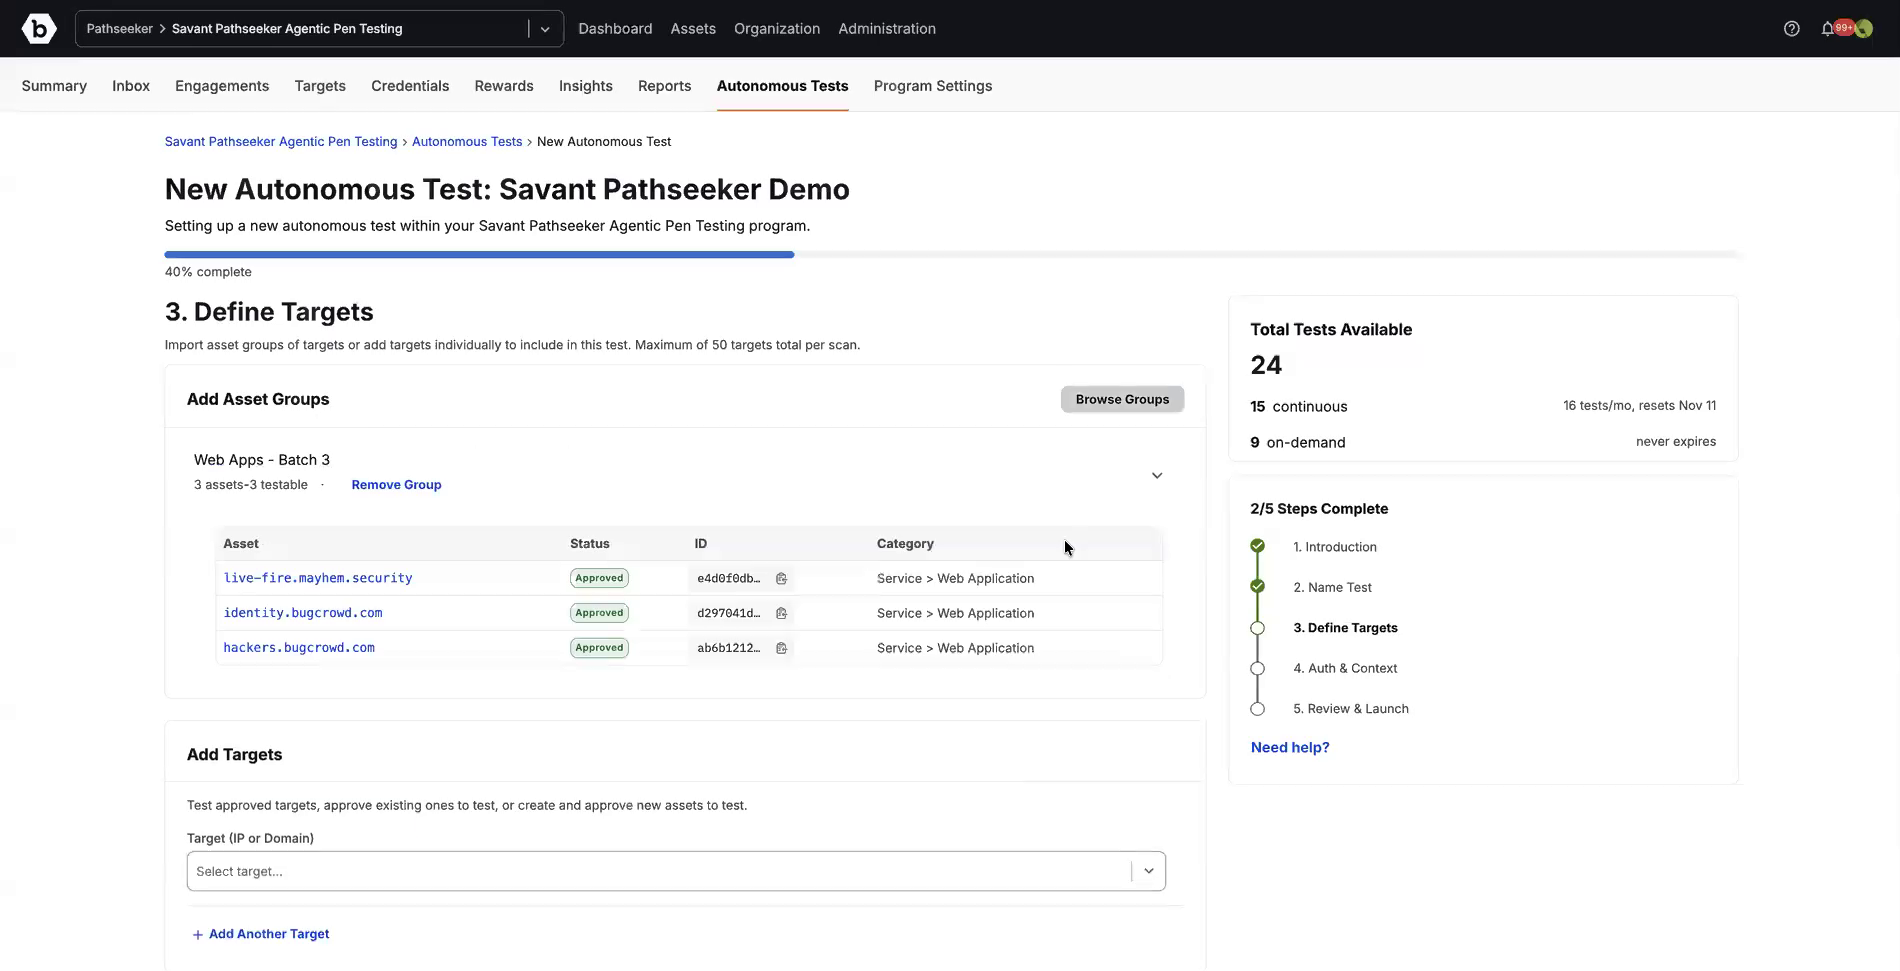
Import asset groups
Under Add Asset Groups, click Browse Groups. Any groups you have created within the Bugcrowd asset inventory will appear here.
Add existing assets individually
Under Add Targets, click the Target (IP or Domain) field and start typing. You can search by name, ID, IP, or URL.
Create and approve a new asset
If a target isn’t in your inventory, you can create it from the wizard. The new asset is added to your test targets and to your asset inventory. If you later remove it from the test, it stays in your inventory.
- Click the Target (IP or Domain) field, then click create and approve a new asset.
- Complete the Create and Approve New Asset form, including the asset details (name, URL or location, type) and asset criticality.
Alternatively, type the asset’s URL into the Target (IP or Domain) field. If no matching asset exists, click Create and approve a new asset?
When you’re done adding targets, click Next: Auth & Context.
Step 4: Configure authentication and context
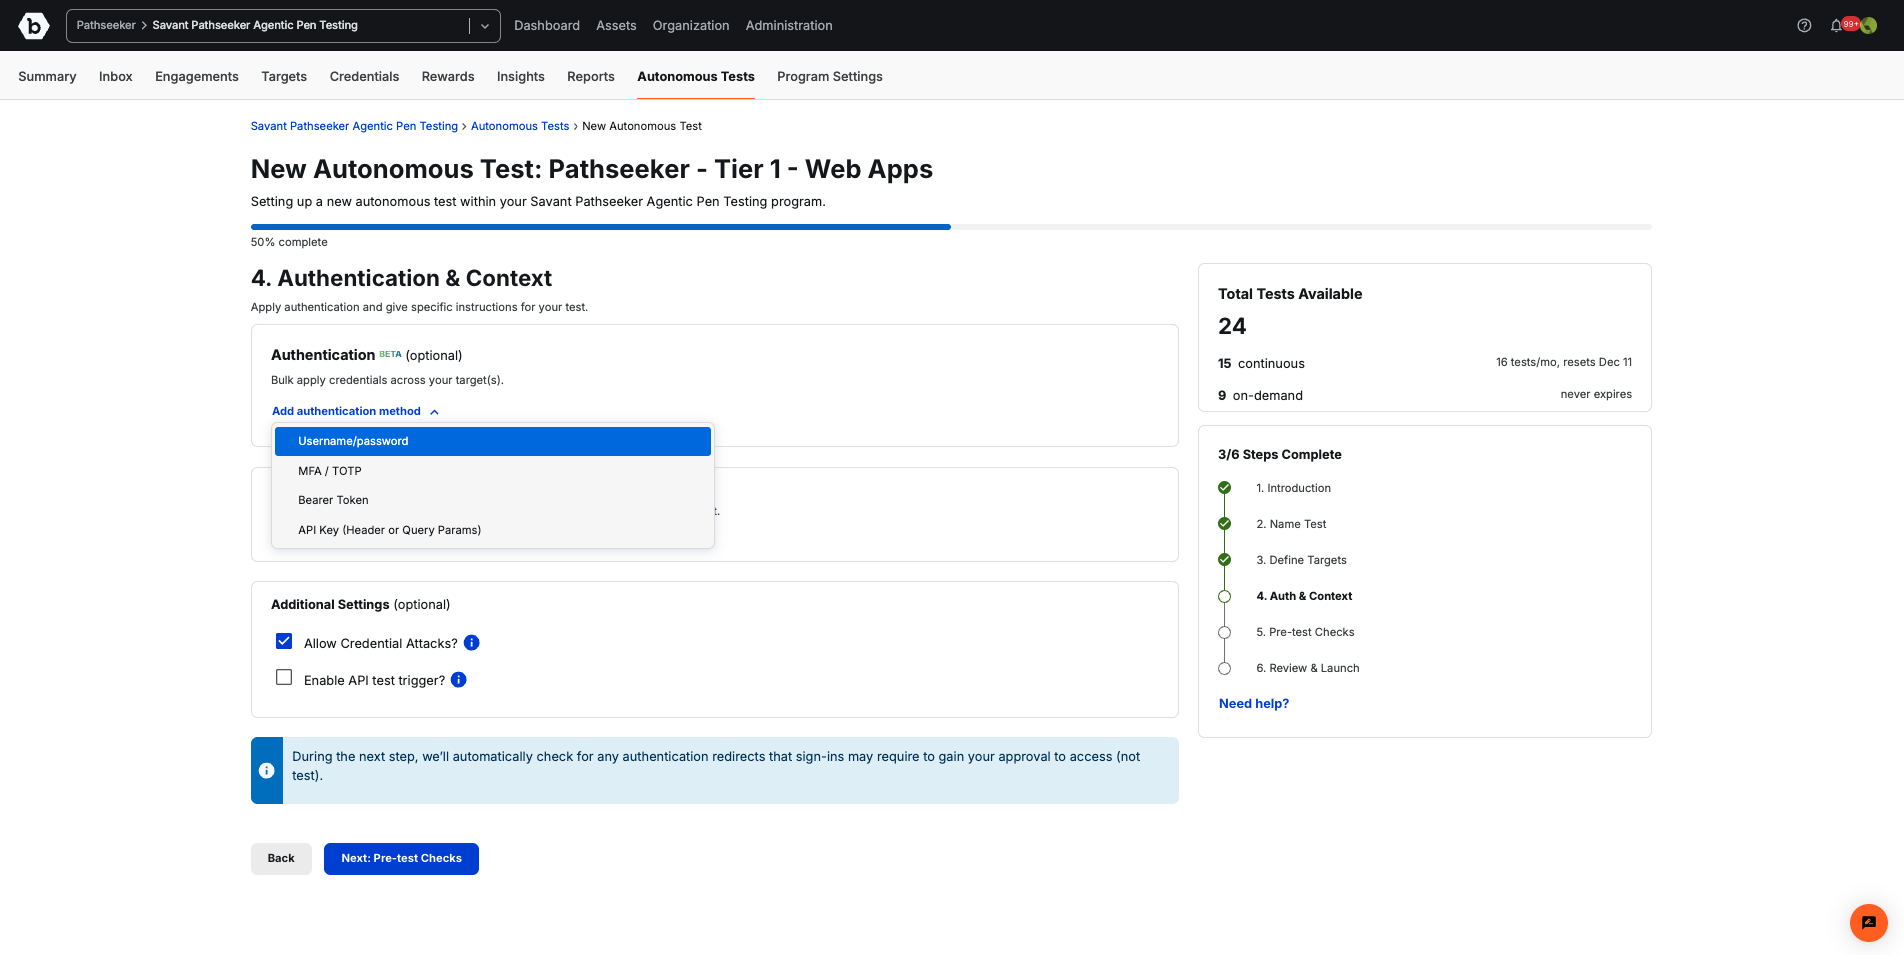
Authentication (optional)
To test behind a login, select your preferred authentication method and complete the required fields.
Authentication Tips:
- Provide two or more roles to improve authenticated testing coverage.
- Provide role descriptions and login instructions within the instructions box.
Context (optional)
Use the context box to give Pathseeker background and instructions in plain English, such as which features matter most, which areas to skip, or how the app is structured.
Miscellaneous (optional)
- Allow Credential Attacks (recommended): Pathseeker also tests as an unauthenticated attacker, attempting to break in using password spraying, brute force, and credential stuffing.
-
Enable API test trigger: After the test is configured, you can trigger future tests on the same targets via API. Use this to run tests as part of your CI/CD pipeline or on your own schedule.
- Follow this link for full instructions on triggering Pathseeker tests via API
Click Next: Review & Launch.
Step 5: Review and launch
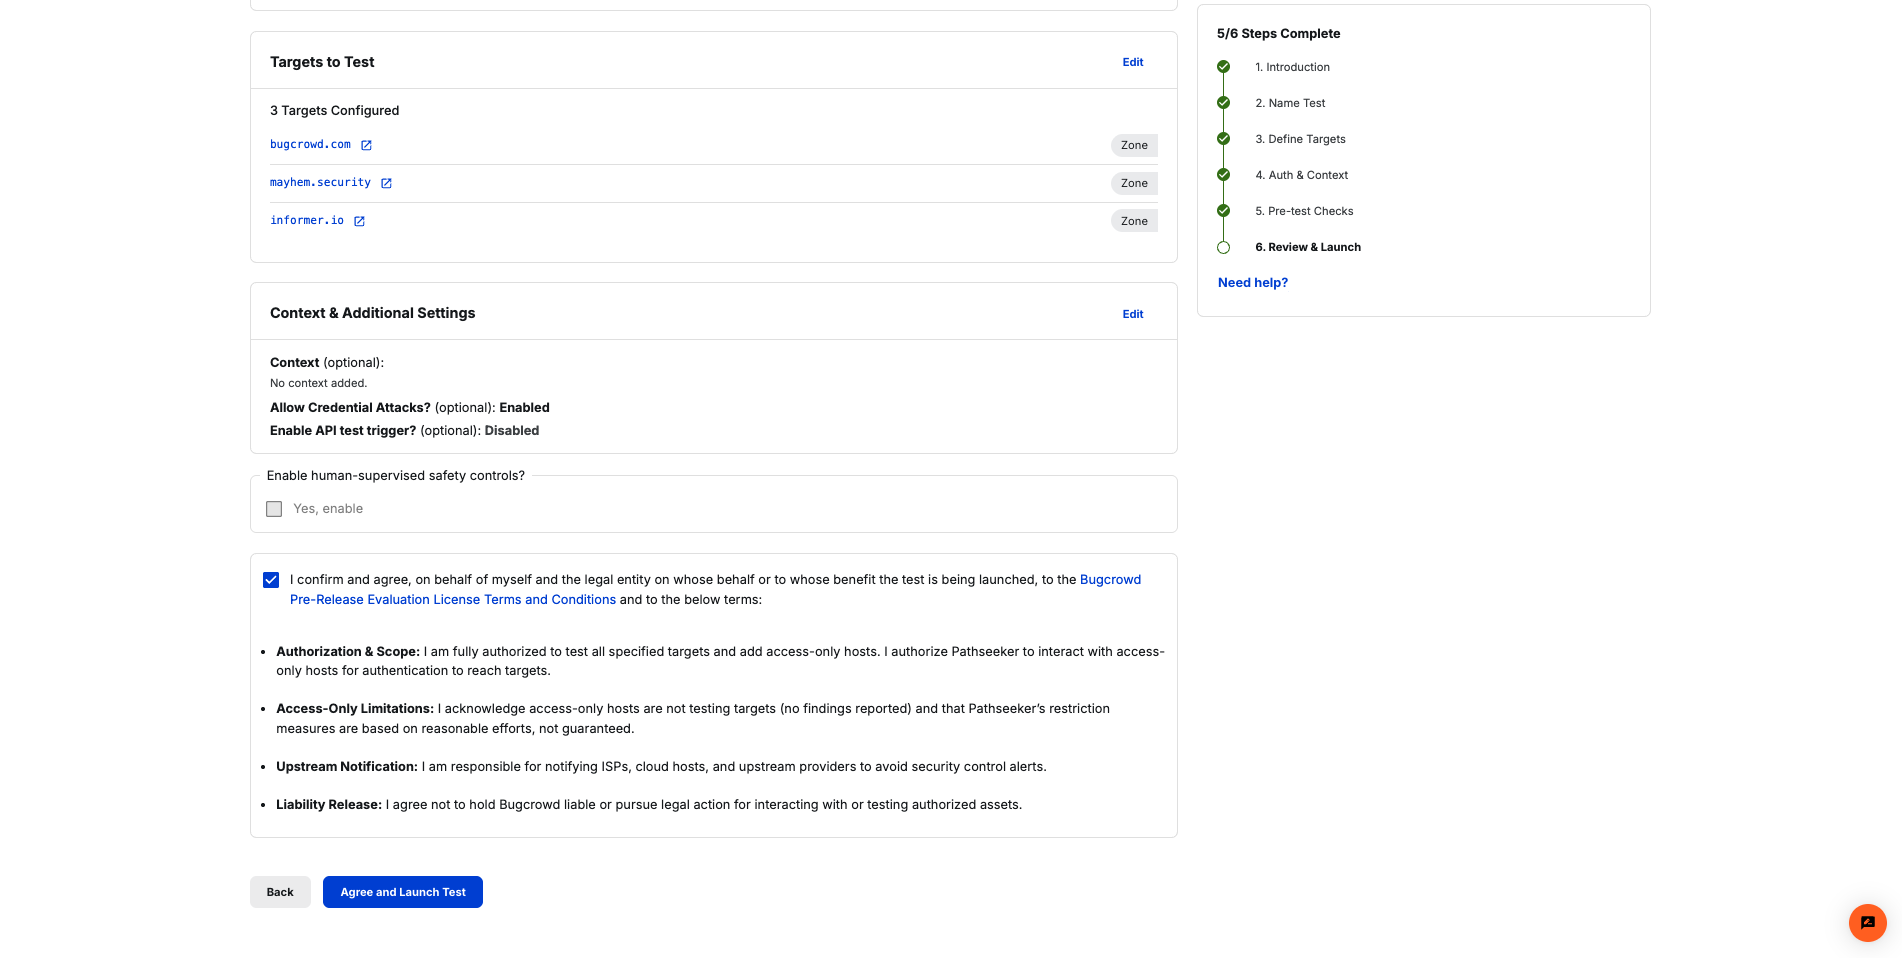
Review the Test Name, Targets to Test, and Context & Additional Settings. To change a section, click Edit.
Select the checkbox to confirm that you agree to the Bugcrowd’s Terms and Conditions and then click Agree and Launch Test to begin testing.
Monitoring Your Test
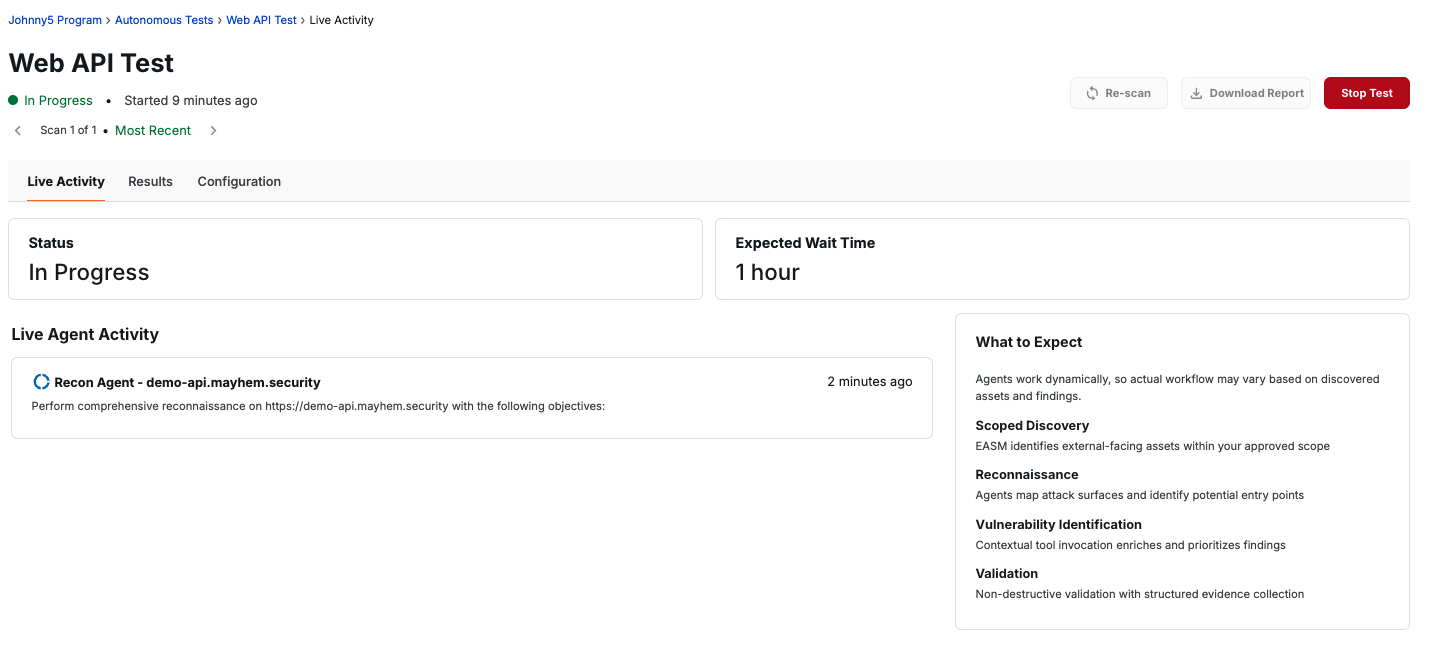
While the test is running, review the status and progress indicators within the Activity tab. If anything appears unexpected you can use the red “Stop Test” button to immediately halt testing. You can also check the status of the test from the Autonomous Test homepage.
Review Your Test Results and Findings
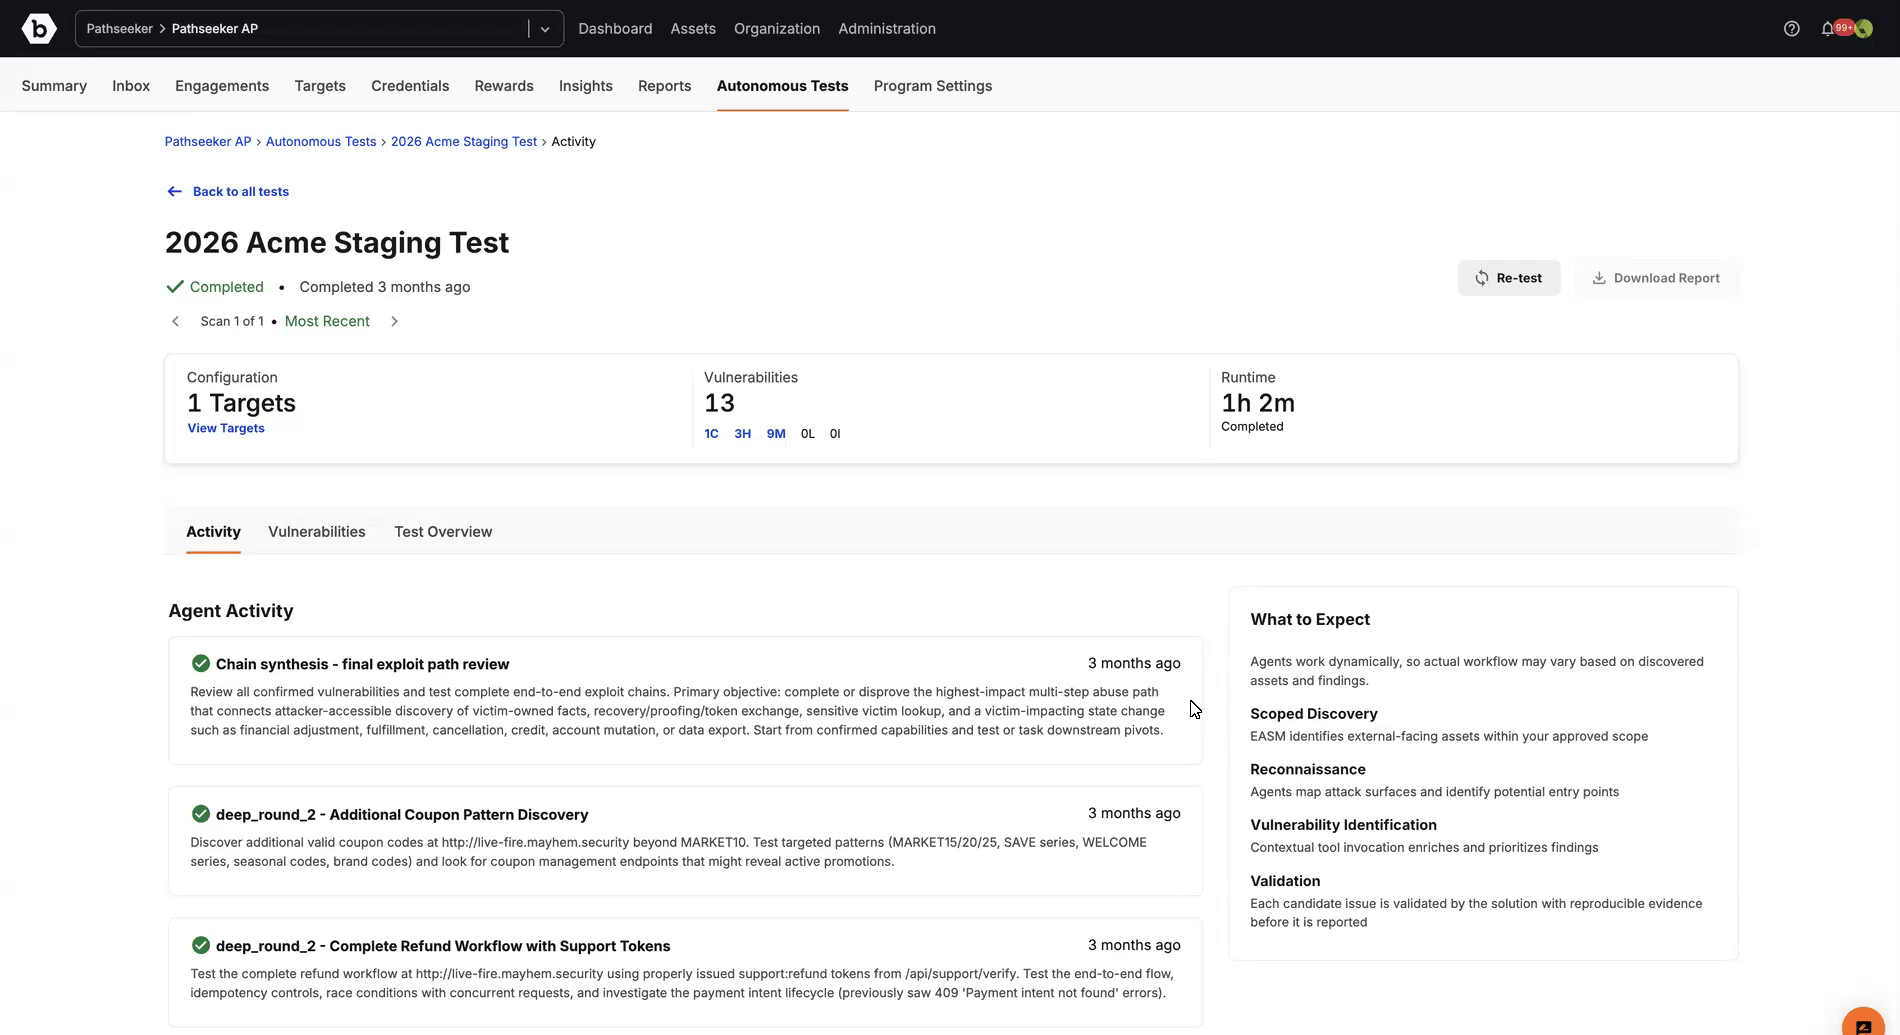
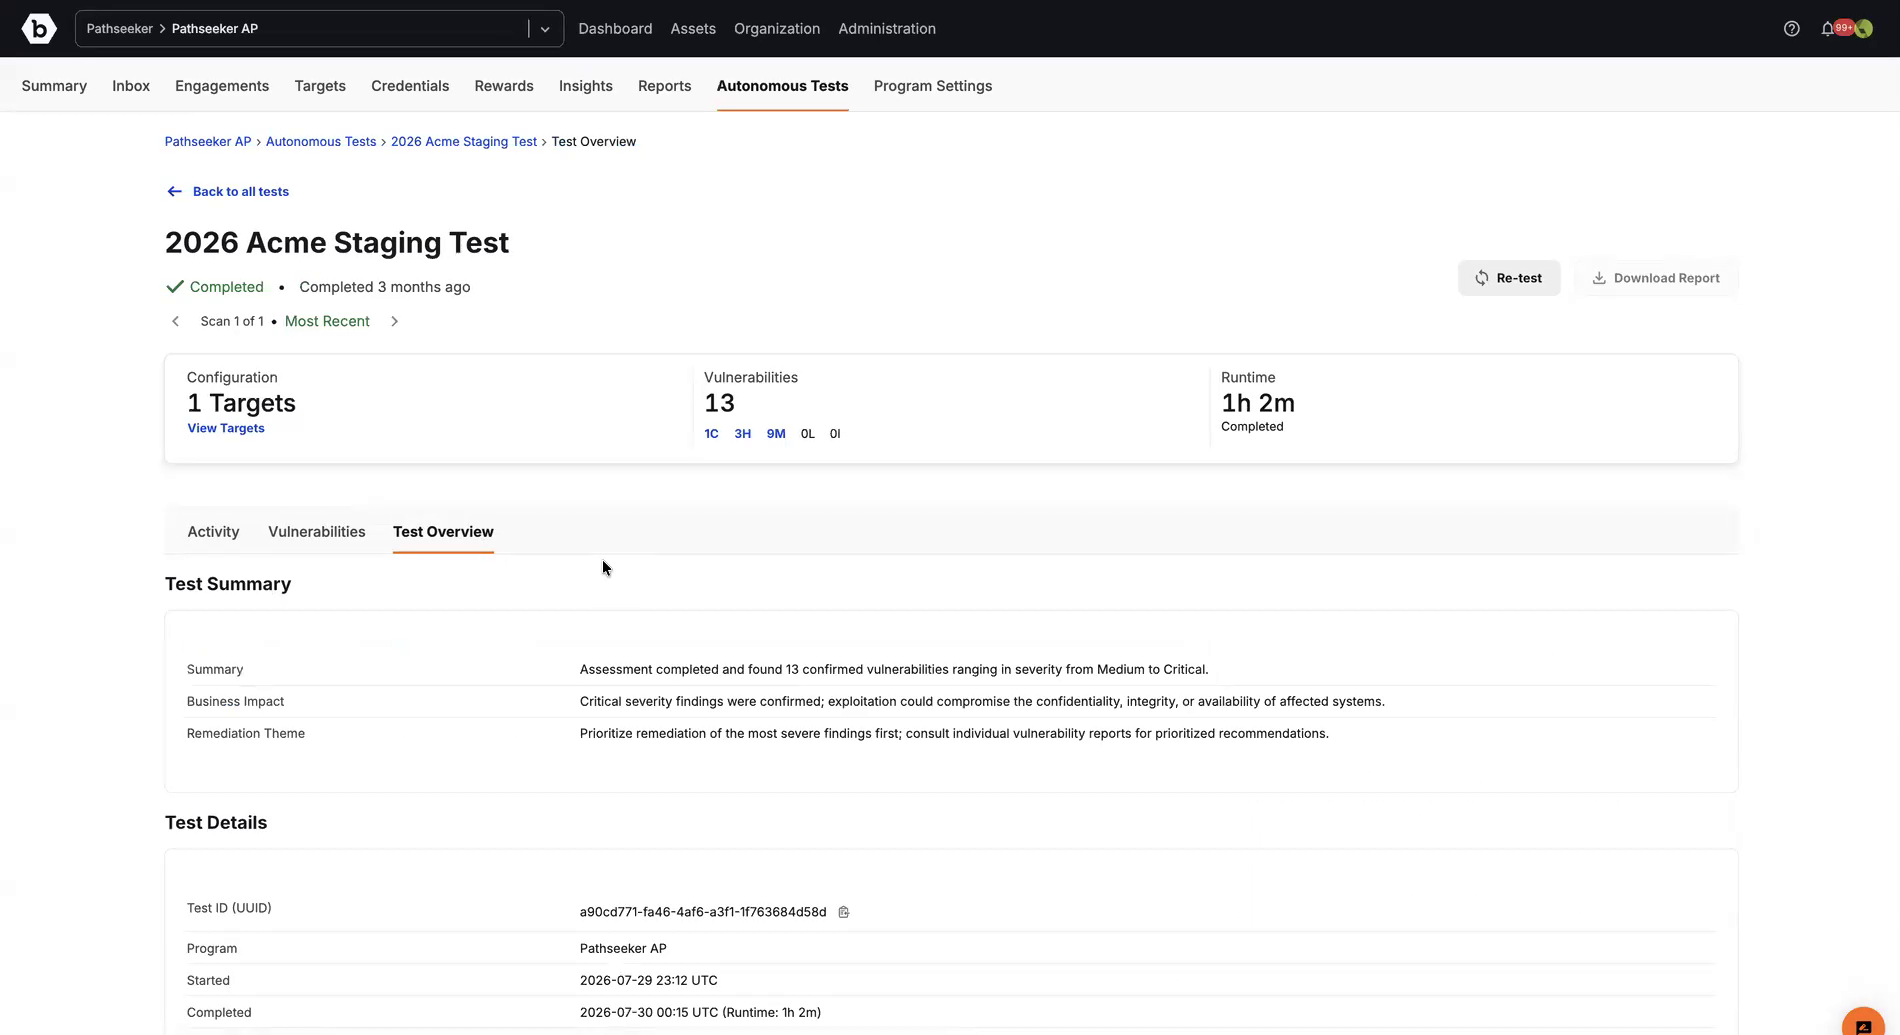
When a Pathseeker test completes, its results page shows what the agents did, what they found, and an audit-ready summary of the test.
The top of the results page shows the test’s status and a summary of the run:
- Configuration: The number of targets tested. Click View Targets to see them.
- Vulnerabilities: The total number of validated findings, broken down by severity (critical, high, medium, low, informational).
- Runtime: How long the test ran.
If a test has been run more than once, use the test selector under the test name to move between scans. To run the test again on the same configuration, click Re-test.
Results are organized into three tabs: Activity, Vulnerabilities, and Test Overview.
Activity
The Activity tab gives an overview of what the agents tested. Agent Activity lists each task the agents ran, with a description of its objective. The What to Expect panel explains the testing phases: Scoped Discovery, Reconnaissance, Vulnerability Identification, and Validation.
Vulnerabilities
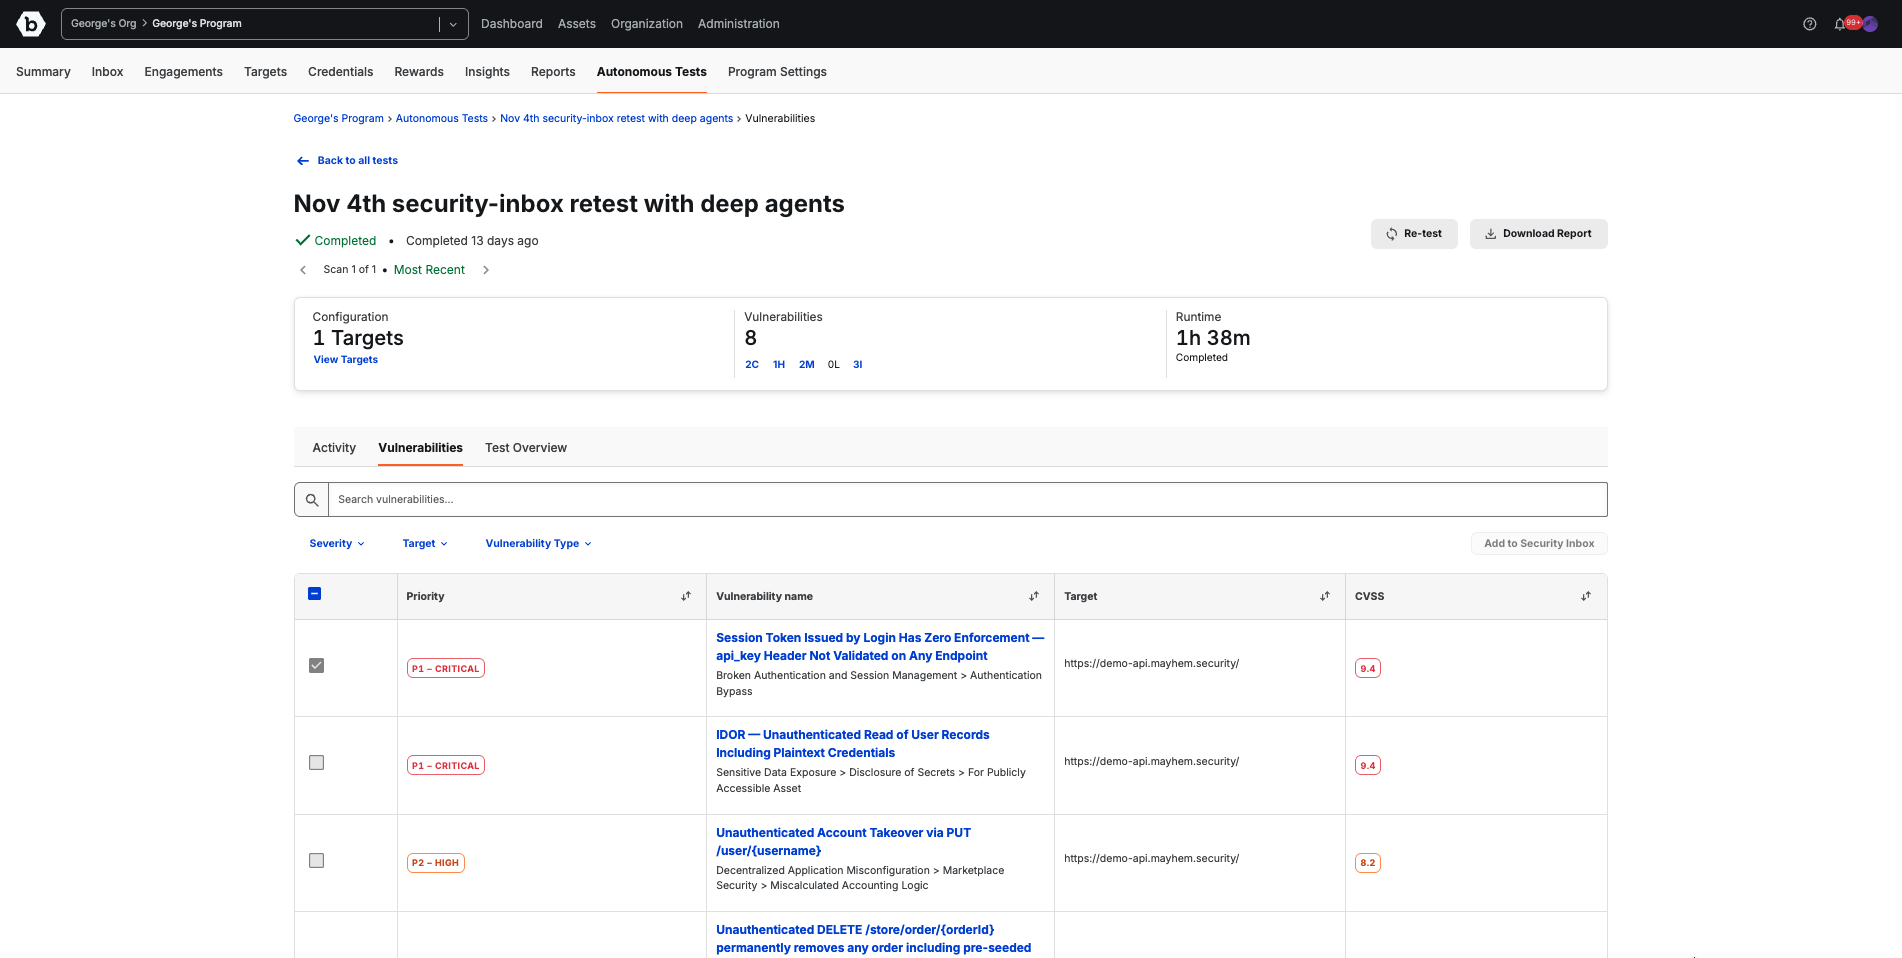
The Vulnerabilities tab lists every validated finding with its priority, name, target, and CVSS score. Search by name, or filter by Severity, Target, or Vulnerability Type. Click a column heading to sort.
Test Overview
The Test Overview tab is an auditor-friendly summary of the test: who ran it, what was tested, the methodology used, and the findings and coverage. It includes these sections:
- Test Summary: Overall results, business impact, and remediation theme.
- Test Details: Test ID, program, start and completion times, who authorized the test, and the settings used.
- Scope and Authorization: Targets tested and the credentials used.
- Methodology and Coverage: The testing frameworks and severity rating used, and coverage of the in-scope targets.
- Vulnerabilities Overview: Finding counts and types by severity.
- Audit Log: A record of test activity.
Review a vulnerability
On the Vulnerabilities tab, click a vulnerability name to open its details. The header shows the finding’s priority under Bugcrowd’s Vulnerability Rating Taxonomy (VRT), its CVSS score, the affected asset, and when and in which scan it was discovered.
Below the header, each finding includes:
- Description: What the vulnerability is and what it affects.
- Security Impact: What an attacker could do by exploiting it.
- Steps to Reproduce: How to confirm the finding yourself.
- Evidence Package: Requests, responses, and other evidence captured during validation. Click Download Artifacts to save them.
- Attack Flow: The sequence of steps an attacker would take to exploit the vulnerability.
- Remediation Guidance: Prioritized steps to fix the issue.
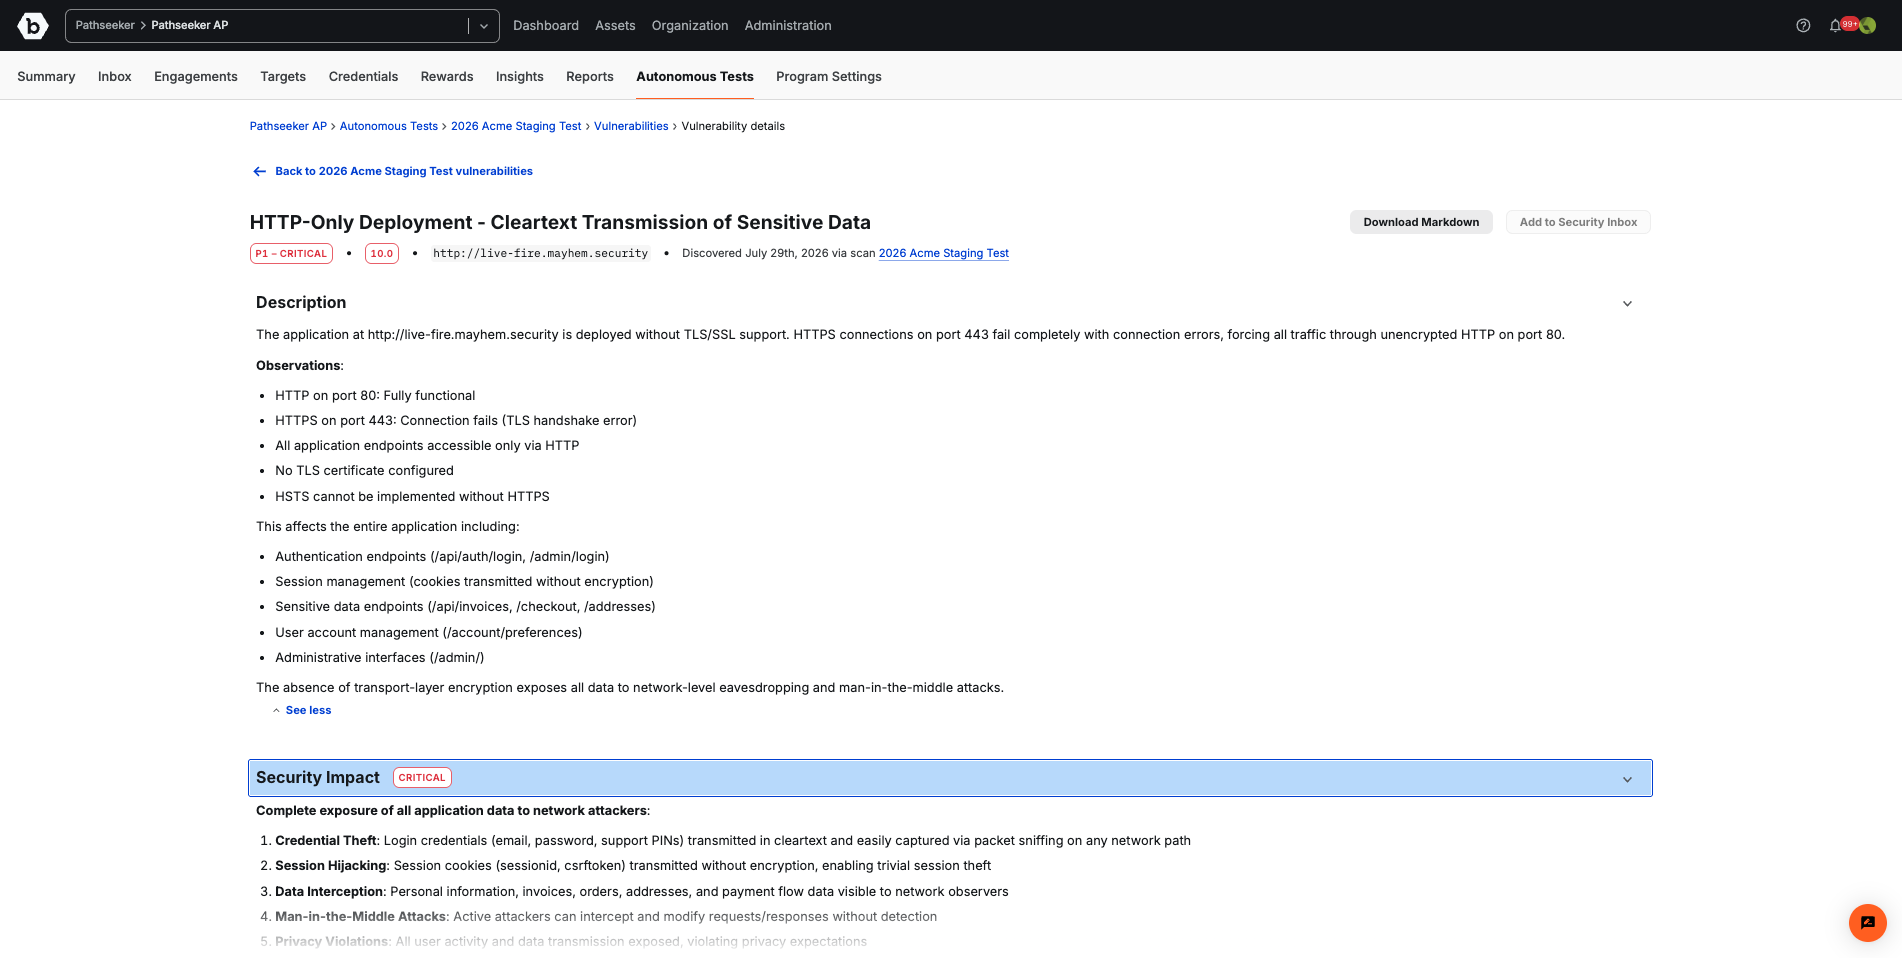
To analyze a finding with your own tools or LLM, click Download Markdown.
Send findings to your Security Inbox
Push findings to the Bugcrowd Security Inbox to manage them alongside your other submissions. In the Security Inbox, you can use built-in integrations and workflows, assign findings to team members, change severity ratings, and add notes.
- From a vulnerability’s details: Click Add to Security Inbox.
- From the Vulnerabilities tab: Select one or more findings, then click Add to Security Inbox.
Provide Feedback
Email your account team or Bugcrowd support team at support@bugcrowd.com with any feedback or questions about the Pathseeker Solution.
