- Configuring ServiceNow Integration
- Pushing Submissions to ServiceNow
- Enabling Two Way Integration
- Unlinking a ServiceNow Issue
Critical to resolving a vulnerability is the handoff to one’s engineering team. You can use the ServiceNow integration for IT Incident Response, Security Incident Response, and Vulnerability Response (VR) management to easily create issues and initiate remediation processes.
Must be Authenticated: To push/view an issue in ServiceNow, you’ll need to be authenticated since Bugcrowd will not be collecting any authentication permissions.
Configuring ServiceNow Integration
The ServiceNow integration is set up in the program’s settings and is specified to create incidents in the customer’s ServiceNow instance. There are no limitations to the number of projects that can be set up with the ServiceNow integration.
To set up the ServiceNow integration, follow these steps:
-
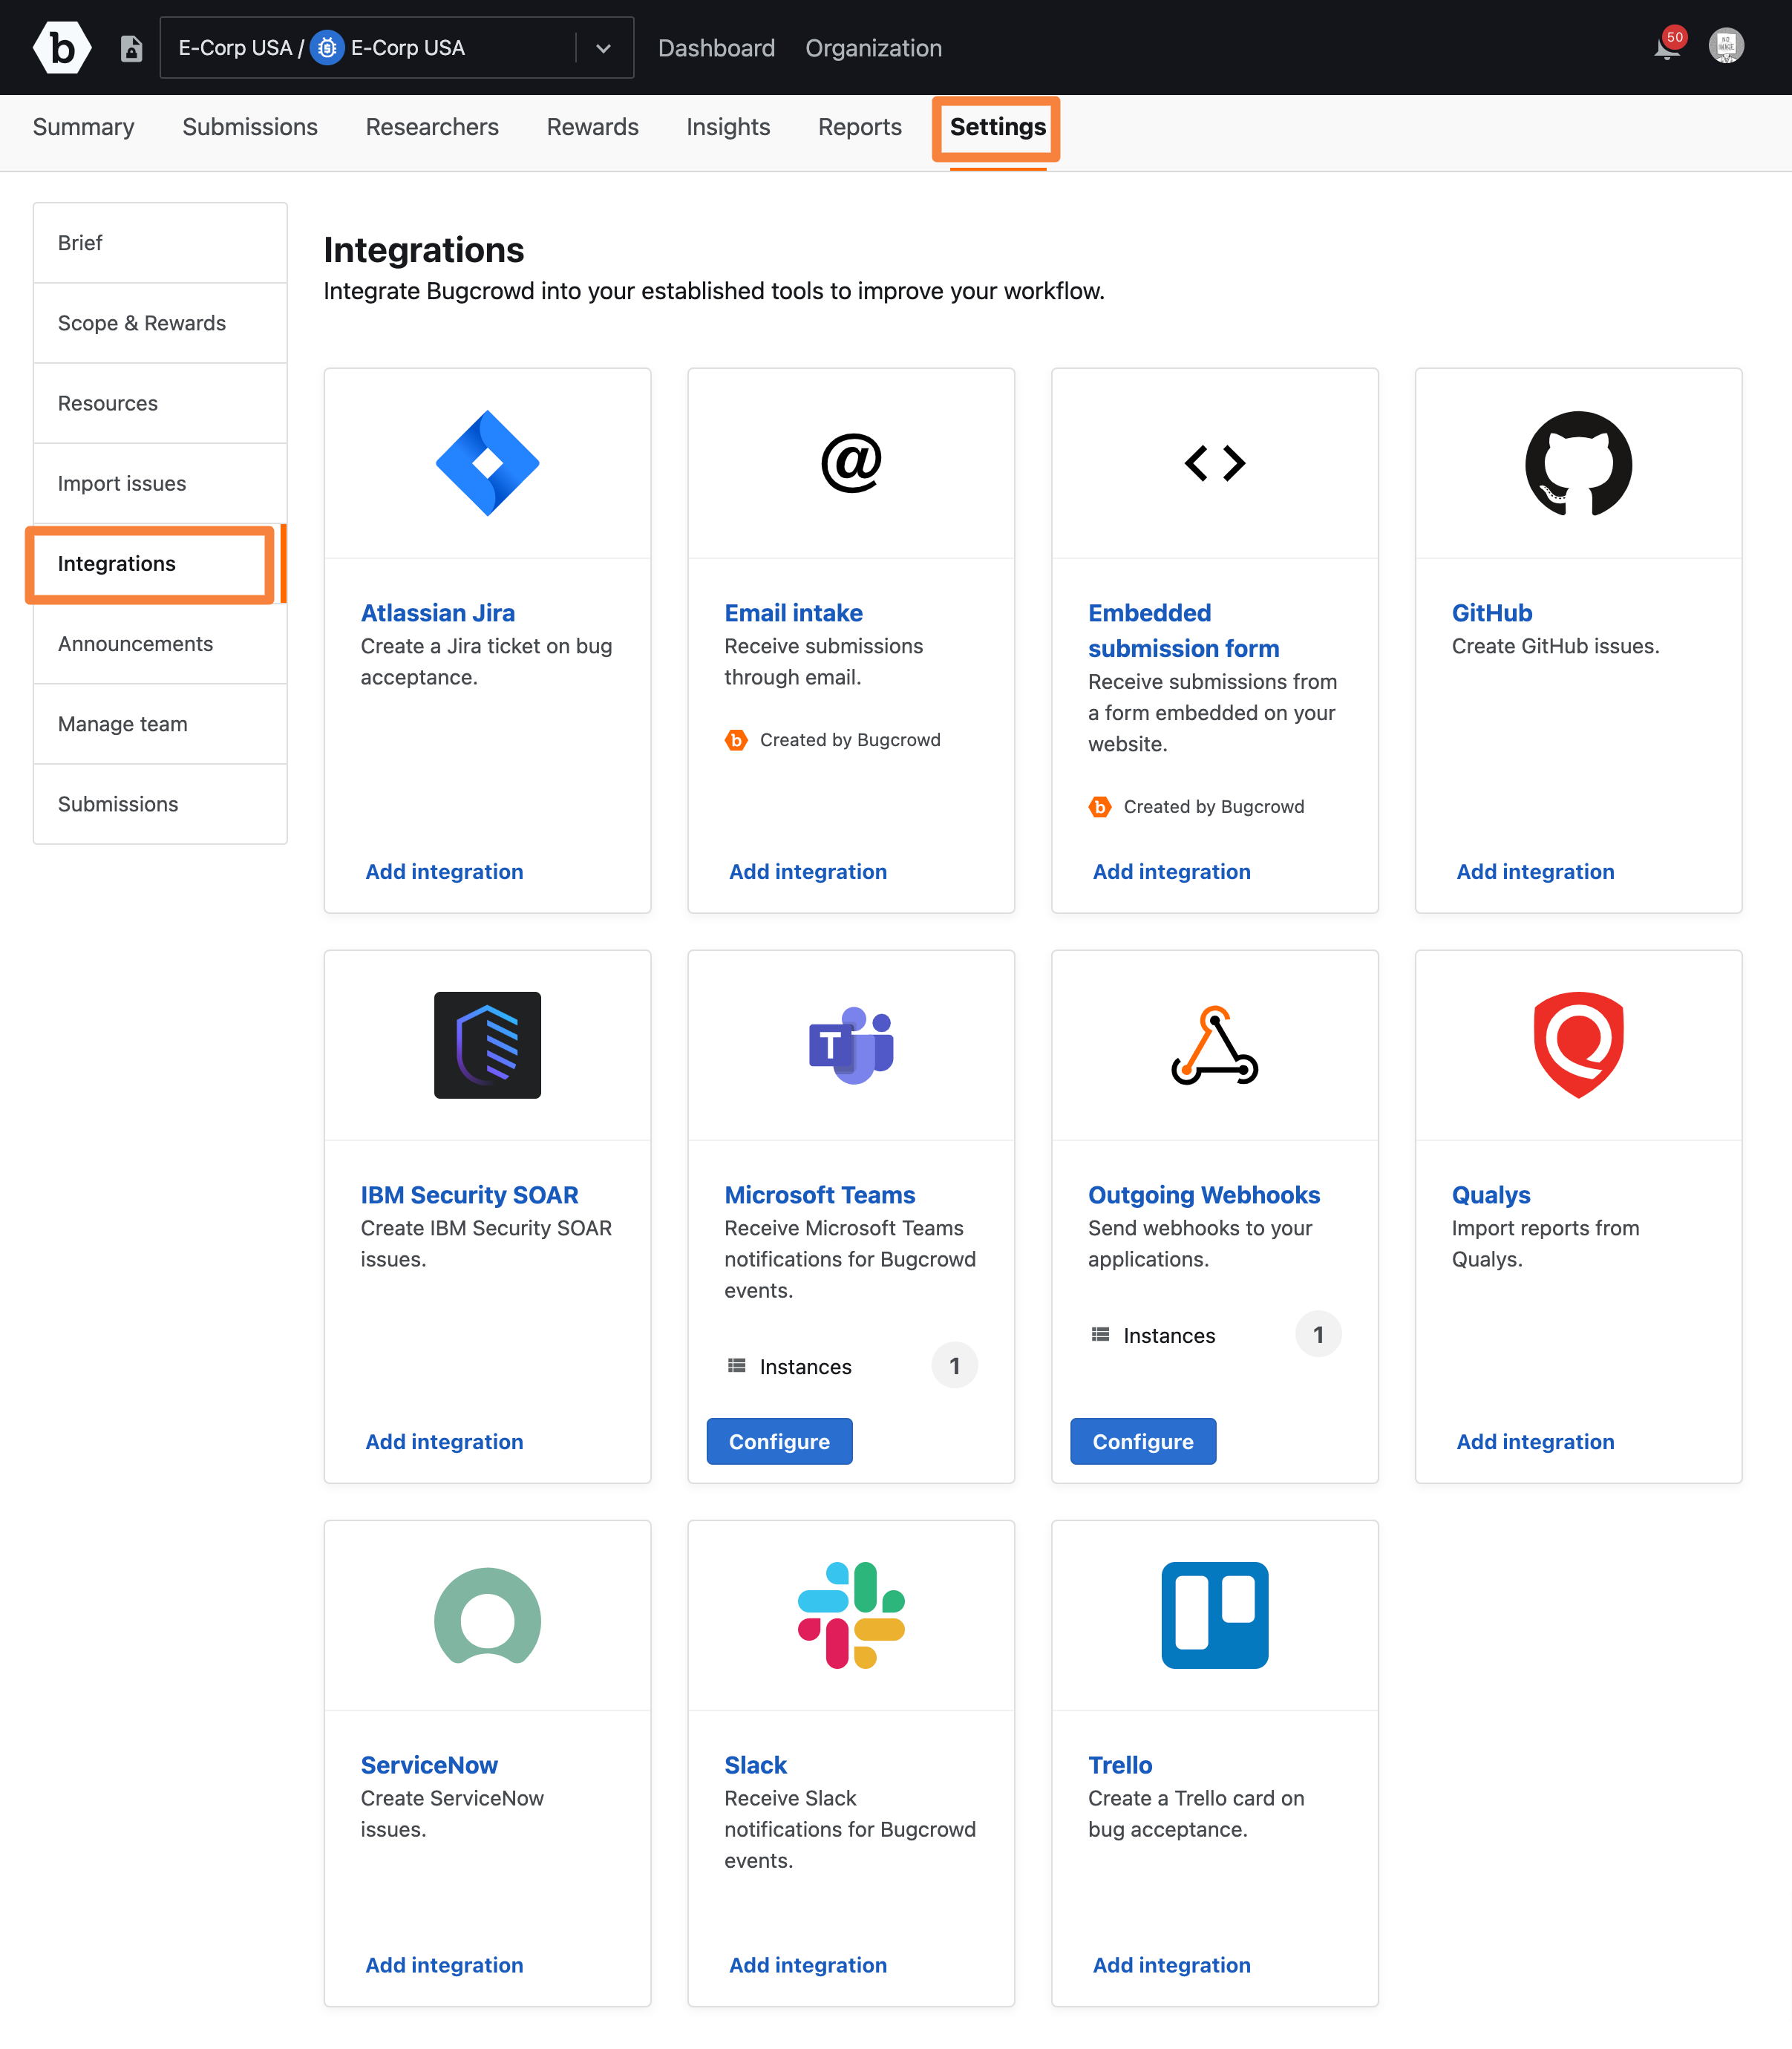
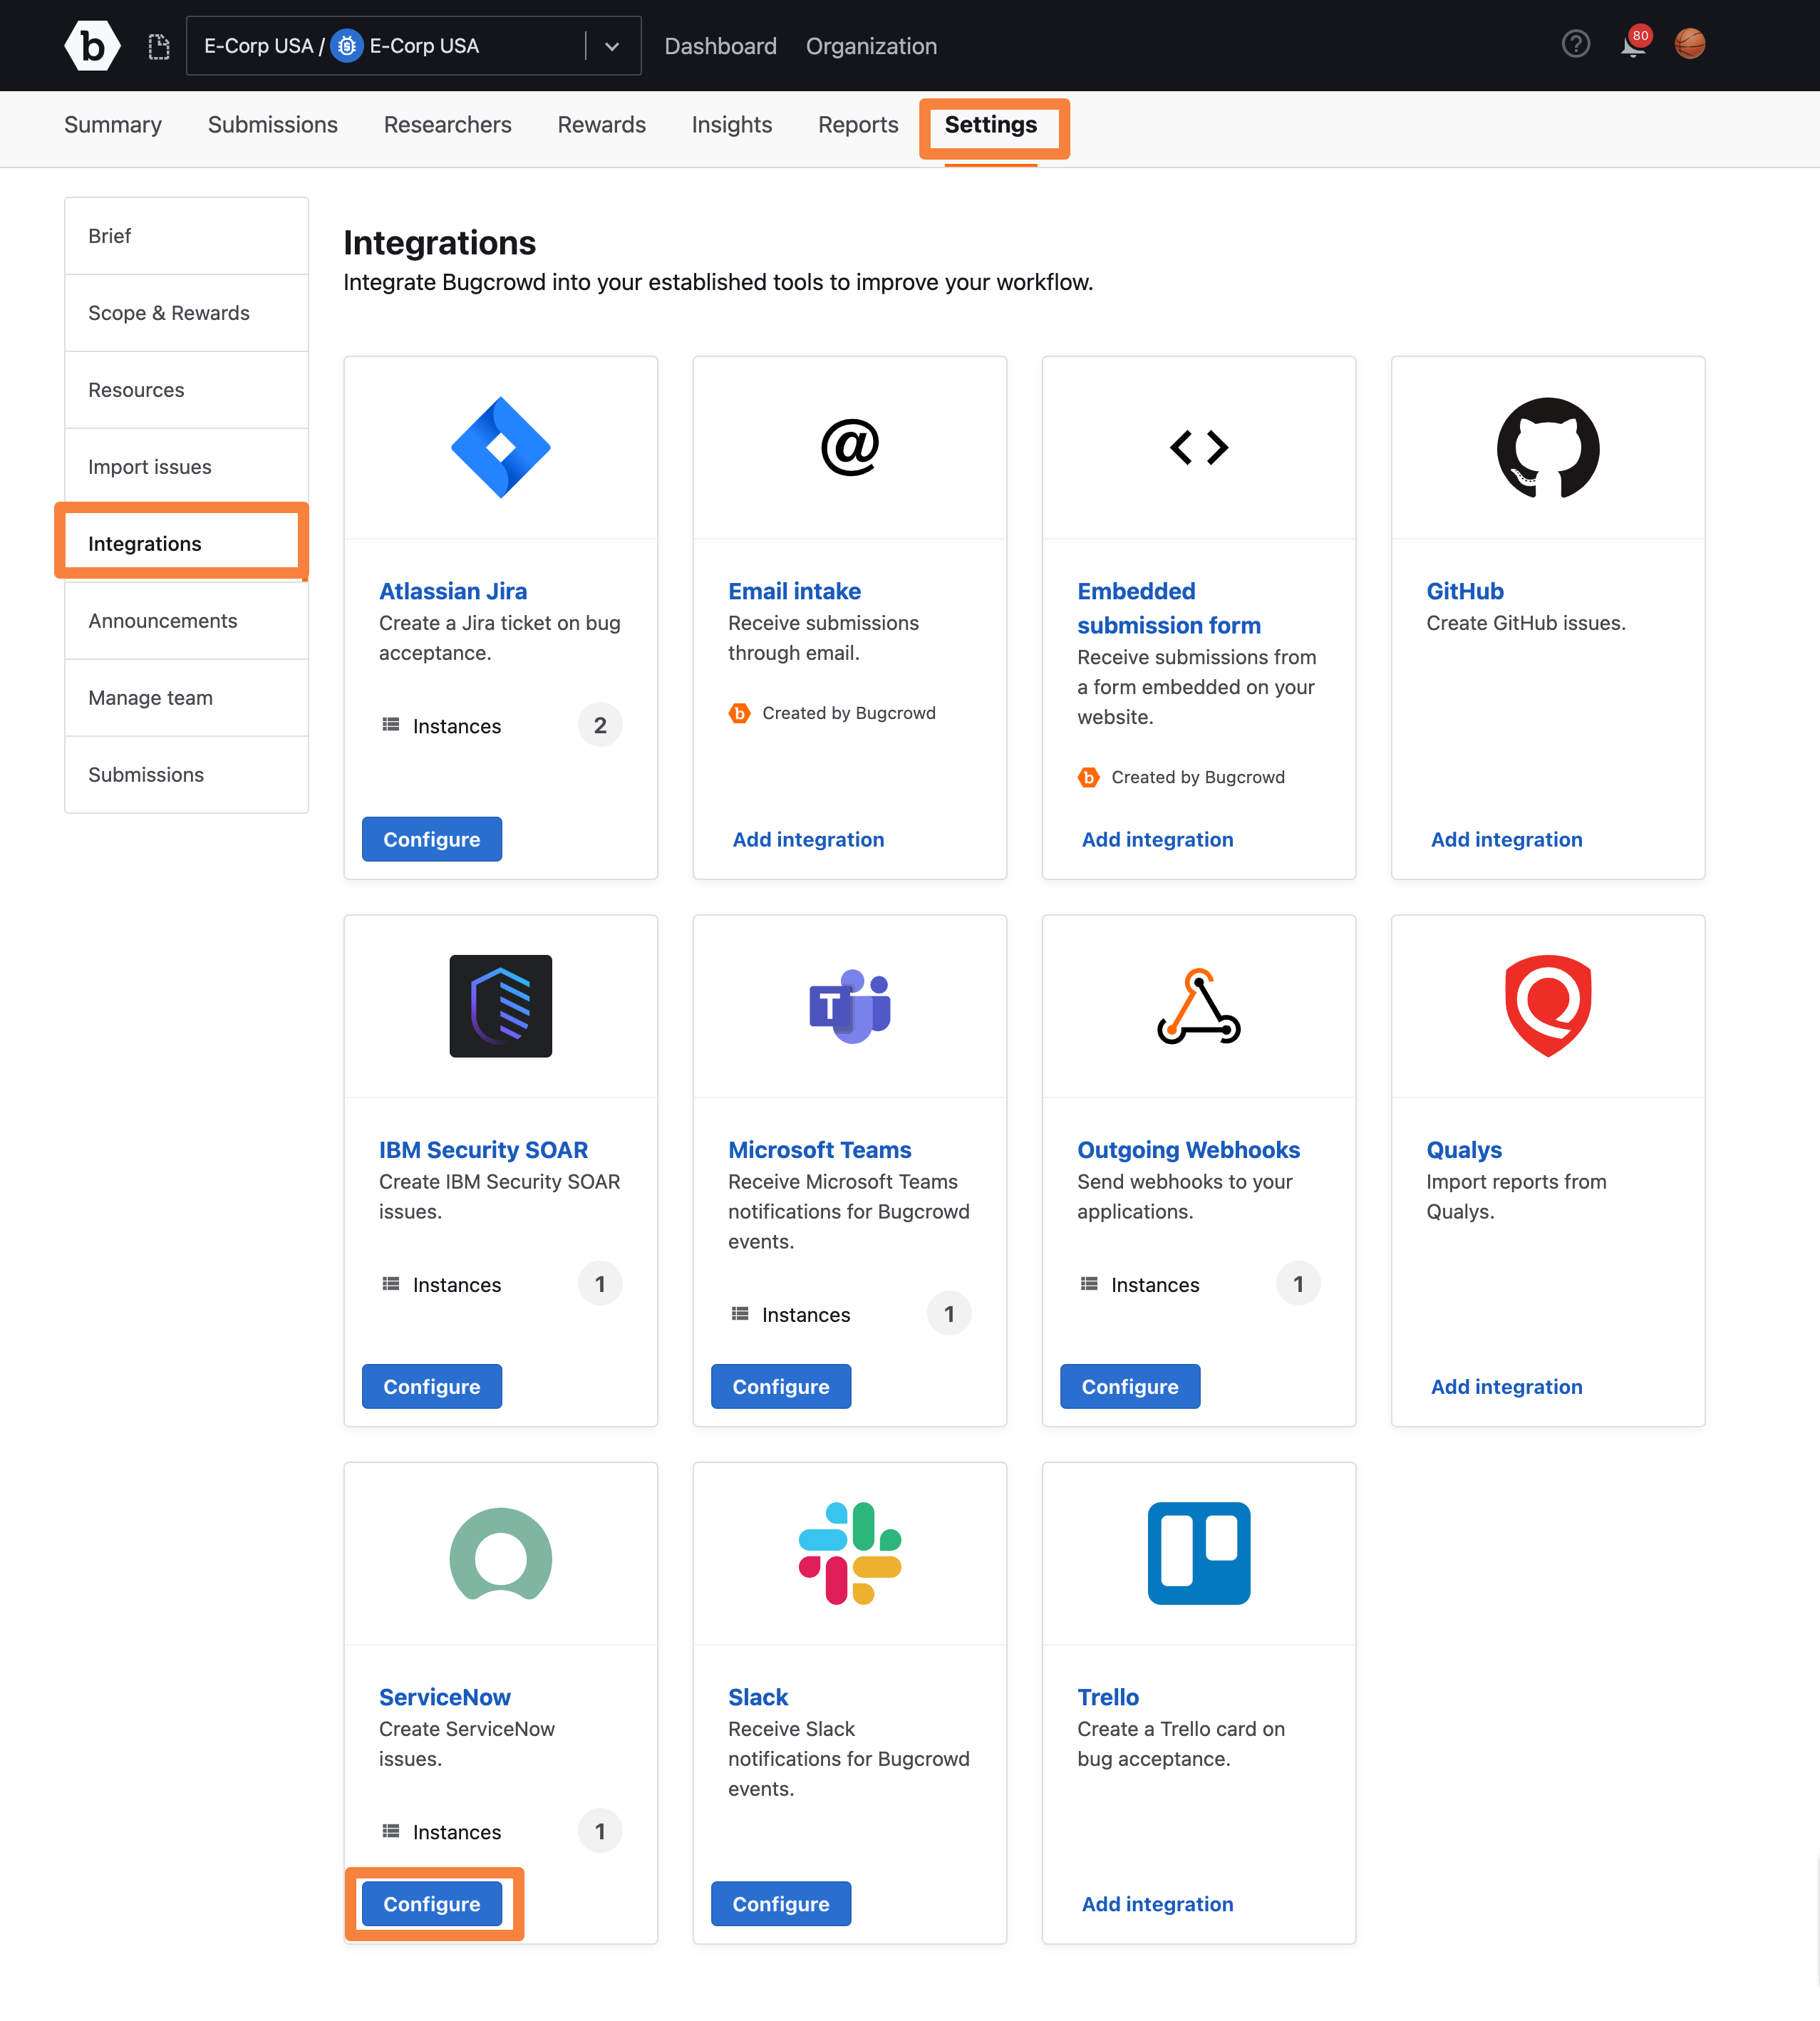
Navigate to your program Settings and select the Integrations tab.
-
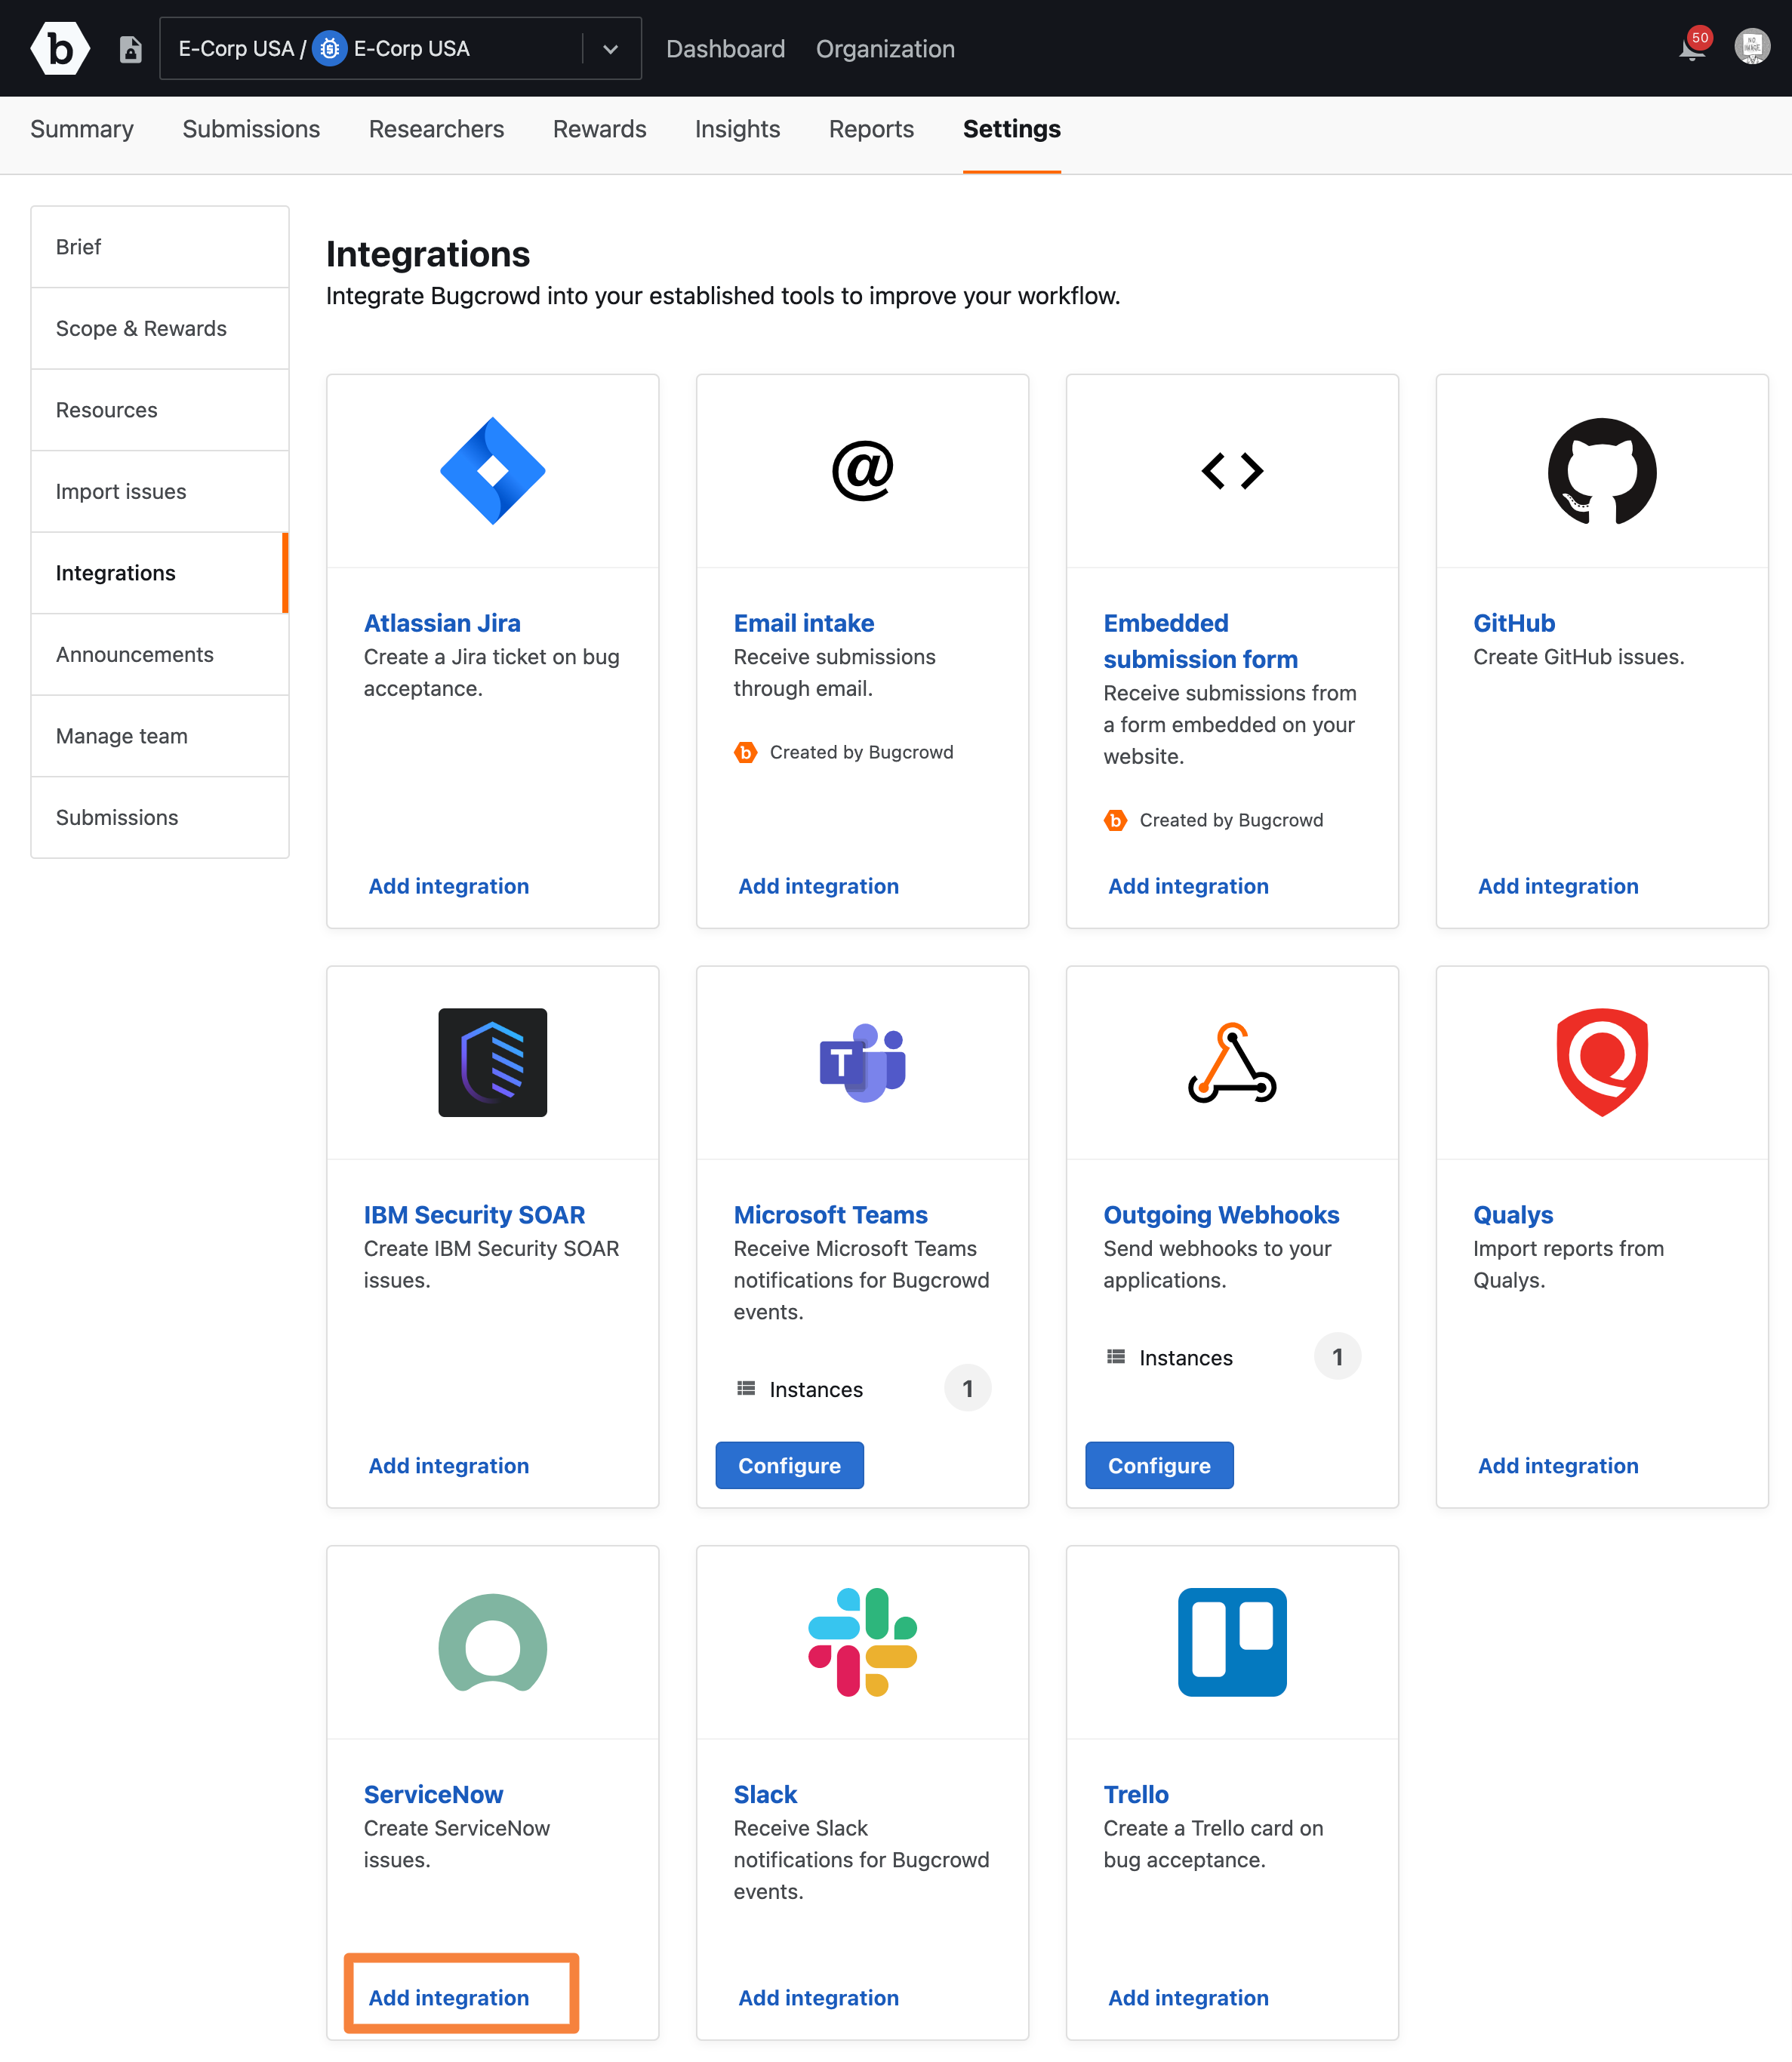
Select the Add integration button for ServiceNow.
-
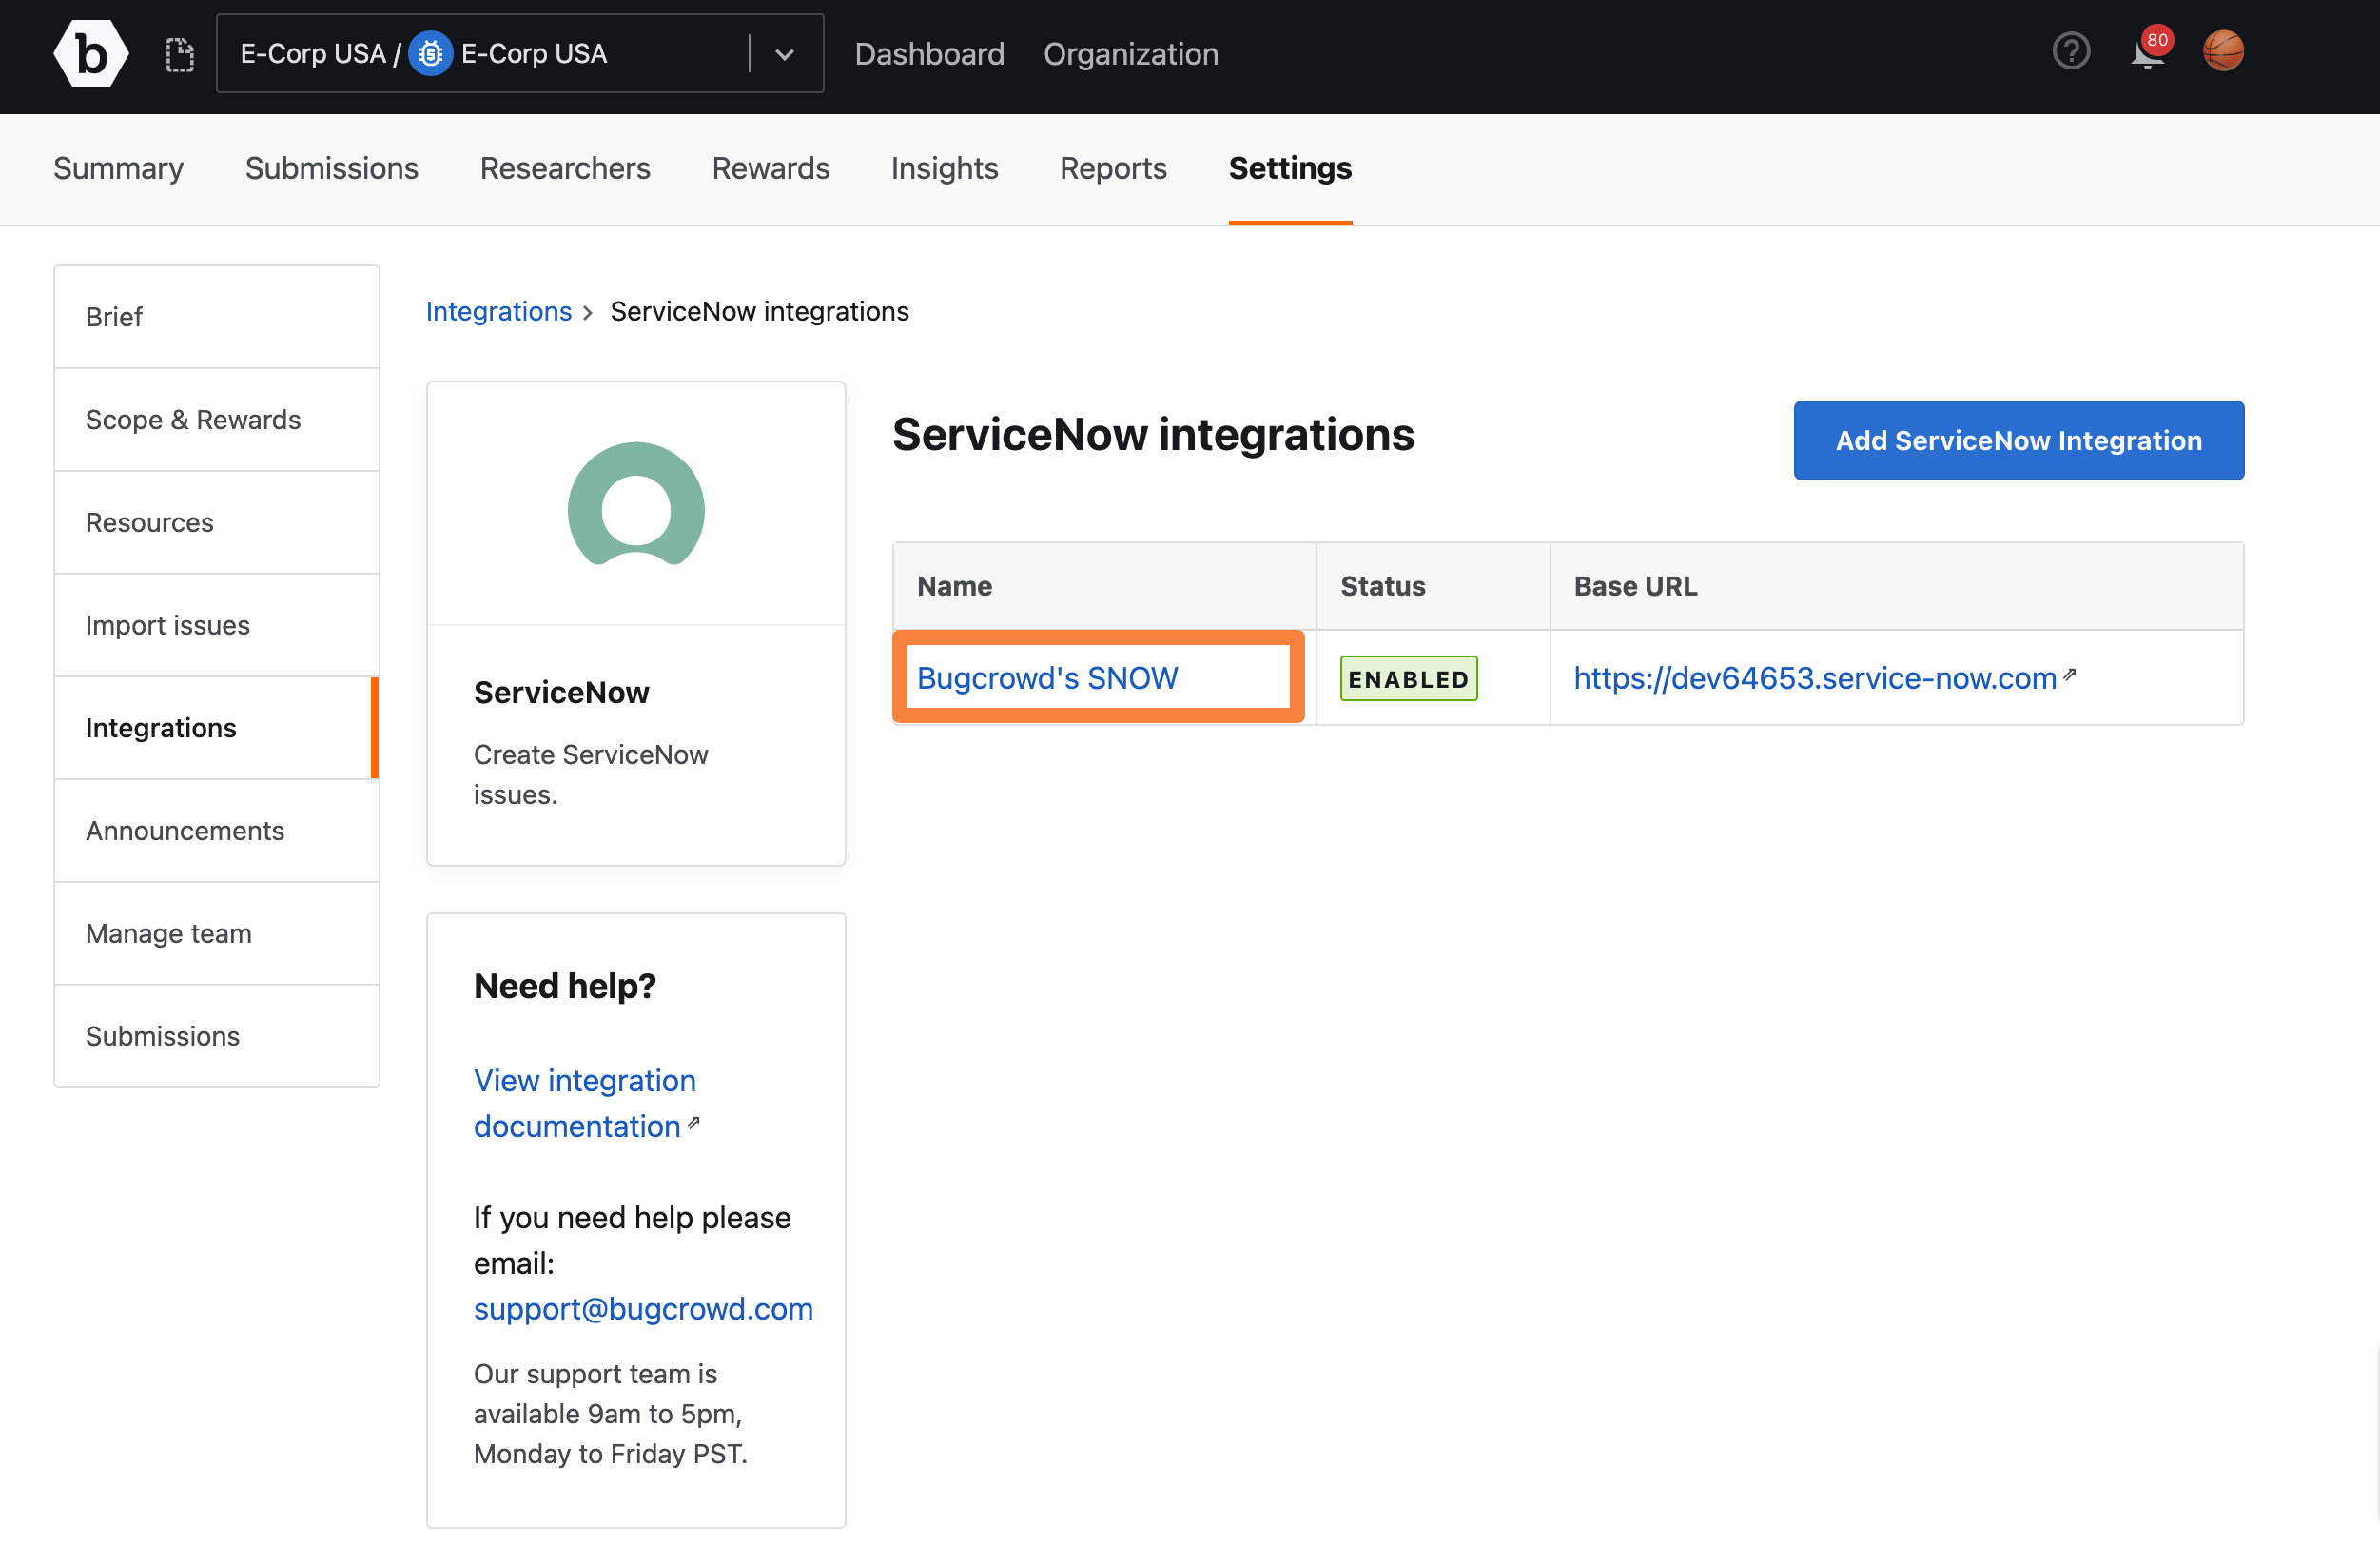
On the ServiceNow integrations page, click the Add ServiceNow Integration button to setup your first ServiceNow project.
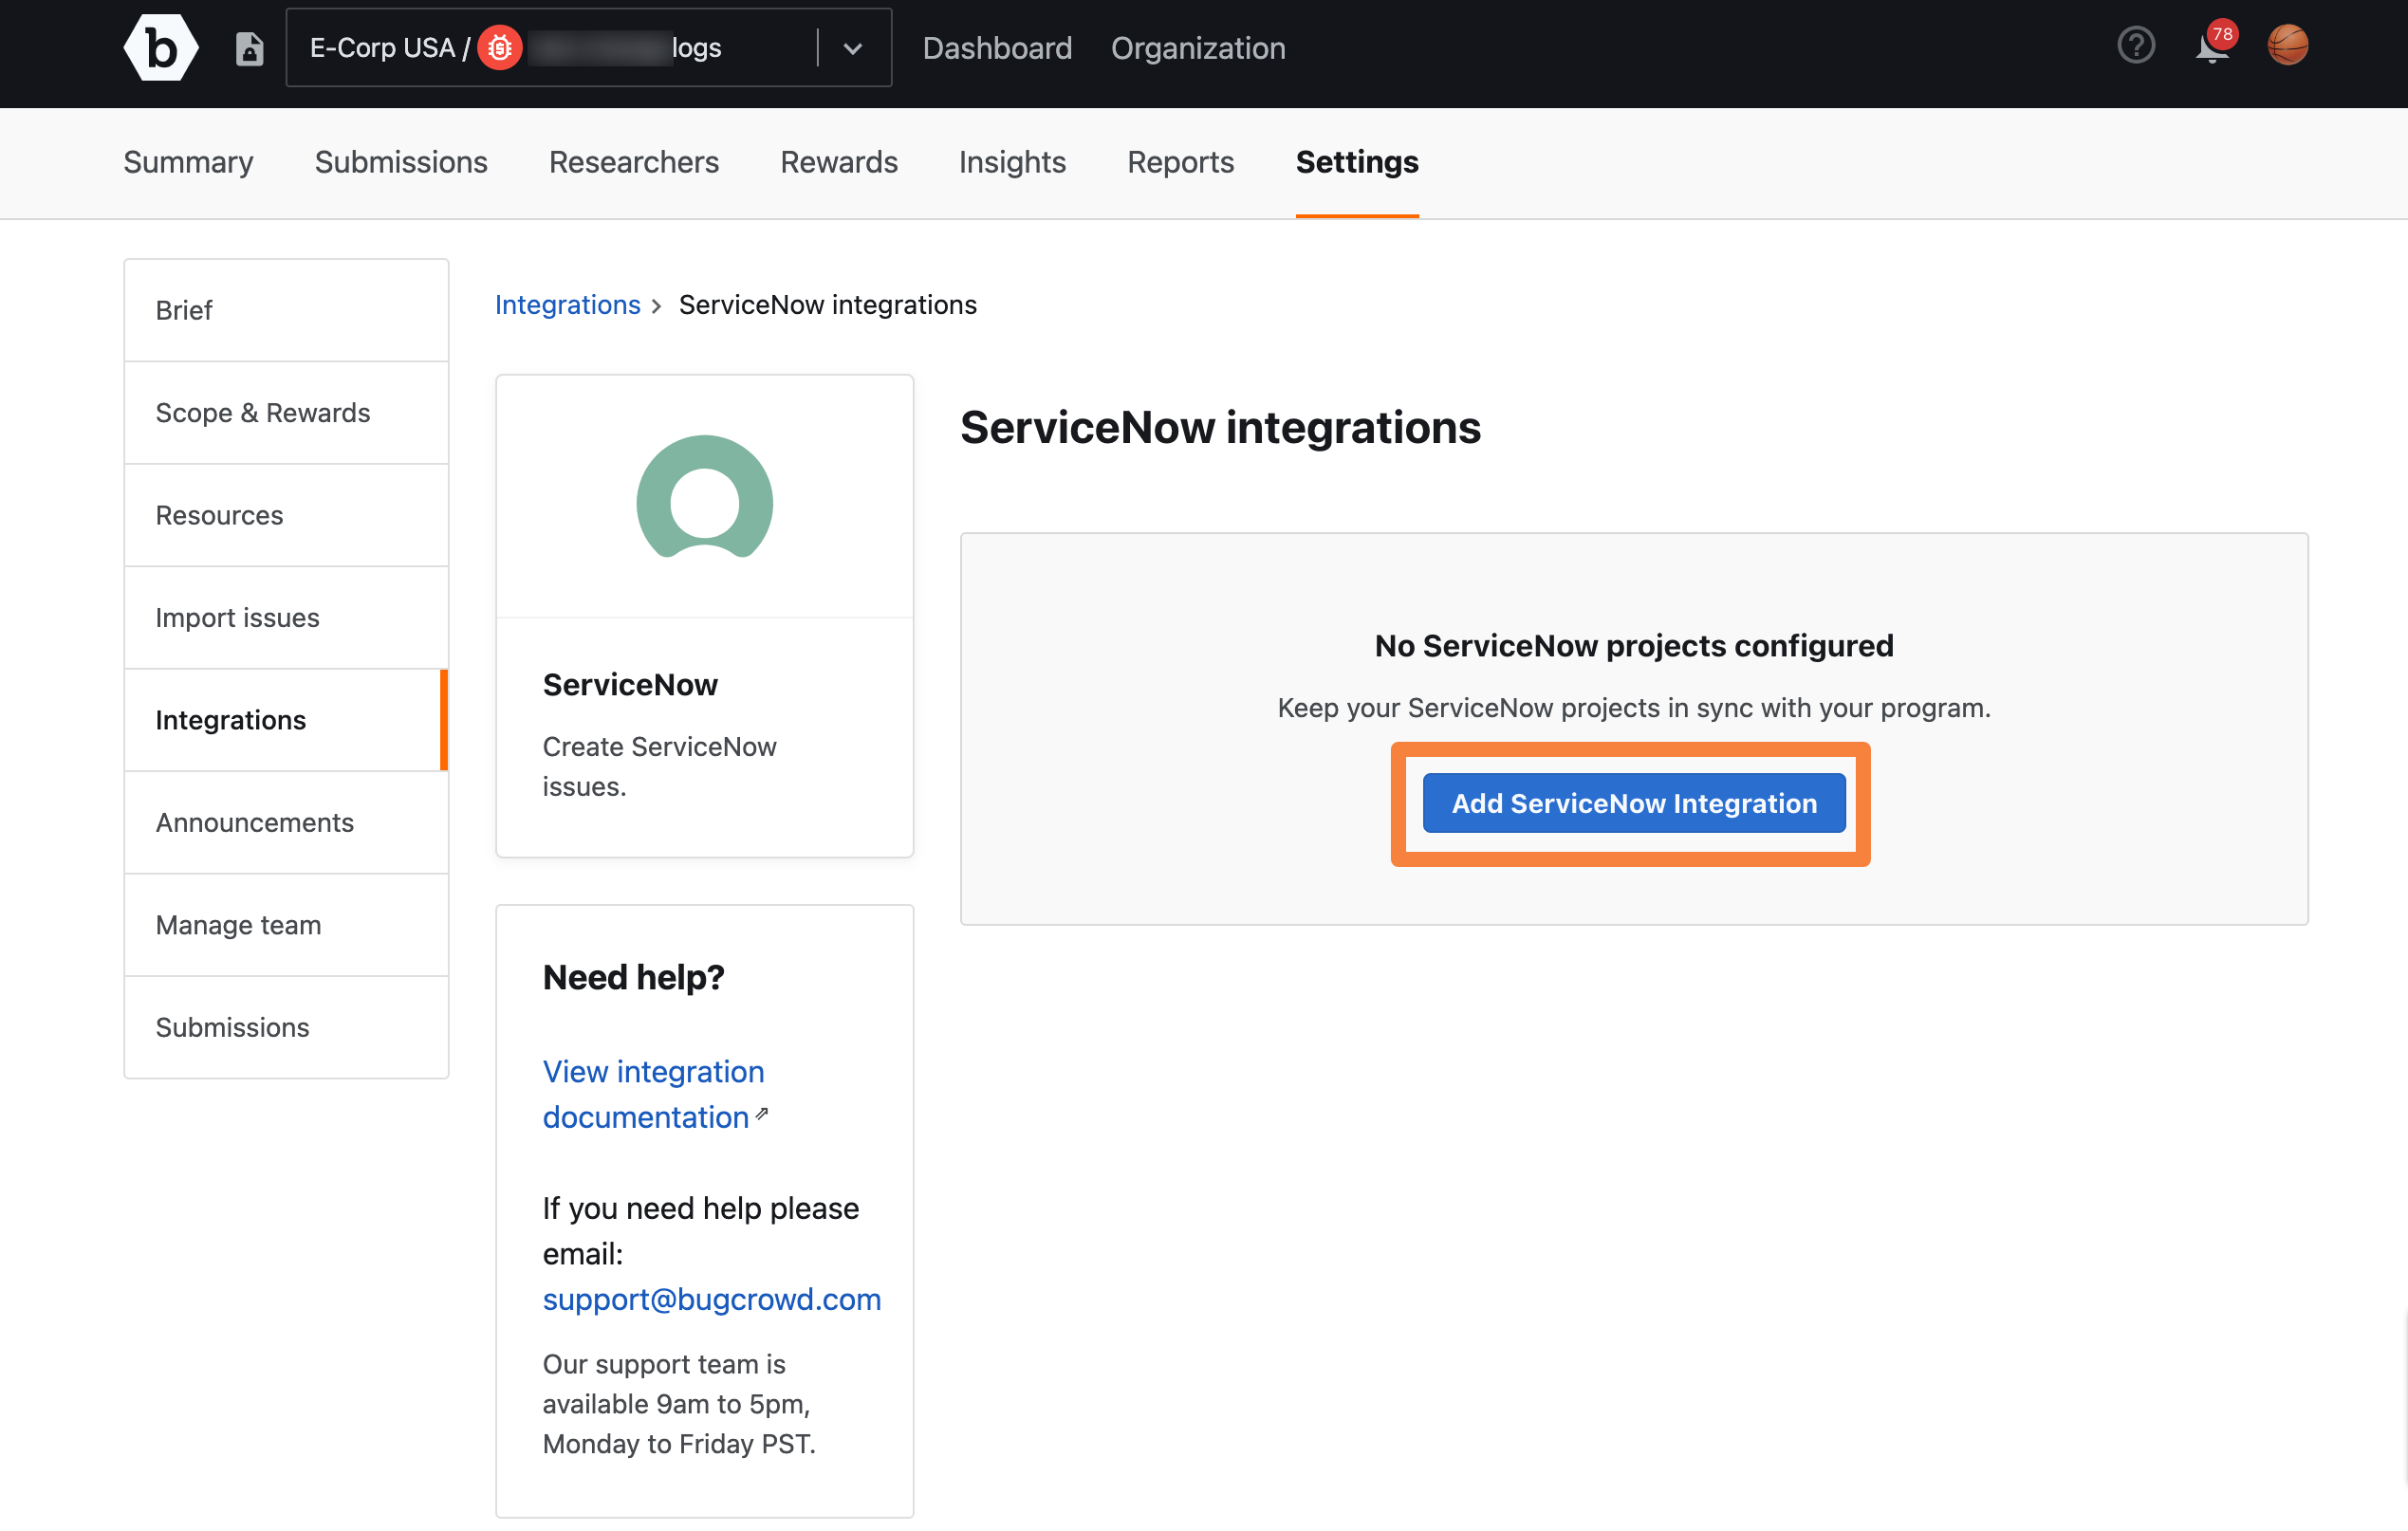
A page will be displayed where you can enter your instance details to enable creating issues in ServiceNow.
-
On this page add the Instance Name, URL building fields, and set the Integration status.
- Integration Name: Provide a name for this ServiceNow integration
- Instance: Specify your ServiceNow instance name. The instance name specified will be added to “.service-now.com” to construct the ServiceNow instance URL. If you are using a custom ServiceNow installation with a different URL, which does not end with “.service-now.com”, then specify the full instance URL including the instance name. In that case the specified full URL will be used.
-
Integration Type: Select from the drop down menu, what type of ServiceNow Incident Response Management instance you have
- IT Incident Response
- Security Incident Response
- Vulnerability Response
-
Custom field names (optional): By default, the Description field in Bugcrowd Submission will map to the Description field in the ServiceNow IT Incident or ServiceNow Security Incident, or map to Technical Details field in case of ServiceNow Vulnerability Response. If you would like to map the Description field to some other custom field in ServiceNow, then please specify the name of the custom field here. The information from the submission Description field will be sent to the custom field specified here.
- Integration status: Select Enabled to activate the integration
- Two way integration: Select Enabled if you want to enable two way integration. Please refer to the section Enabling Two way Integration.
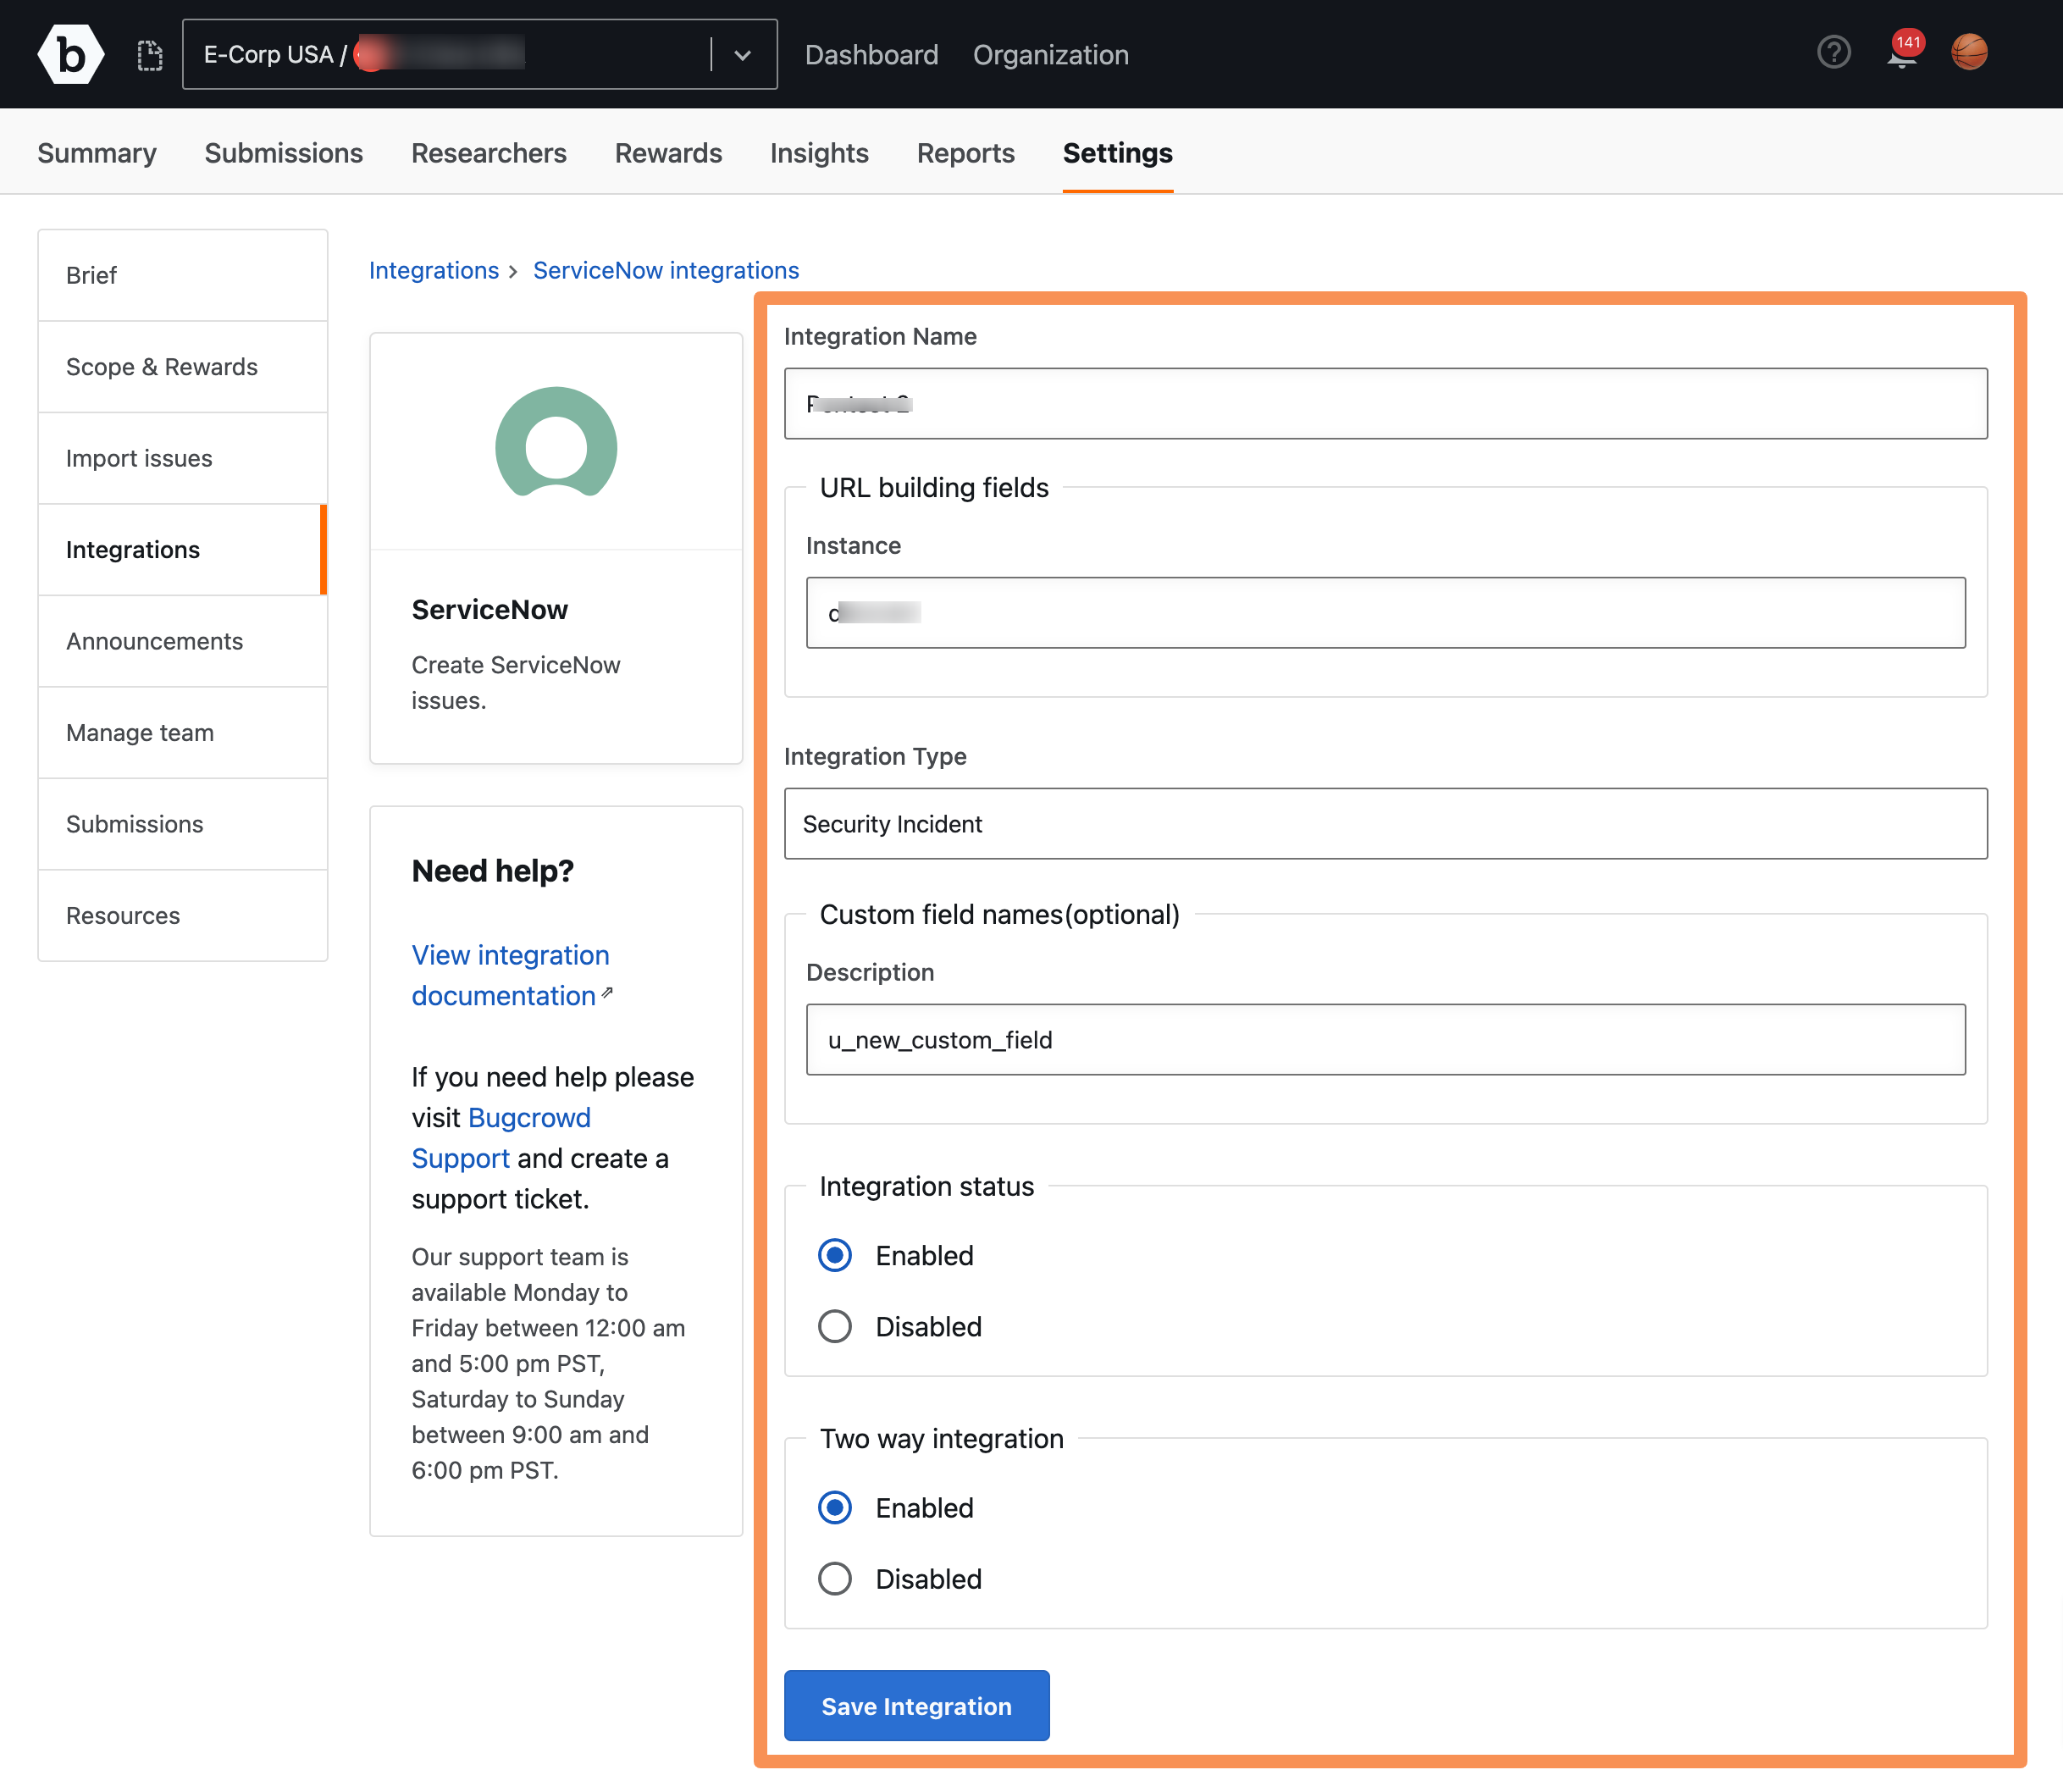
After configuring all details, click Save Integration to save the changes.
Note: Be sure to specify the correct ServiceNow Incident Management type depending on your ServiceNow instance. When specifying the custom field name, add “u_” to the front of the custom field name. For example, if you see the name of the custom field as “new_custom_field” in the ServiceNow incident page, then specify the name as “u_new_custom_field”.
Pushing Submissions to ServiceNow
Once you have the integration setup and enabled, you can push submissions to ServiceNow.
To push a submission to ServiceNow, follow these steps:
-
Go to any submission, and click the Push to ServiceNow link. Depending on the Integration type, you will see either Push to ServiceNow (IT incident) or Push to ServiceNow (Security incident) or Push to ServiceNow (Vulnerability Response).
A modal displaying the Create the incident link is displayed.
-
Click Create the IT Incident or Create the Security Incident, or Create Vulnerable Item to open the corresponding issue in ServiceNow.
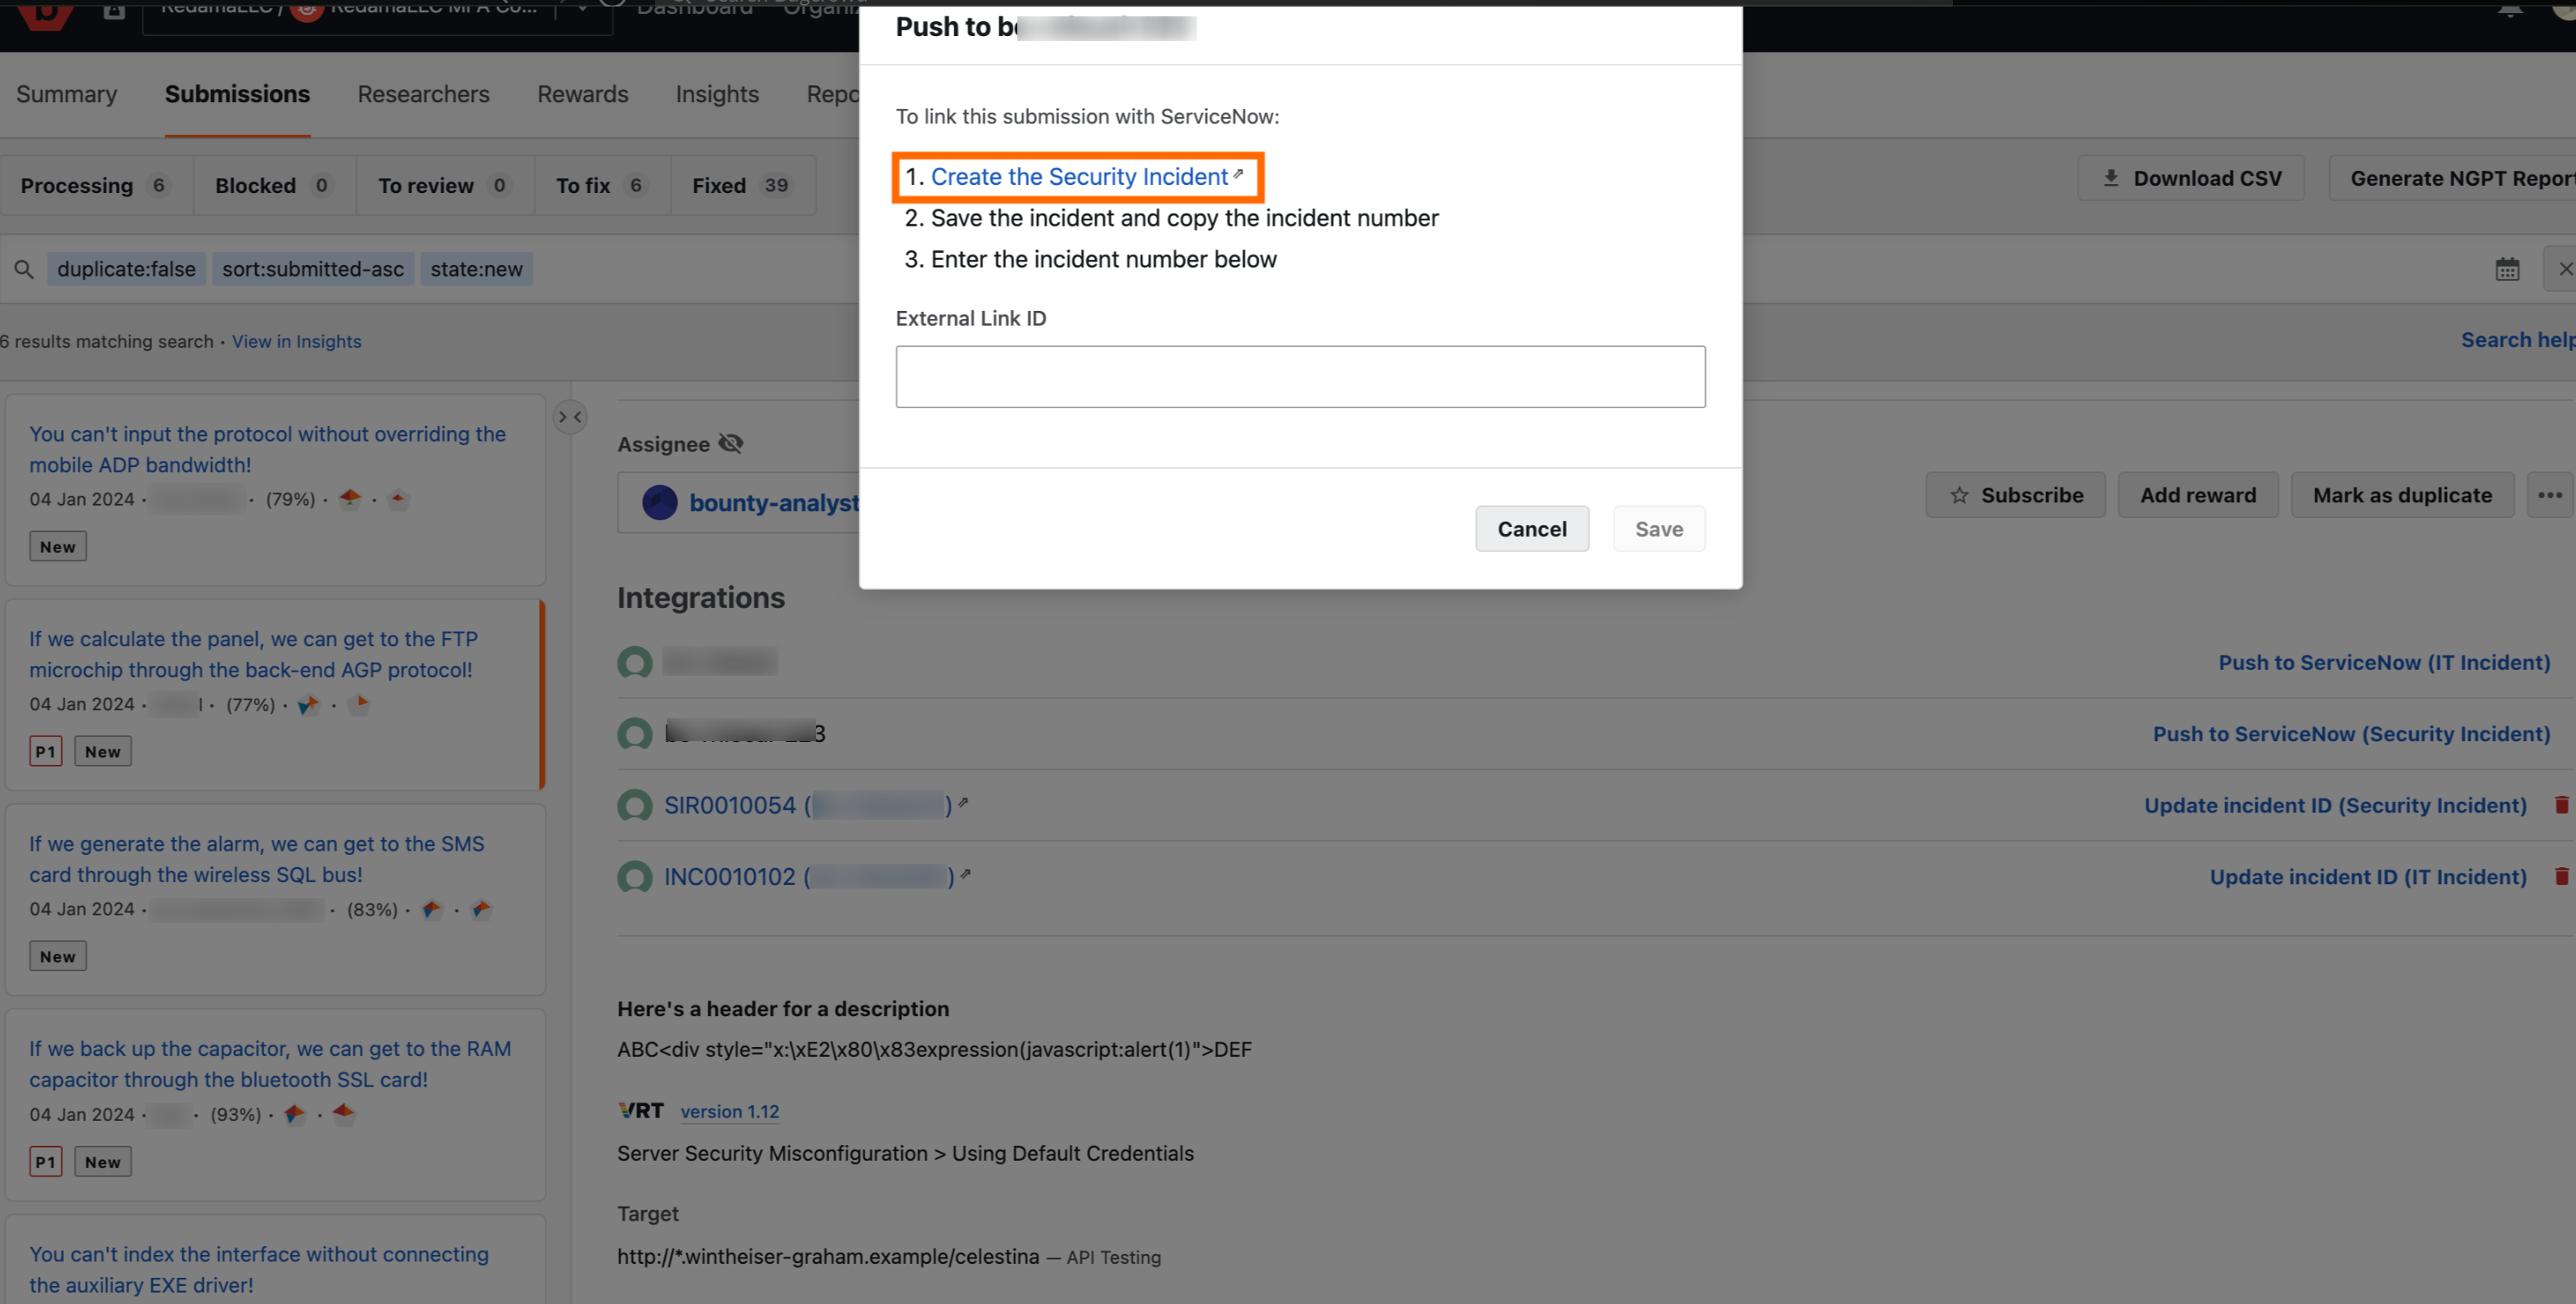
The submission content is populated in the Incident form enabling you to further edit it before submitting.
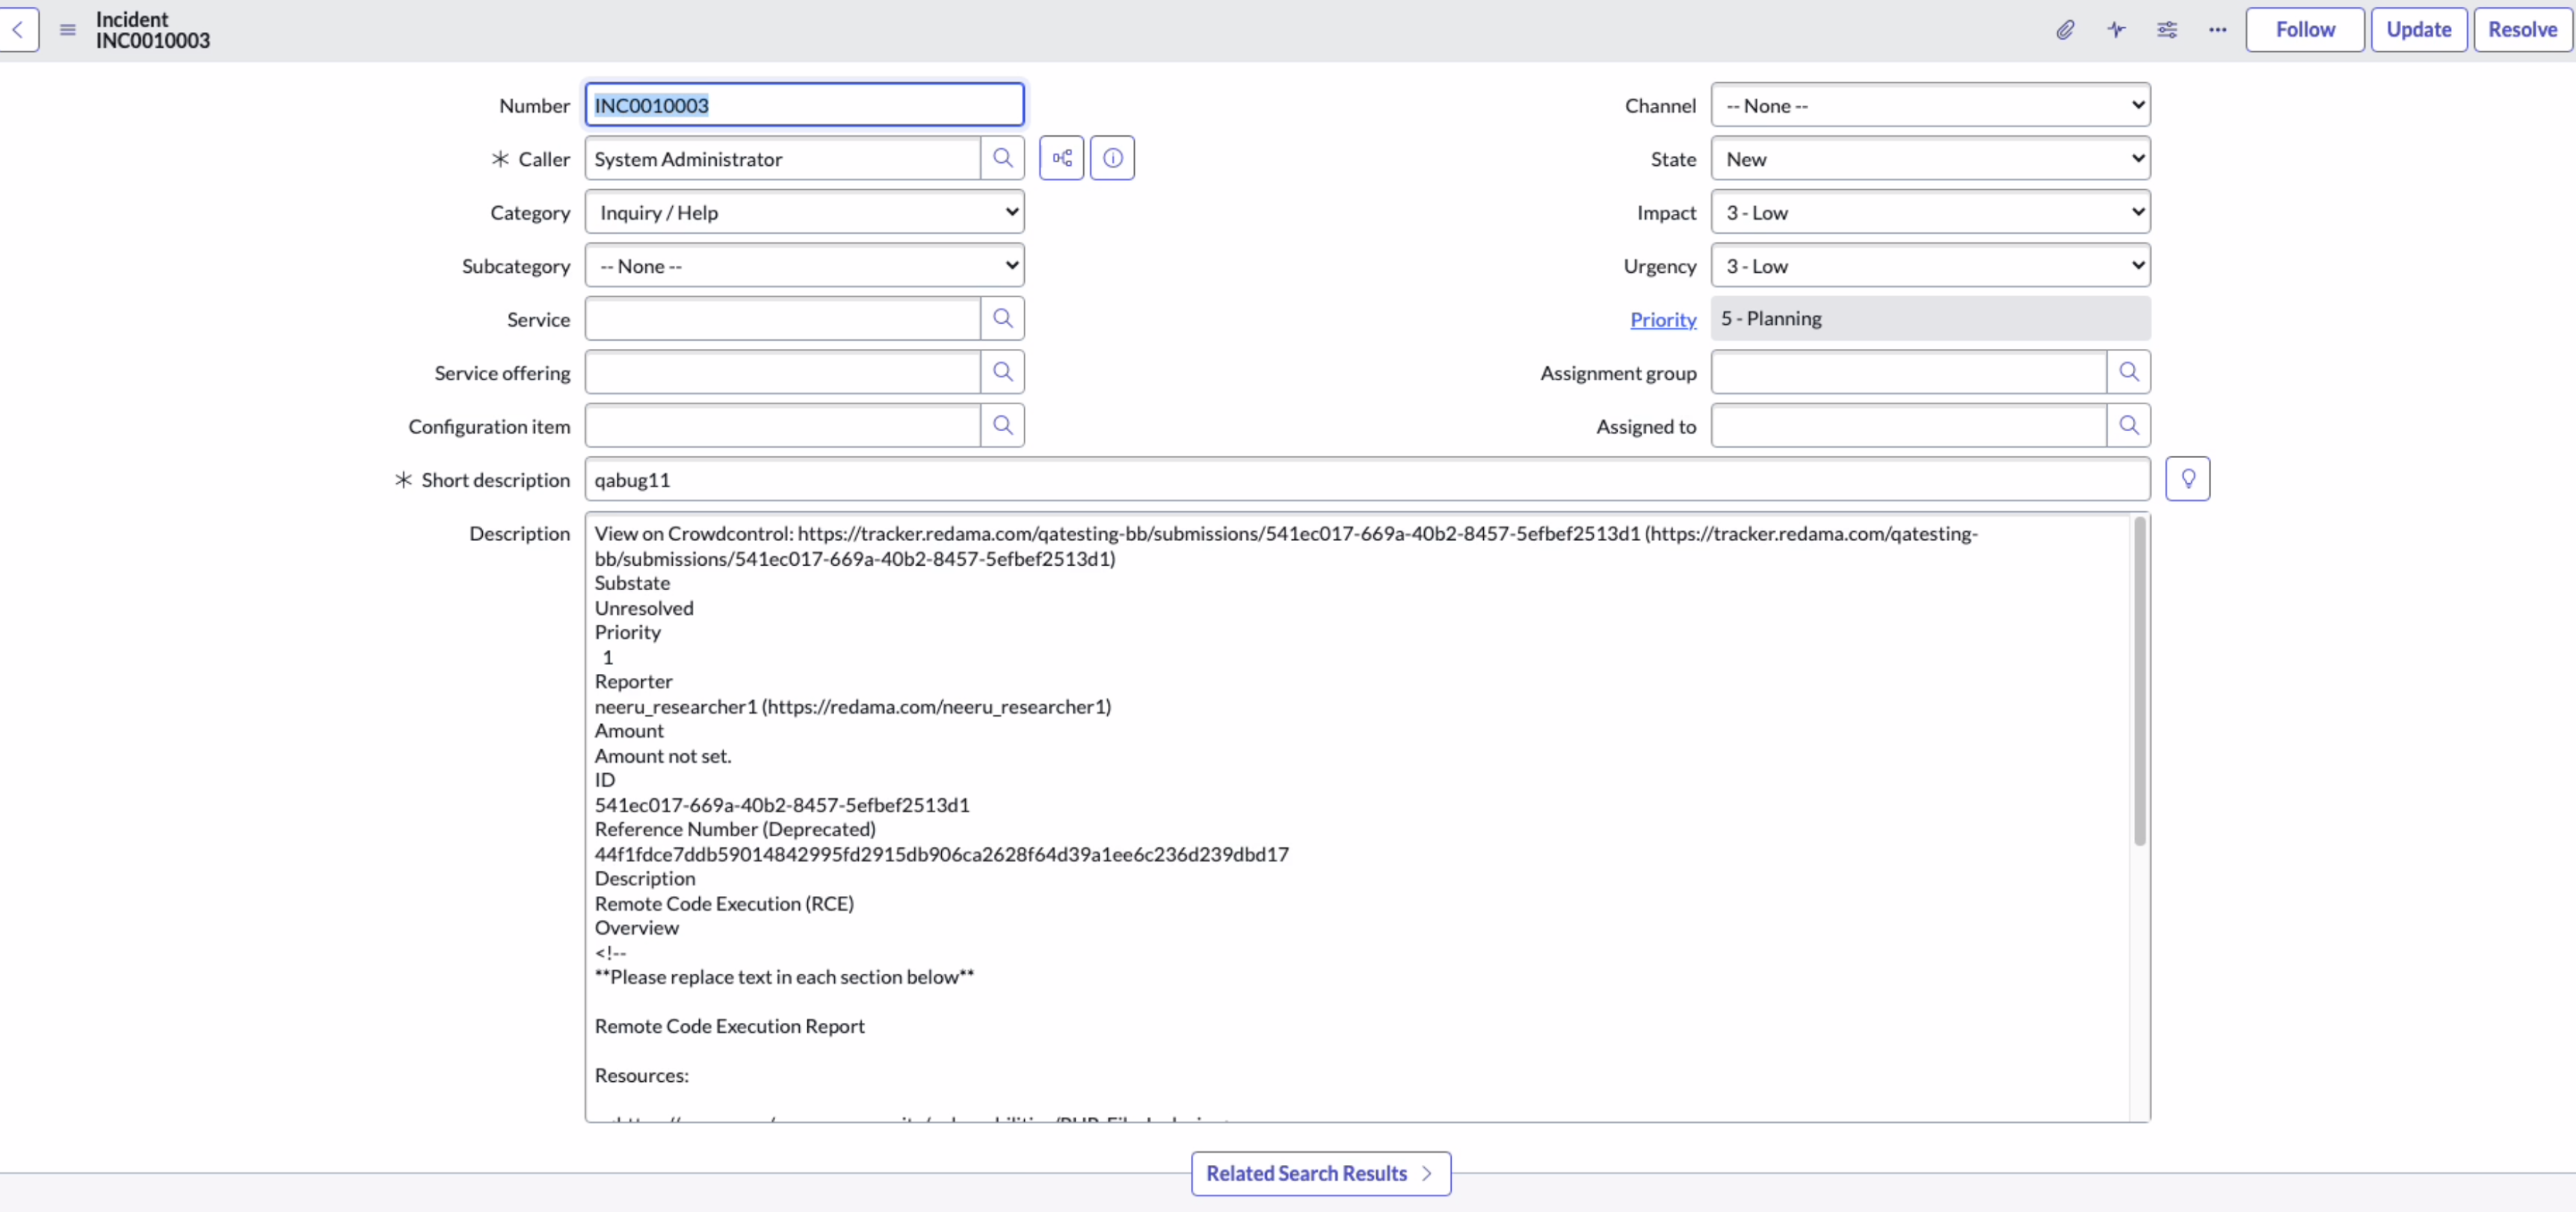
-
Once the Incident is saved, copy the ID Number from the incident page and go back to Crowdcontrol to save it.
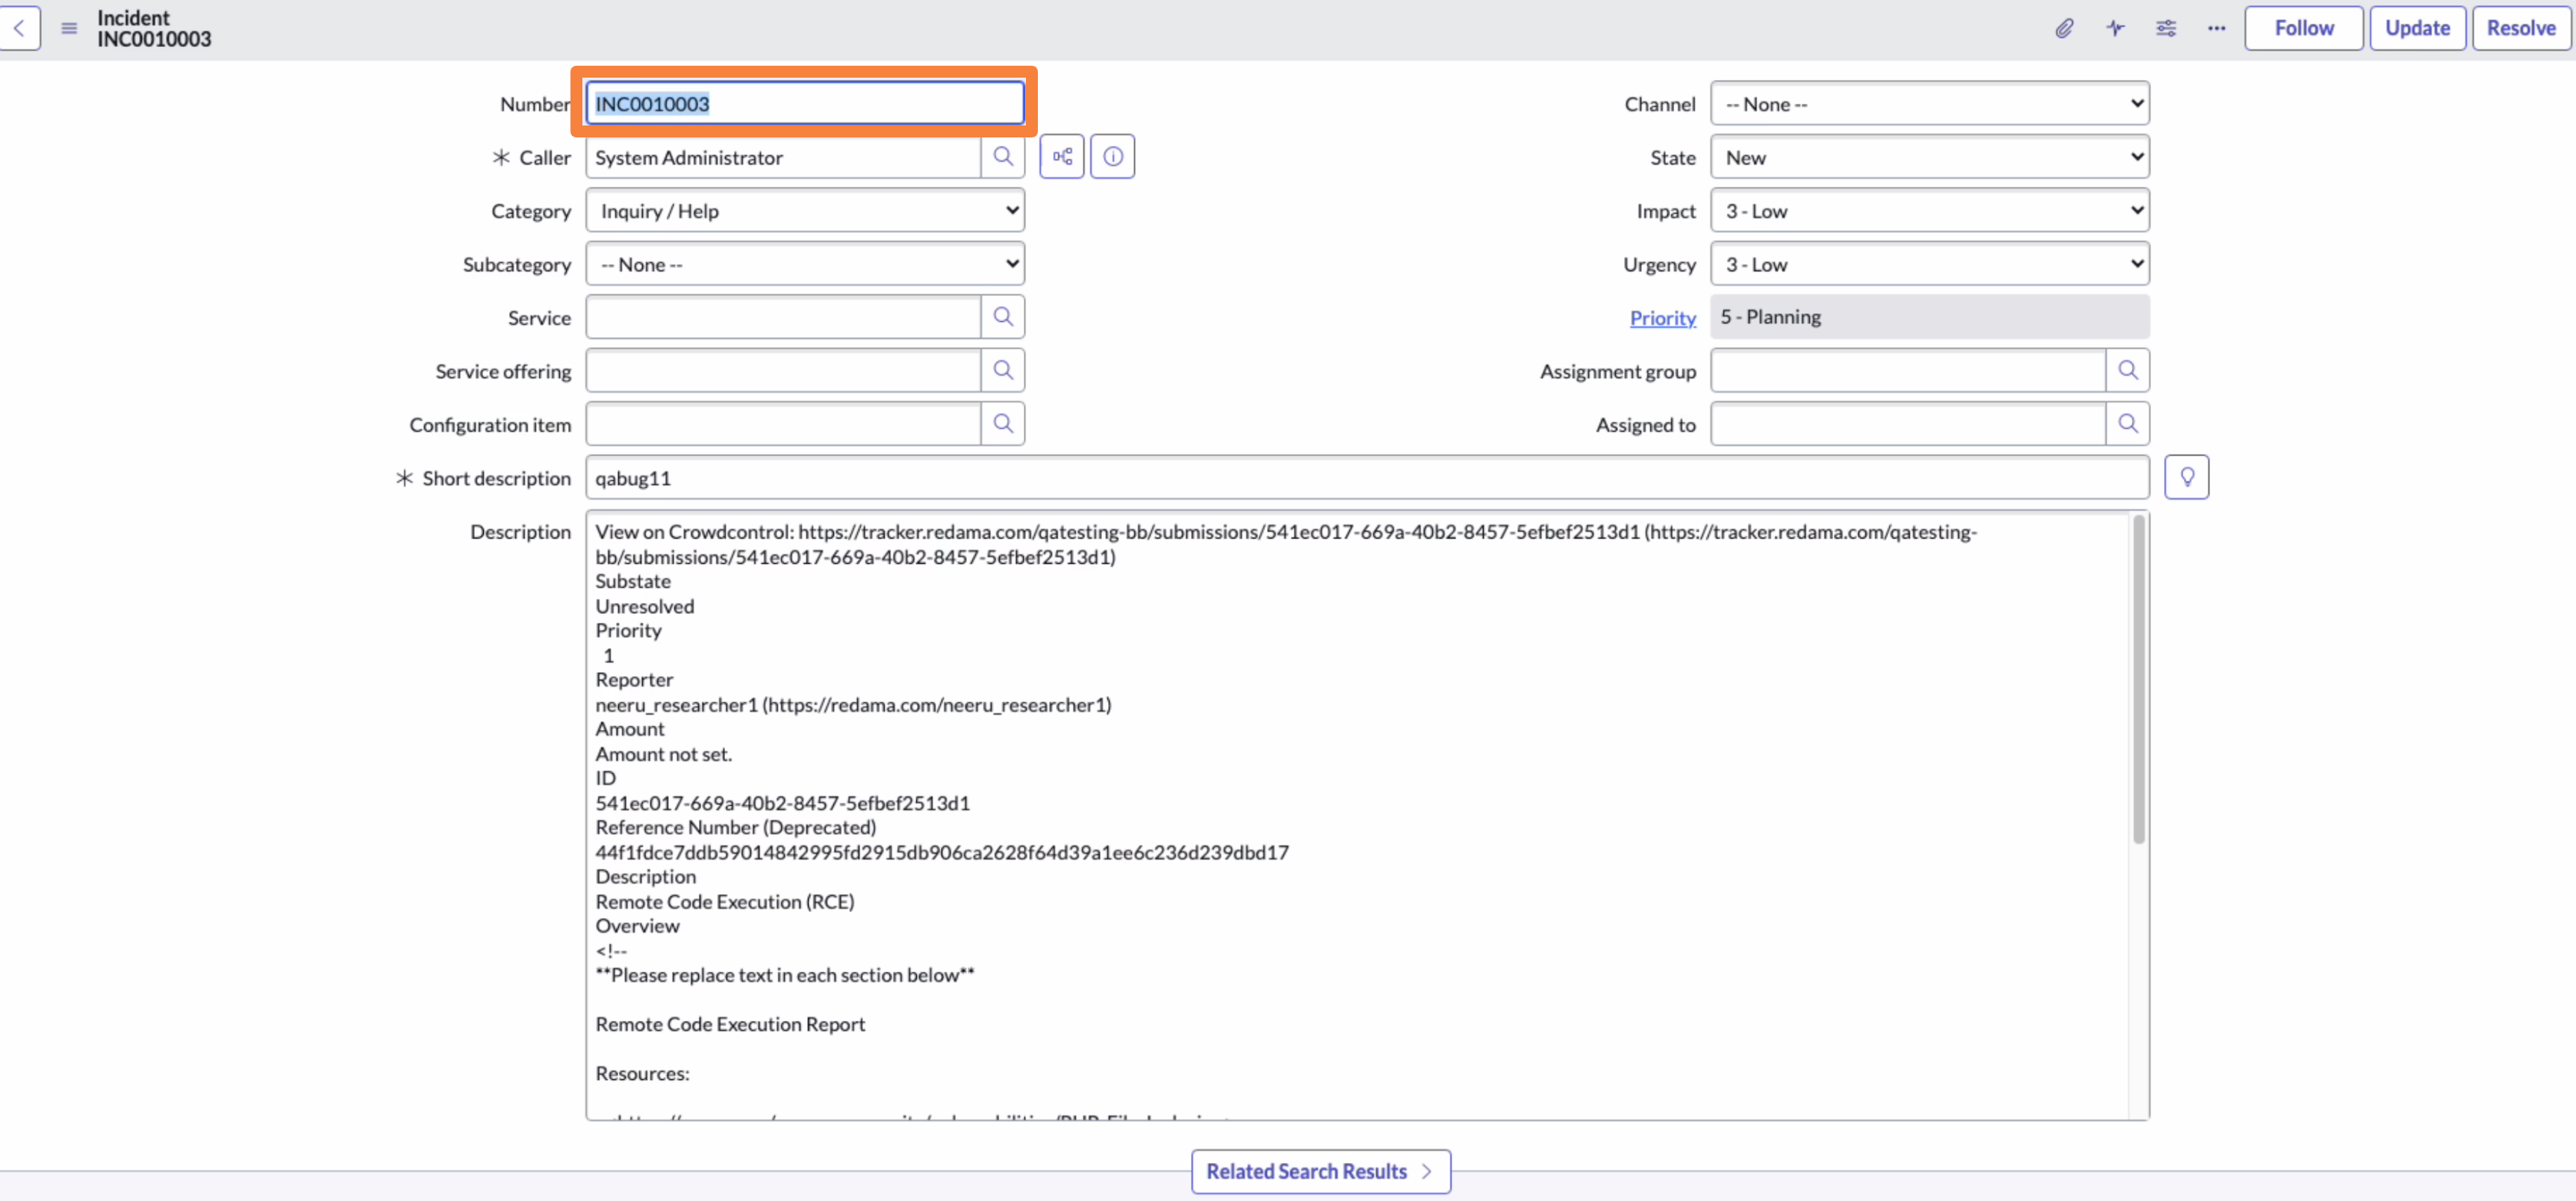
-
In the External Link ID field in the modal form, fill in the ID Number and click Save.
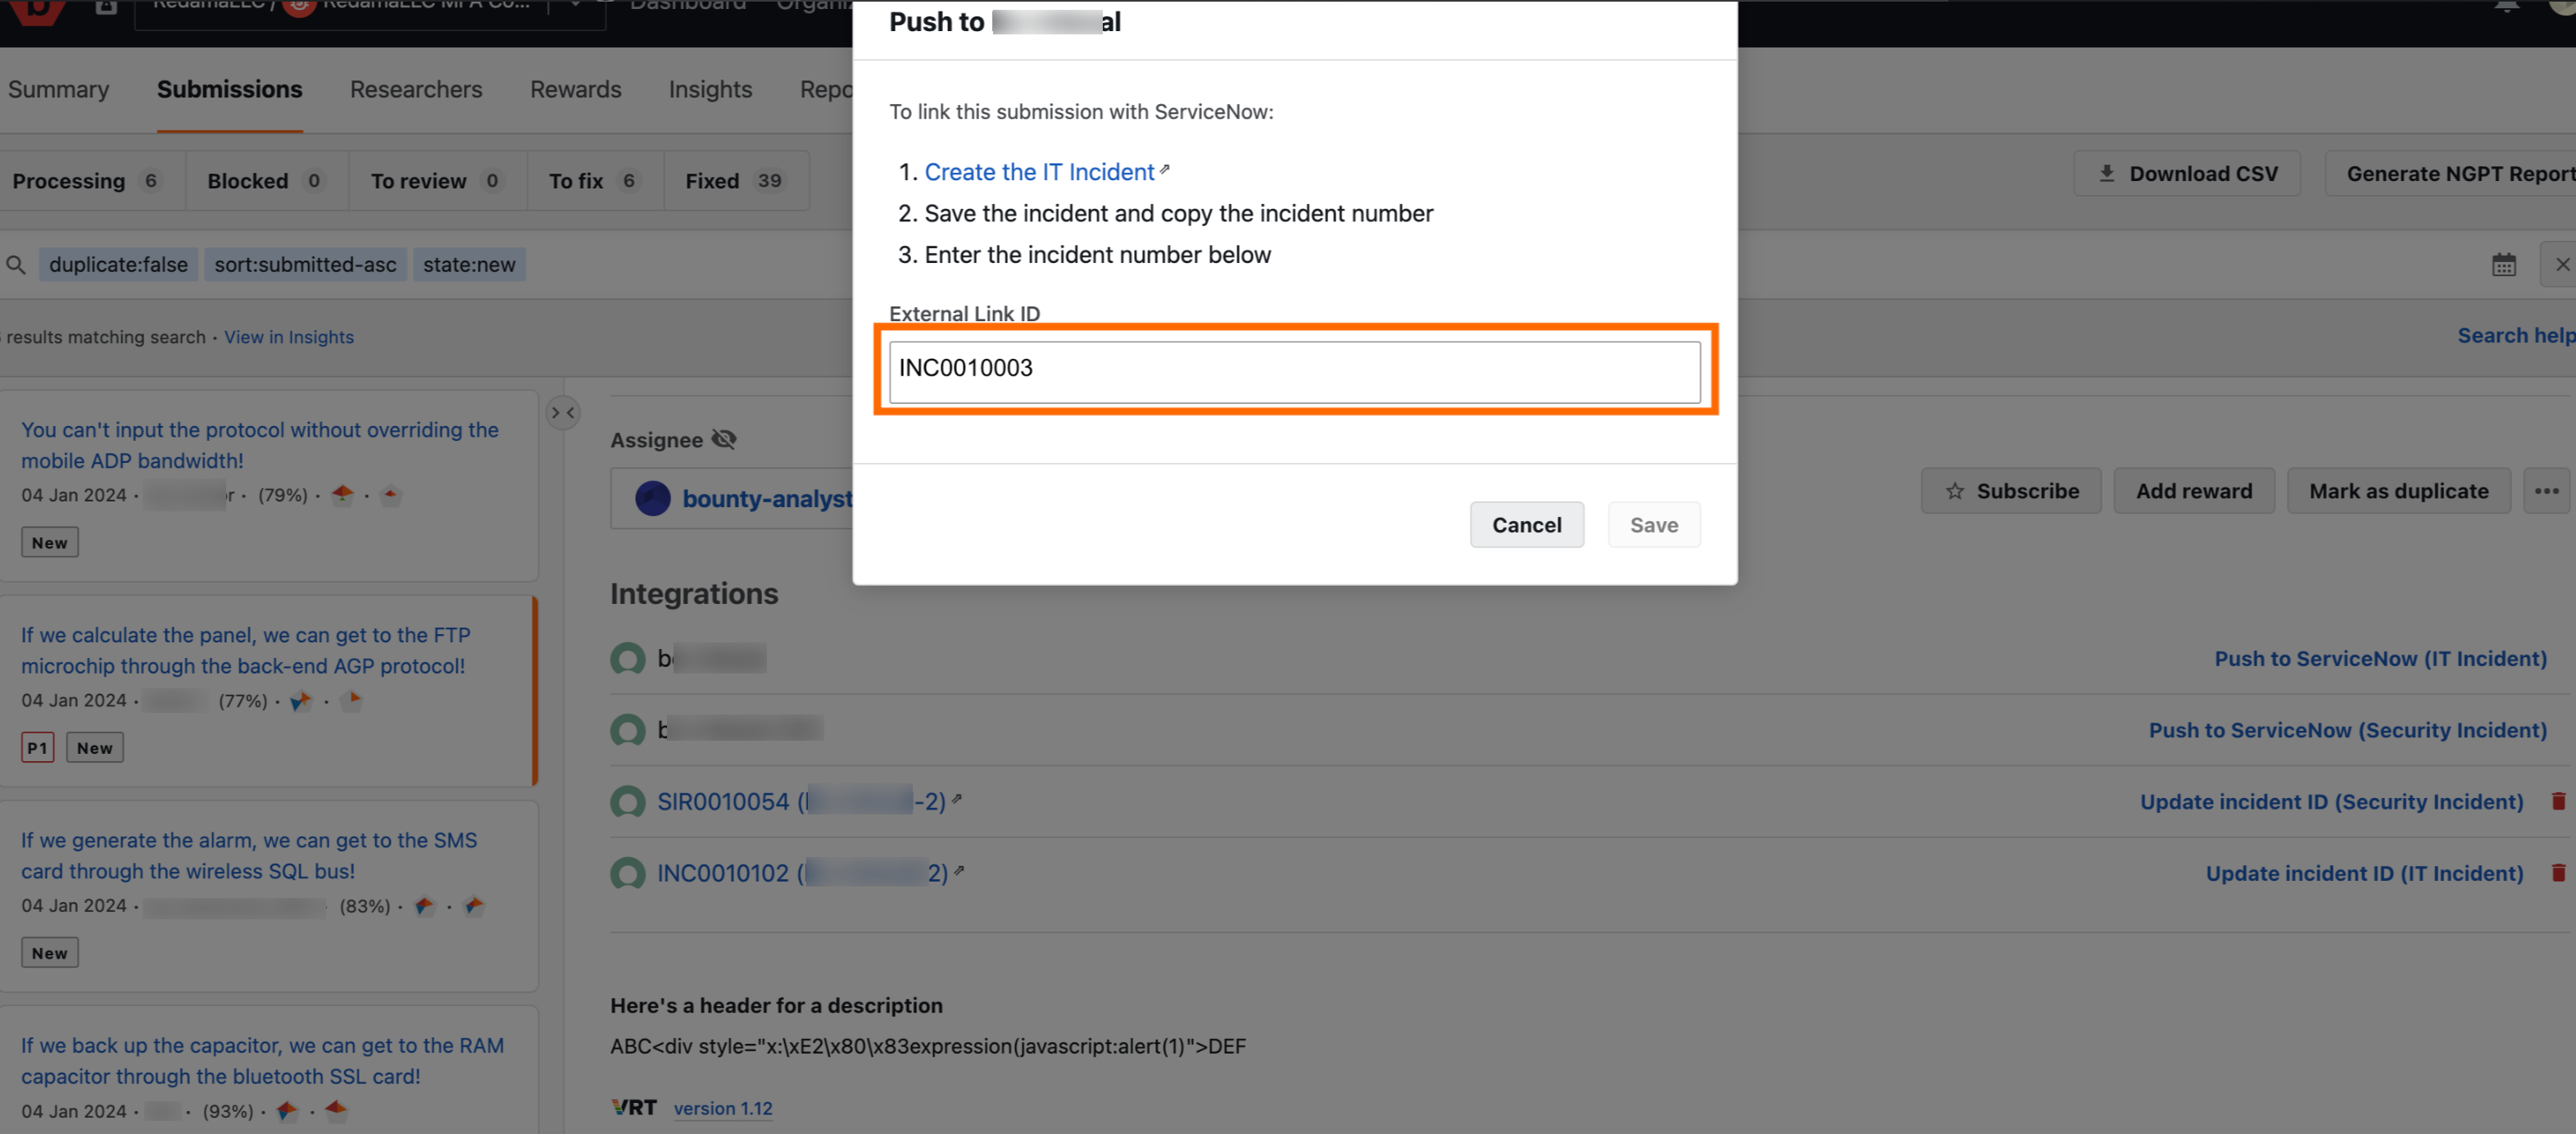
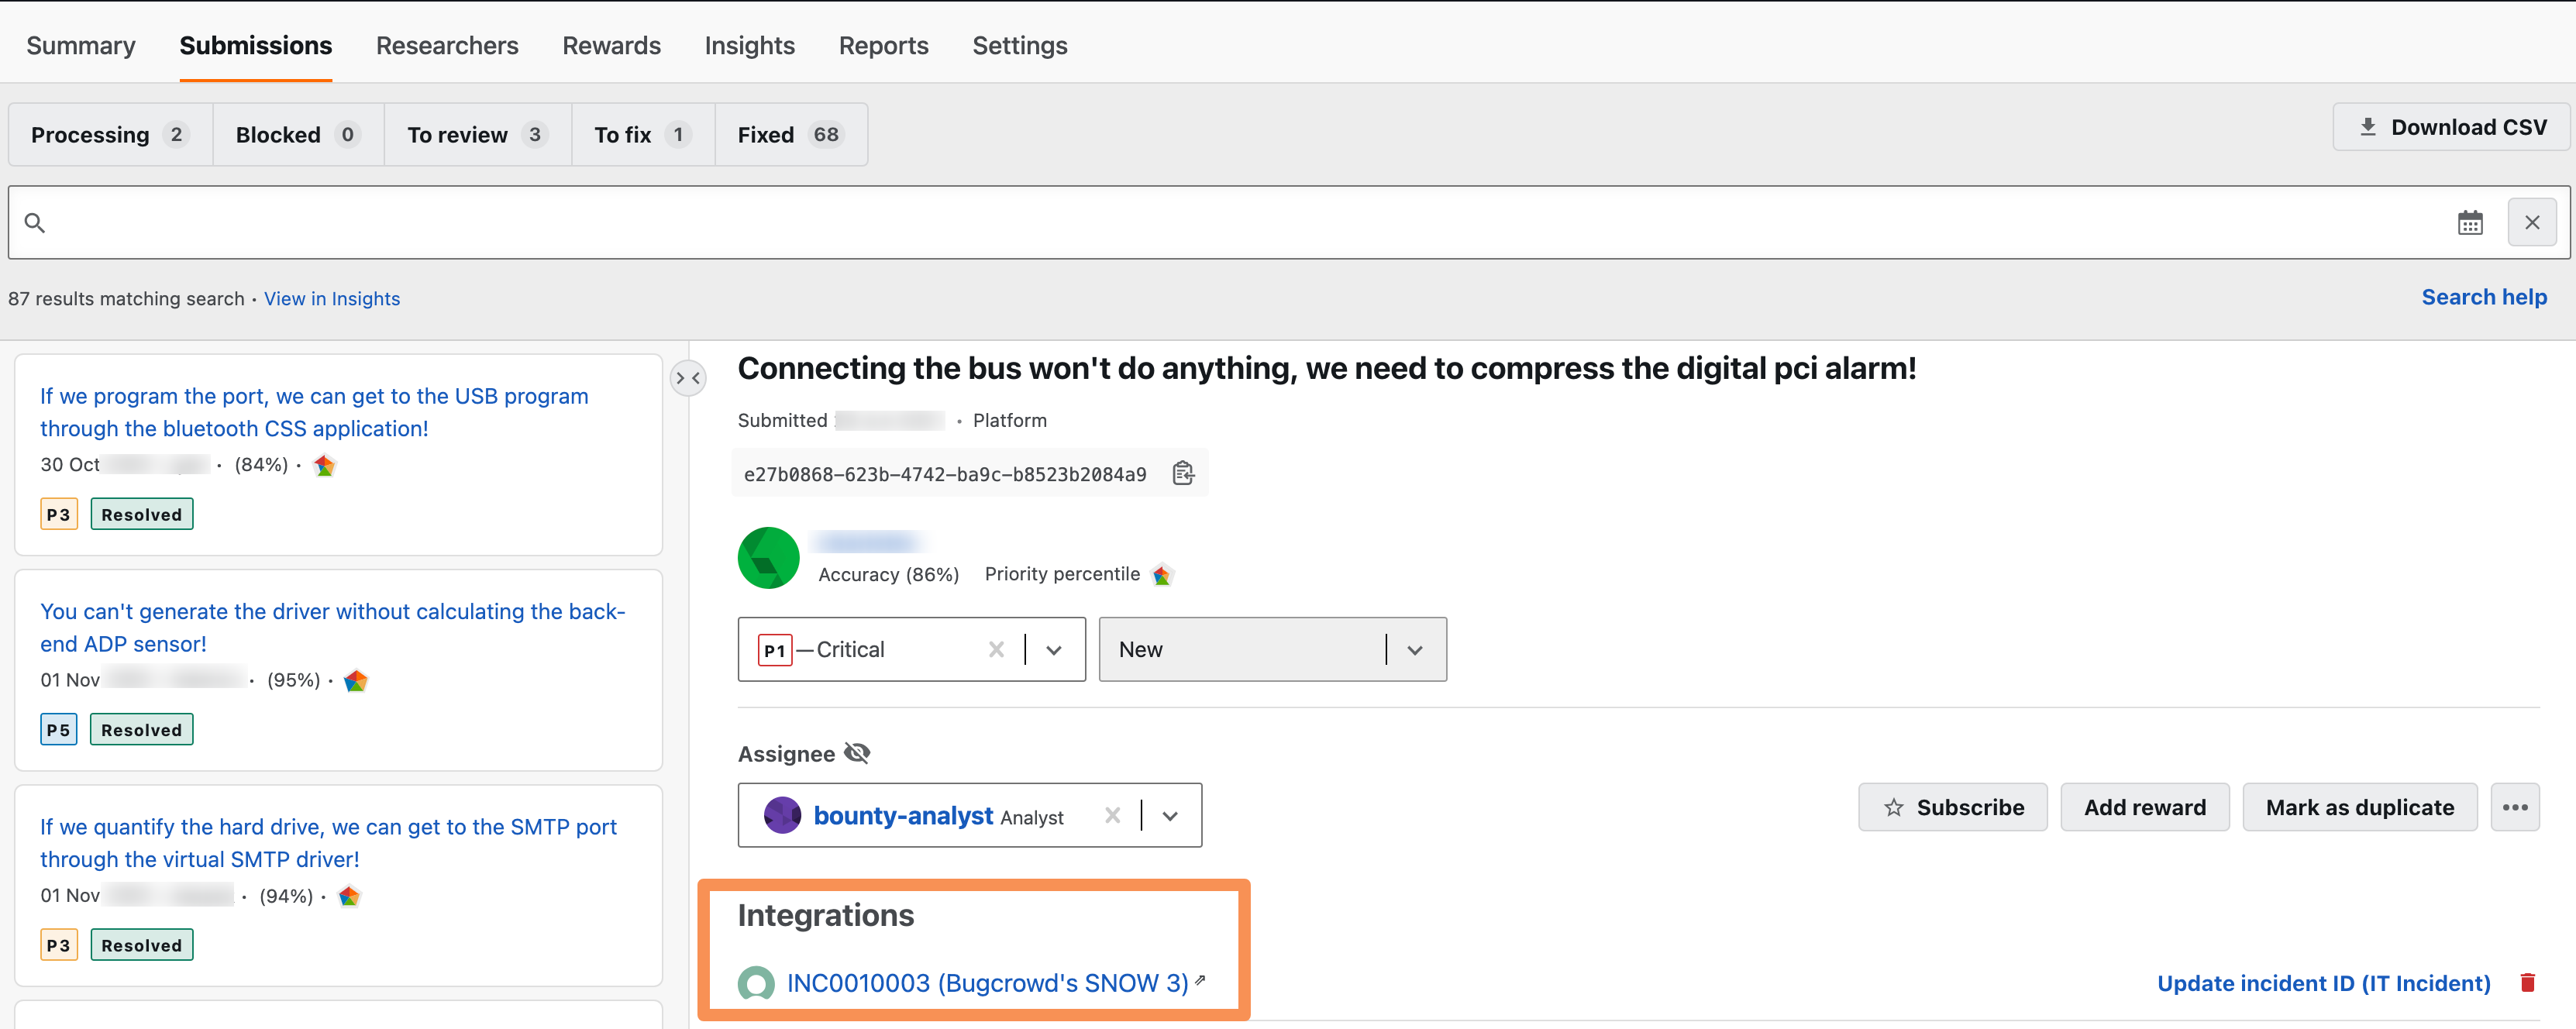
A link to the ServiceNow incident is created in the submission. This makes it easy to access the ServiceNow Incident within Crowdcontrol for further updates.
Enabling Two Way Integration
If you enable two way integration while configuring ServiceNow and push a submission, the status of the submission in Crowdcontrol will be automatically marked as resolved/closed when the ServiceNow incident to which it is associated is resolved/closed. Please note that to update the status of the submission automatically, the submission should be in one of the Accepted statuses - Resolved, Unresolved, or Informational.
To enable two way integration, follow these steps:
-
Go to Settings > Integrations, and then click Configure.
-
Click on the integration name.
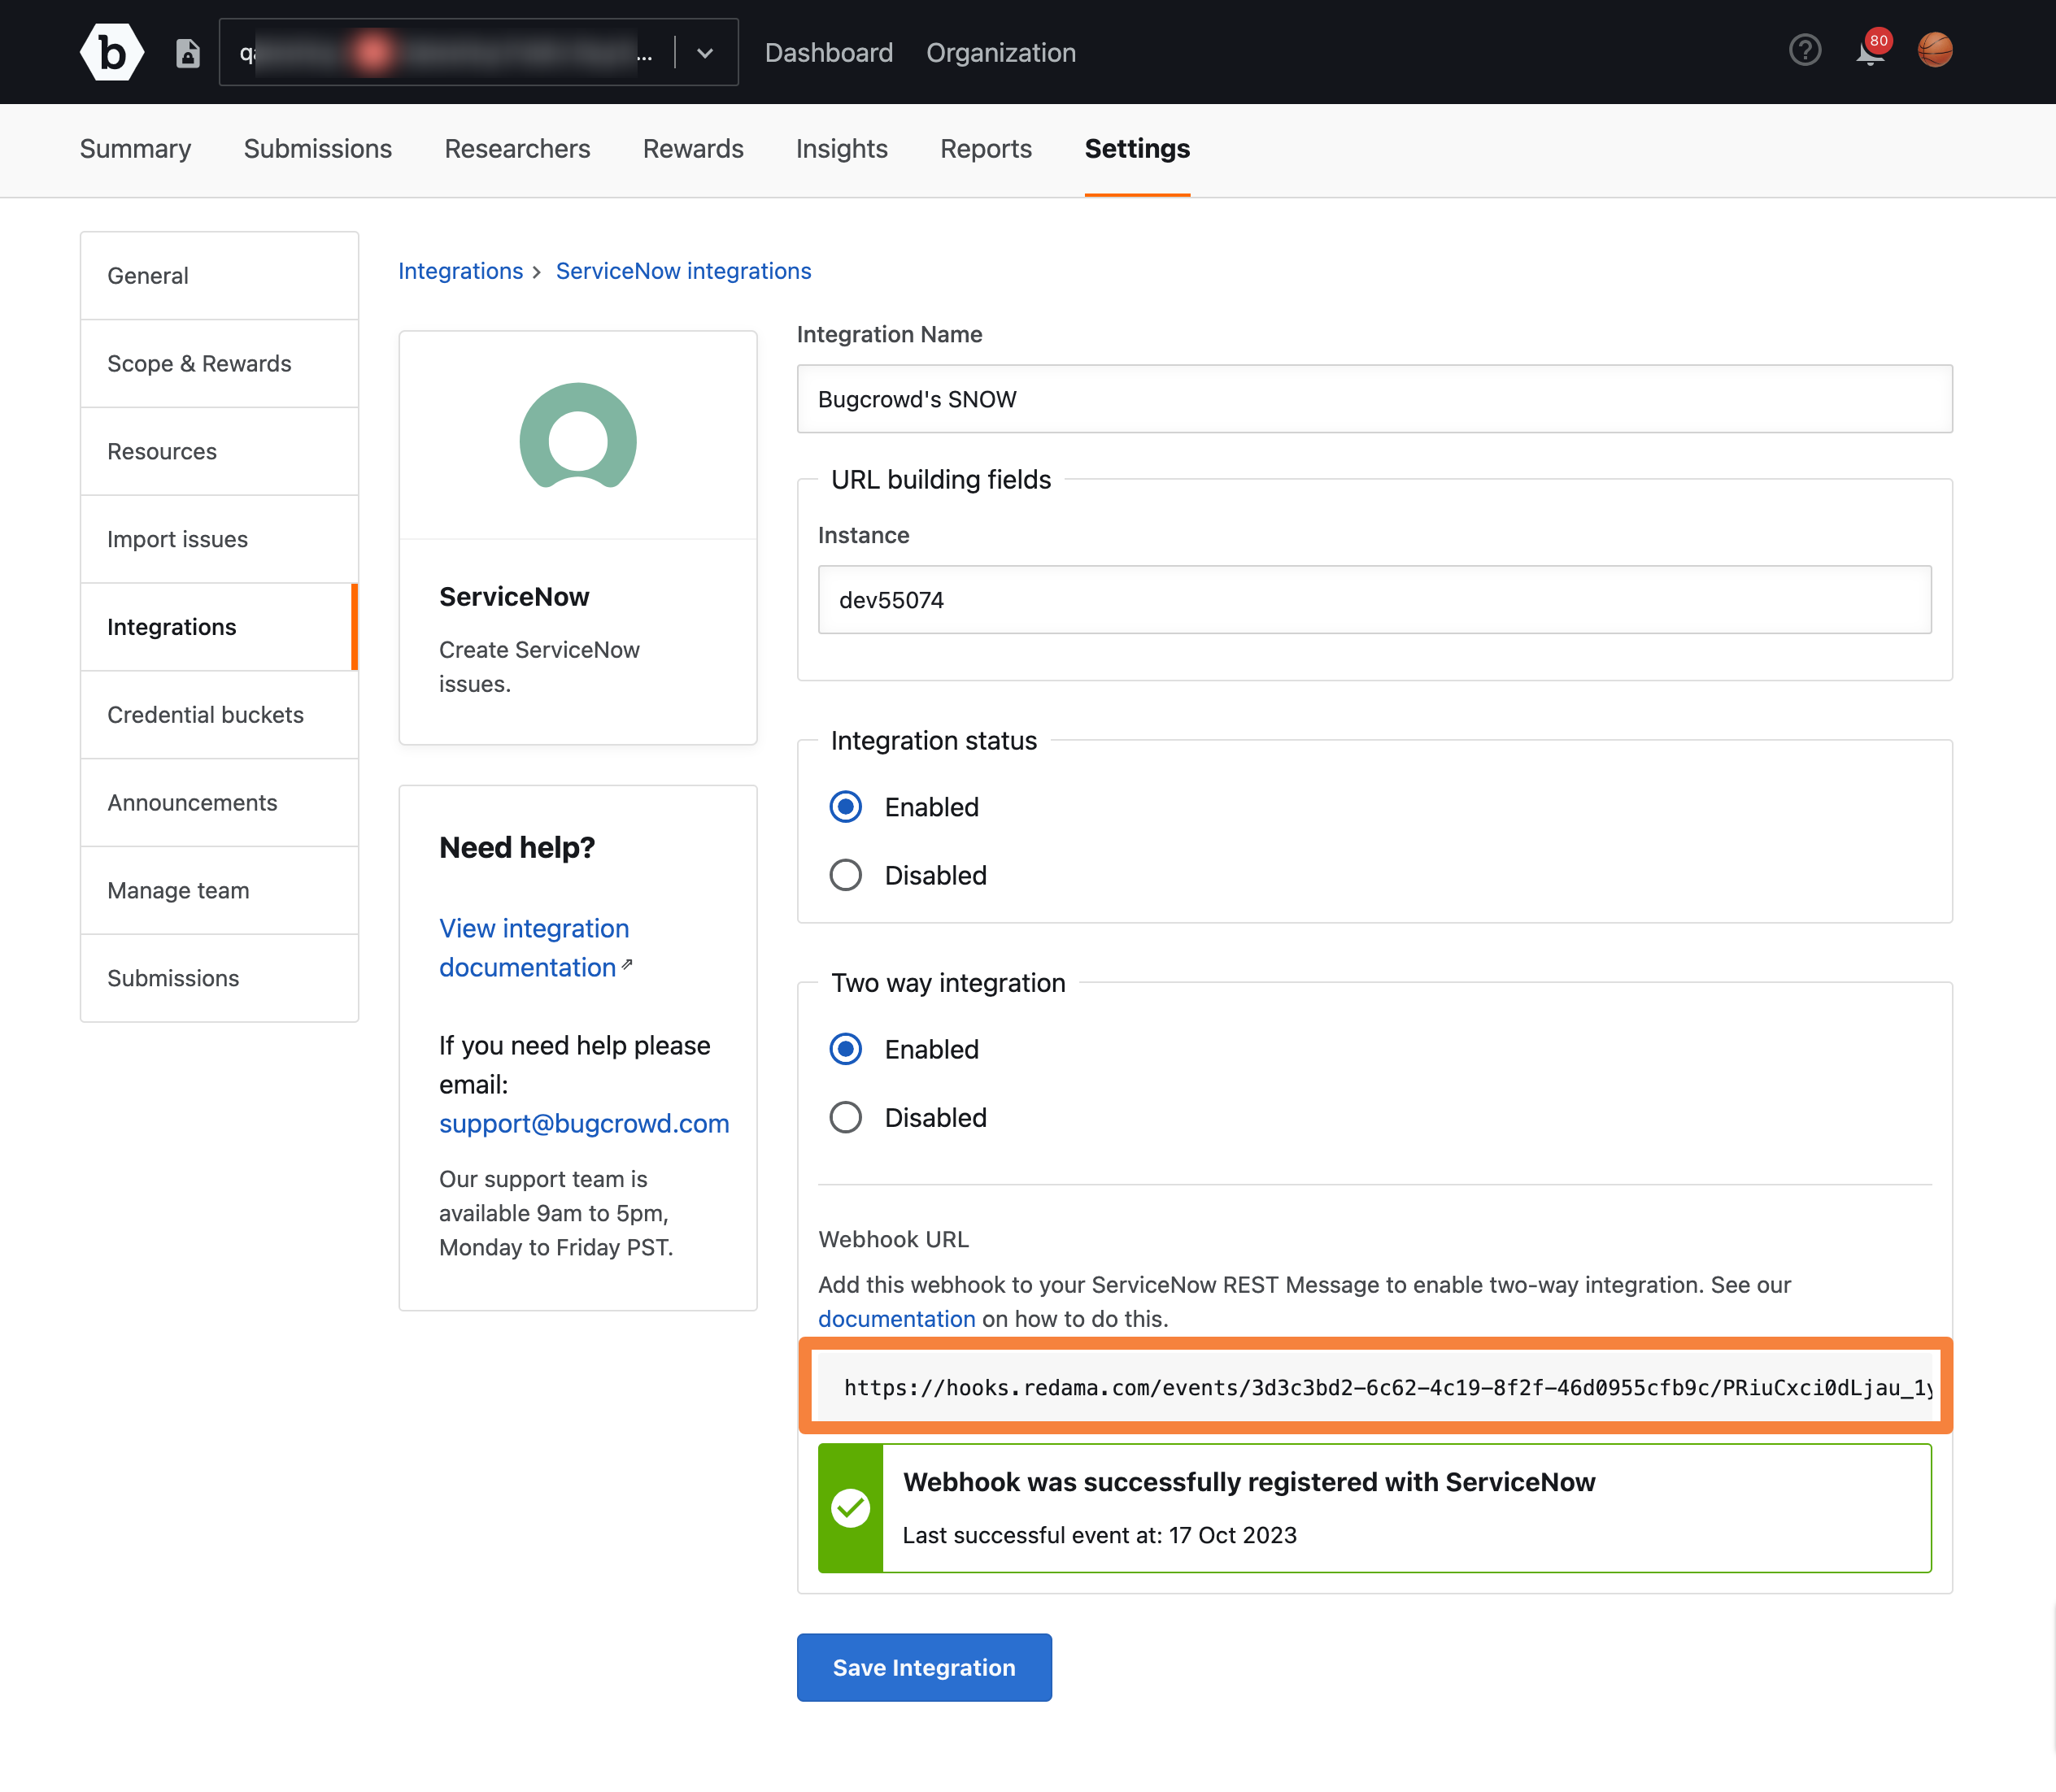
-
Scroll down to the Two way integration section and copy the Webhook URL.
-
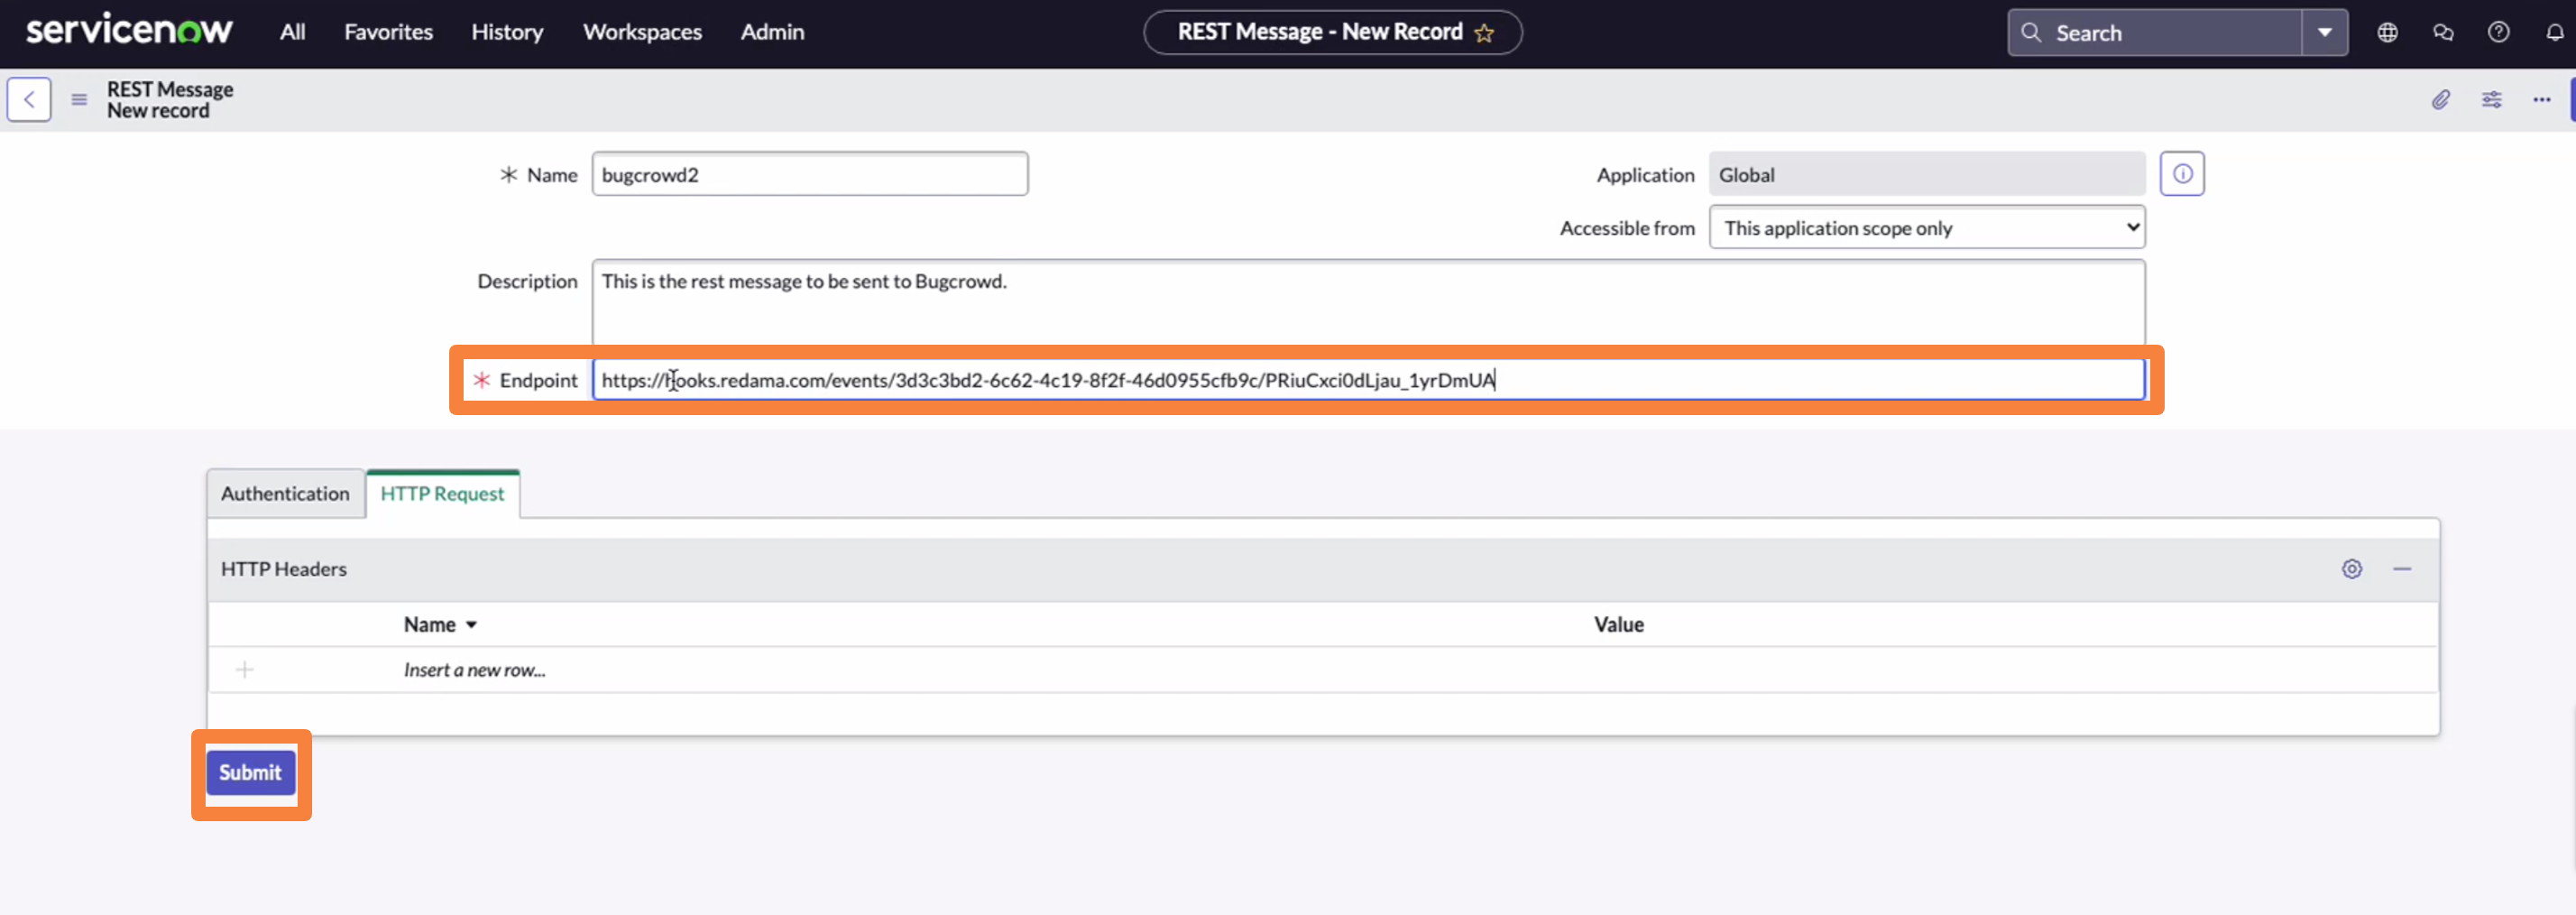
Go to the REST Message in ServiceNow and click New to create a new REST Message record.
-
Add all details like Name, Description, paste the Webhook URL in the Endpoint field and then click Submit.
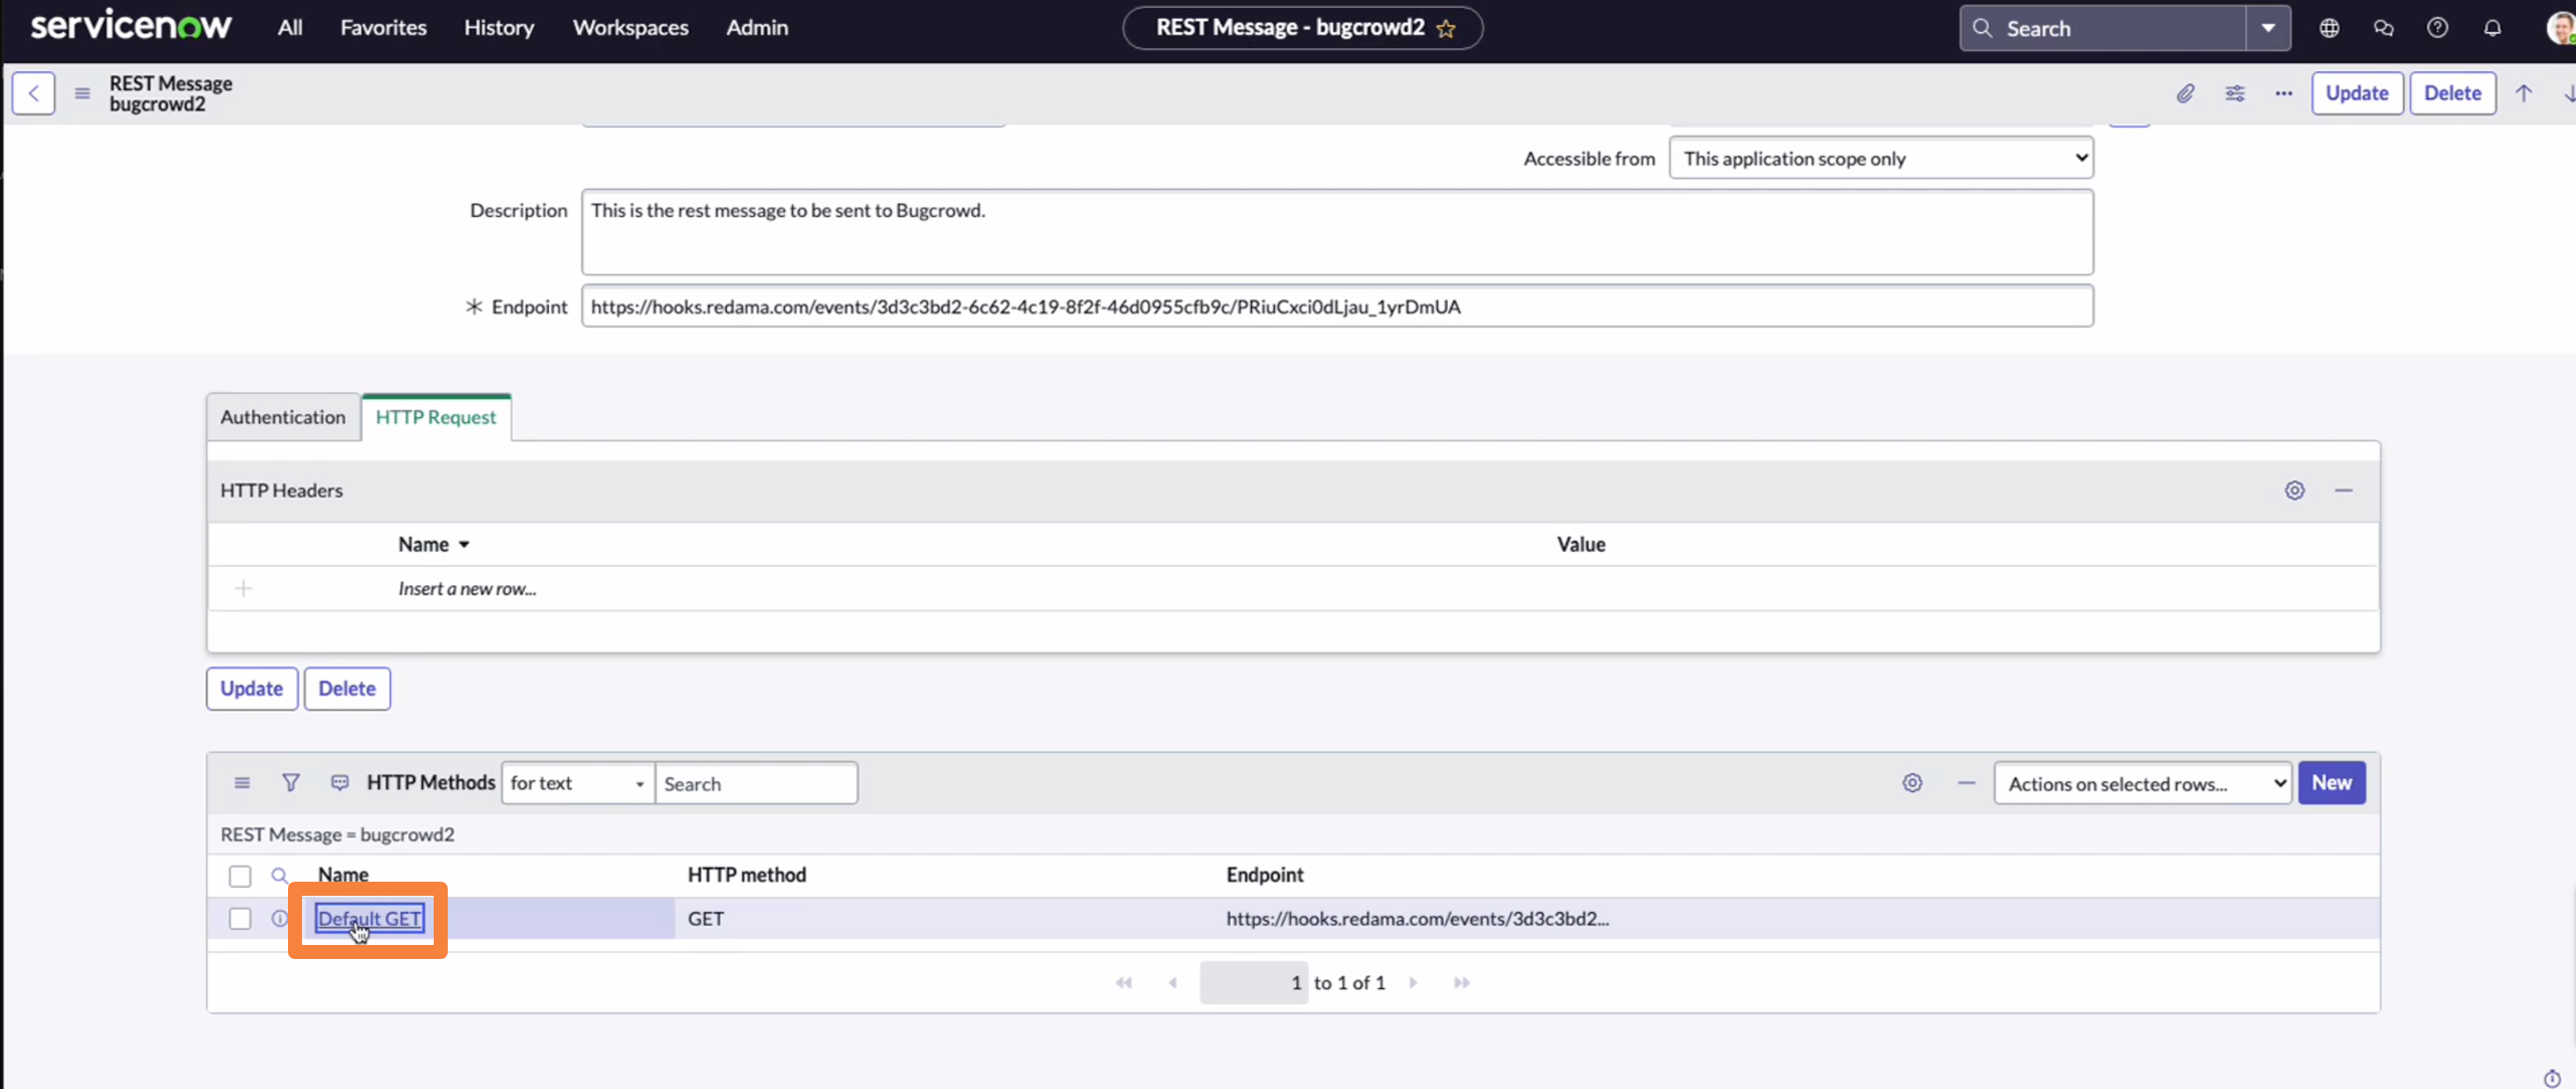
-
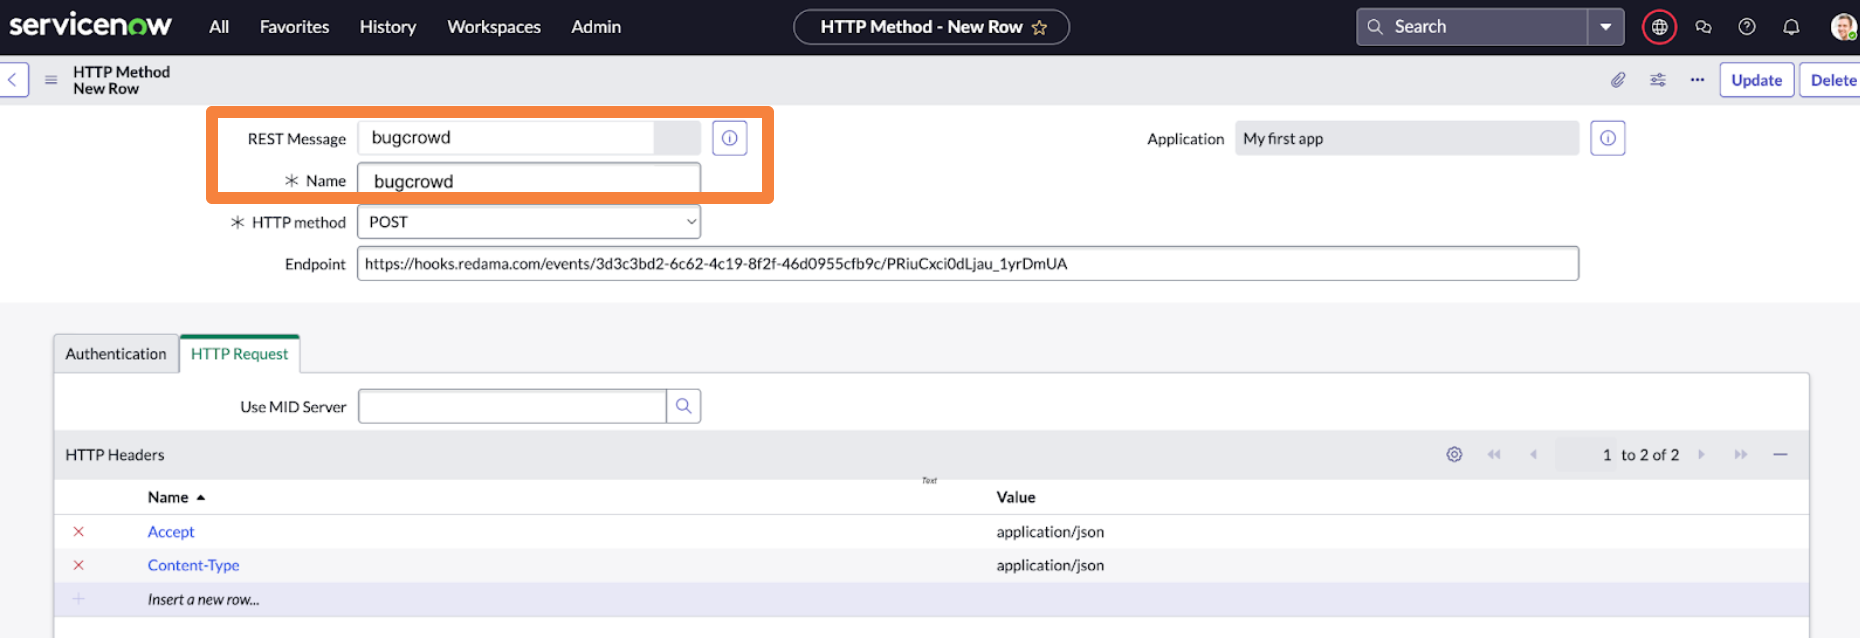
Click on the REST Message record that you recently created, go to the HTTP Methods section and click the Default GET link.
-
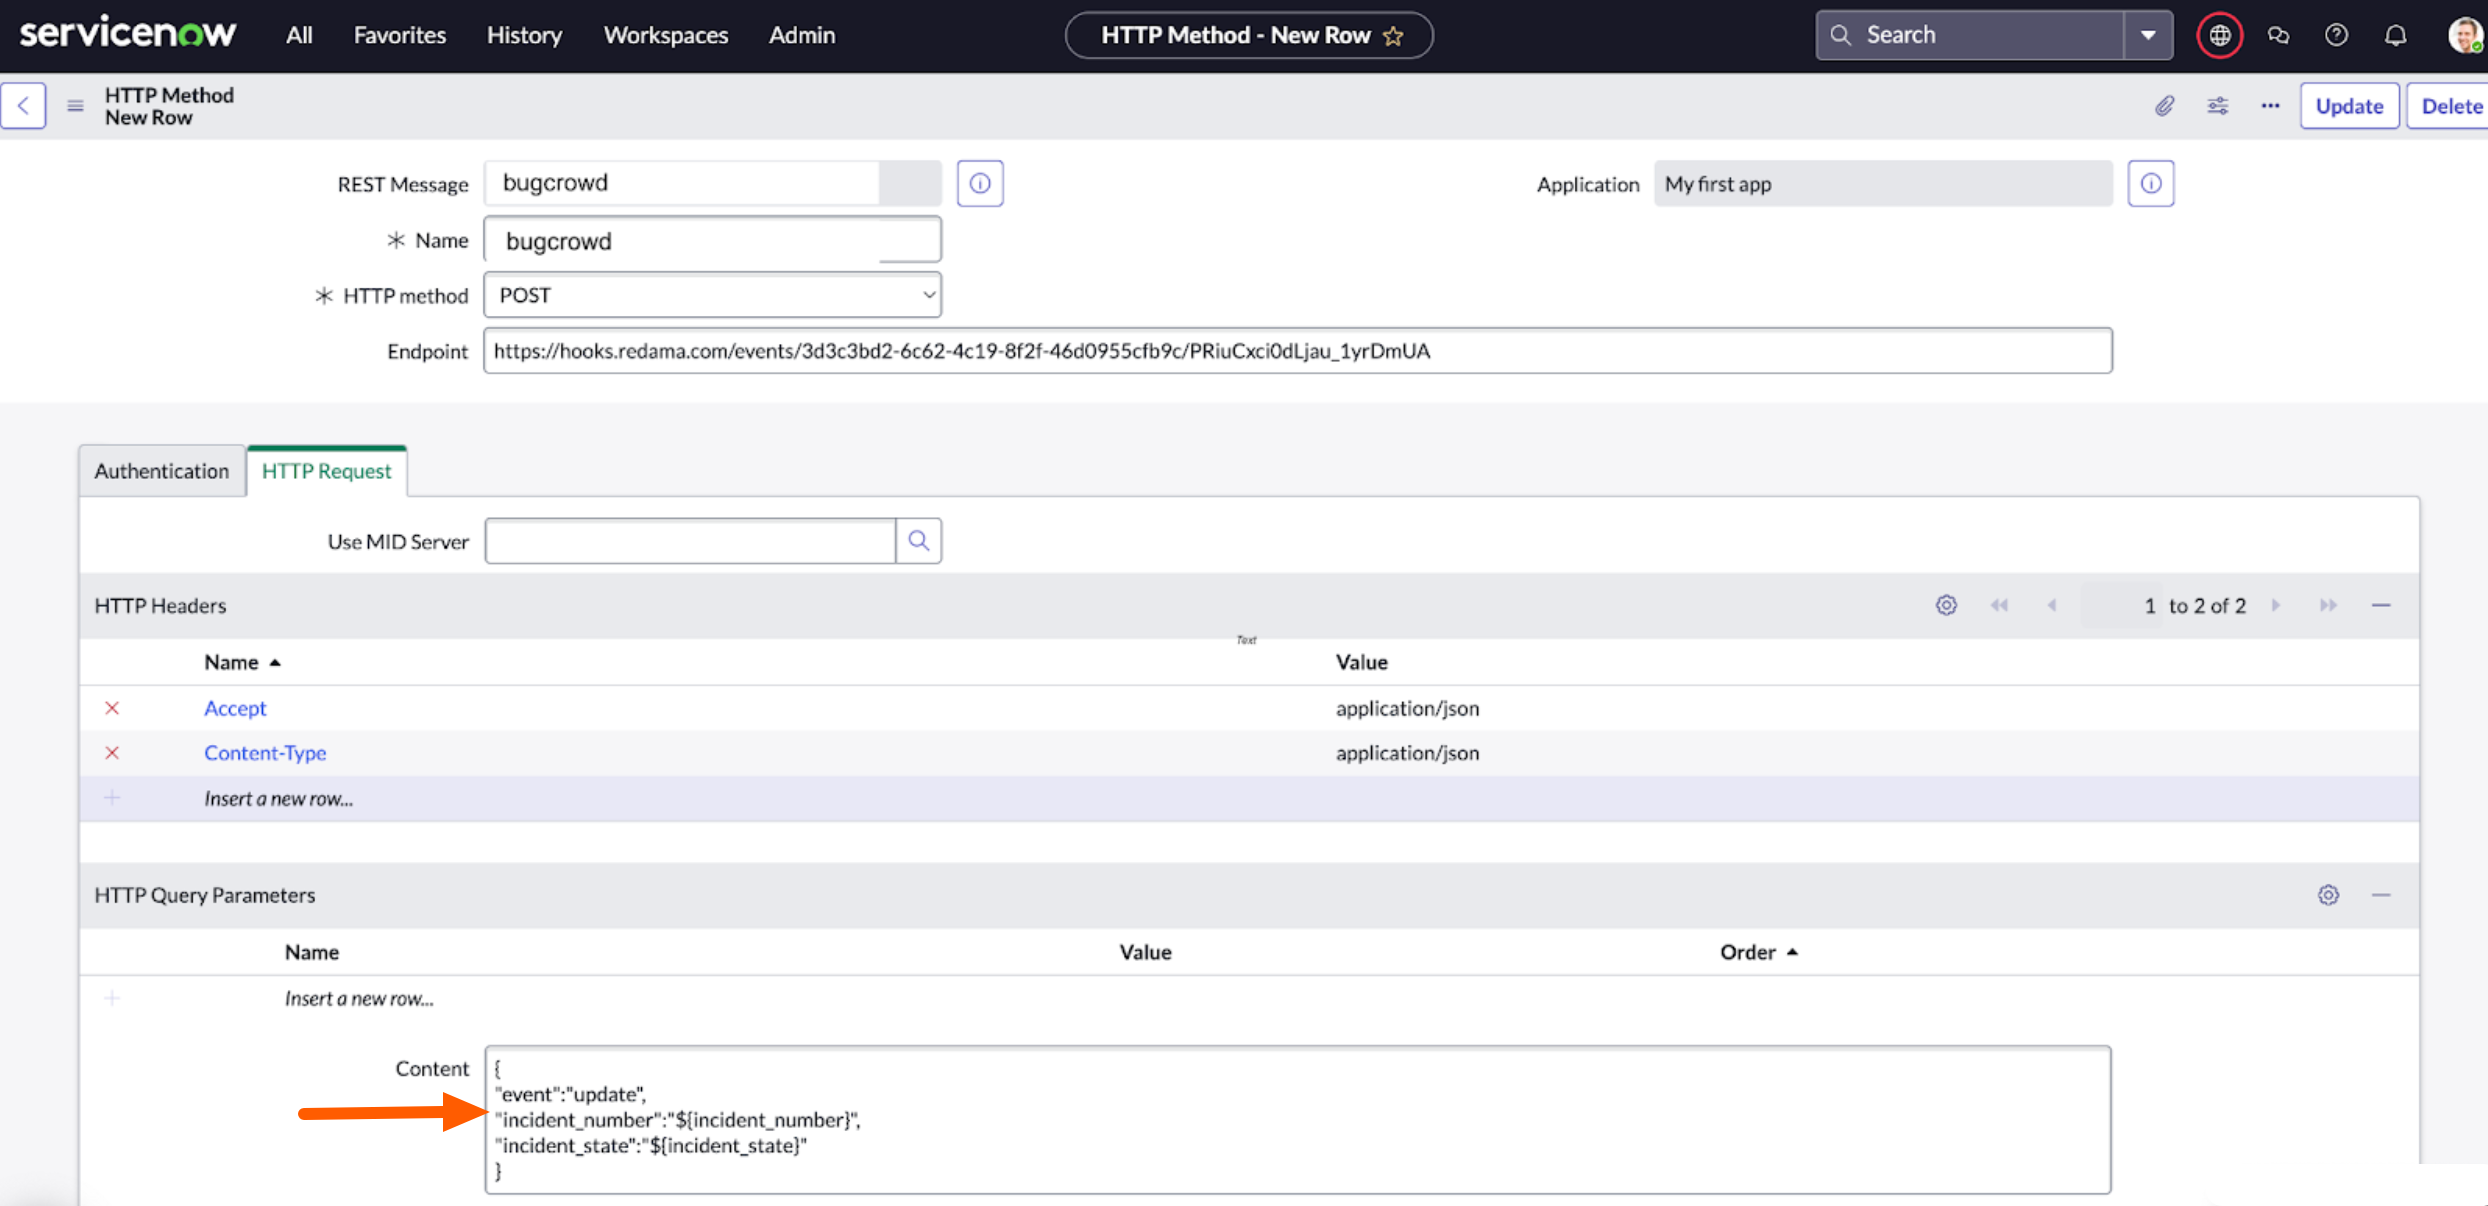
Update the Name, and go to the HTTP Headers section. Add the header names and their values.
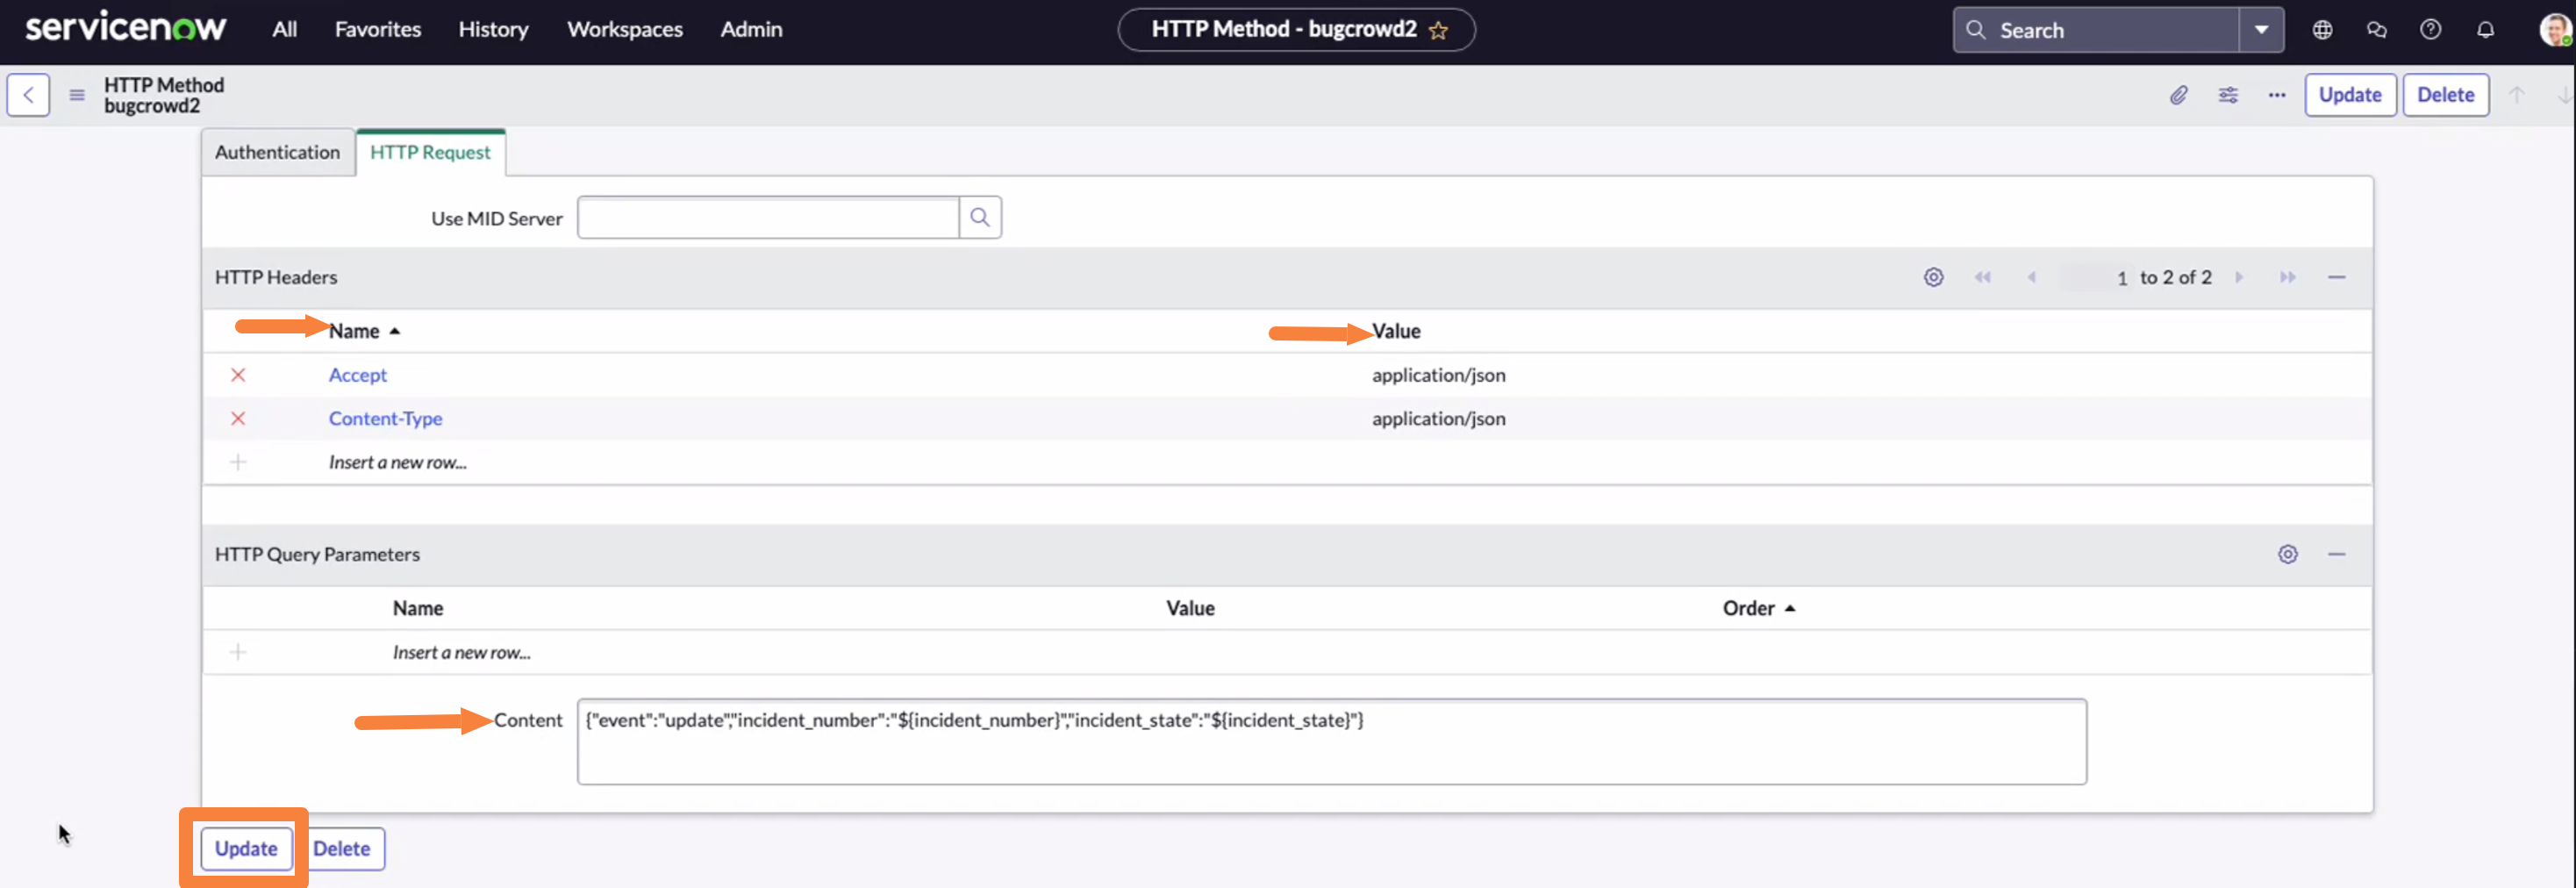
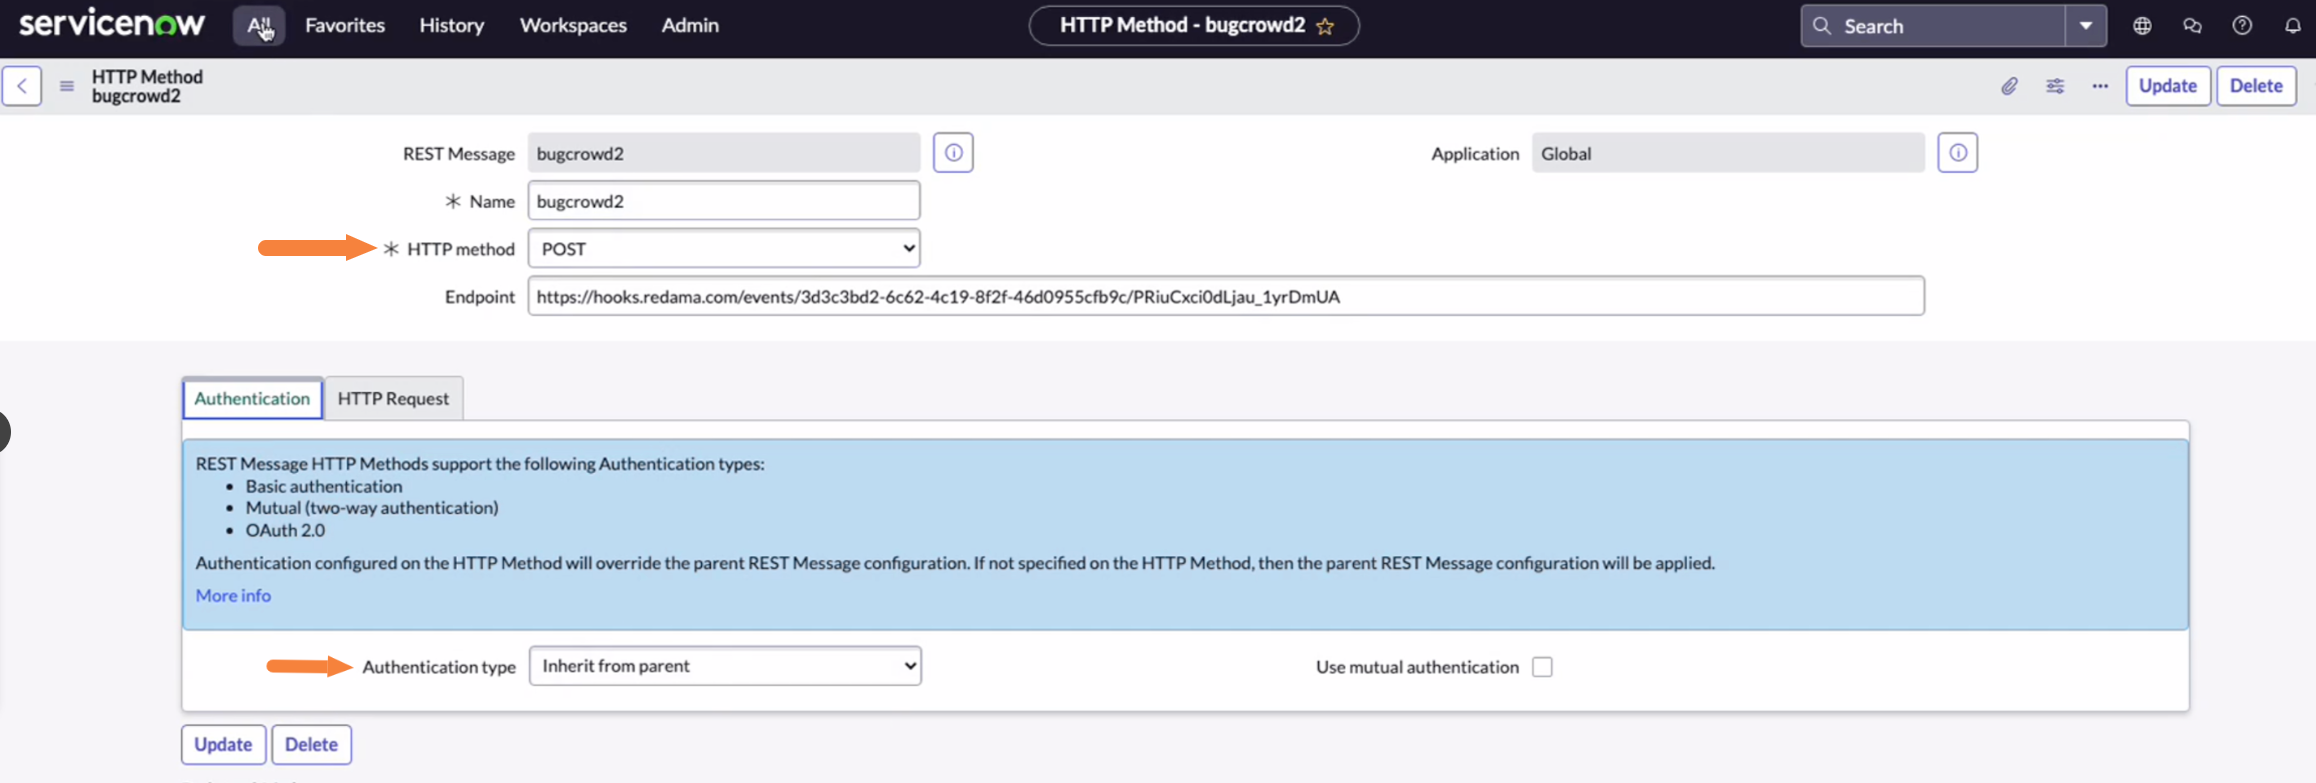
Go to the HTTP Query Parameters, Content section, define the query parameters and click Update.
You can add the following content:
{ "event": "updated", "incident_number": "${incident_number}", "incident_state": "${incident_state}" } -
Check the Authentication type is set to Inherit from parent and the HTTP method is set to POST.
-
Go to the Business Rule page.
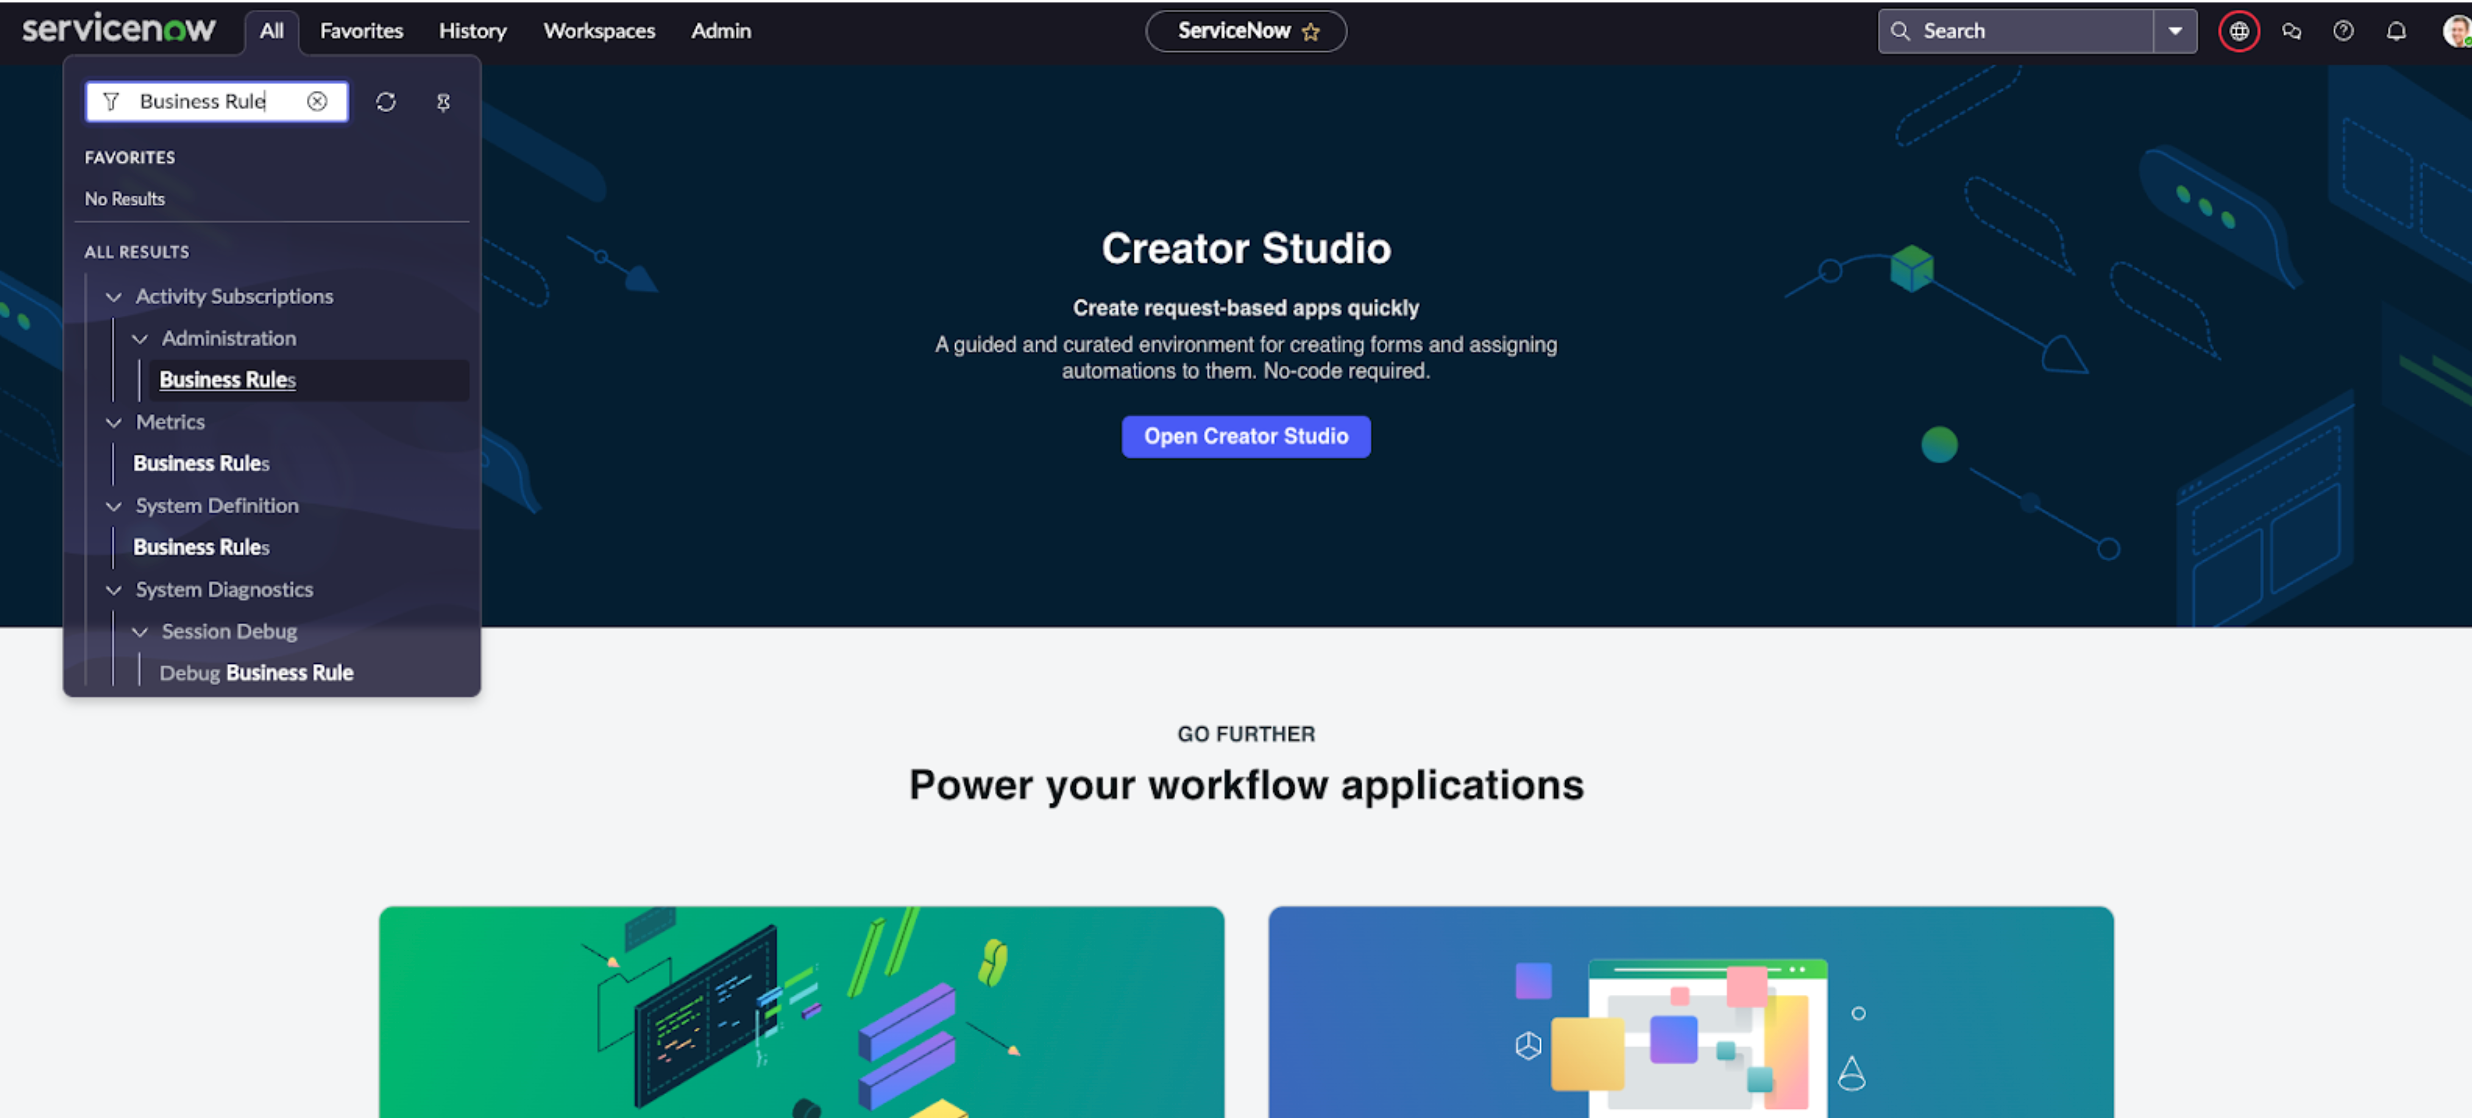
-
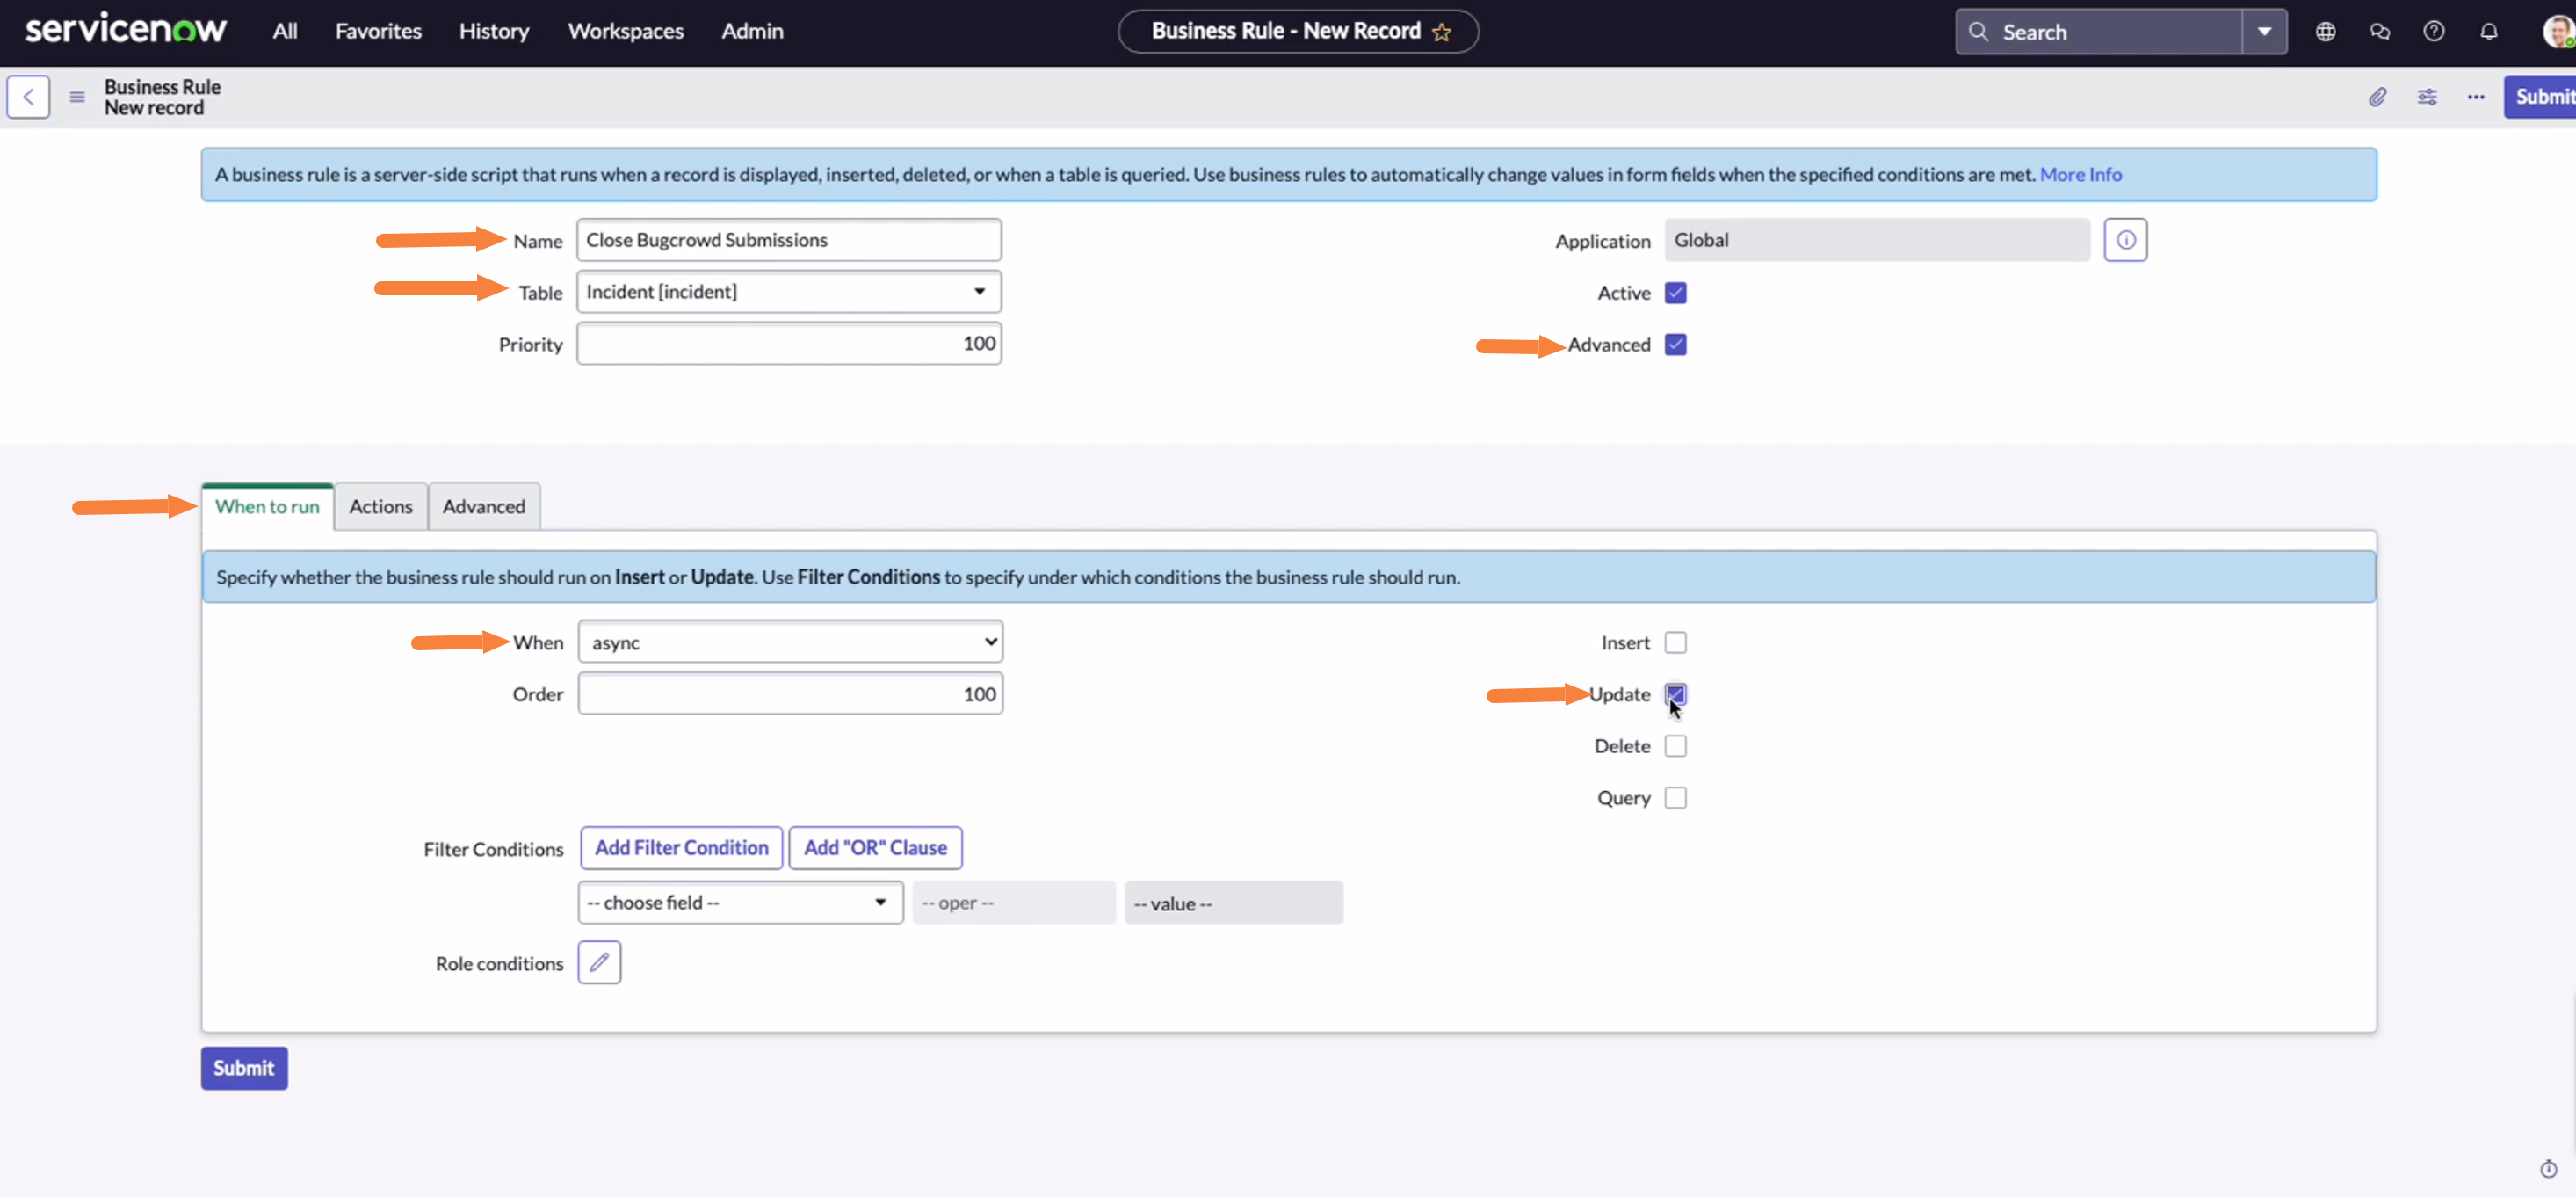
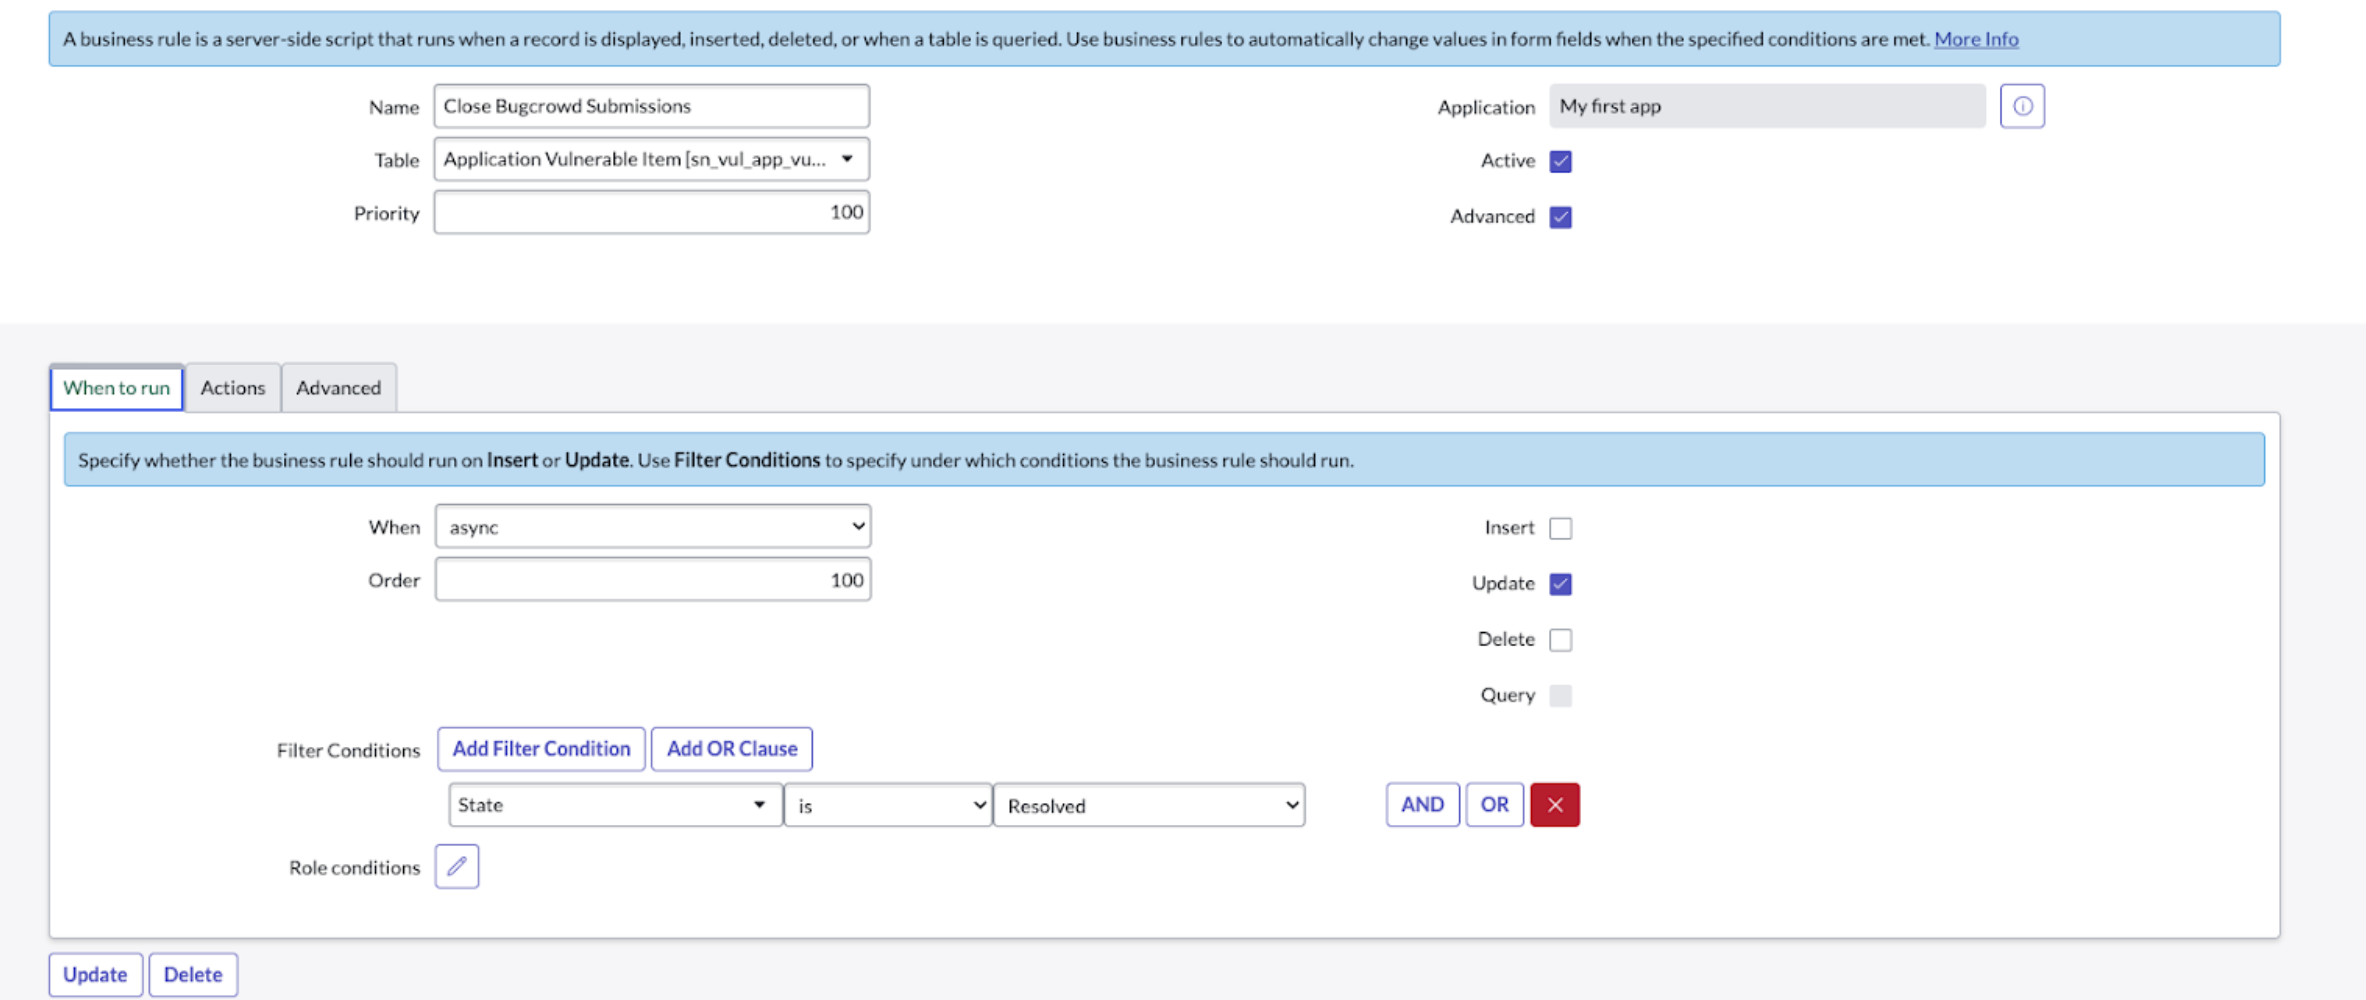
Add the Name, select Incident in the Table drop-down.
Check the Advanced checkbox and then go to the When to run tab.
In the When drop-down select async and check the Update checkbox.
-
Go to the Advanced tab and define the business rule condition, script, and then click Update.
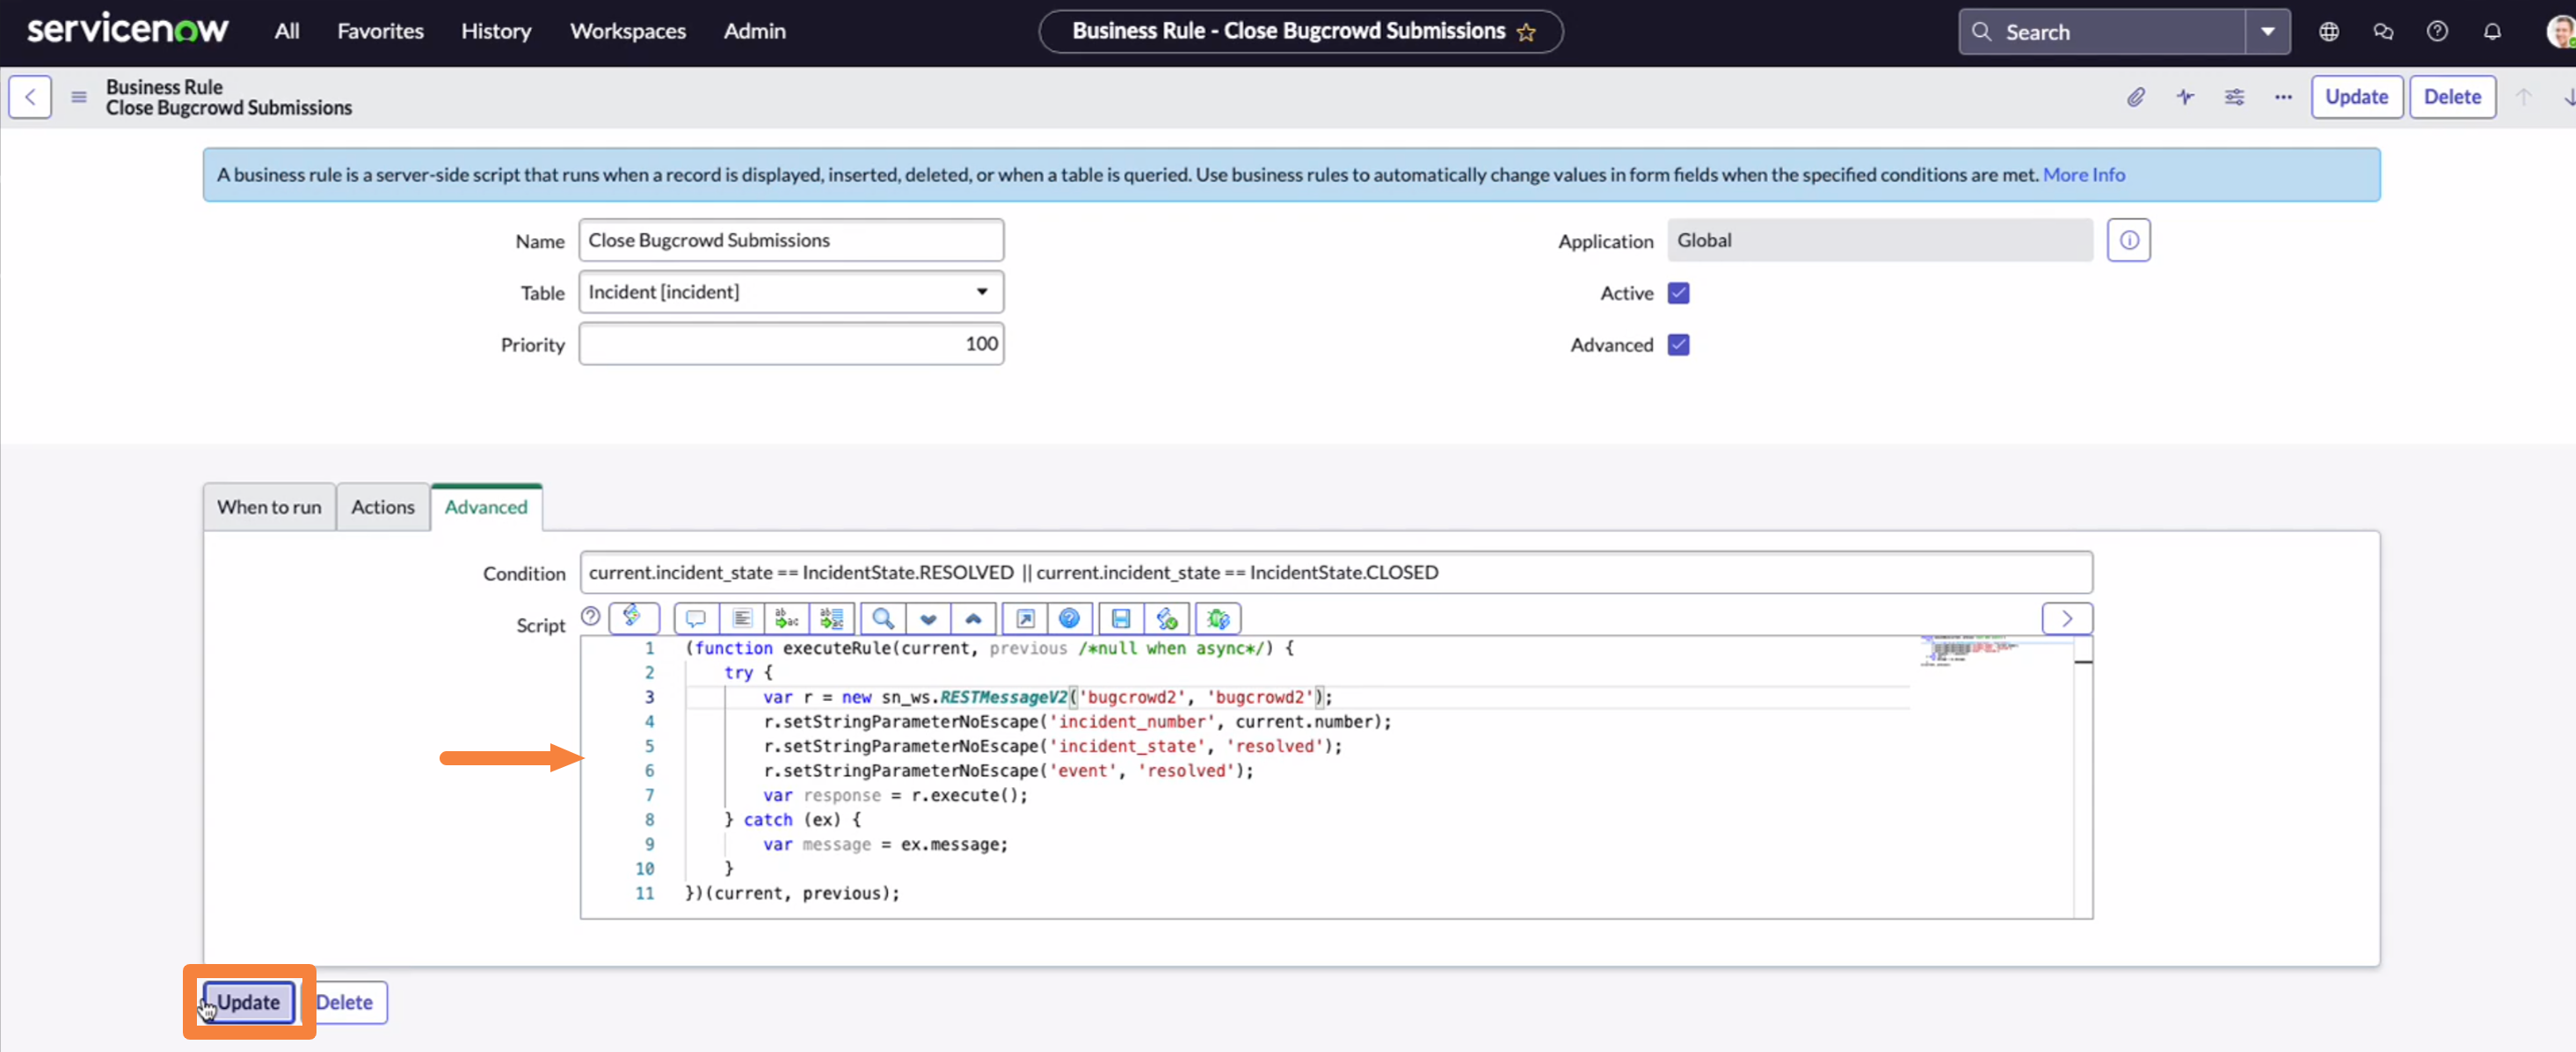
For the following condition, you can use the mentioned business rule script:
current.incident_state == IncidentState.RESOLVED || current.incident_state == IncidentState.CLOSED(function executeRule(current, previous /*null when async*/) { try { var r = new sn_ws.RESTMessageV2('bugcrowd', 'bugcrowd'); r.setStringParameterNoEscape('incident_number', current.number); r.setStringParameterNoEscape('incident_state', 'resolved'); r.setStringParameterNoEscape('event', 'resolved'); var response = r.execute(); } catch (ex) { var message = ex.message; } })(current, previous);If the ServiceNow instance is Application Vulnerability Response:
Please note the change in Filter Conditions:
Use the REST Message and Name fields to construct the request below:
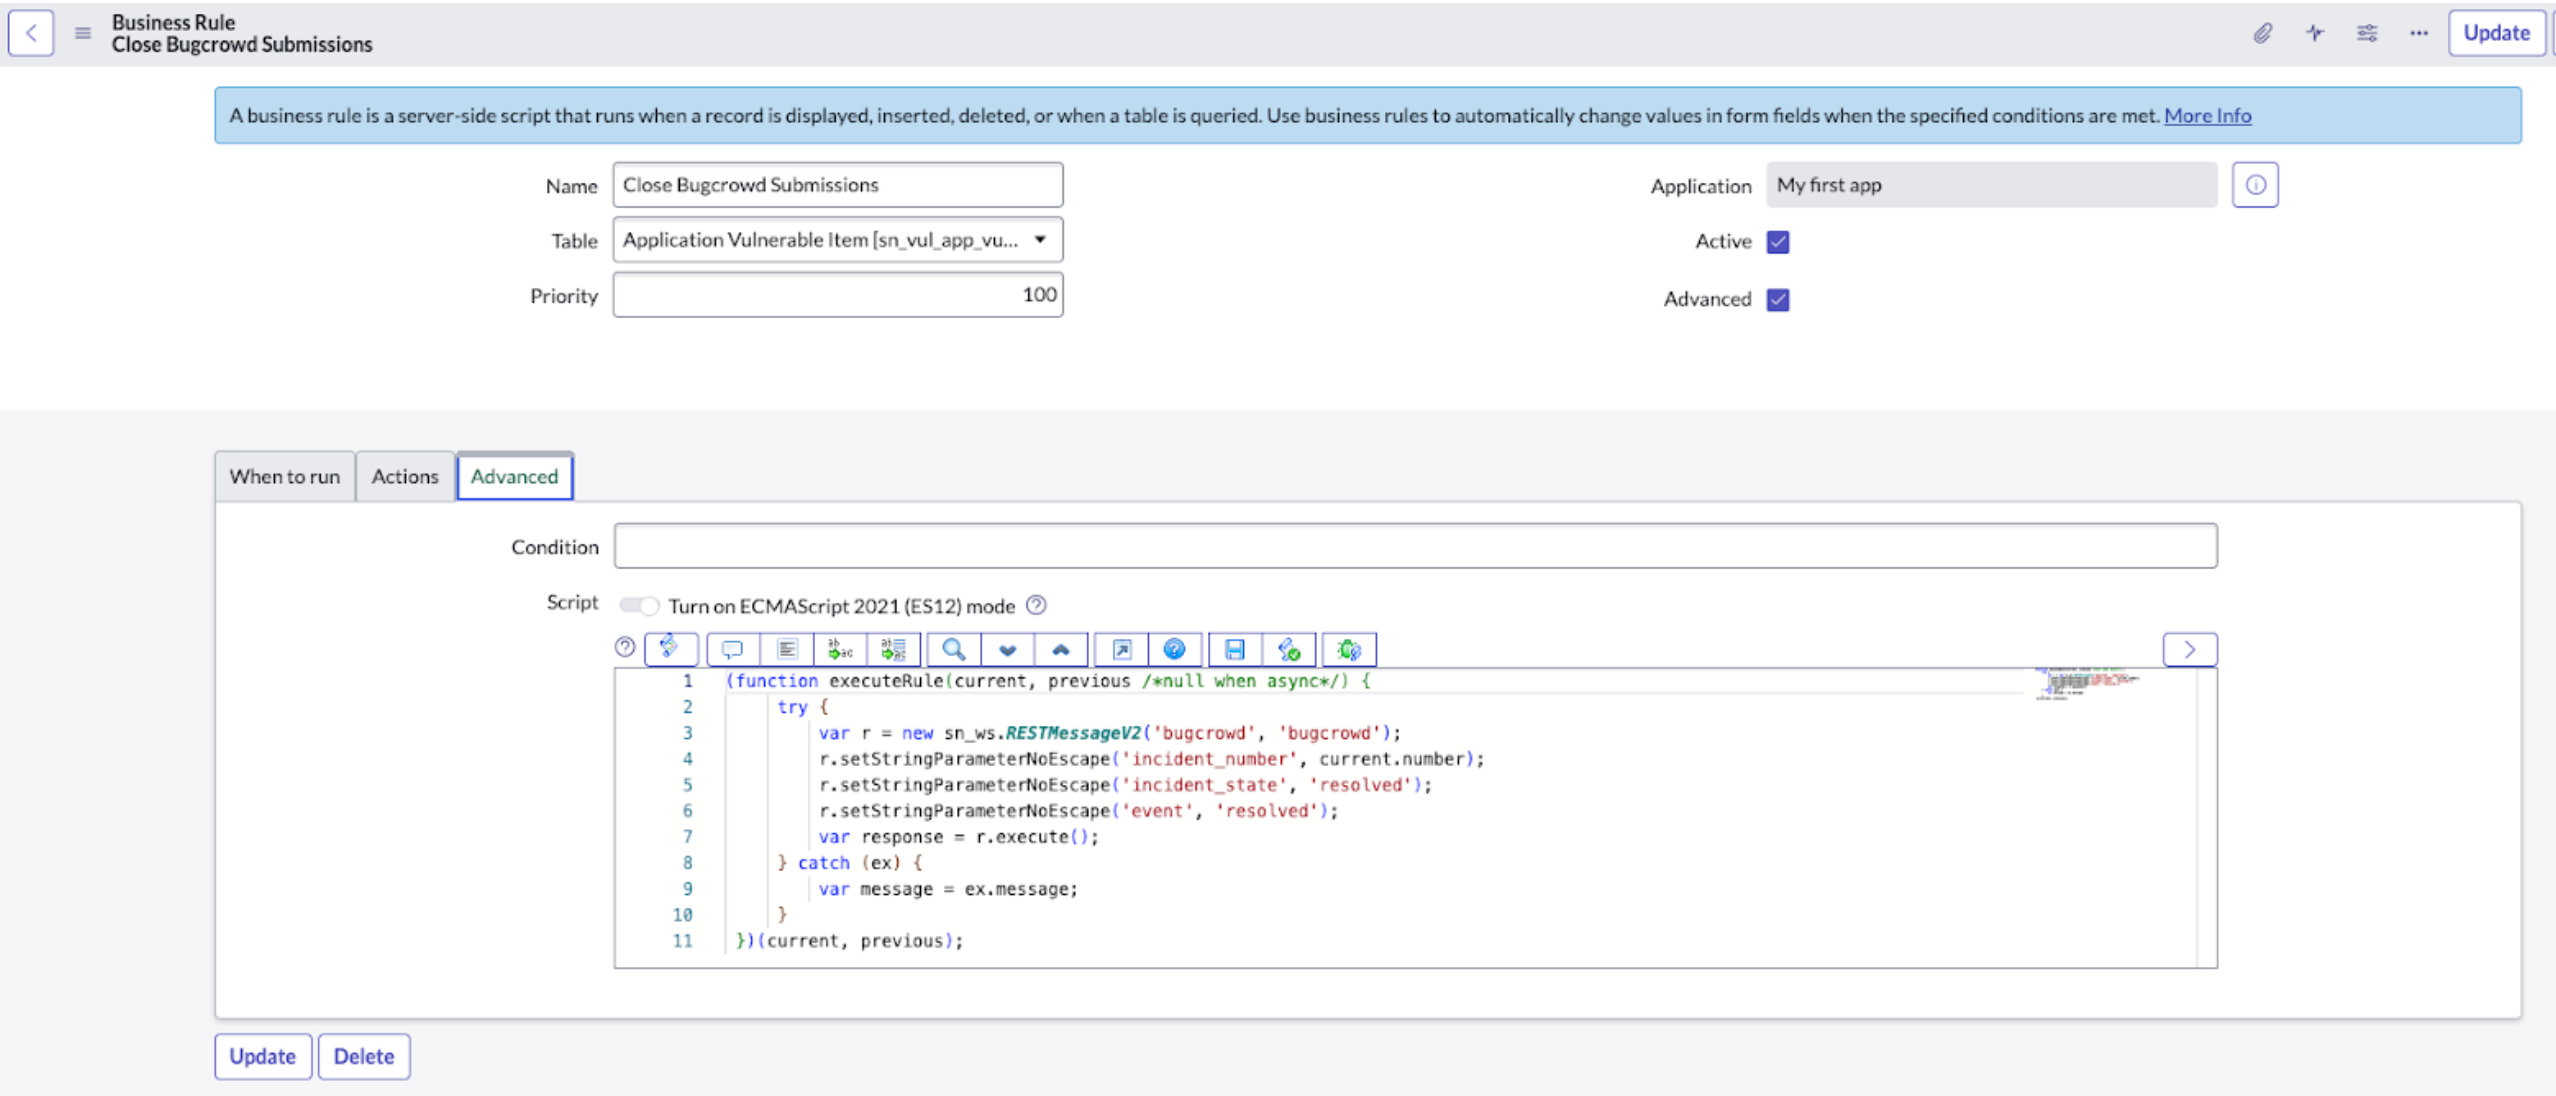
(function executeRule(current, previous /*null when async*/) {
    try {
        var request = new sn_ws.RESTMessageV2('bugcrowd','bugcrowd');
        request.setStringParameterNoEscape('incident_state','resolved');
        request.setStringParameterNoEscape('incident_number', current.number);
        request.setStringParameterNoEscape('event','resolved');
        var response = request.execute();
        gs.log(response.getBody());
} catch (ex) {
    var message = ex.message;
}
})(current, previous);
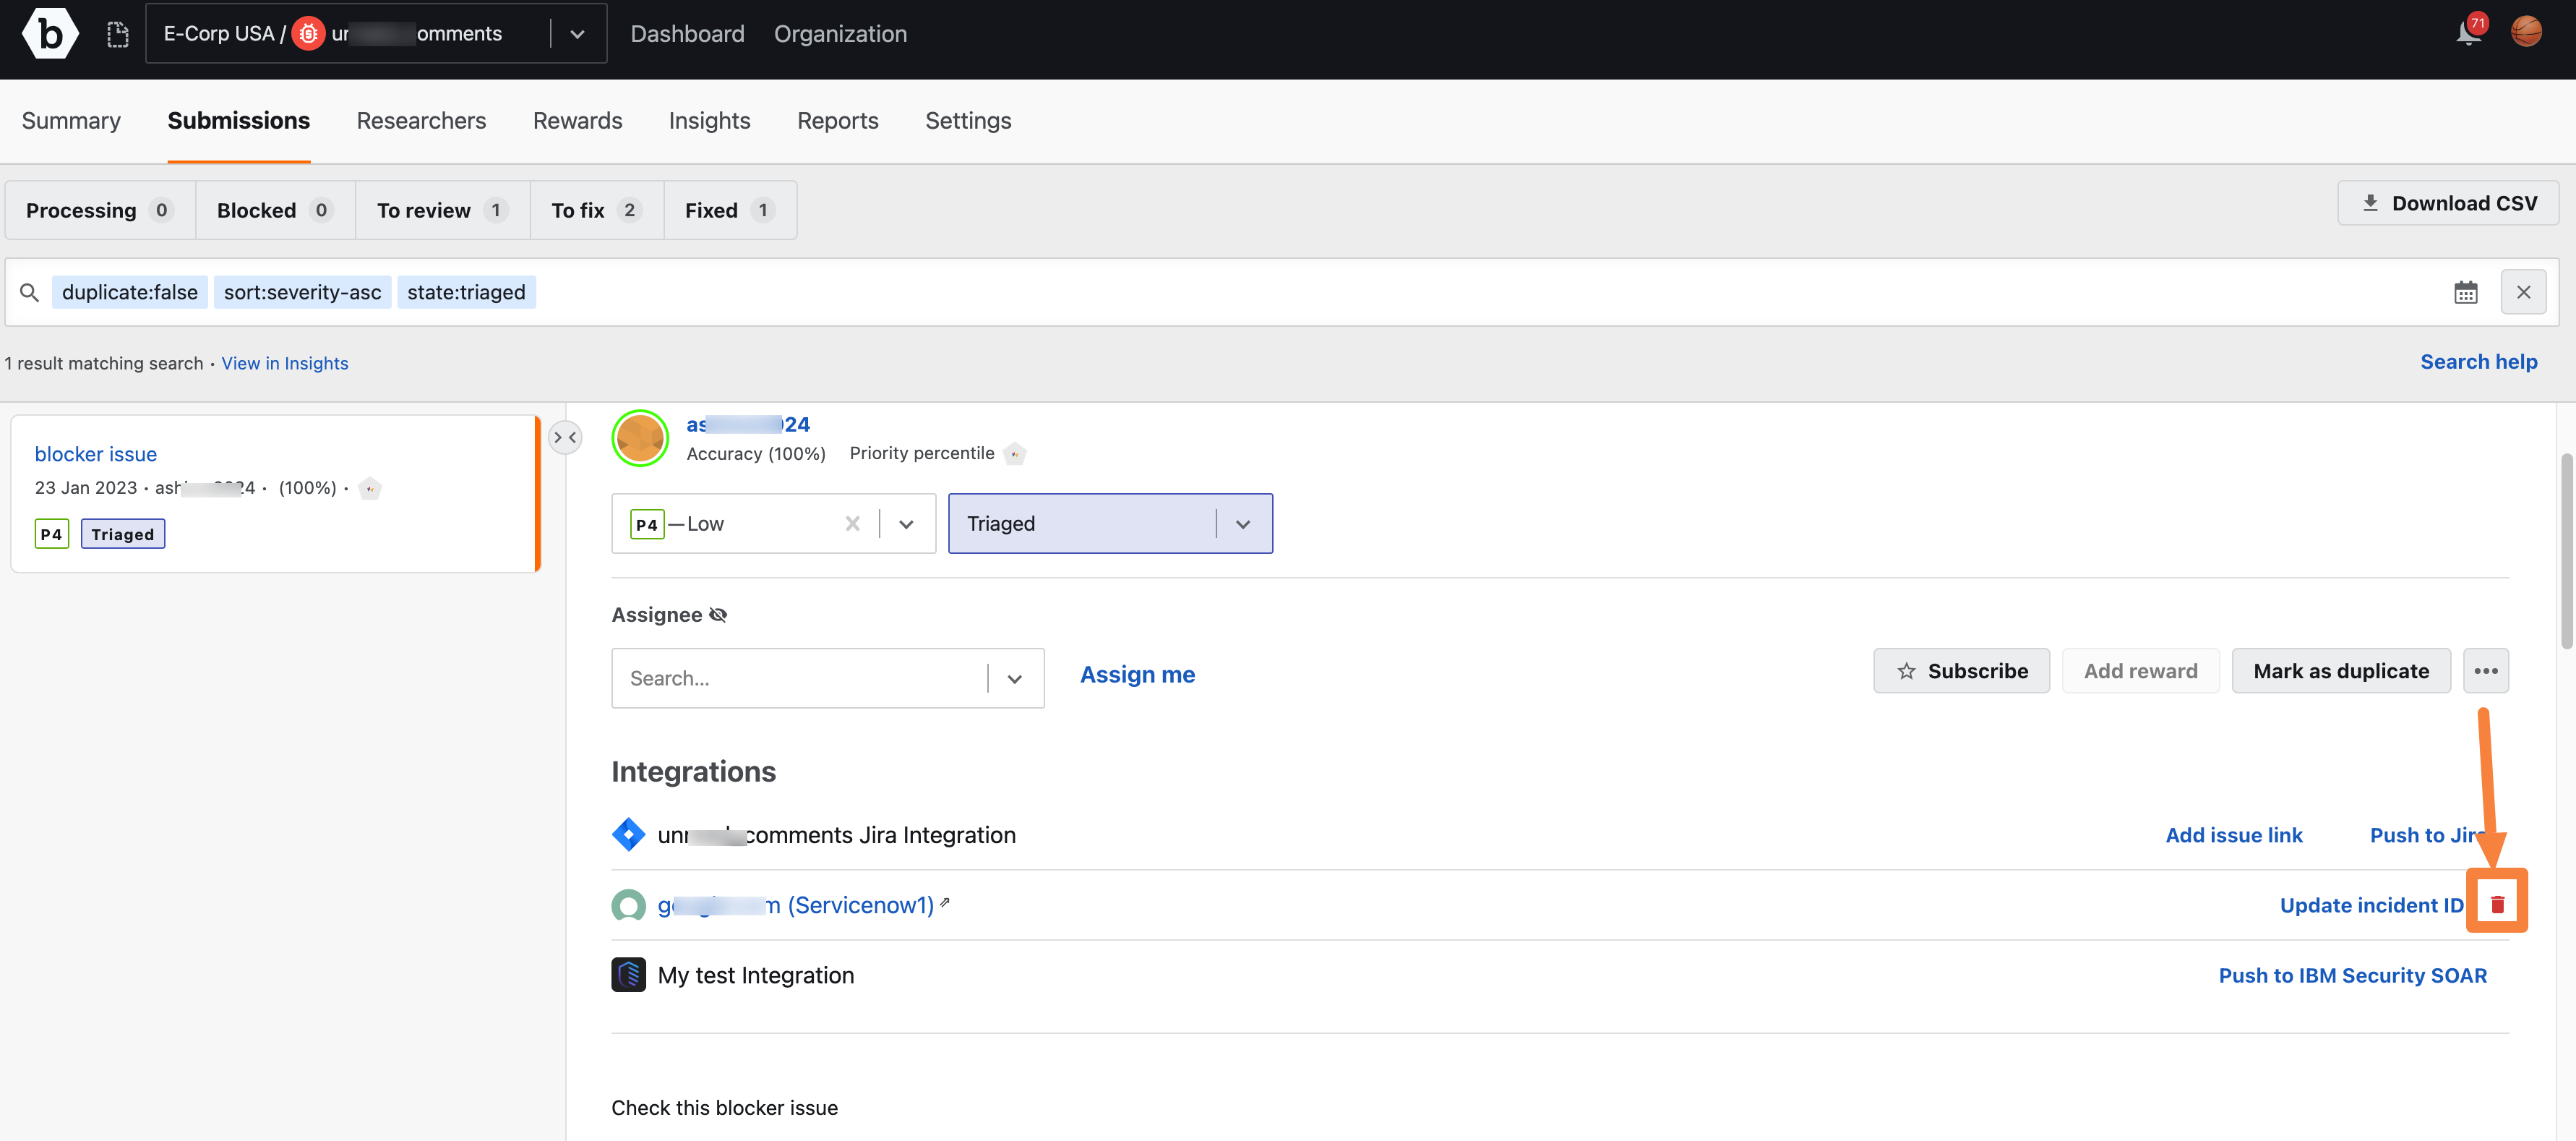
Unlinking a ServiceNow Issue
You can unlink a saved ServiceNow issue from the Submissions page.
To unlink a ServiceNow issue, follow these steps:
-
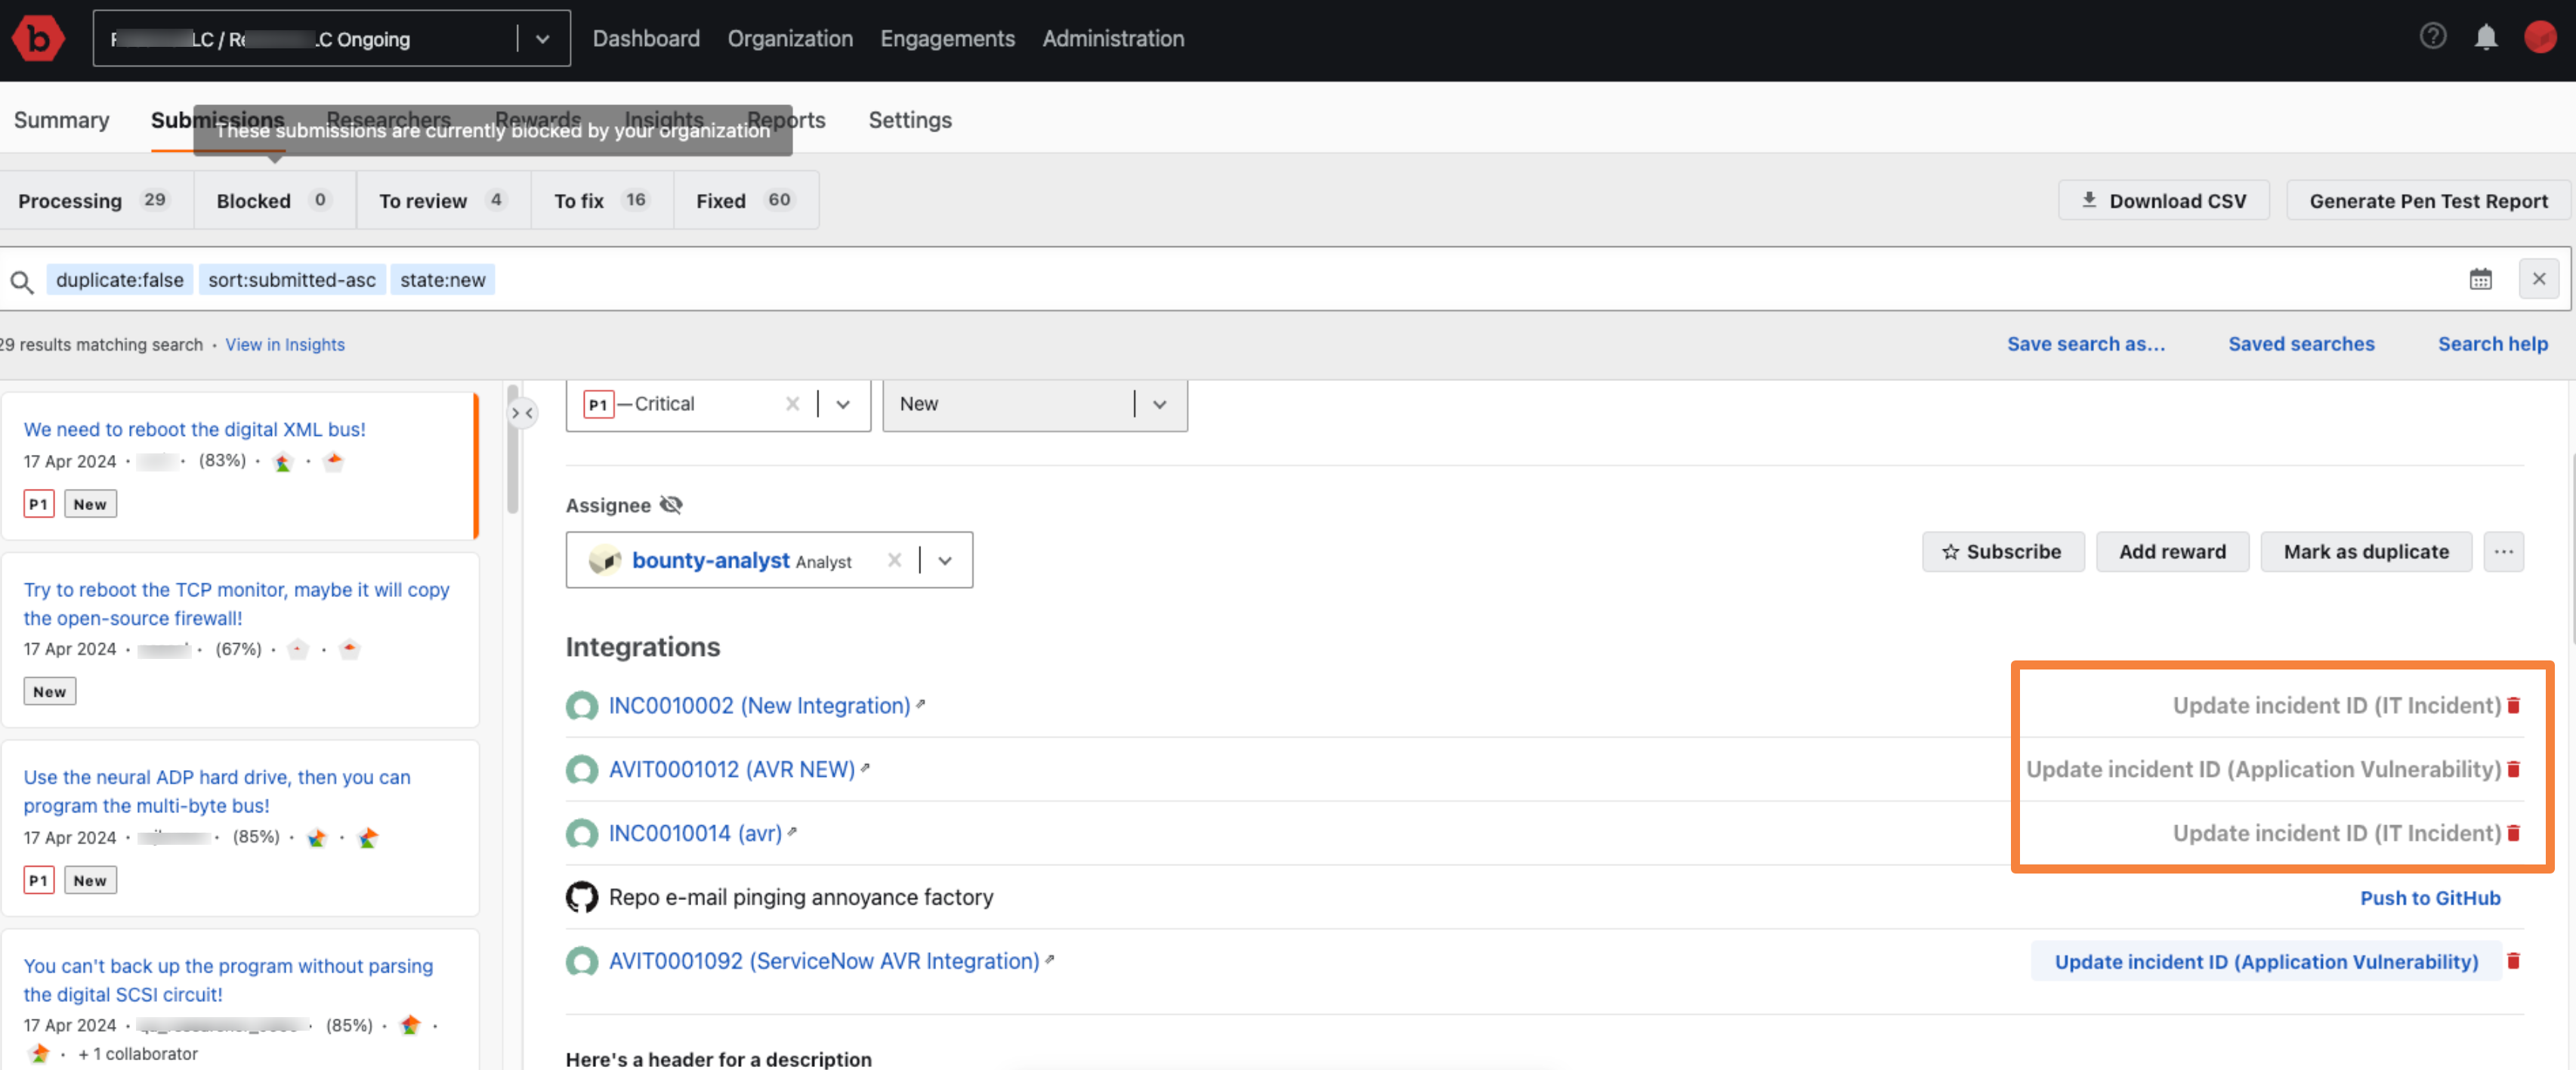
Click on the red bin icon adjacent to Update incident Id in the Integrations section.
The unlink confirmation prompt is displayed.
-
Click Unlink to confirm unlinking of the ServiceNow issue.

A successful unlinking message is displayed.