Bi-directional Jira integration between Jira and Crowdcontrol enables you to automatically track vulnerabilities from validation to remediation. It allows the following:
- When a submission is marked as Resolved in Crowdcontrol, automatically updates the corresponding issue in Jira to a pre-defined state.
- When an issue is closed in Jira, automatically closes the corresponding issue in Crowdcontrol.
- Only Valid substates will trigger the submission closure. For information about valid substates, see understanding substates.
To set up bi-directional Jira integration:
-
On the Jira integrations page, click Resolving issues on the left side.
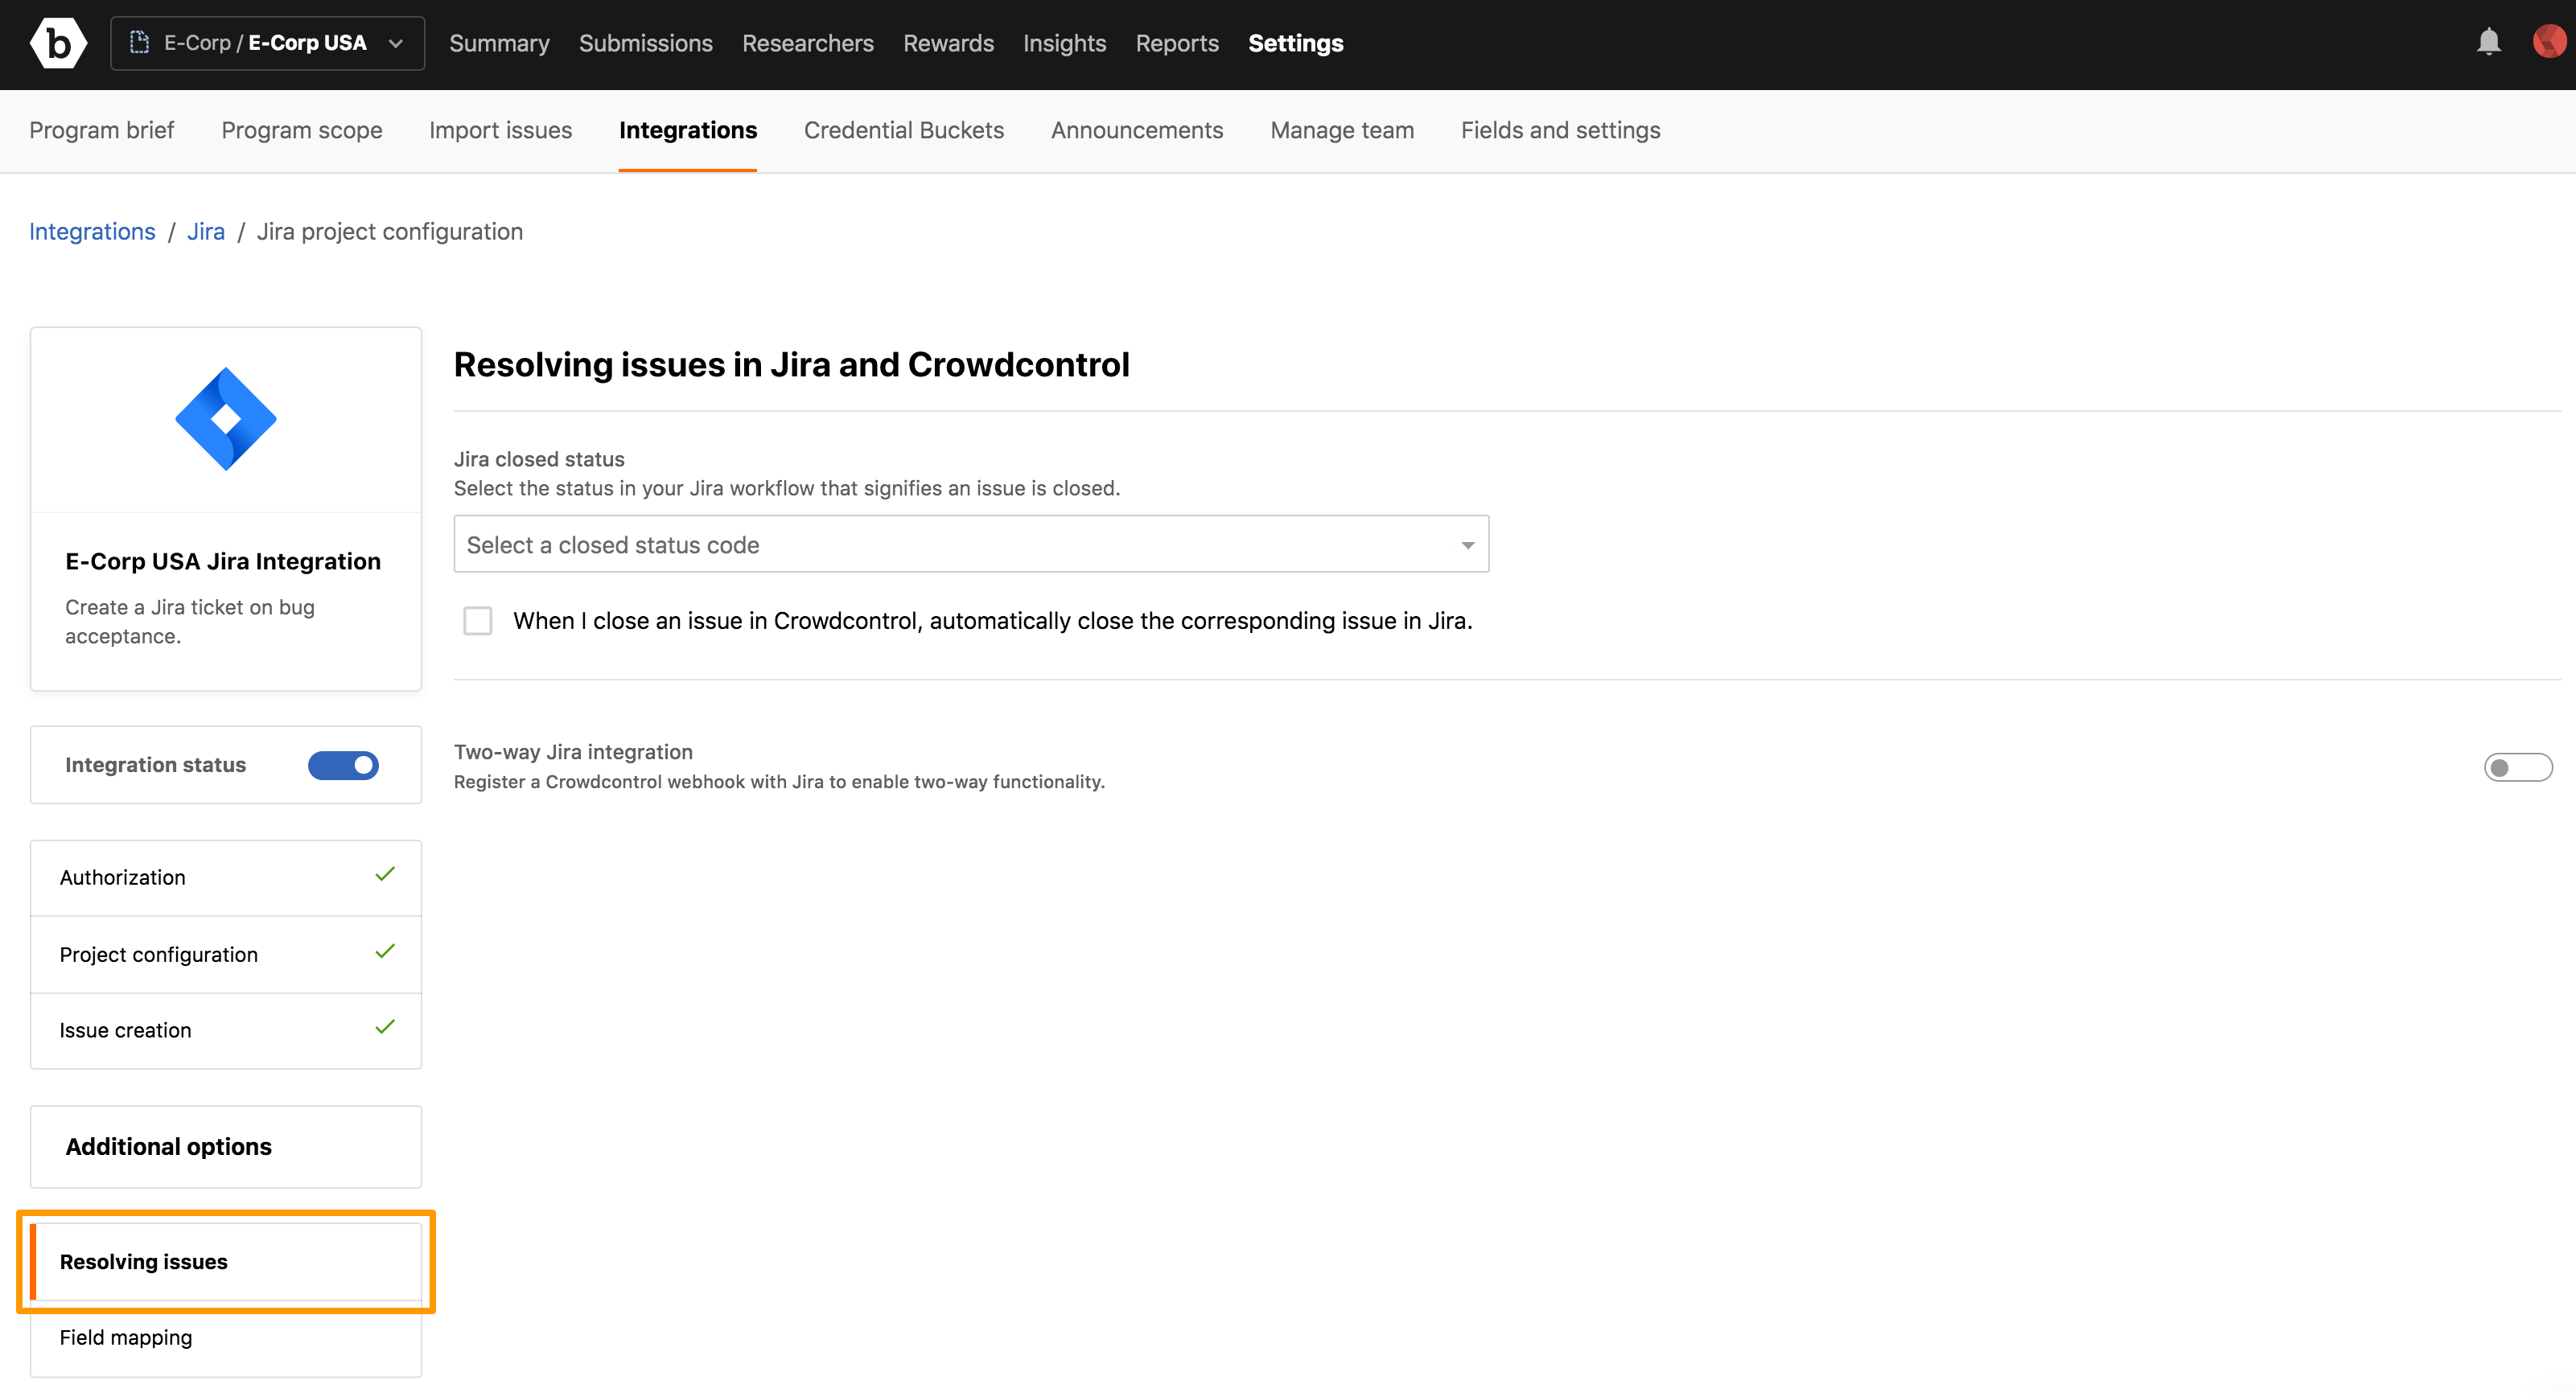
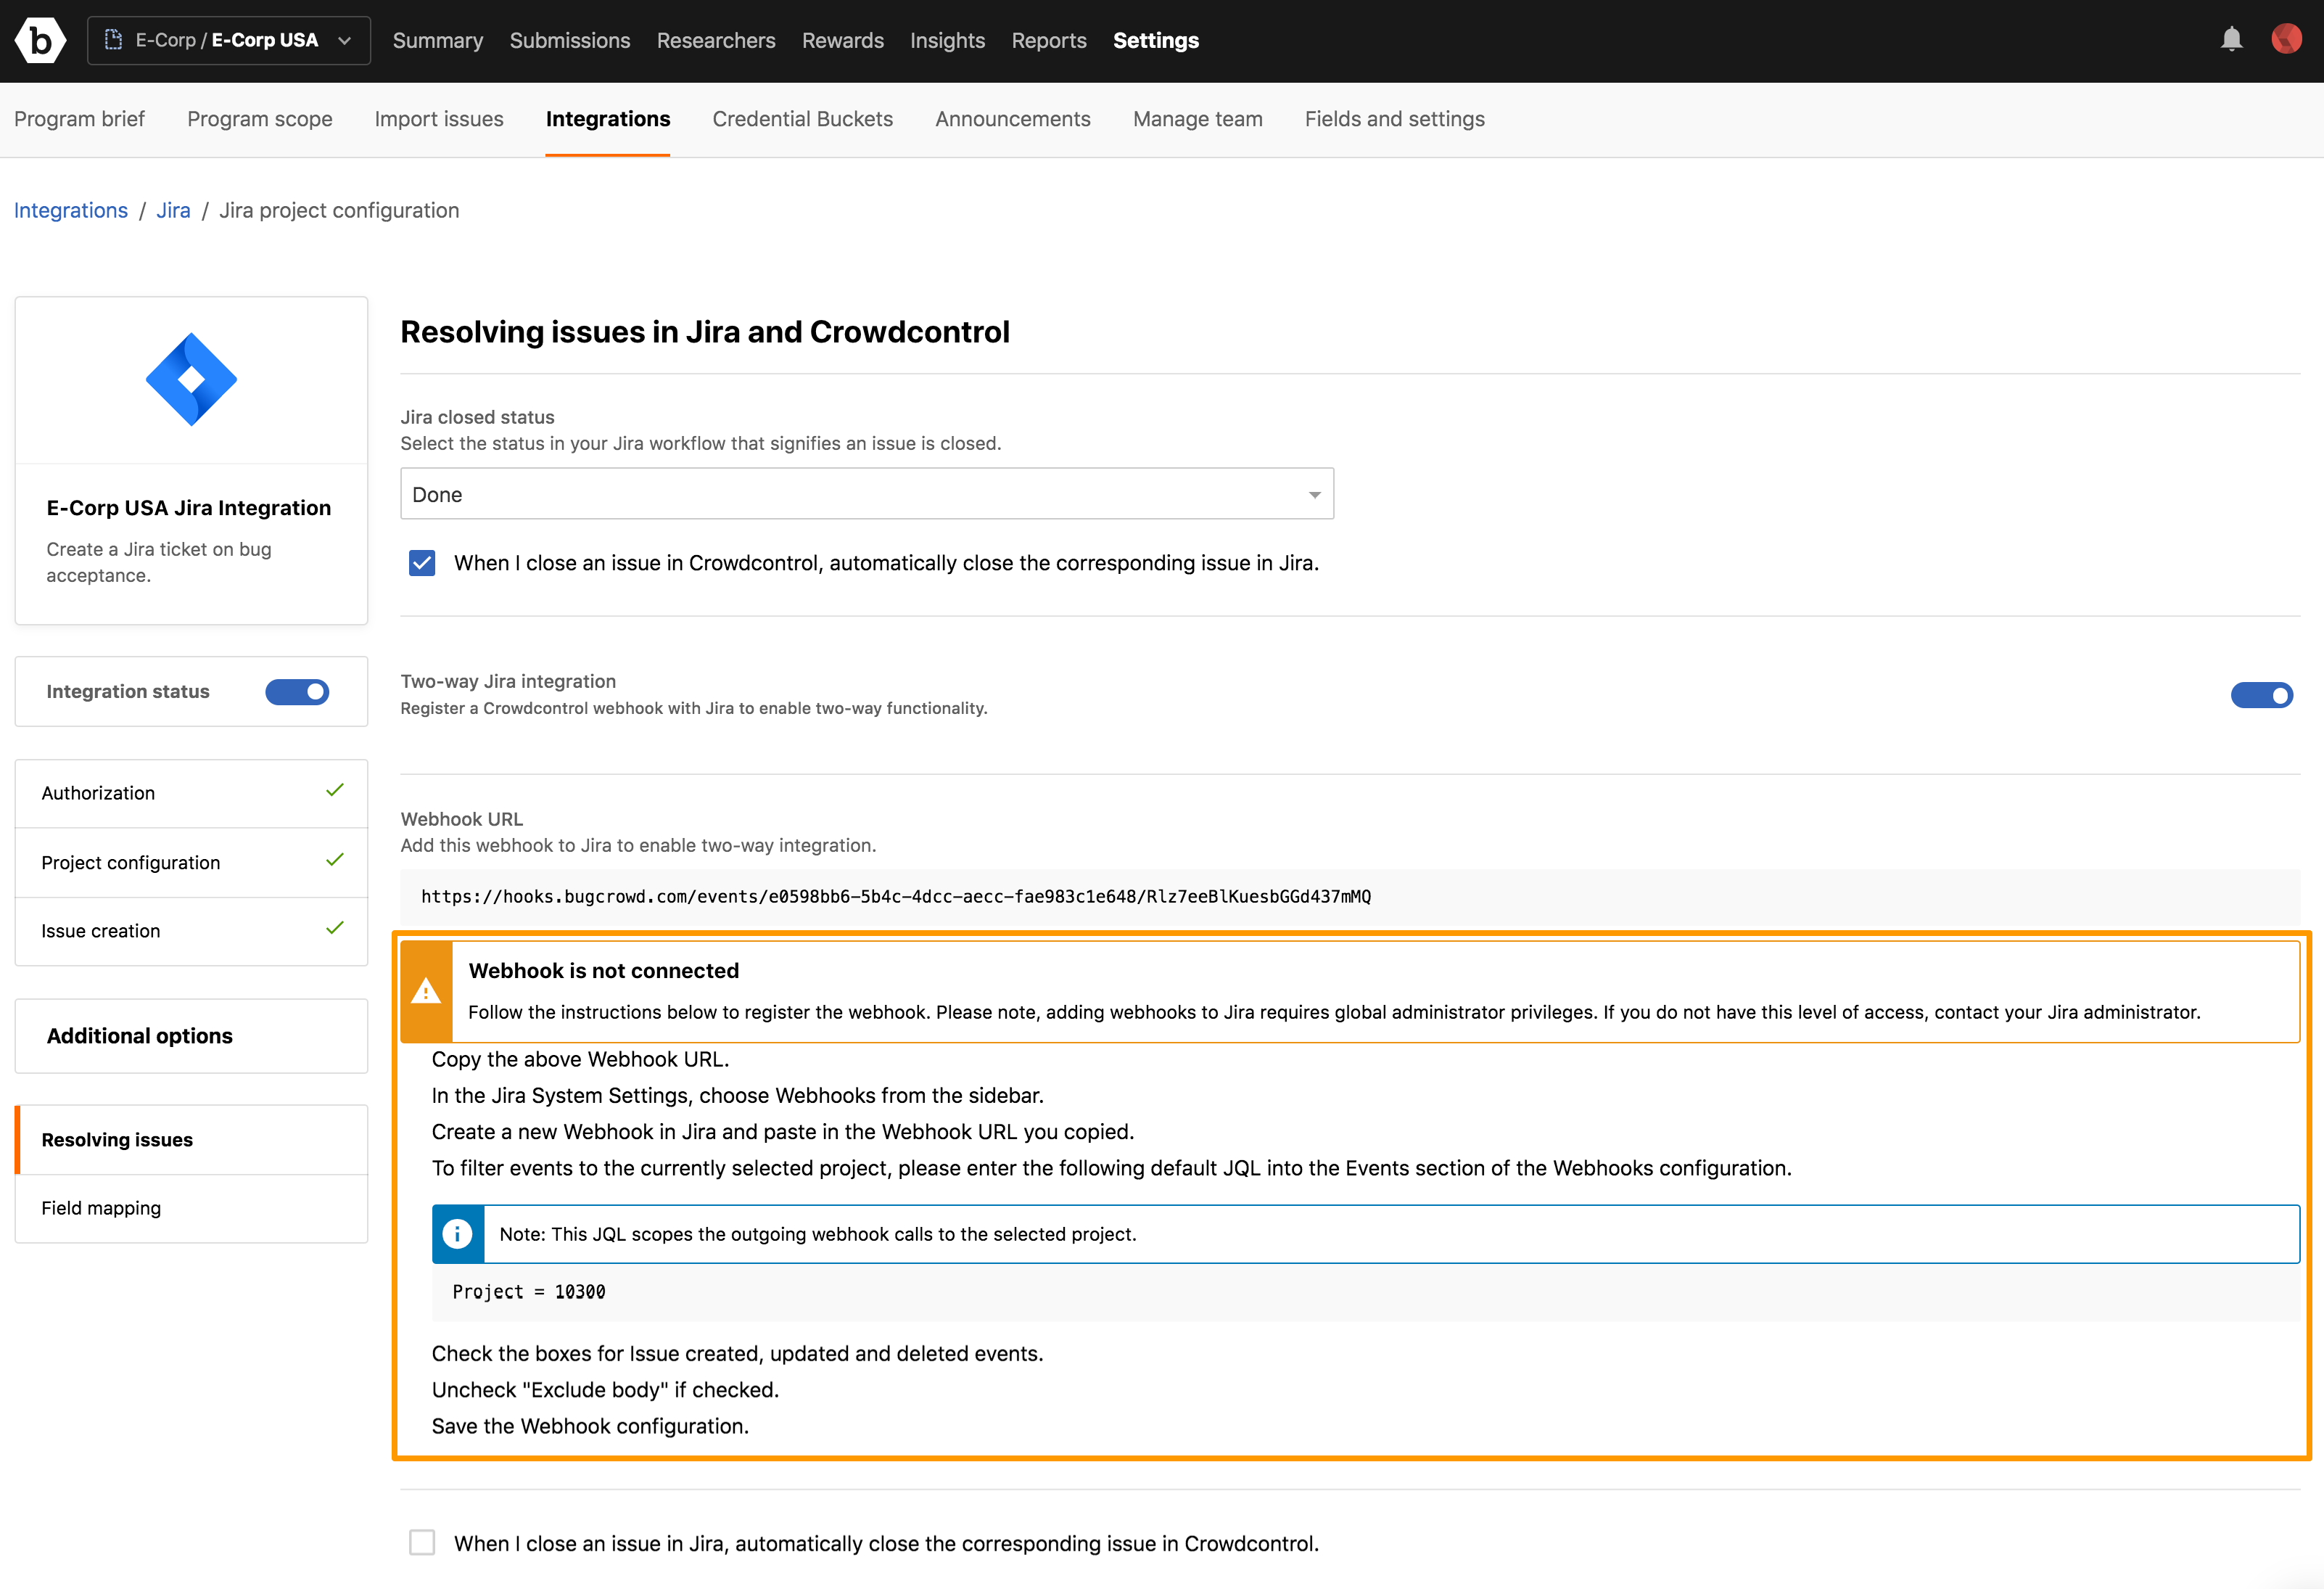
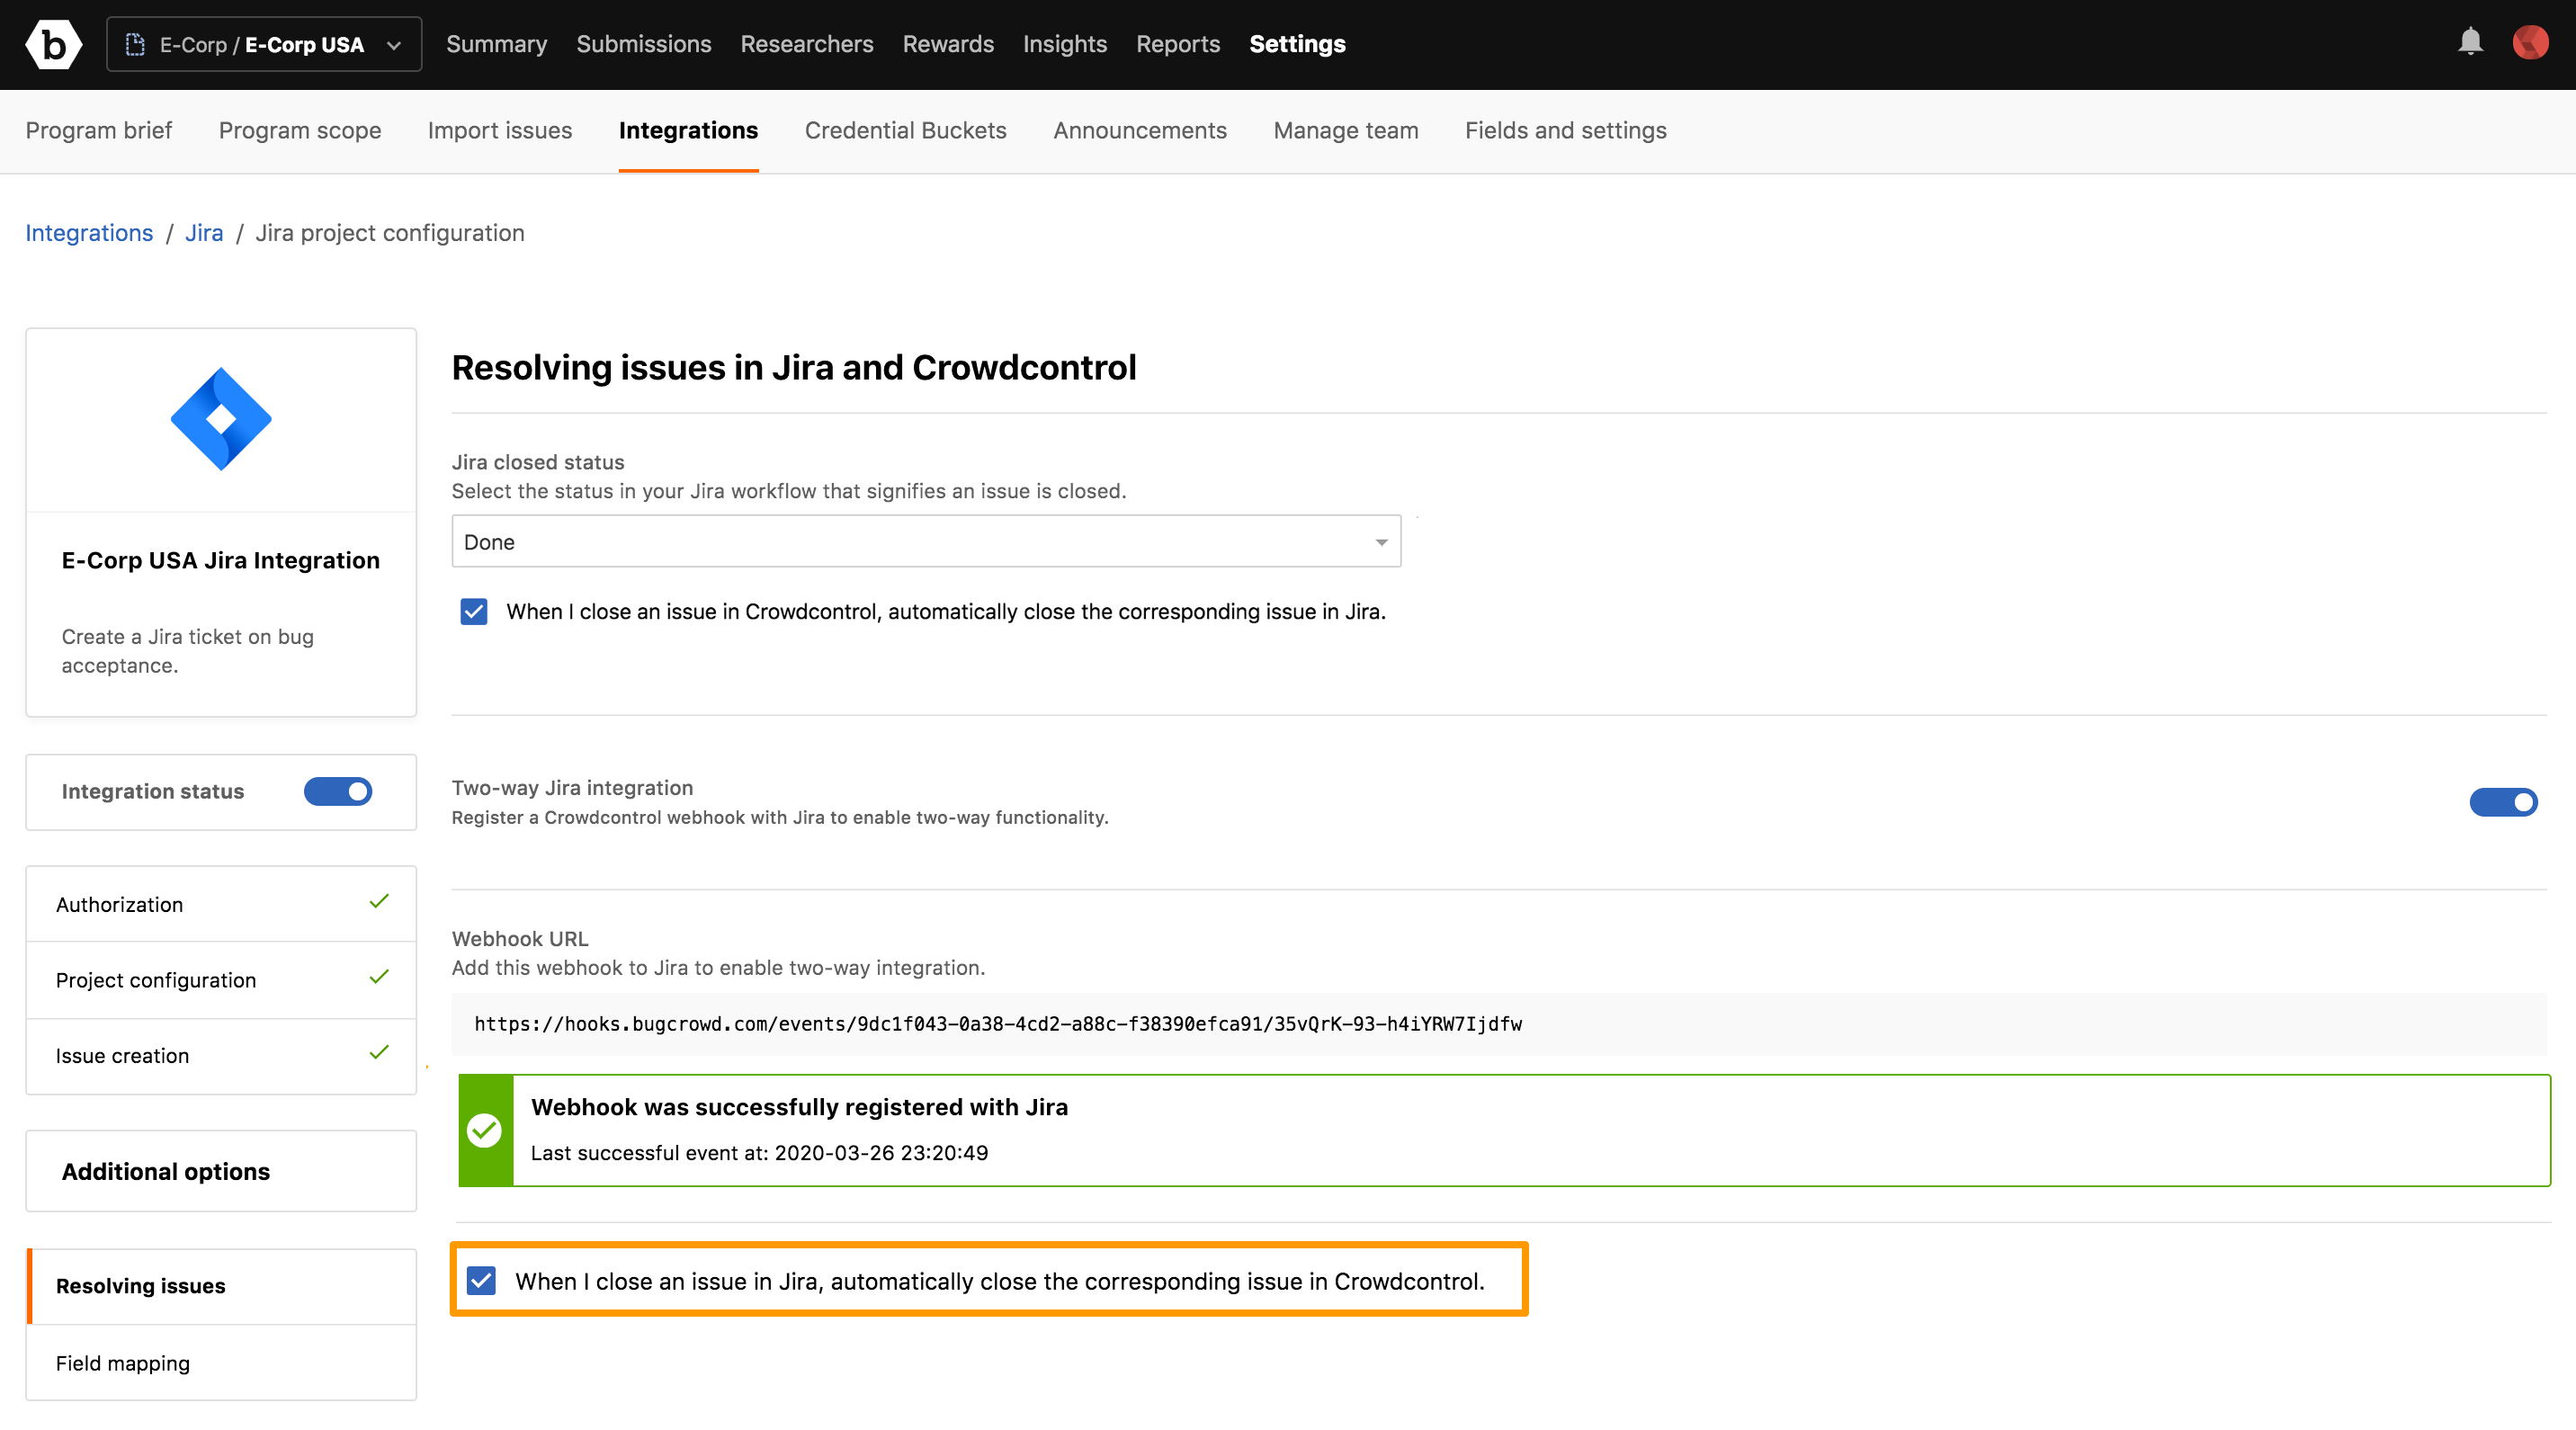
The Resolving Issues in Jira and Crowdcontrol settings are displayed.
-
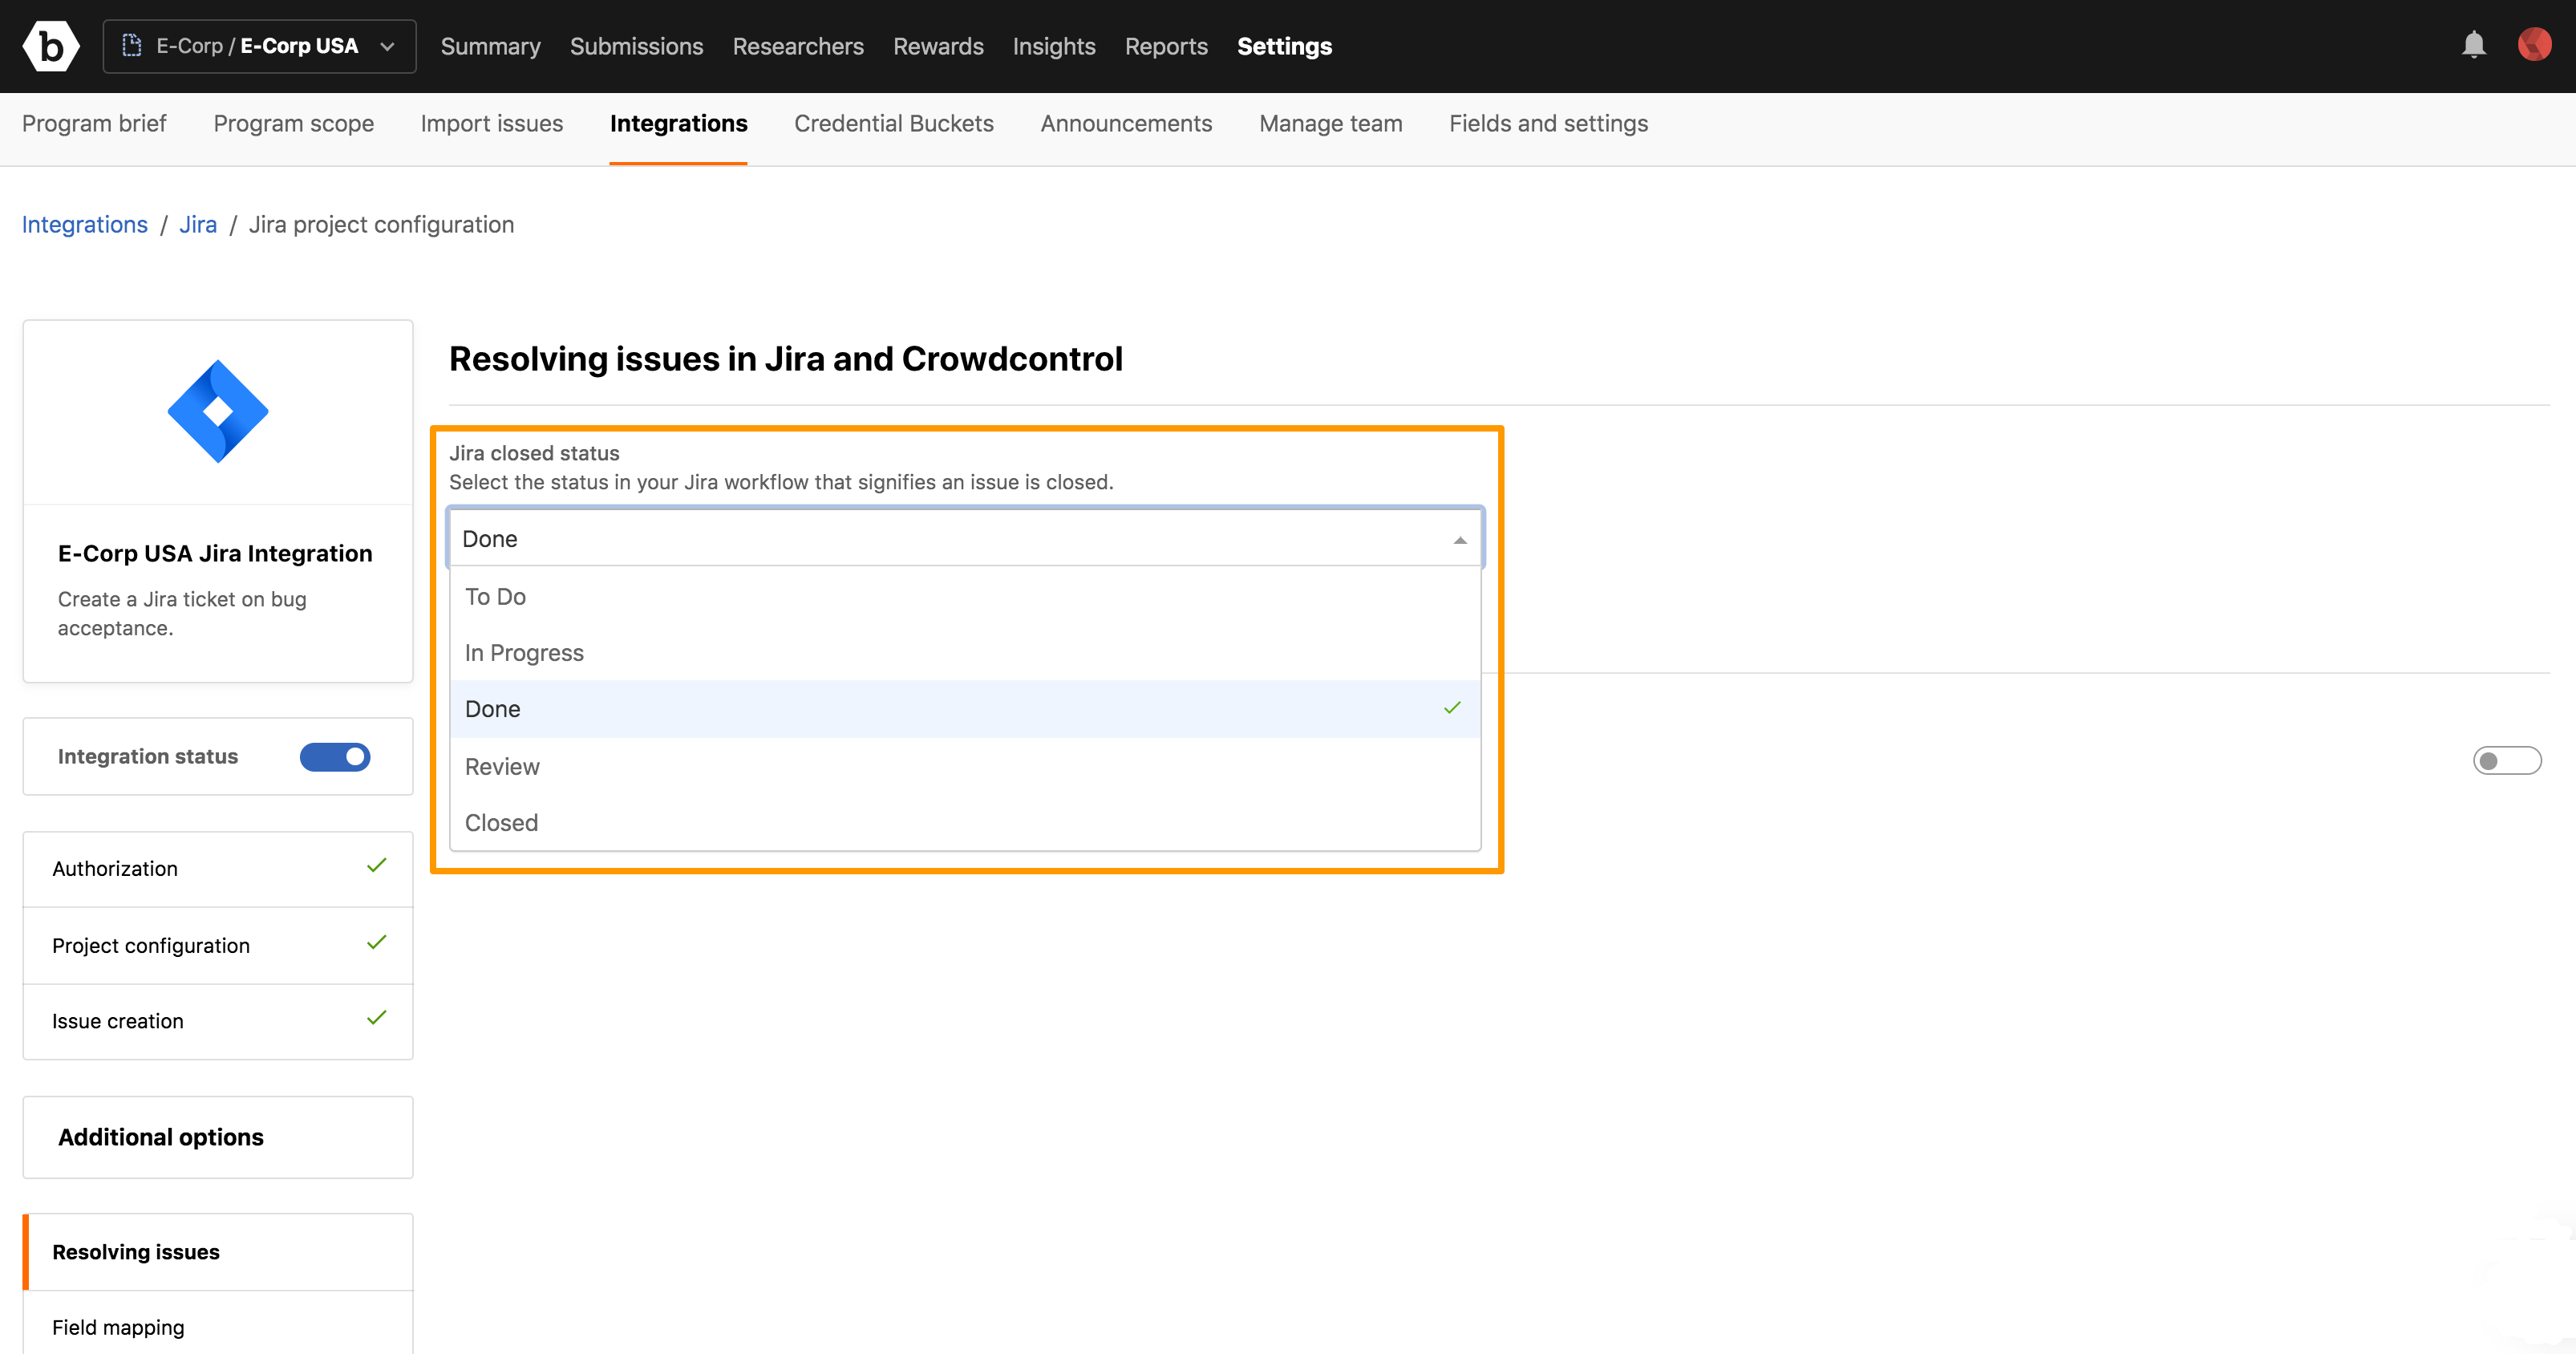
To set the closed status for Jira tickets, in Jira closed status, select a status. This indicates the status within the Jira workflow that maps to the Resolved state in Crowdcontrol. In the following example, Done is selected as the closed status for Jira tickets.
-
To activate communication from Crowdcontrol to Jira, select when I close an issue in Crowdcontrol, automatically close the corresponding issue in Jira option. When a submission is moved to Resolved state in Crowdcontrol, it automatically closes the corresponding ticket in Jira.

-
Register a Crowdcontrol webhook with Jira. To perform this, move the slider to the right for the Two-way Jira integration option.
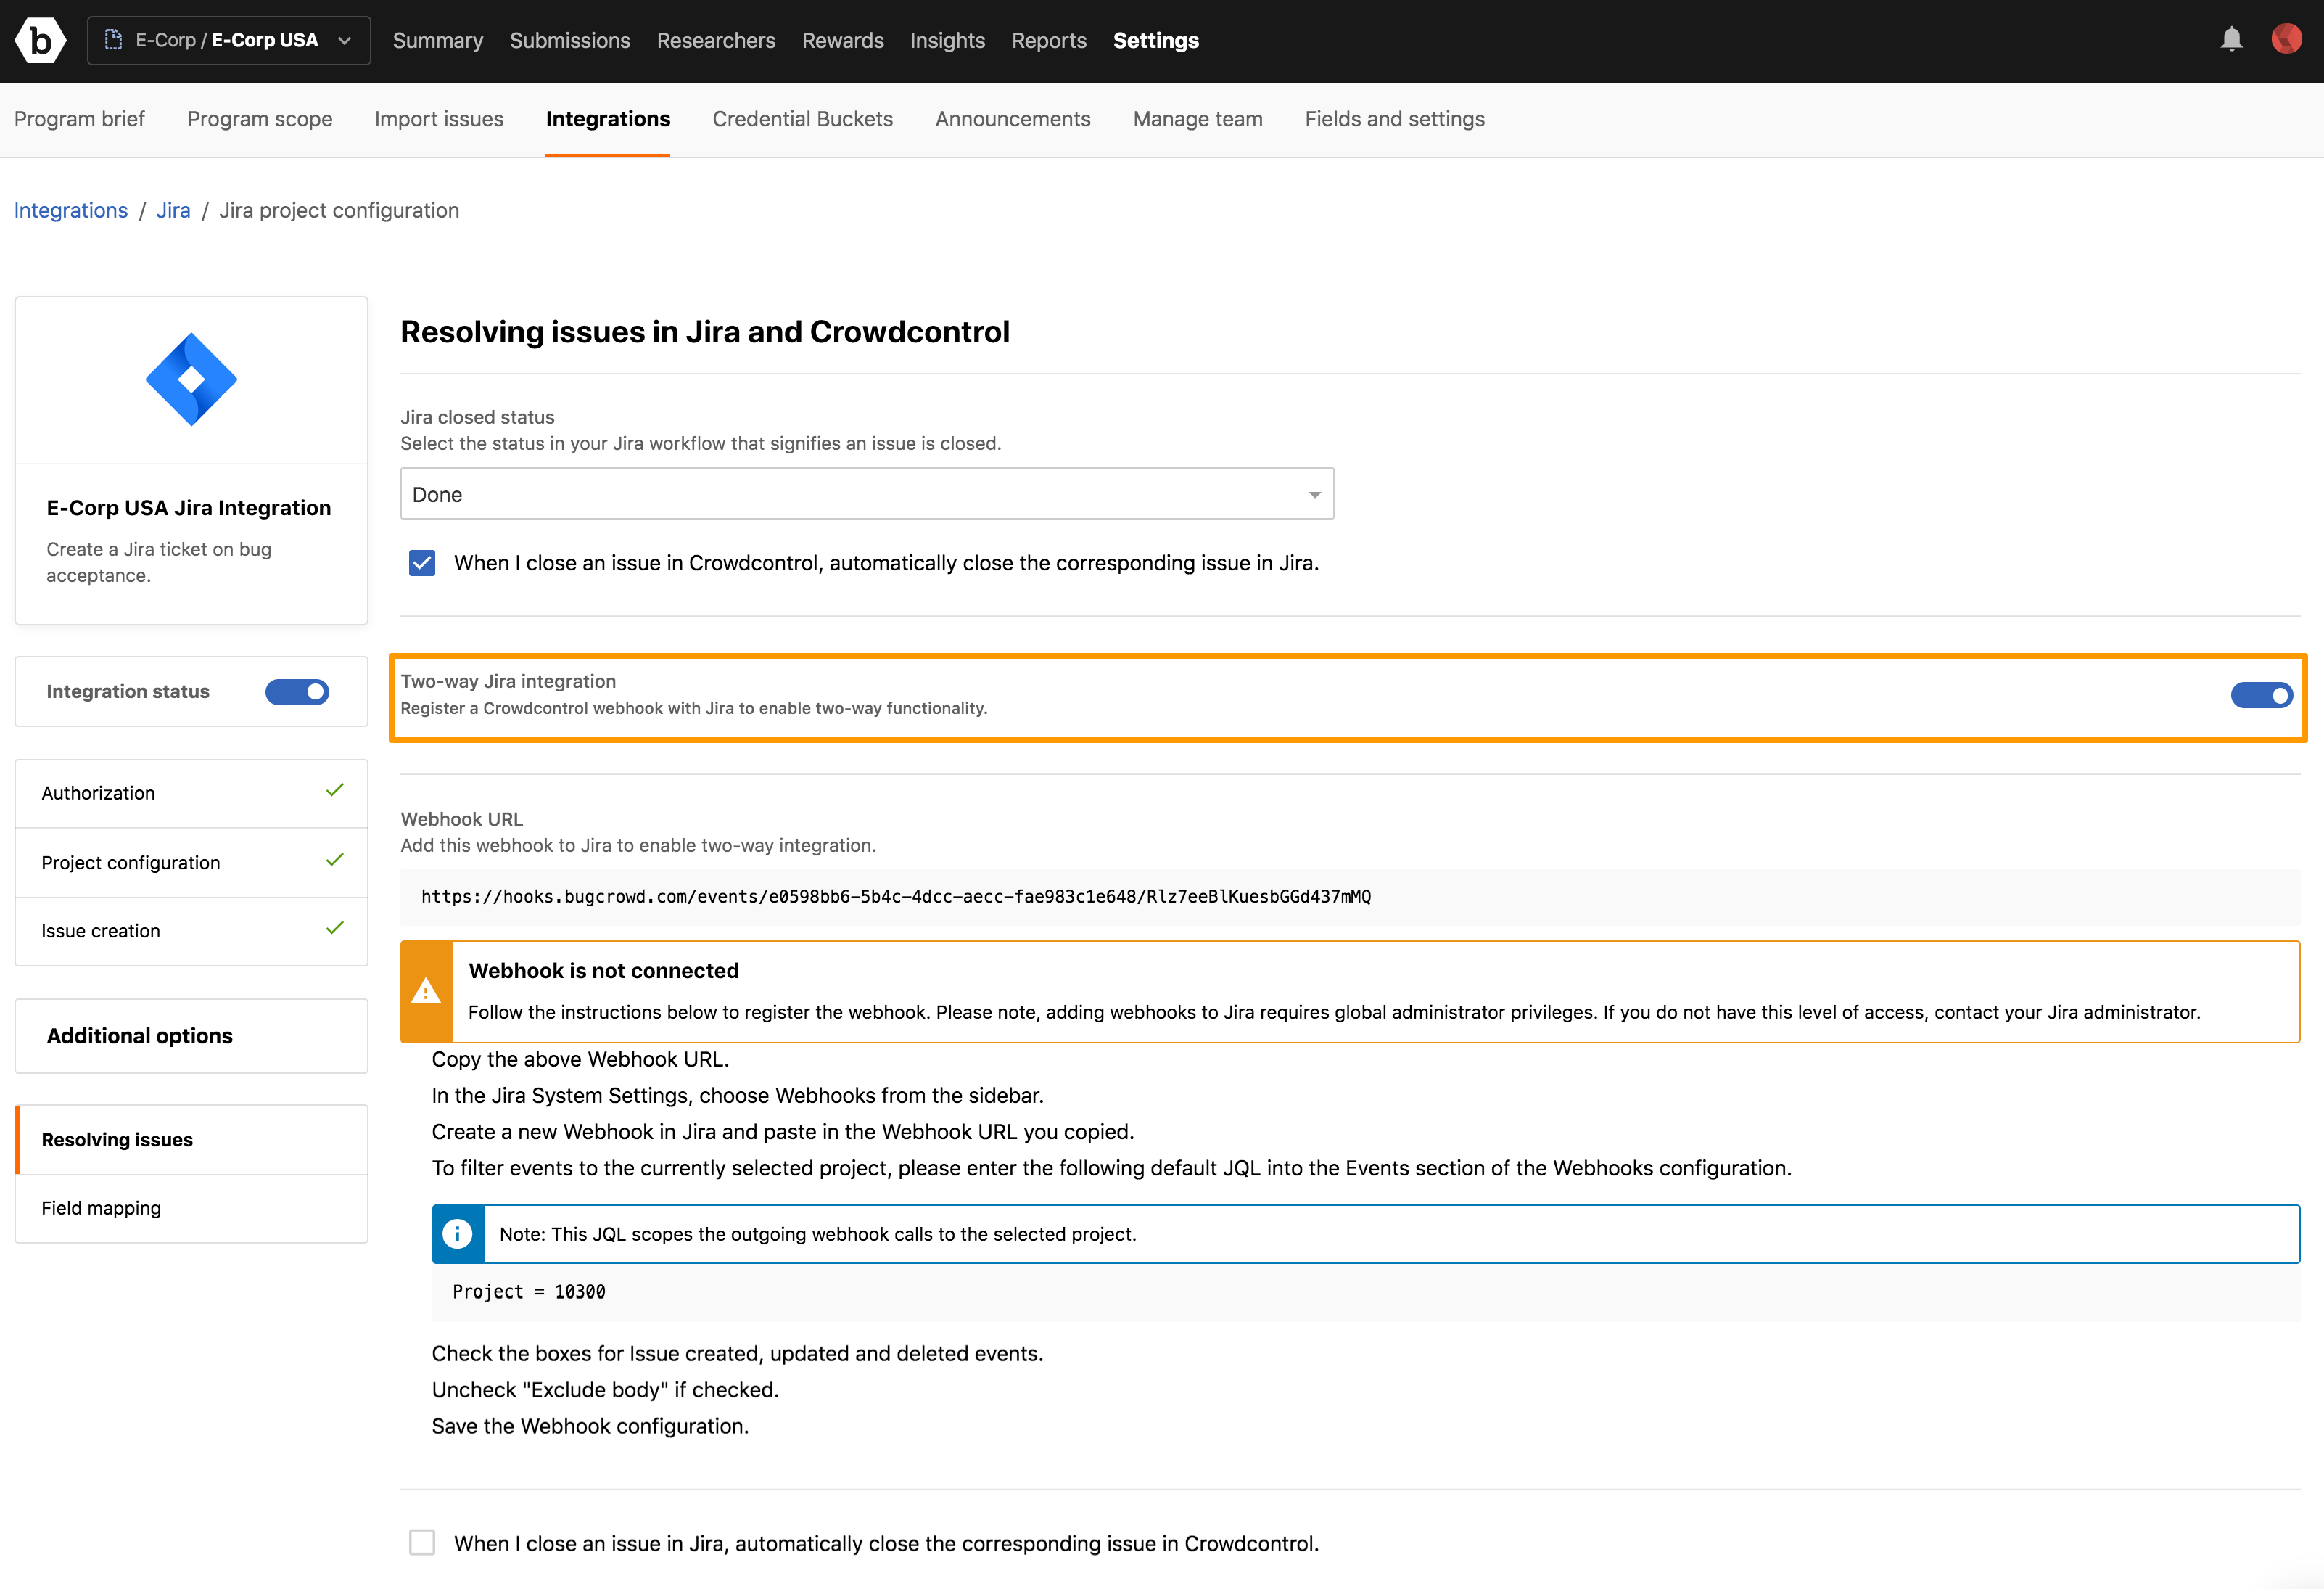
Crowdcontrol generates and displays a webhook URL.
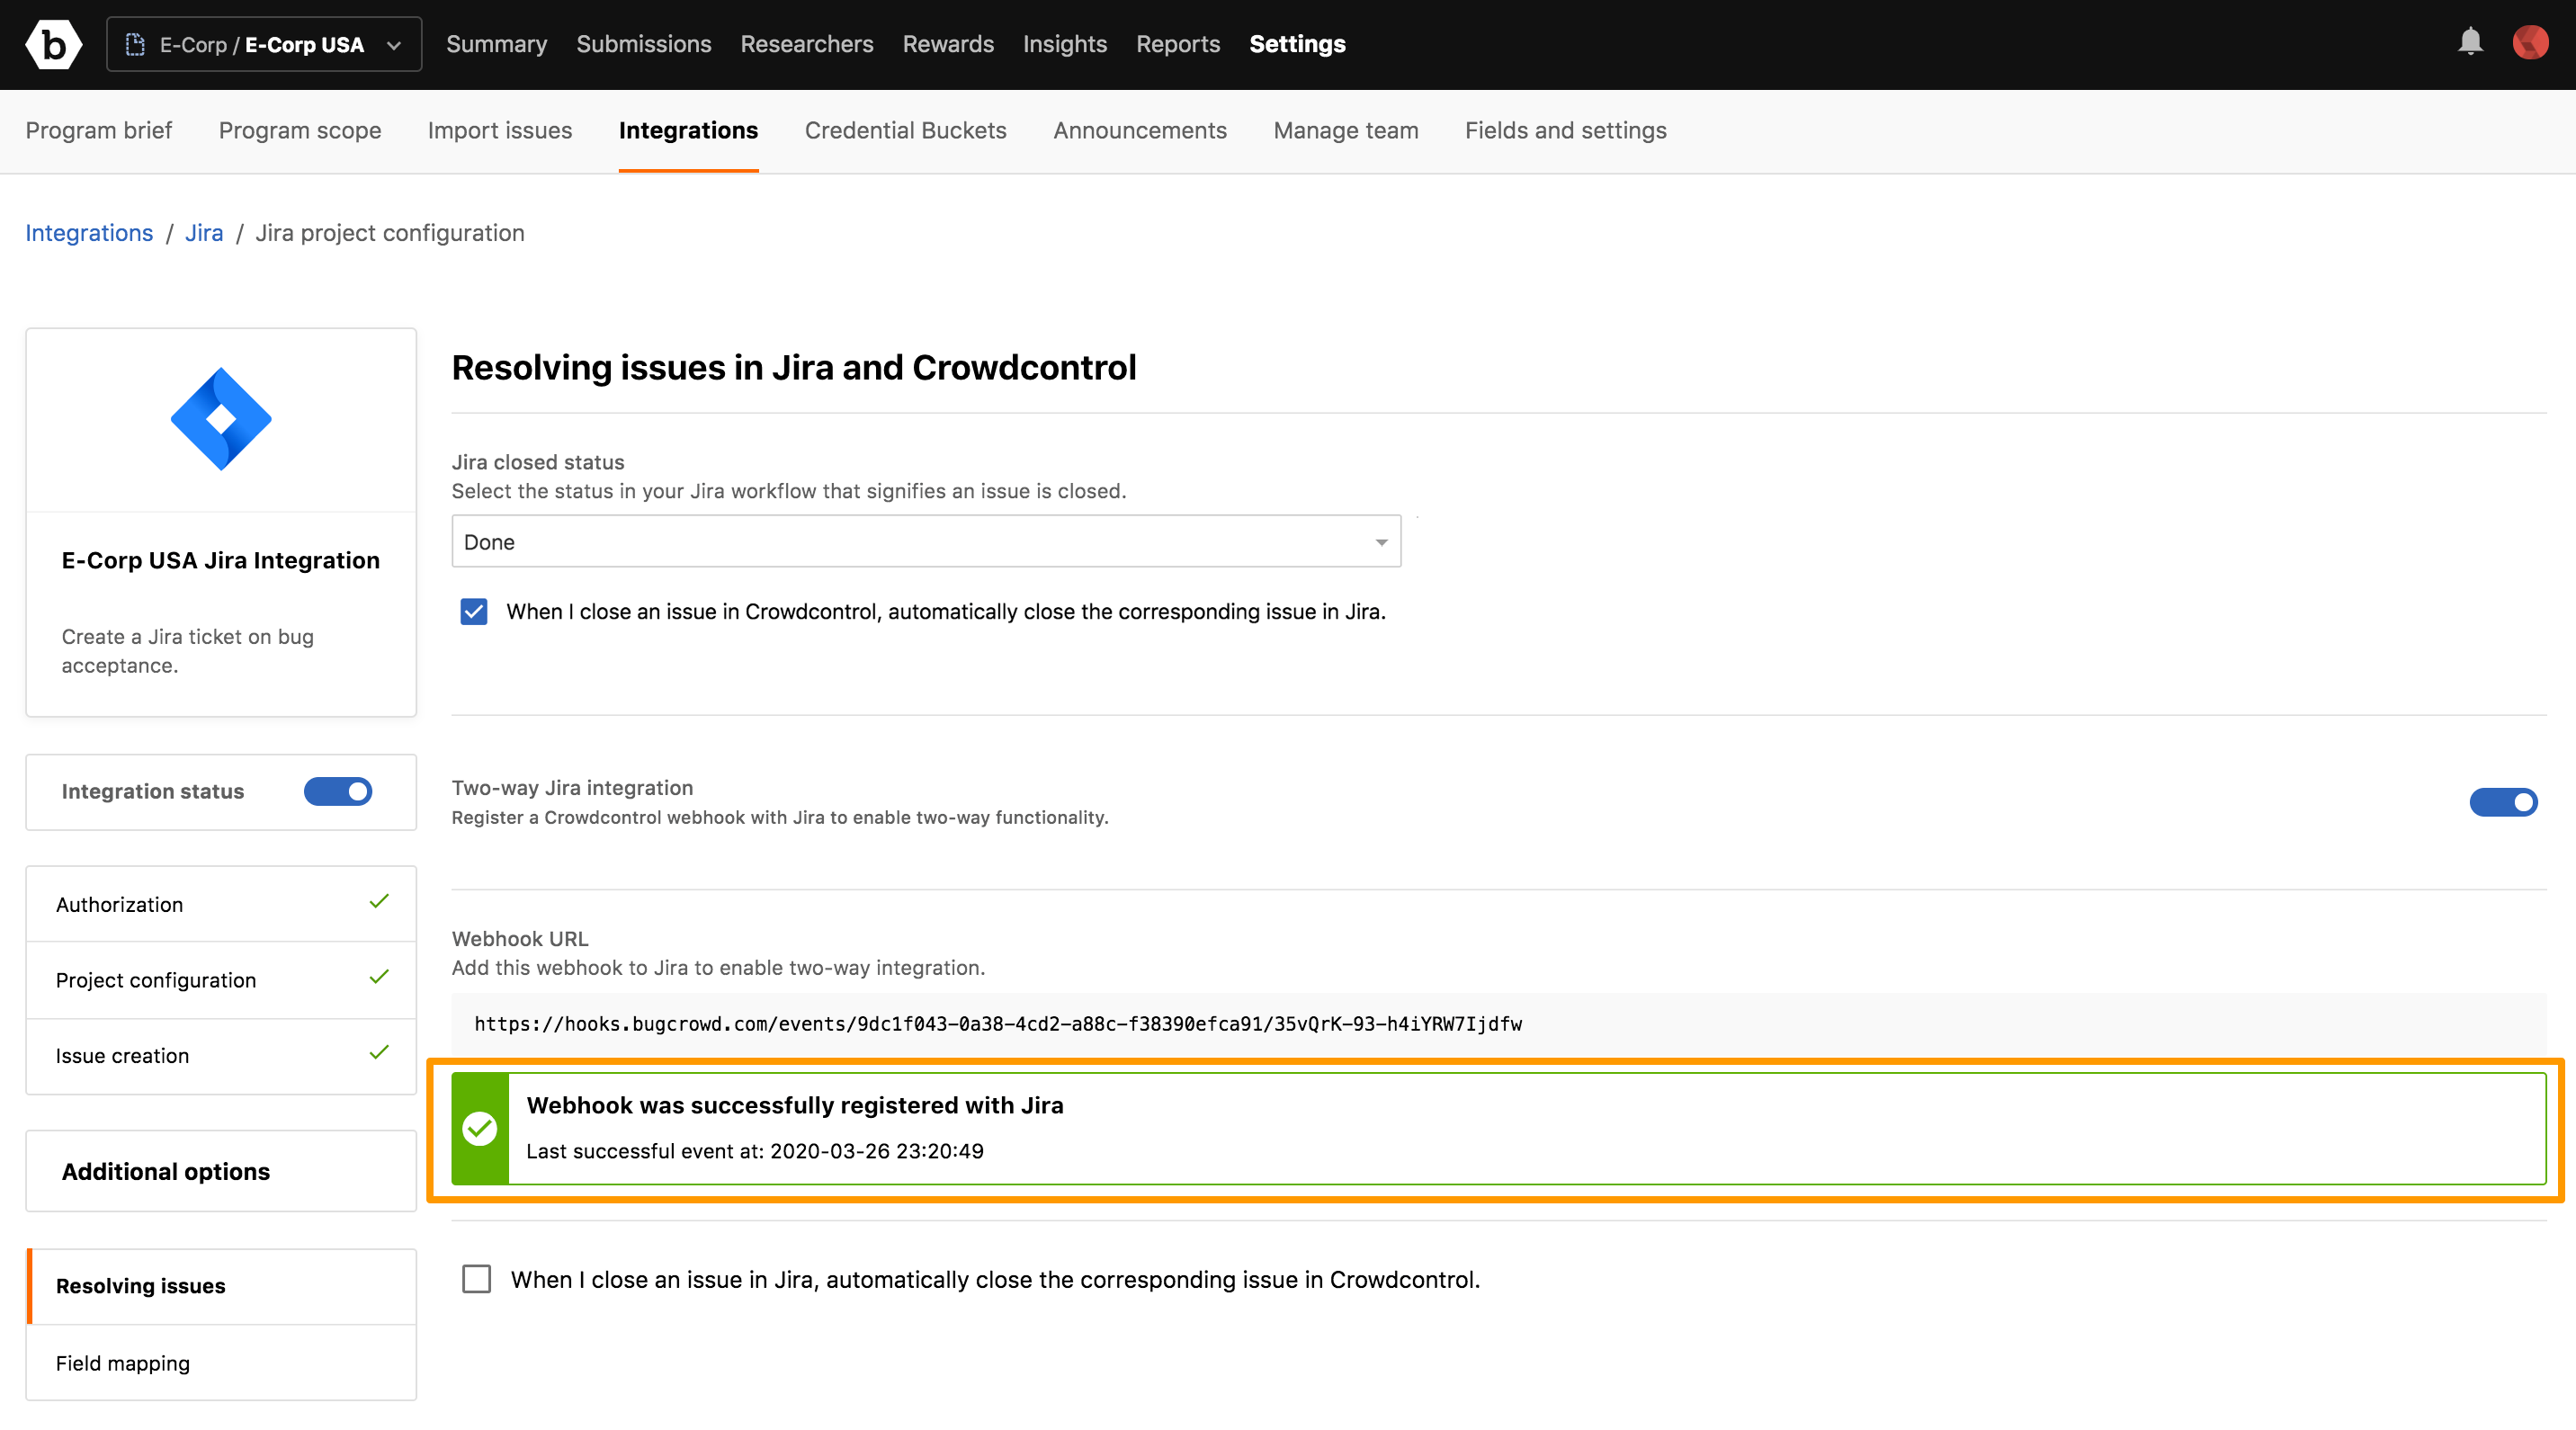
If you are a admin Jira user, then the webhook is automatically updated in your Jira settings.
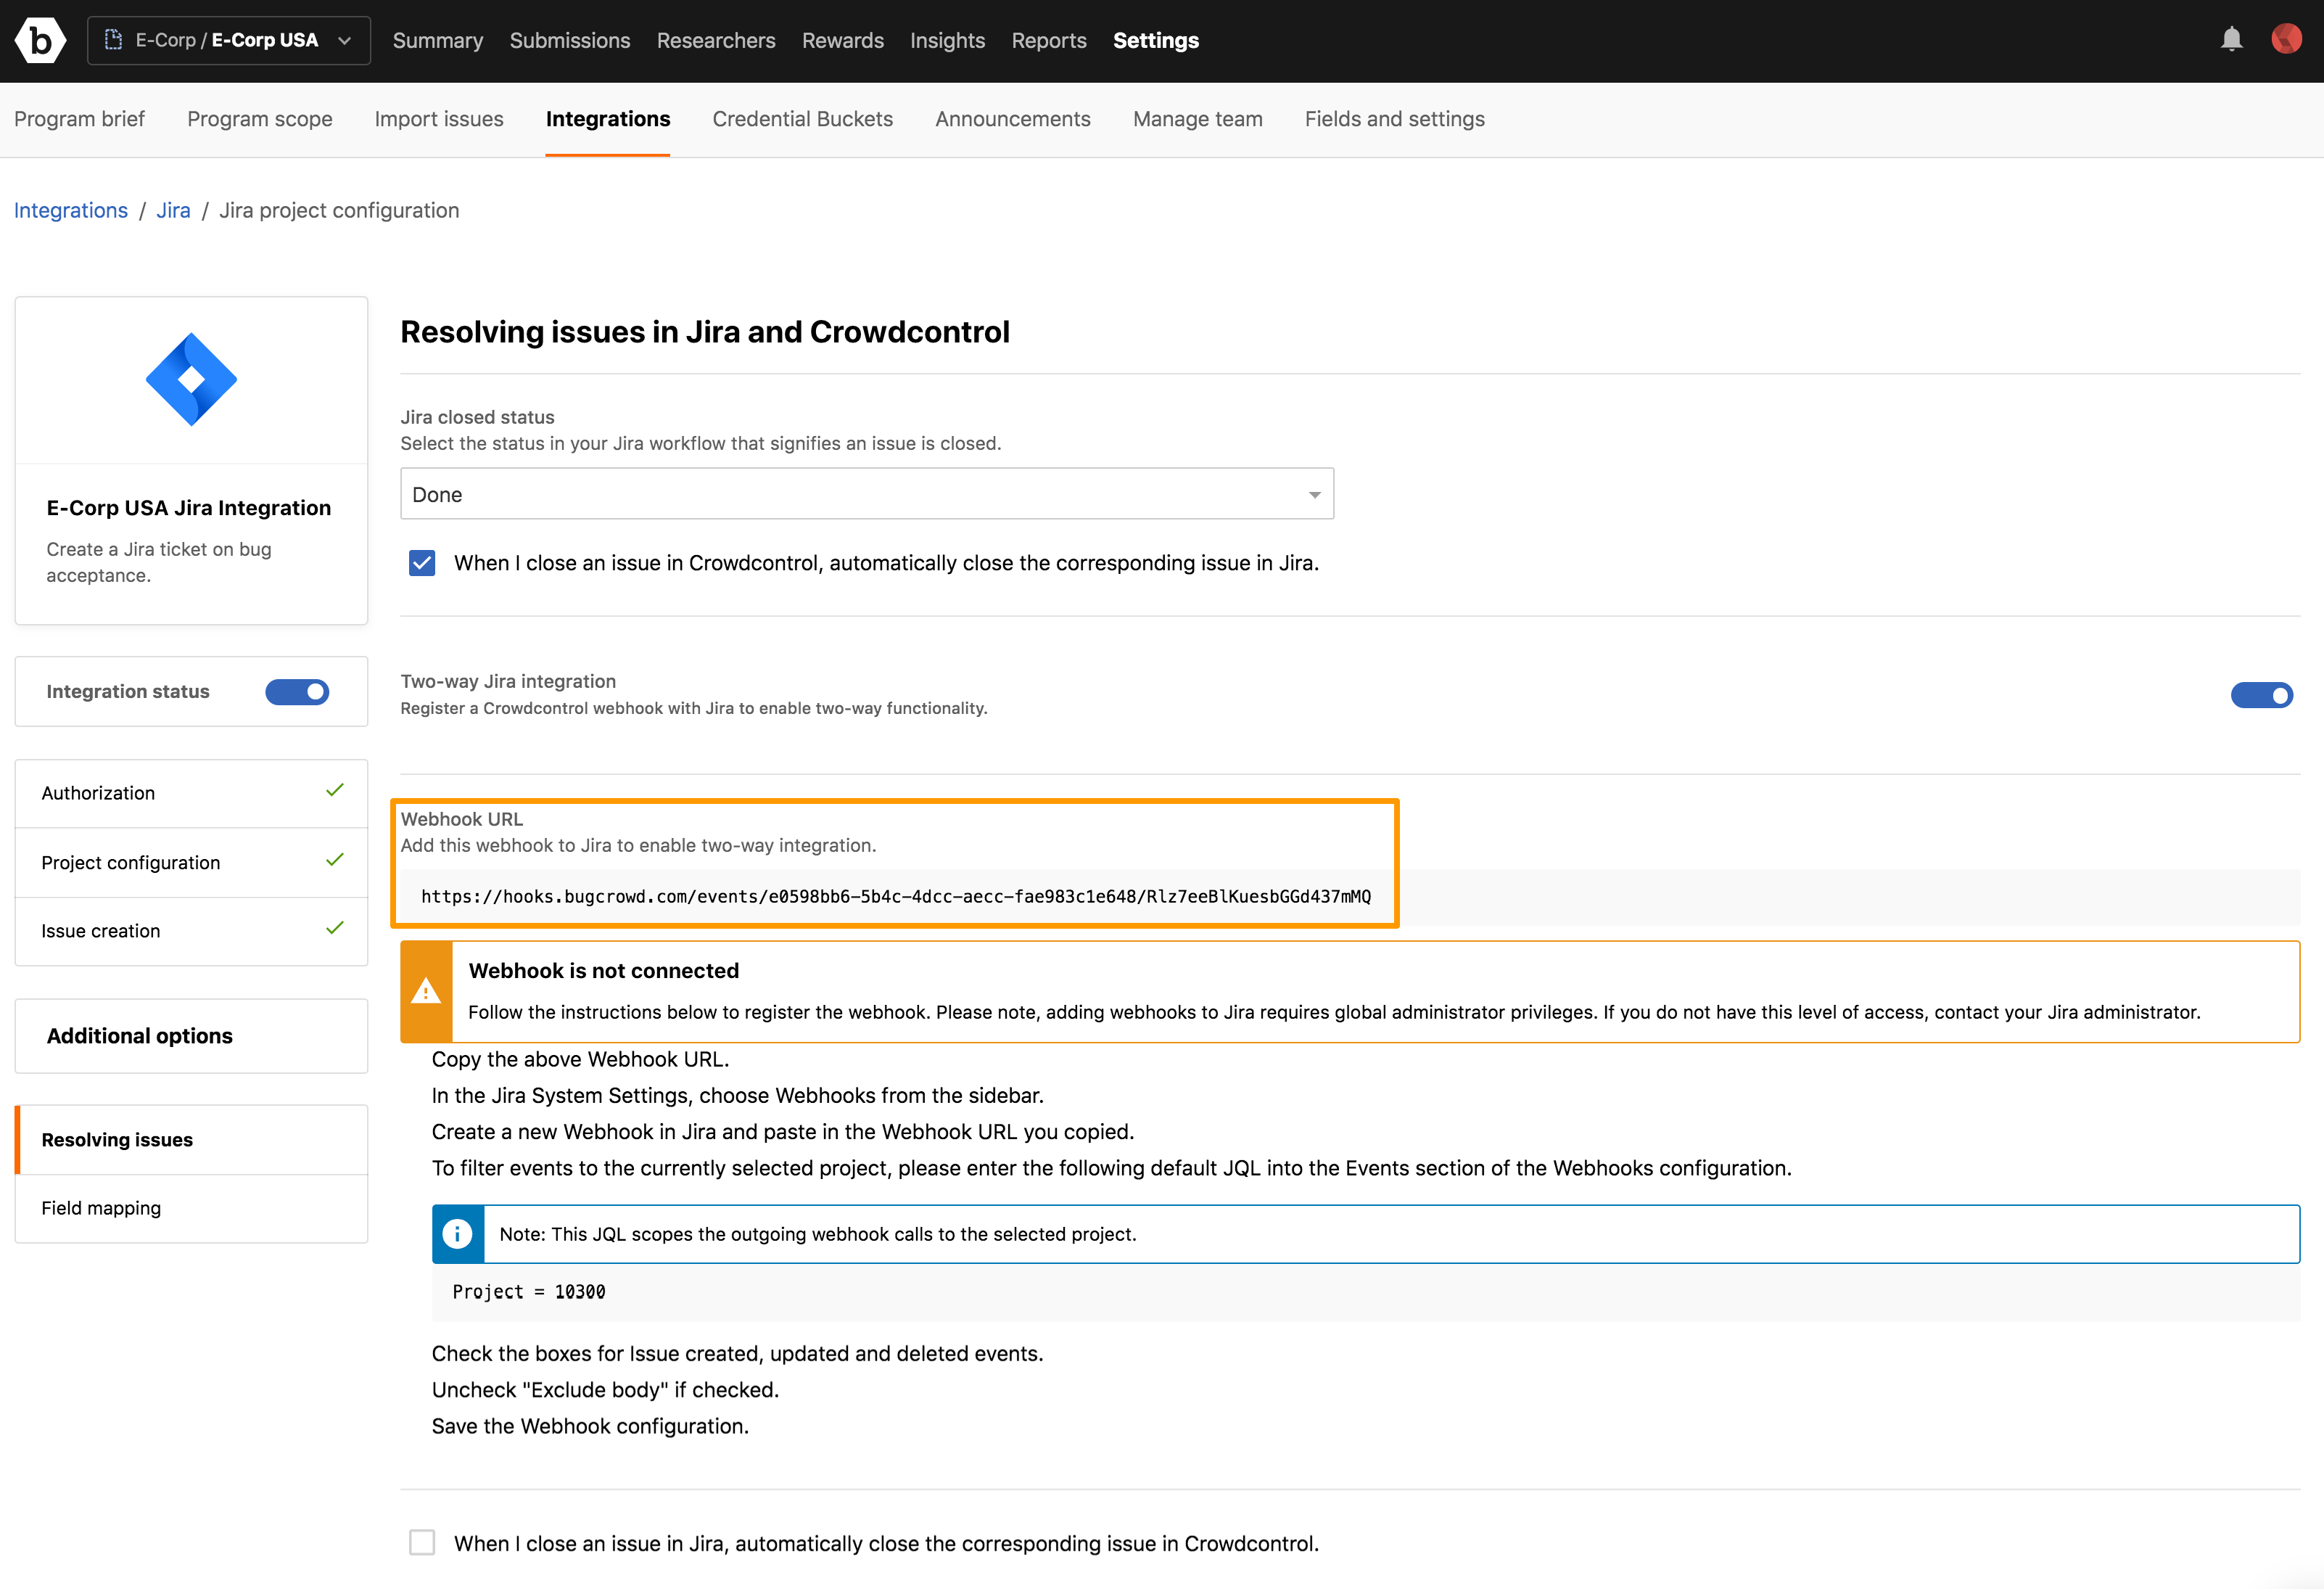
If you are a non-admin Jira user and you do not have permission to add webhooks, then Crowdcontrol detects this and displays the instructions for adding webhooks (customized for your project configuration).
After the webhook URL is registered with Jira, the Webhook was successfully registered with Jira message is displayed.
Workflow Tip
By default the Jira webhook is created with JQL scoping issue monitoring to the project selected in the basic configuration section. If you move Jira tickets between projects regularly, any ticket updated in a project outside of the project scope is ignored. The following screenshot shows an example Jira webhook configuration with the default JQL set to Project = 10400 (corresponding to the ID of the project selected in the basic configuration). If you want to monitor Jira issues across multiple projects, you can manually adjust the JQL in the webhook to encompass different selection criteria. One example is to use the label that is automatically set for the Jira tickets when created through Bugcrowd. For more information about configuring labels, see Advanced Field Mapping section. In this example, assume all tickets are created with the label
bugcrowd-bugcrowdongoing. You can create a custom JQL query such that instead of looking for issues to the project it will look for any issues with that label.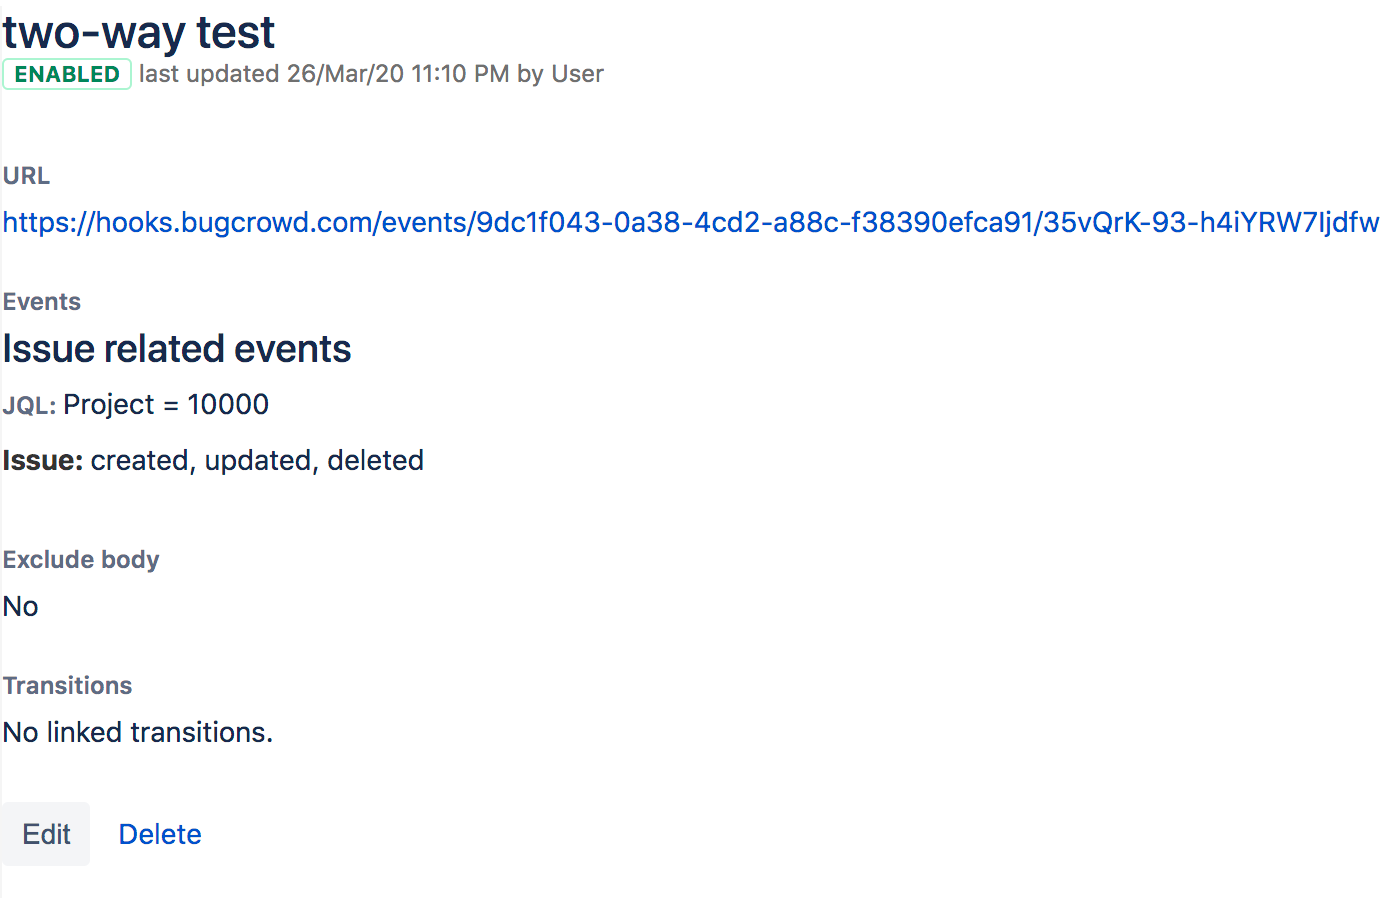
The following screenshot shows an updated Jira webhook with scope changed to the label
bugcrowd-bugcrowdongoing.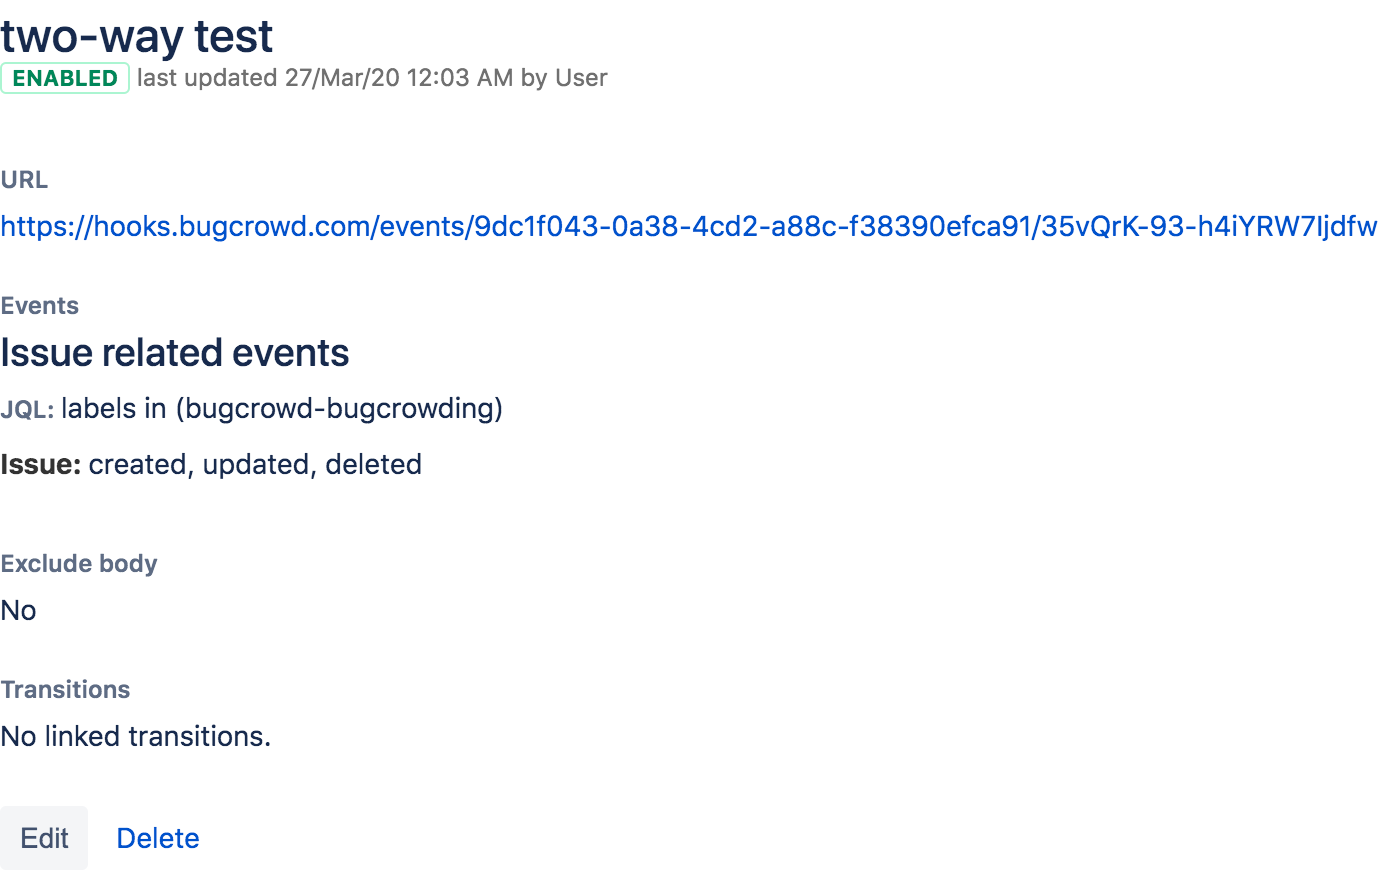
-
To activate communication from Jira to Crowdcontrol, select the When I close an issue in Jira, automatically close the corresponding issue in Crowdcontrol option. Closed issues in Jira associated with submissions in Crowdcontrol will automatically move the submission to Resolved.
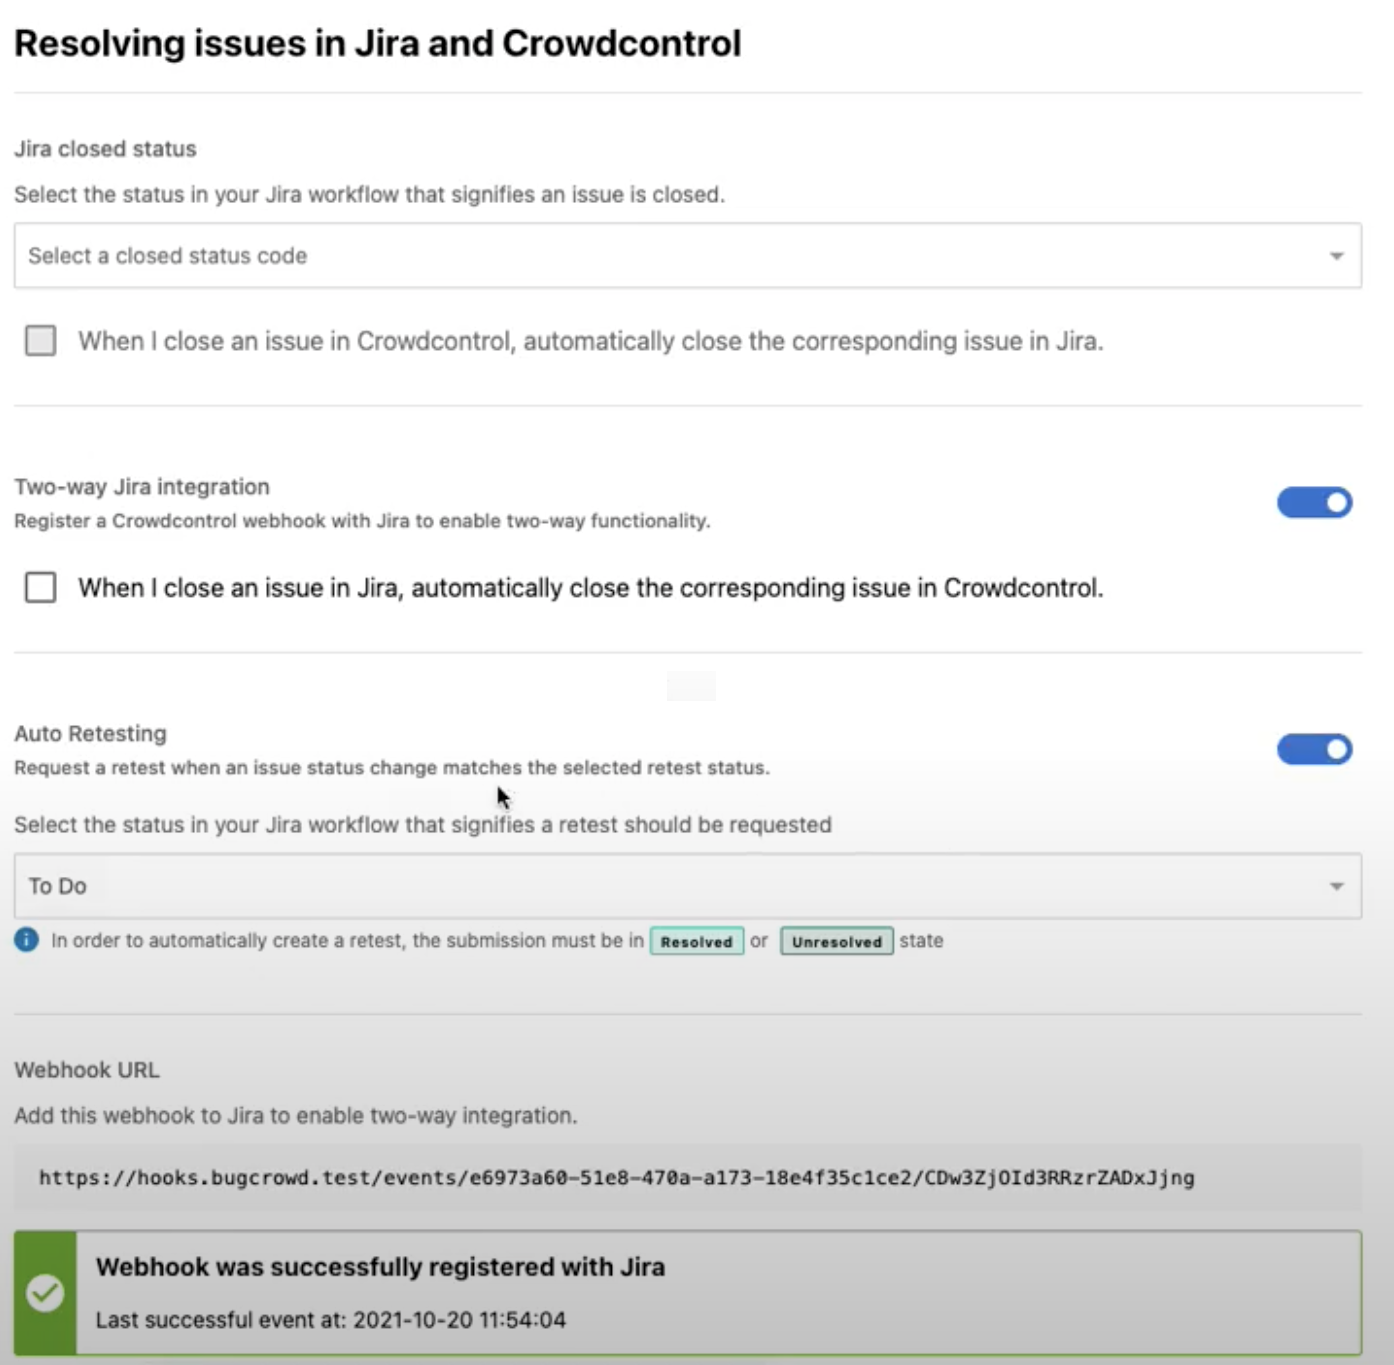
Auto Retesting
You can automatically trigger a retest for a submission in Crowdcontrol based on the change in Jira state. To do this:
-
Move the slider for the Auto Retesting option to the right.
-
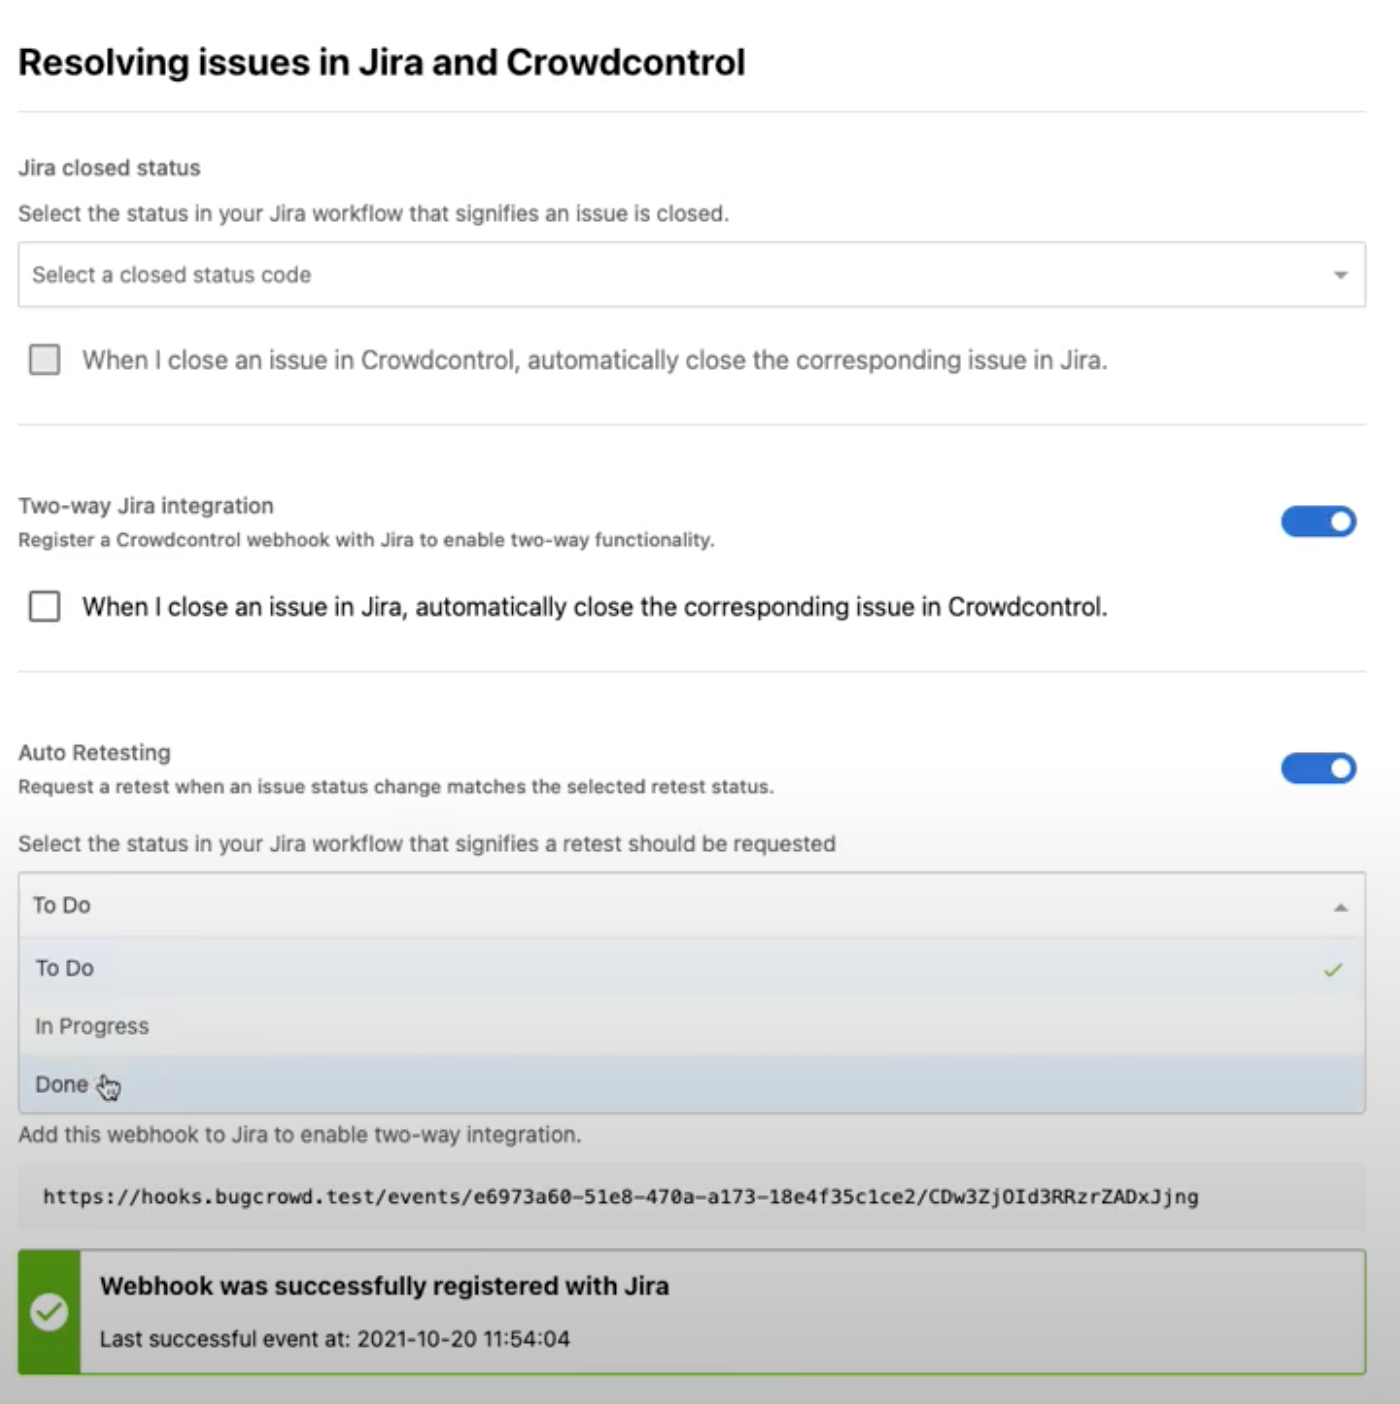
From the drop-down list, select the status in your Jira workflow that must trigger a retest. For example, when the state in Jira changes to Done, Jira notifies Crowdcontrol and it triggers a retest in Crowdcontrol for the submission.
To automatically create a retest, the submission must be in Resolved or Unresolved state.
-
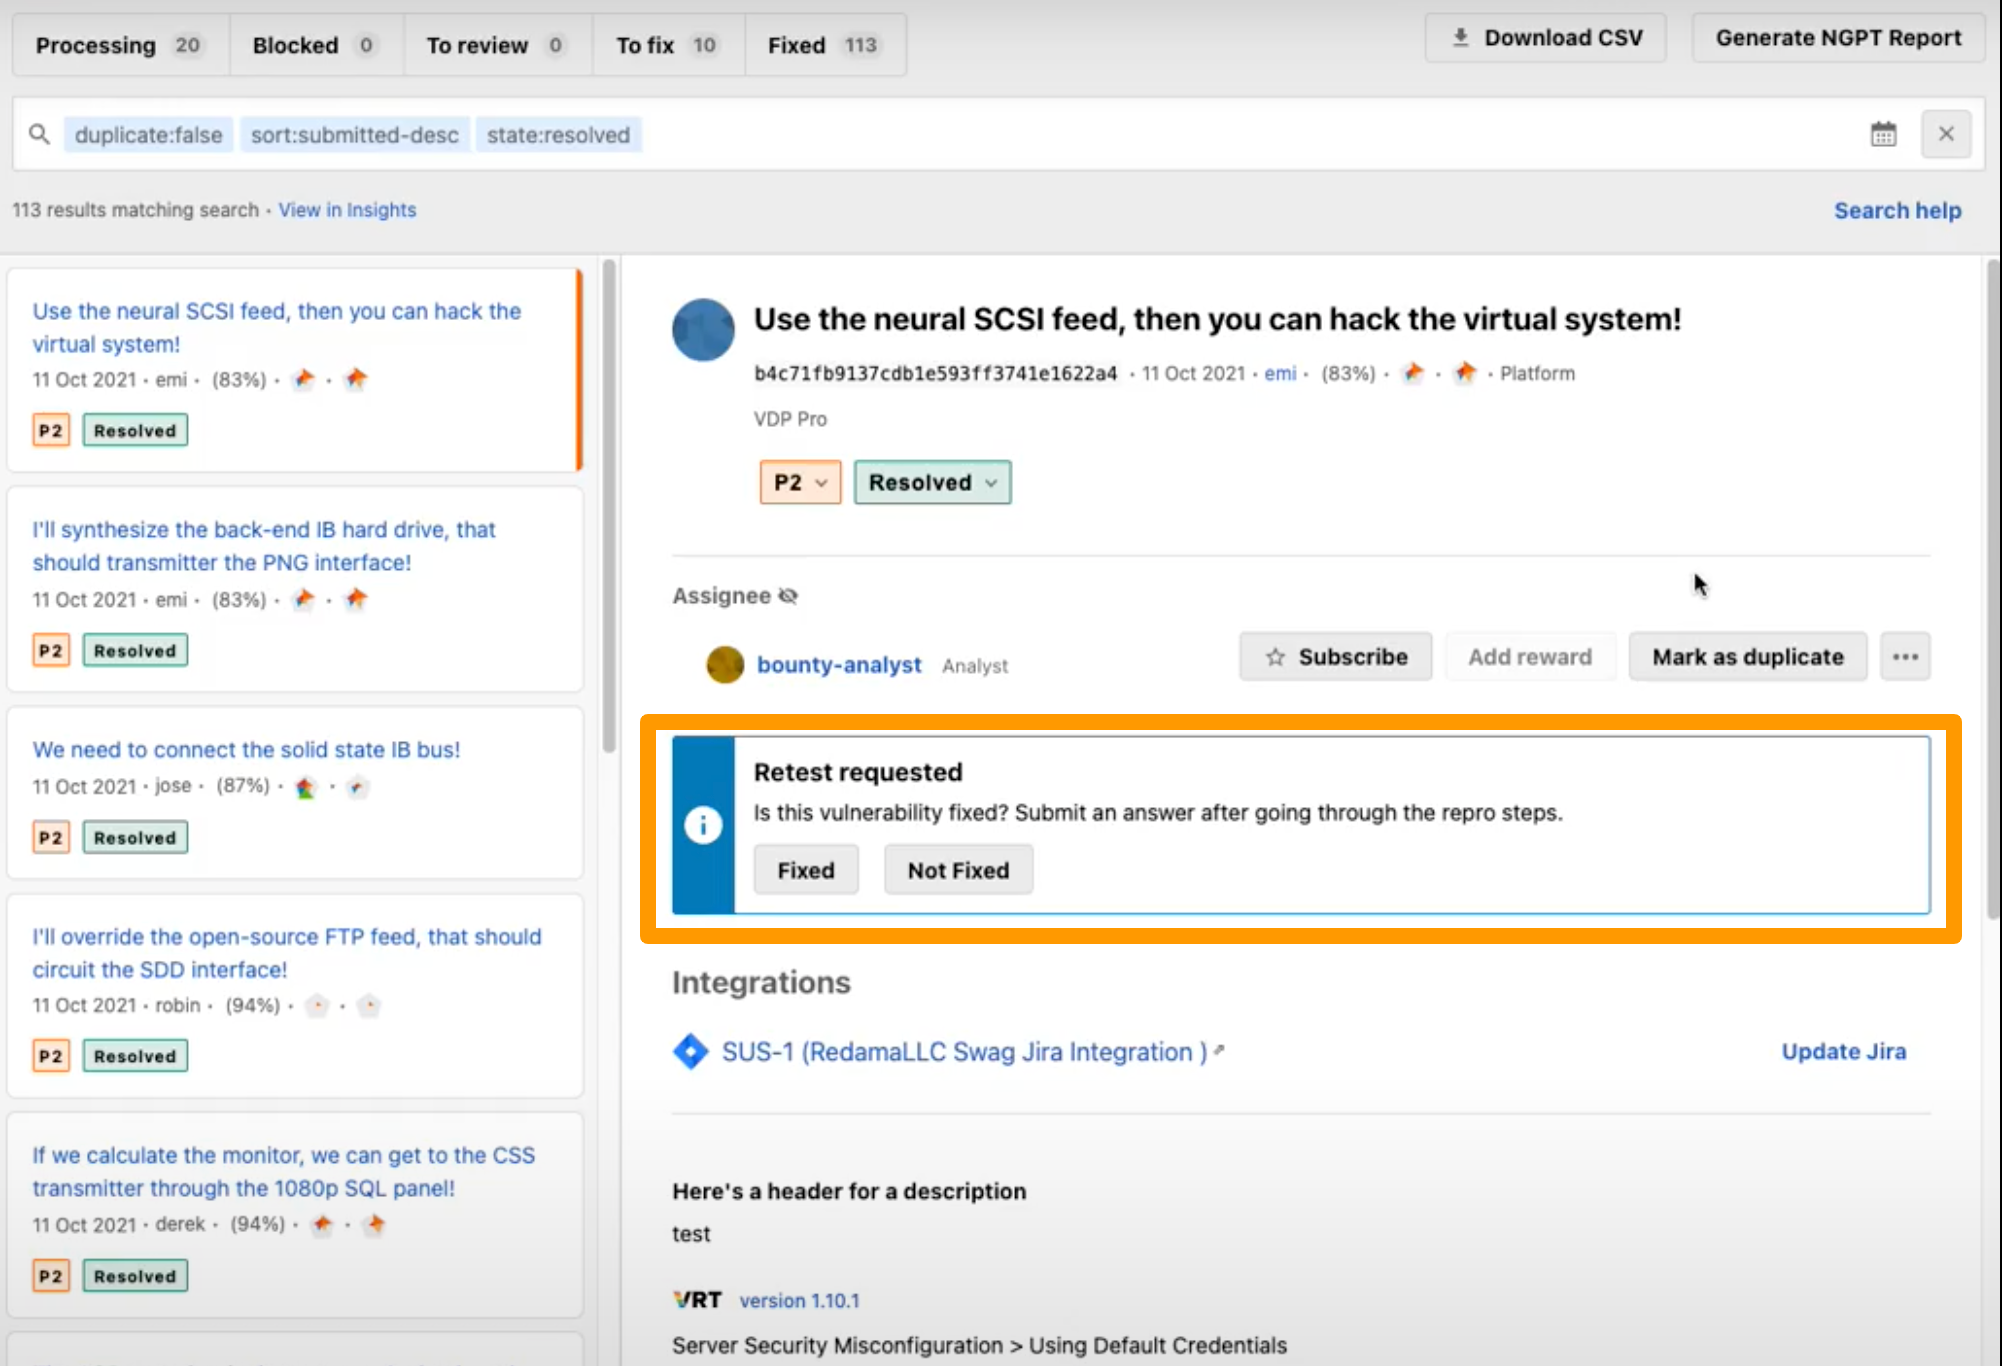
After the Auto Retesting option is enabled and if you change the status of the Jira ticket to Done, then the Retest Requested notification appears for the submission in Crowdcontrol as shown.
-
If you click the retest status change to Fixed or Not Fixed, then a comment is added in Jira indicating that the retest is completed or the retest determined that the issue is not fixed.