- Configuring Jira for Vulnerability Detections
- Locating the Jira Integration Panel
- Pushing a Vulnerability Detection to Jira
- Linking a Vulnerability Detection to an Existing Jira Issue
- Managing an Existing Jira Link
In addition to linking crowdsourced submissions to Jira, you can also link to Vulnerability Detections (surfaced in the Security Inbox from continuous scanning) to Jira issues. This keeps remediation work tracked in Jira in sync with the risk data in Crowdcontrol.
Jira integration must already be configured for the Security Program before you can link a Vulnerability Detection to Jira. See Jira for setup steps.
Linking to Jira is only available for Vulnerability Detections in the Security Program designated to receive results as part of your Vulnerability Scanning configuration. See Vulnerability Scanning for details.
Configuring Jira for Vulnerability Detections
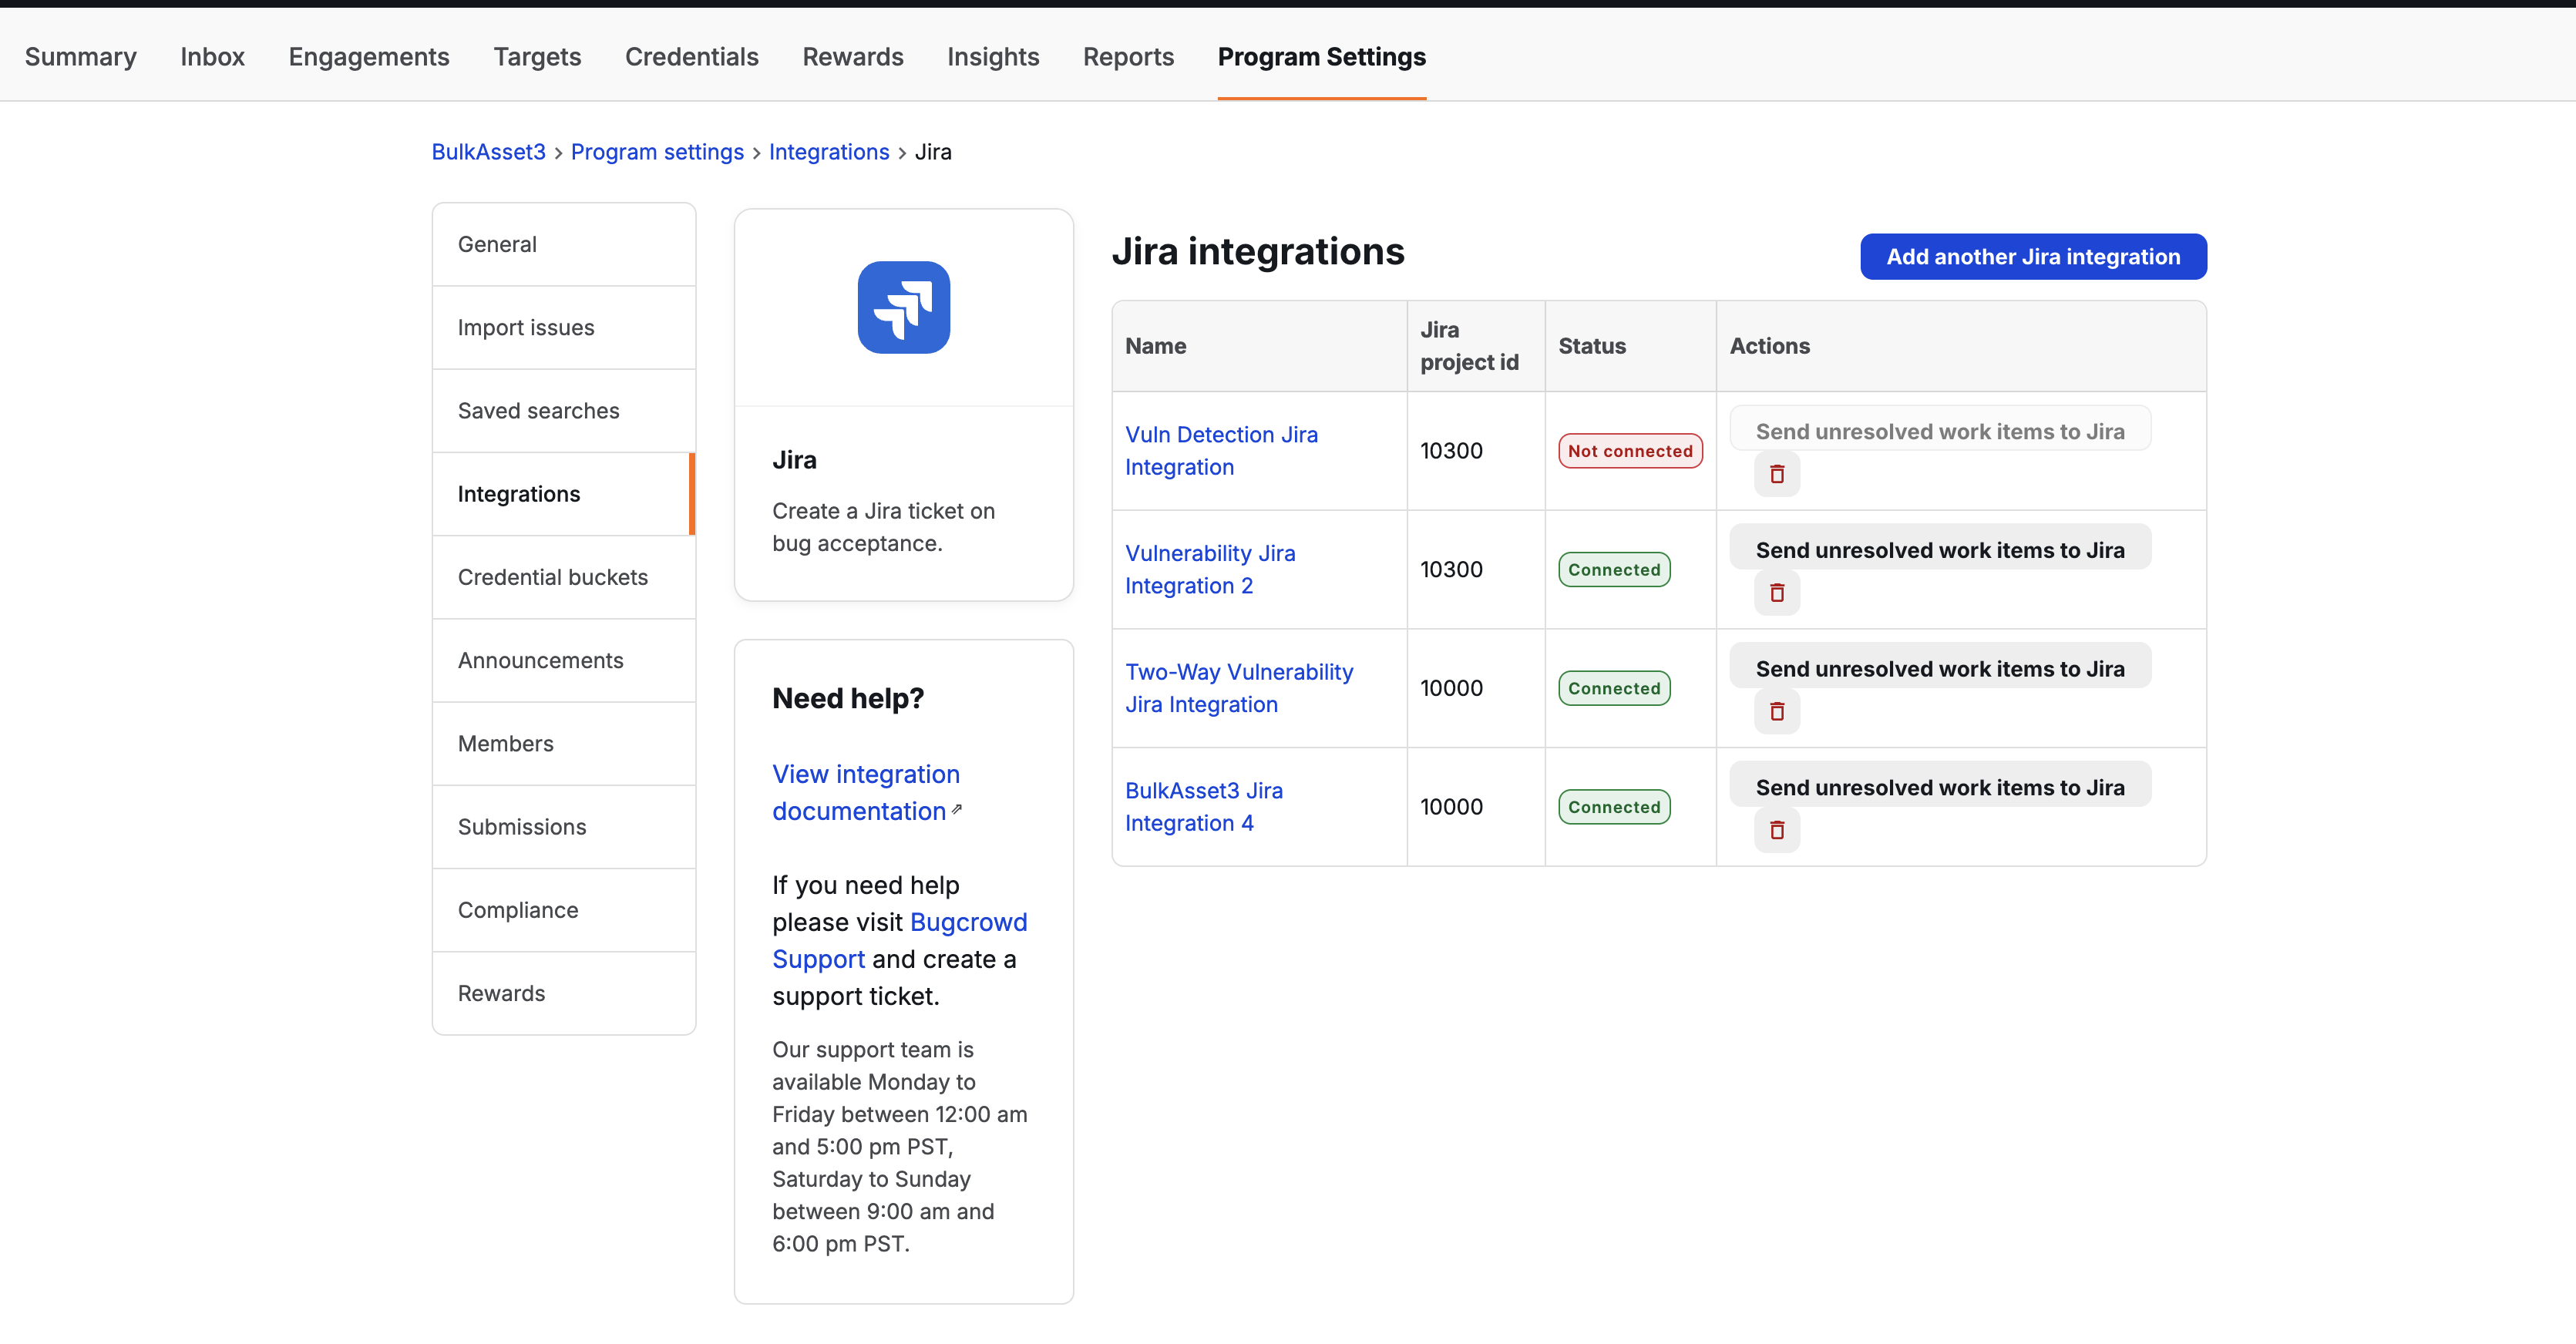
There is no separate settings page for Vulnerability Detections. Once Jira integration is enabled for the Security Program, the same Settings > Integrations > Jira pages used to configure submissions become aware of Vulnerability Detections, and relabel from “issue” to “work item” language to reflect that both content types are covered.
-
Work item creation: On the Work item creation page (previously named “Issue creation”), you can set the Work item type and enable Enable automatic Jira work item creation. Both submissions and Vulnerability Detections can be pushed to Jira using Push to Jira, and linked items automatically update when details change in Crowdcontrol. Automatic Jira work item creation based on certain criteria is only currently supported for submissions, not Vulnerability Detections.
Note: Automated creation rules and attachment syncing currently apply to submissions only. Comment syncing applies to both submissions and Vulnerability Detections.
</div>
-
Resolving work items: The Resolving work items page (previously named “Resolving issues”) controls how a Jira issue’s status change resolves the linked item in Crowdcontrol, and applies to both submissions and Vulnerability Detections.
-
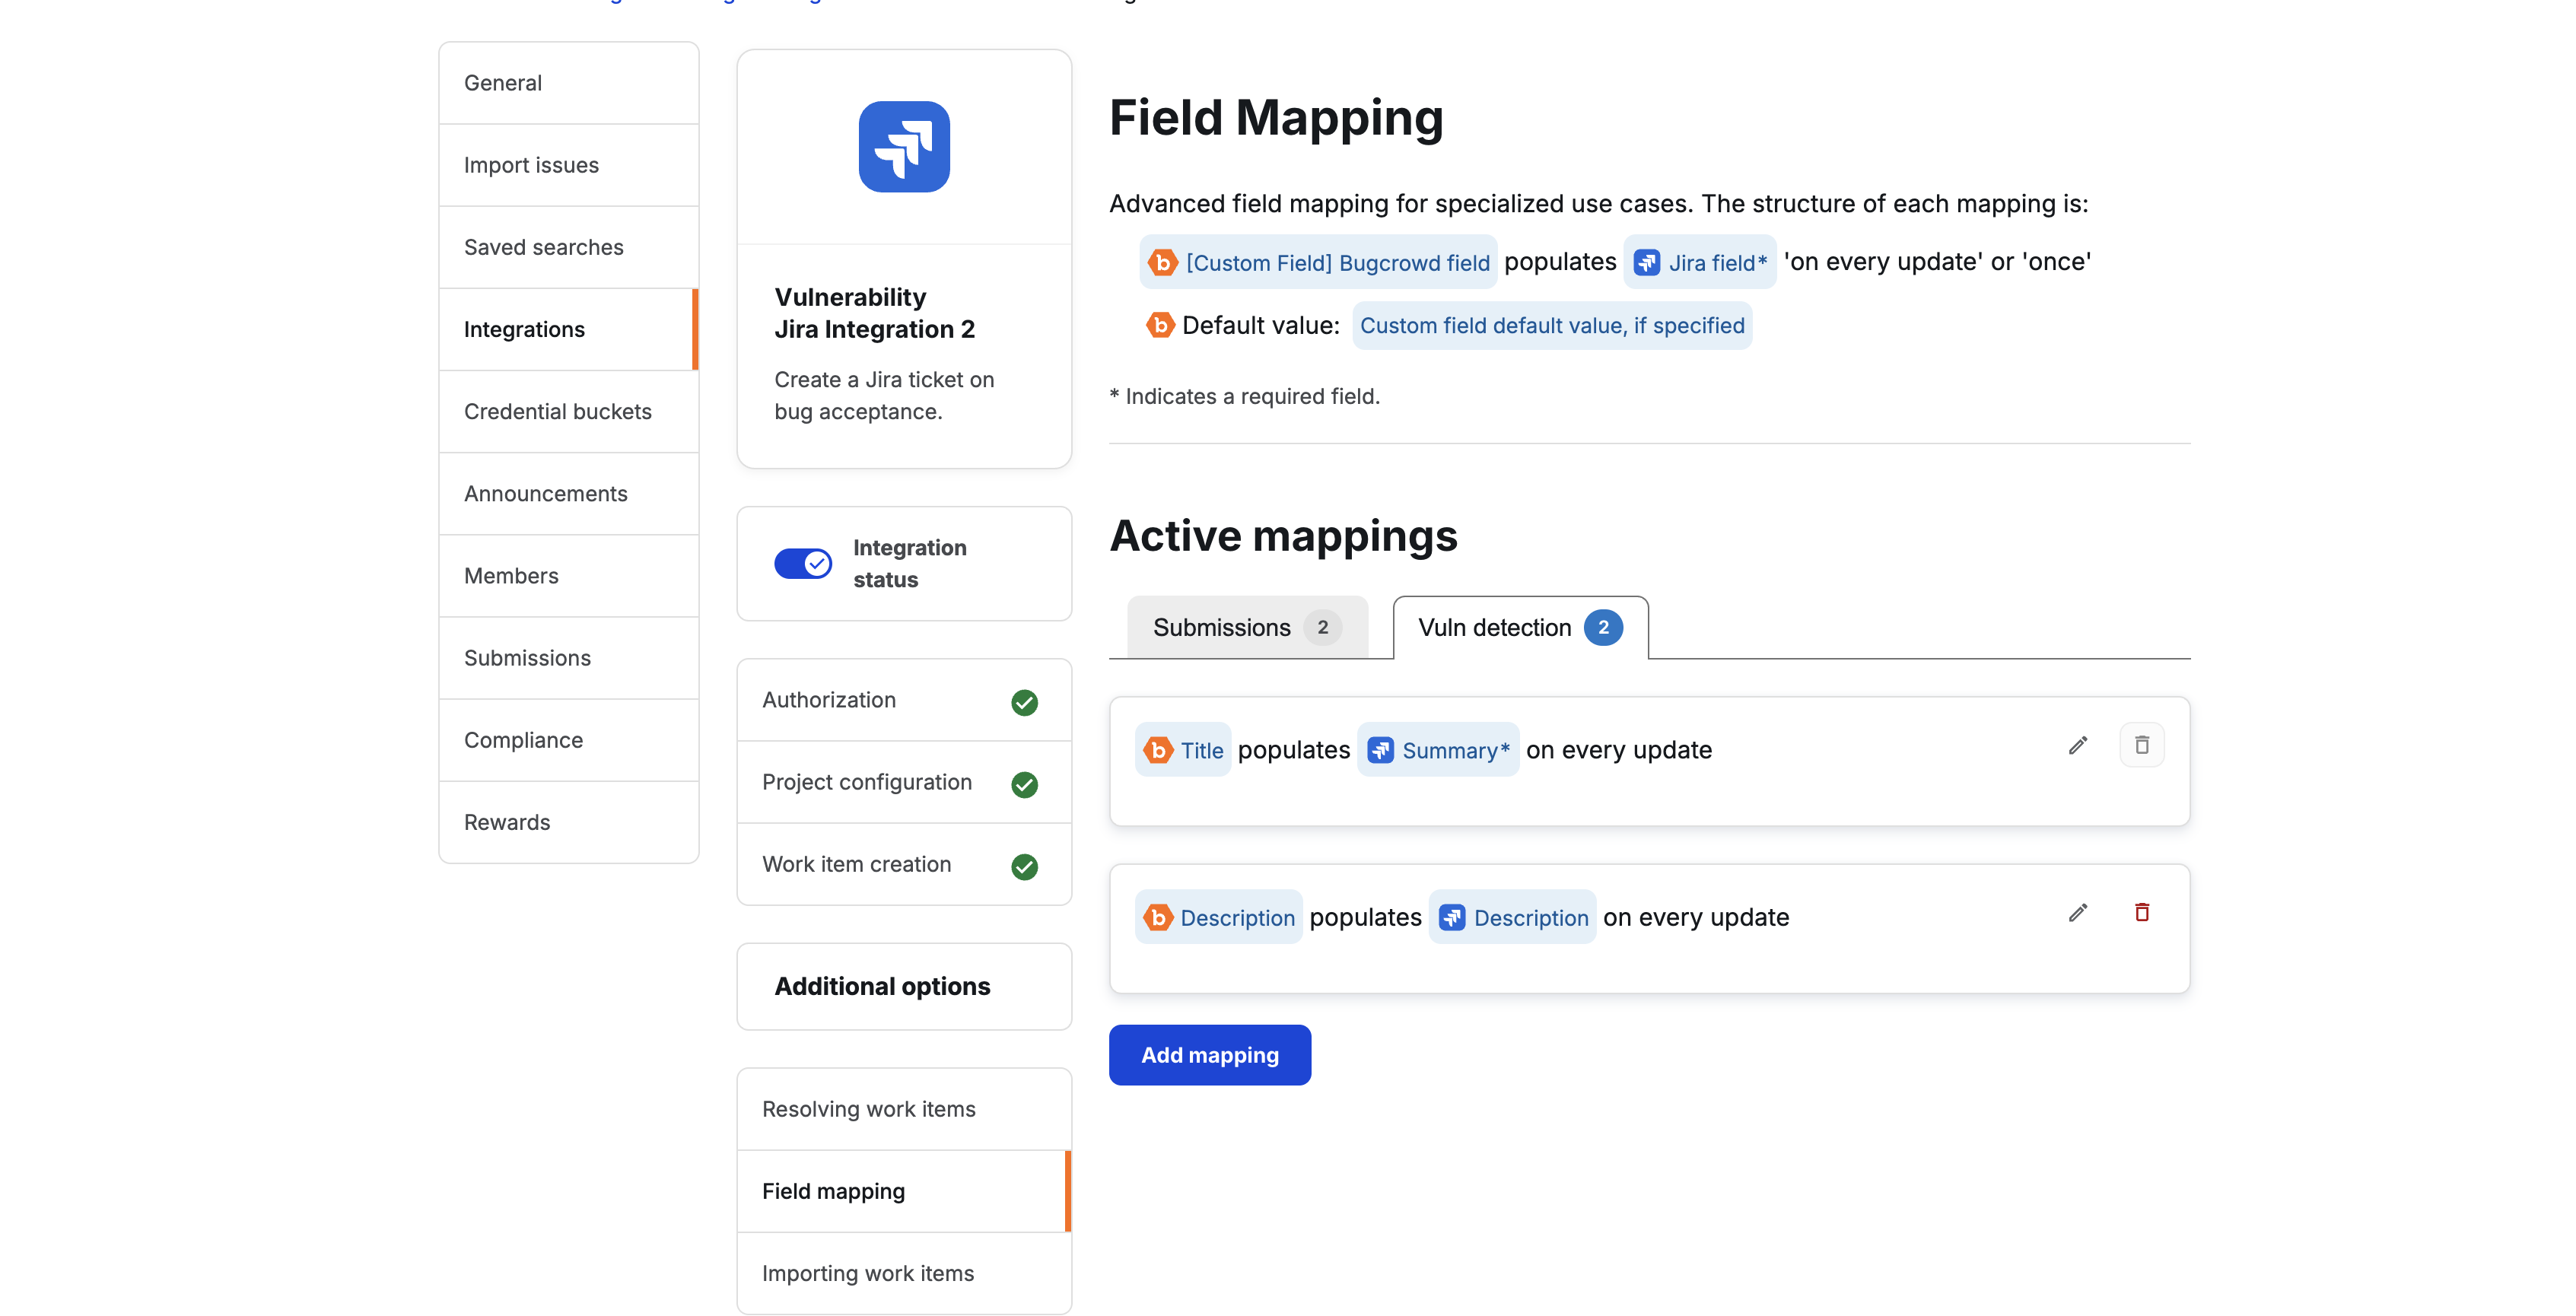
Field mapping: Field mapping remains shared and generic — there is currently no dedicated mapping UI for Vulnerability Detection-specific fields such as CVSS score or severity.
-
Importing work items: The Importing work items page (previously named “Importing issues”) only creates Crowdcontrol submissions from imported Jira issues. Importing directly into Vulnerability Detections is not currently supported.
Locating the Jira Integration Panel
- Open the Security Inbox and select a Vulnerability Detection.
-
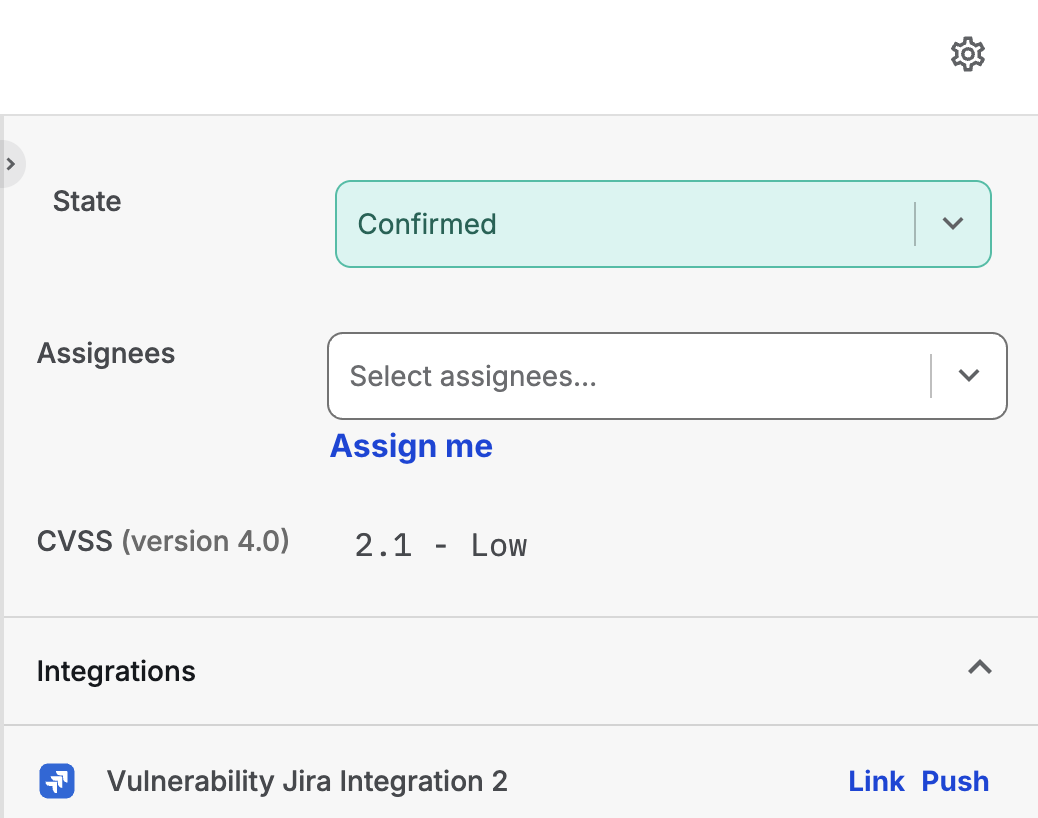
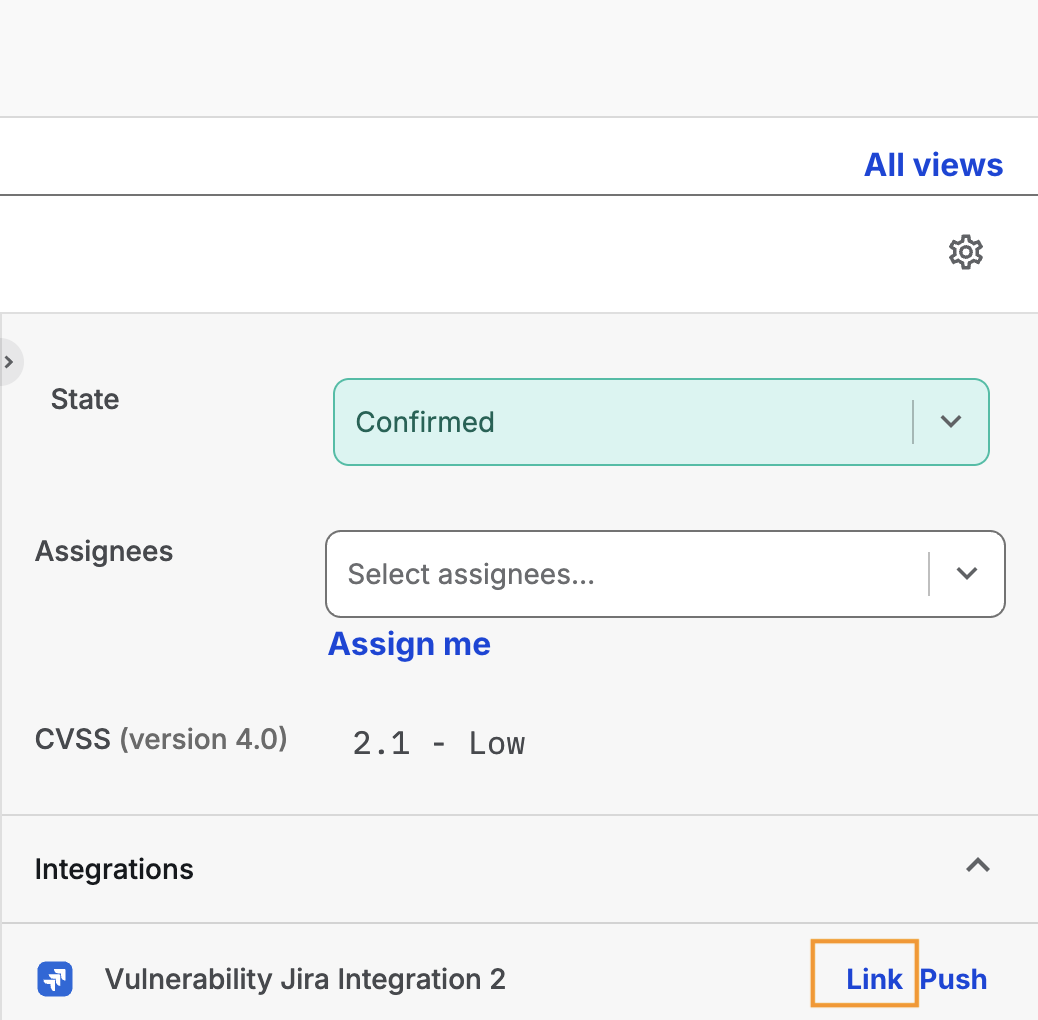
In the right-hand sidebar, find the Integrations section. If Jira has not yet been linked, you’ll see Link and Push buttons.
Pushing a Vulnerability Detection to Jira
Use Push to automatically create a new Jira issue populated with the Vulnerability Detection’s details.
-
Click Push.
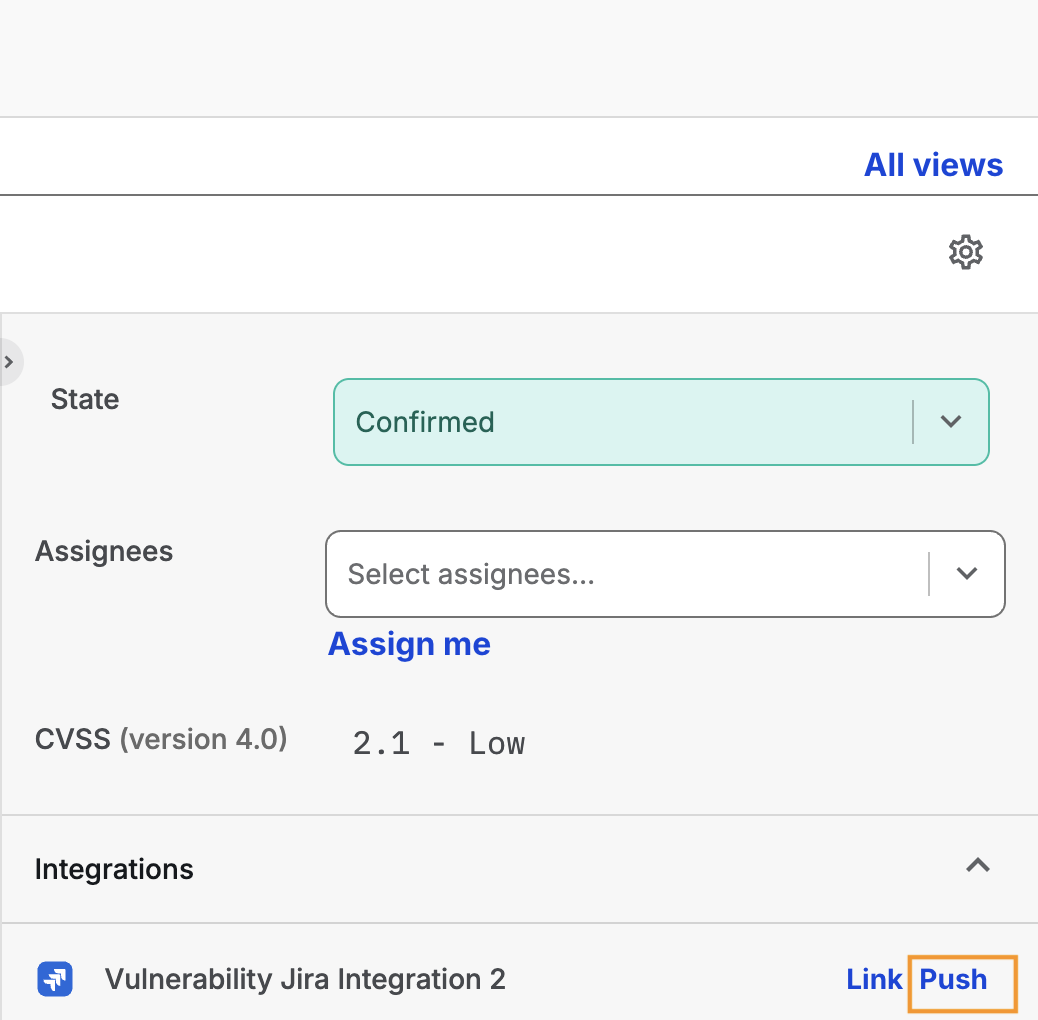
A new Jira issue is created and linked to the Vulnerability Detection, and a confirmation message is displayed.
Linking a Vulnerability Detection to an Existing Jira Issue
Use Link if a Jira issue for this vulnerability already exists.
-
Click Link.
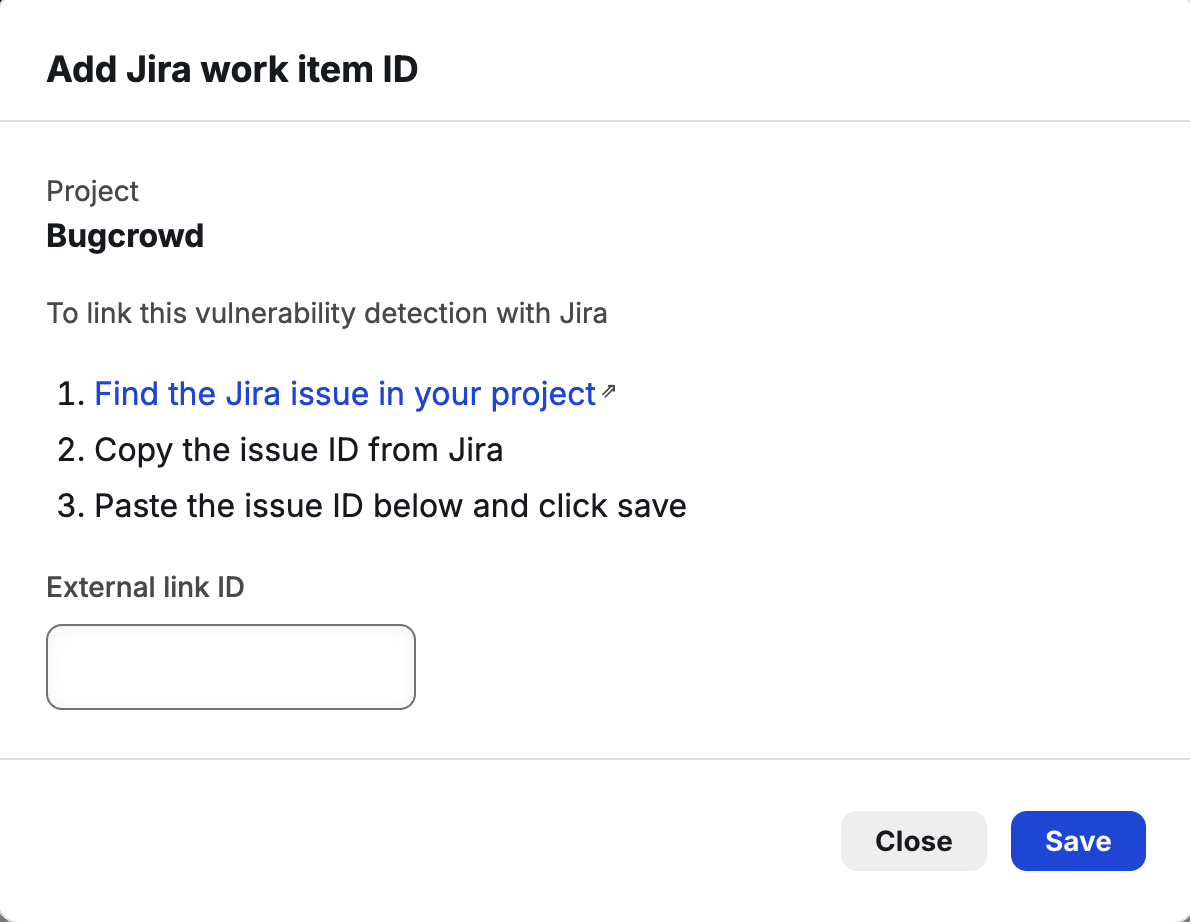
The Add Jira work item ID window is displayed, showing the Jira Project this Vulnerability Detection will link into.
-
Follow the on-screen steps: find the Jira issue in your project, then copy its issue ID from Jira.
-
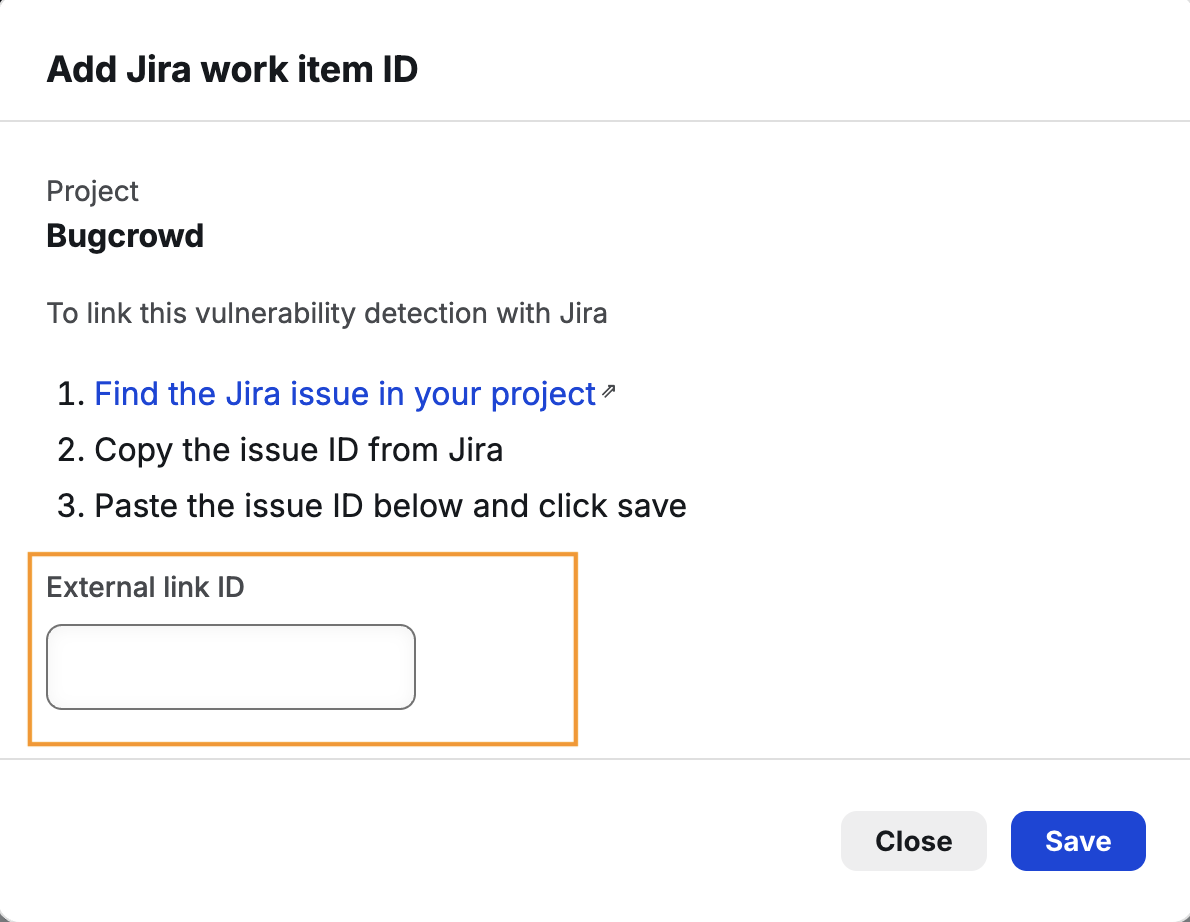
Paste the issue ID into External link ID and click Save.
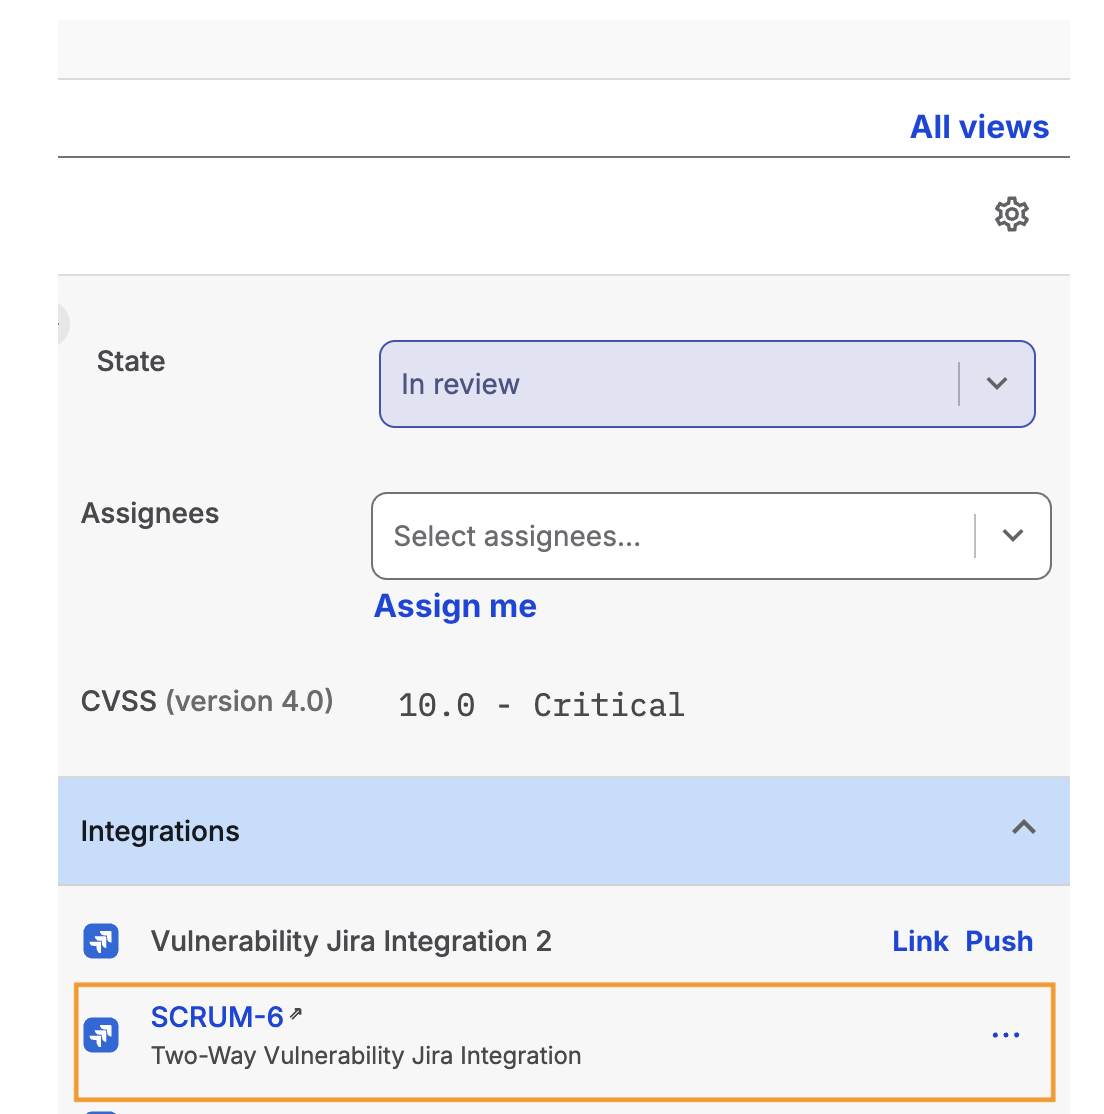
If the ID matches an actual Jira issue, the link is saved and the Vulnerability Detection now shows the linked Jira issue. Otherwise, an error message is displayed.
Managing an Existing Jira Link
Once a Vulnerability Detection is linked to Jira, click the kebab (⋮) menu next to the linked issue to access further actions:
| Action | Description |
|---|---|
| Push updates to Jira | Re-syncs the latest Vulnerability Detection details to the linked Jira issue. |
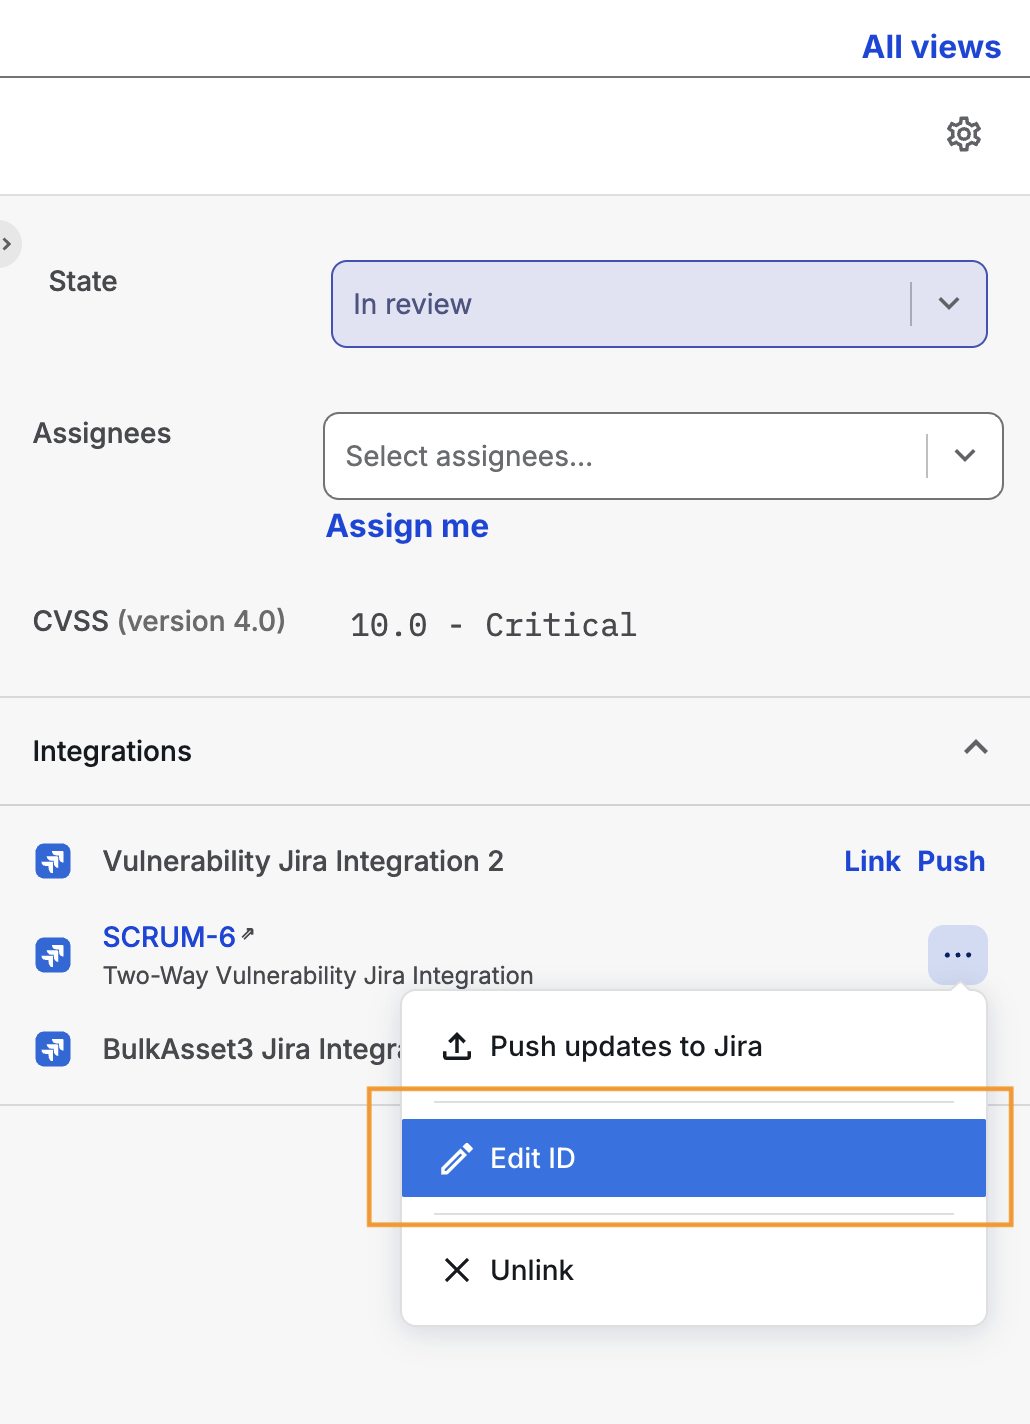
| Edit ID | Opens the Edit Jira work item ID window so you can point the Vulnerability Detection to a different Jira issue ID. |
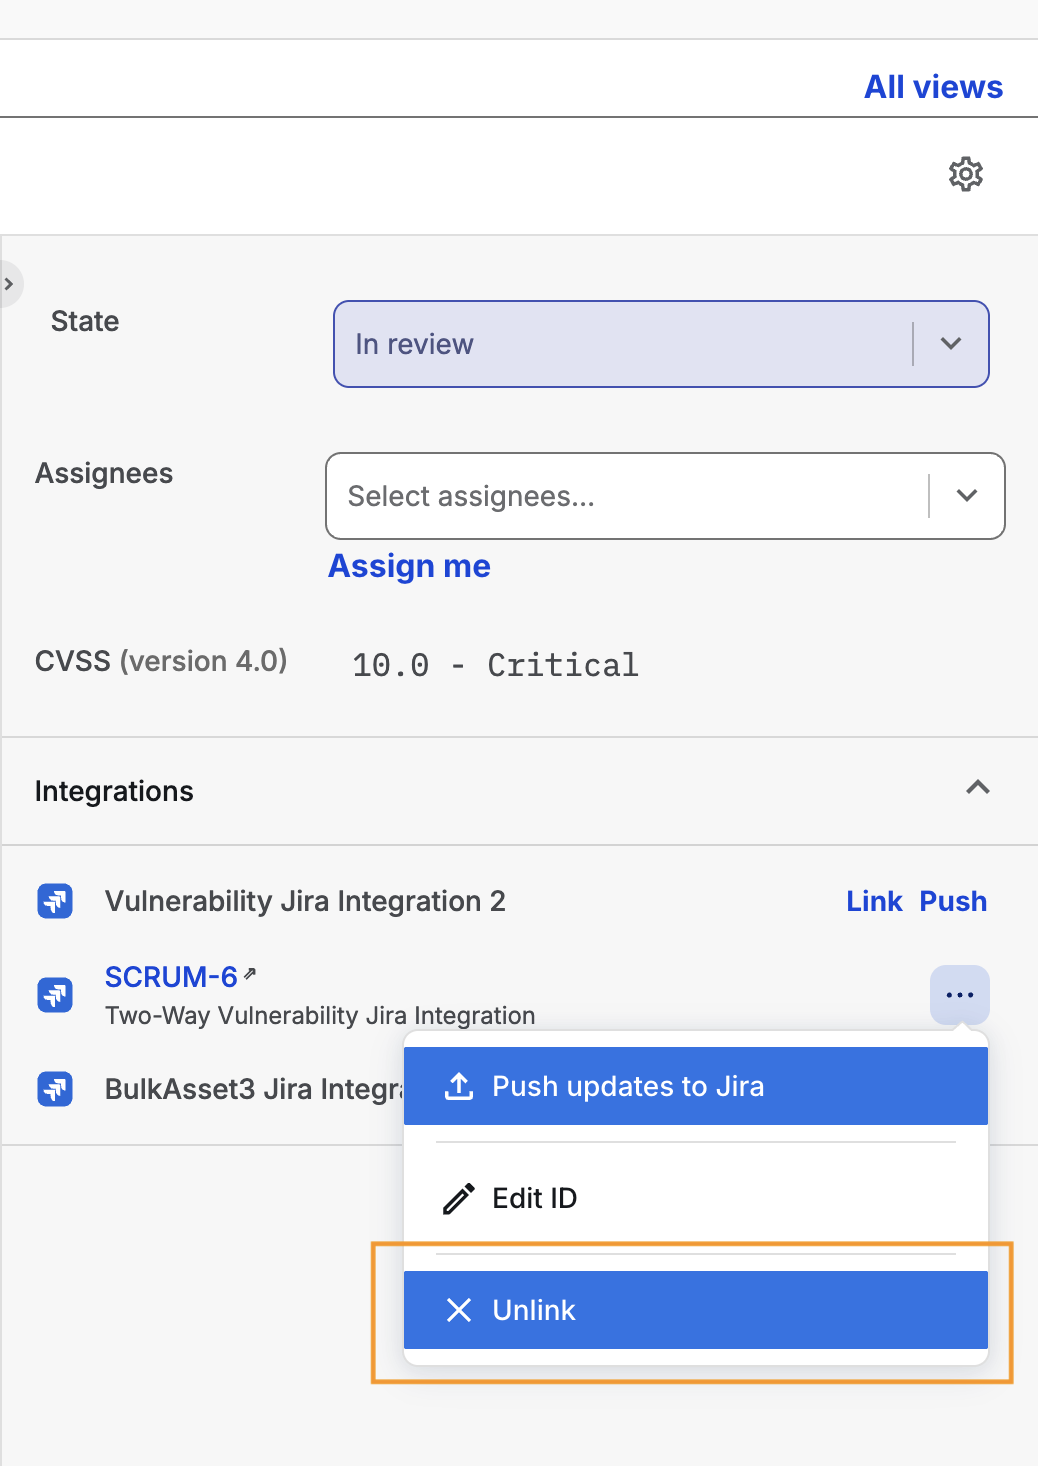
| Unlink | Removes the link between the Vulnerability Detection and the Jira issue. |
Editing the Linked Jira Issue
-
Click Edit ID from the kebab menu.
-
Update the External link ID and click Save.
Unlinking a Jira Issue
-
Click Unlink from the kebab menu.
The Confirm unlinking issue window is displayed, warning that this action cannot be undone.
-
Click Unlink to confirm, or Cancel to keep the existing link.