- Navigation
- Completing the Add Asset Form
- Saving the Asset
- Importing assets in bulk
- Additional Information
In addition to automatically discovered assets, you can manually add assets to your Bugcrowd Asset Inventory - either individually or in bulk. This ensures that all relevant assets – including domains, IPs, web applications – are tracked and included in your security programs for testing.
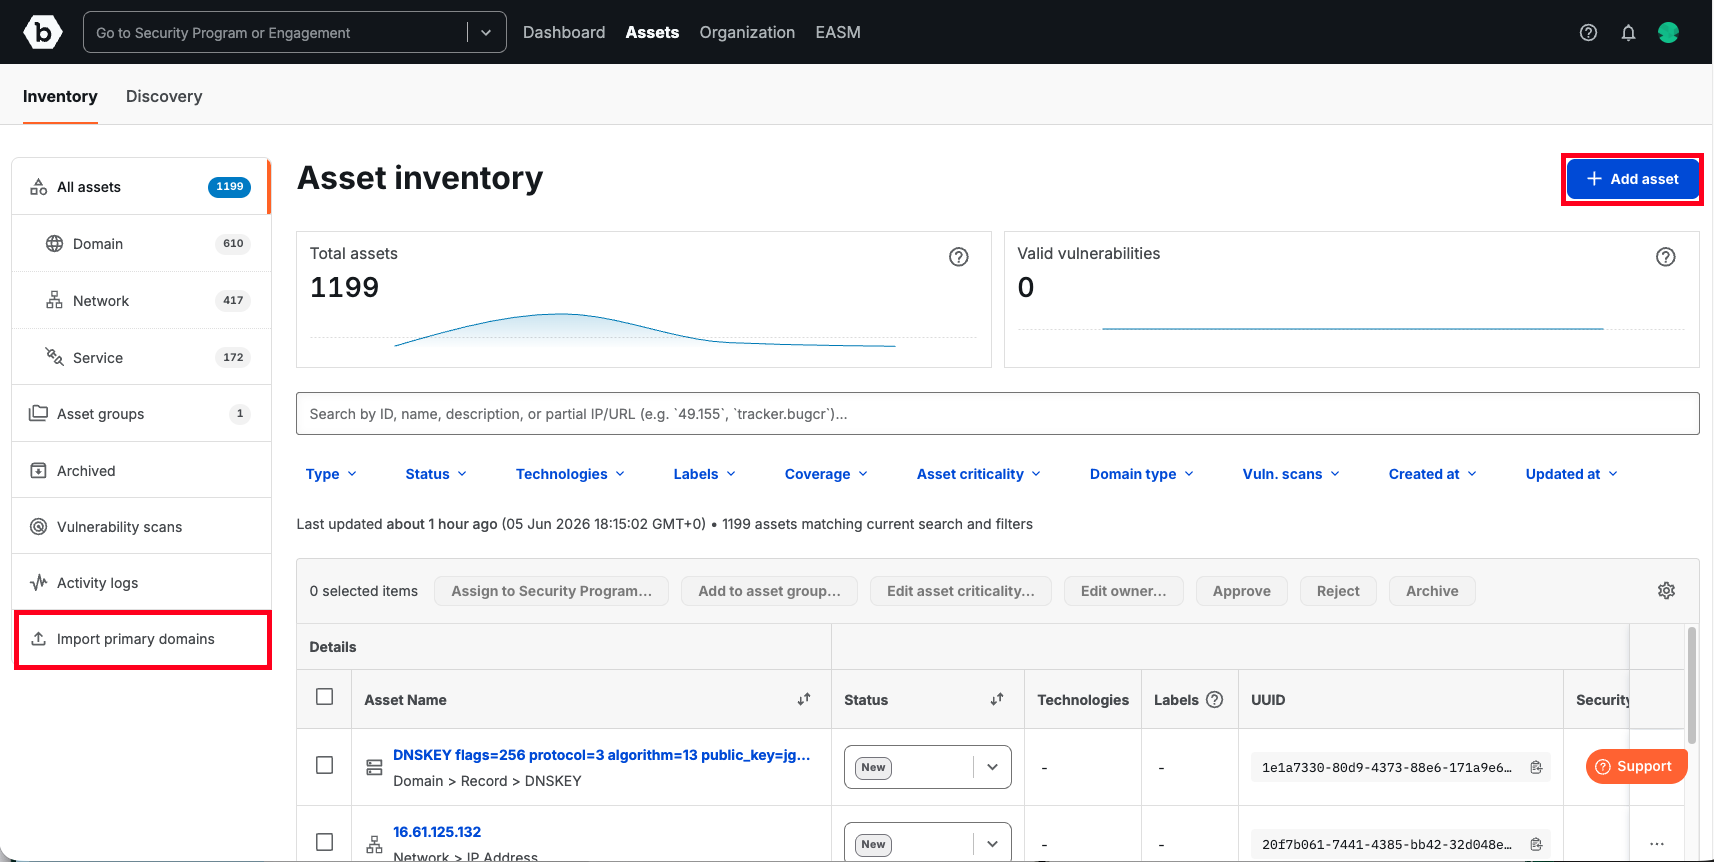
Navigation
You can manually add individual assets from any asset view page:
- All assets
- Domains (including Zone or Record pages)
- Network (including IP Address or ASN pages)
- Services (including Web Application)
To add a new asset:
- Navigate to the asset view page where you want to add the asset.
- Click the Add asset button (top right).
- The Add Asset form will open.
Completing the Add Asset Form
The Add Asset form is divided into sections: Details, Asset Criticality, Advanced (optional), Programs and groups, and Properties.
1. Details
- Name (required): A name to identify the asset.
- URL / Location (required): Enter a full URL that narrows the asset to a specific protocol, port, and/or path, or an IPv4 or IPv6 address.
- Type (required): Choose the basic categorization (Zone, Record, Web Application, IP Address, ASN). Note: The type of asset you select will automatically populate the appropriate Properties fields for that specific asset type (e.g., domains show domain-specific properties, IP addresses show IP-specific properties).
2. Asset Criticality
Define the risk and operational context of the asset:
- Business Criticality: Critical, High, or Moderate.
- Exposure Status: Internet-facing, Internal-only, Partner-network-exposed.
- Environment: Production, Staging, Development, Test.
- Sensitivity: Public, Internal, Confidential, Regulated (PCI, HIPAA).
Note: These fields are required for an Asset Criticality Score to be generated for an asset.
3. Advanced (optional)
- Technologies: Keywords or technologies to help organize and find assets.
- Labels: Custom labels to categorize assets (maximum 10).
- Description: Provide context for internal use (purpose, features, ownership).
- Owner: The person or team responsible for the asset.
- External ID: UUID from an external asset management system, if applicable.
4. Programs and groups
- Assign Security Programs: Add this asset as a target within one or more Bugcrowd Security Programs.
- Add to groups: Group this asset into one or more groups for categorization and security testing.
5. Properties
- This section dynamically updates based on the Asset Type selected.
- For example, selecting Zone enables domain-specific fields – CDN provider and Hosting provider.
Saving the Asset
- Complete all required fields.
- Review your entries for accuracy.
- Click Add asset.
- The asset will appear in the selected asset view page and in the All assets view.
Importing assets in bulk
For larger inventories, you can import multiple assets at once via CSV instead of adding them one at a time.
To import assets:
- Navigate to Organization → Settings → Asset Inventory
- Click Import assets.
- Download the CSV example or CSV schema to format your file. Every column is required besides
asset_group:name, url_or_location, asset_type, is_primary_domain, asset_group, business_criticality, exposure_status, classification_or_sensitivity, environment - Click Select a CSV to upload and choose your file with assets in correct schema.
- Click Import assets
CSV fields
| Field | Required/Optional | Requirements |
|---|---|---|
| name | Required | Maximum 255 characters. |
| url_or_location | Required | Maximum 255 characters. Accepts protocol (http/https), domain/subdomain/IP (v4 + v6), port, or path. |
| asset_type | Required | Must be one of: Zone, IP Address, Web Application, Record. |
| is_primary_domain | Required | Must be true or false (default false). |
| asset_group | Optional | Enclose in double quotes and separate multiple groups with commas (e.g., “Payments, APIs, Mobile Apps”). |
| business_criticality | Required | Must be one of: Critical, High, Moderate (default). |
| exposure_status | Required | Must be one of: Internet-facing (default), Internal-only, Partner-network-exposed. |
| classification_or_sensitivity | Required | Must be one of: Public (default), Internal, Confidential, Regulated. |
| environment | Required | Must be one of: Production (default), Staging, Development, Test. |
What happens after upload
- Basic file checks (file type, row limits, and the primary domain cap) are validated immediately and shown in the UI.
- Individual row errors (invalid values, duplicate assets, formatting issues) are validated asynchronously. You’ll receive an email summarizing assets added and any rows with errors, so you can correct and re-upload just those rows.
- Imported assets land in New status — review and approve them from Assets → All assets before they’re eligible for scanning or testing.
Additional Information
- Manually added assets are treated the same as discovered assets in terms of tracking, posture, and risk scoring.
- Approve assets to confirm ownership. Approval is required before any asset can be scanned or tested.
- Assign assets to programs and groups during creation to ensure they are covered immediately.
- You can edit metadata and posture later from the Asset Inventory table.
