Assign asset criticality scores to your approved assets so the scanner can prioritize them, then review findings in the security inbox. Scans run automatically on your organization’s configured frequency (weekly by default for up to 10 assets on Standard plans) and the quota available with preference given to highest asset criticality-scored assets.
Before you begin: Complete Discover Your Estate first. Assets must be in Approved status and have asset criticality scores assigned before they are eligible for scanning.
Steps
1. Confirm Asset Criticality scores are assigned
From Assets then All assets, check the Asset Criticality column. Any asset showing no score will not enter the scan queue. Open the … then Edit for each unscored asset and complete the four Security Posture fields: Business Criticality, Environment, Sensitivity, and Exposure Status. The score (0-40) calculates instantly on save.
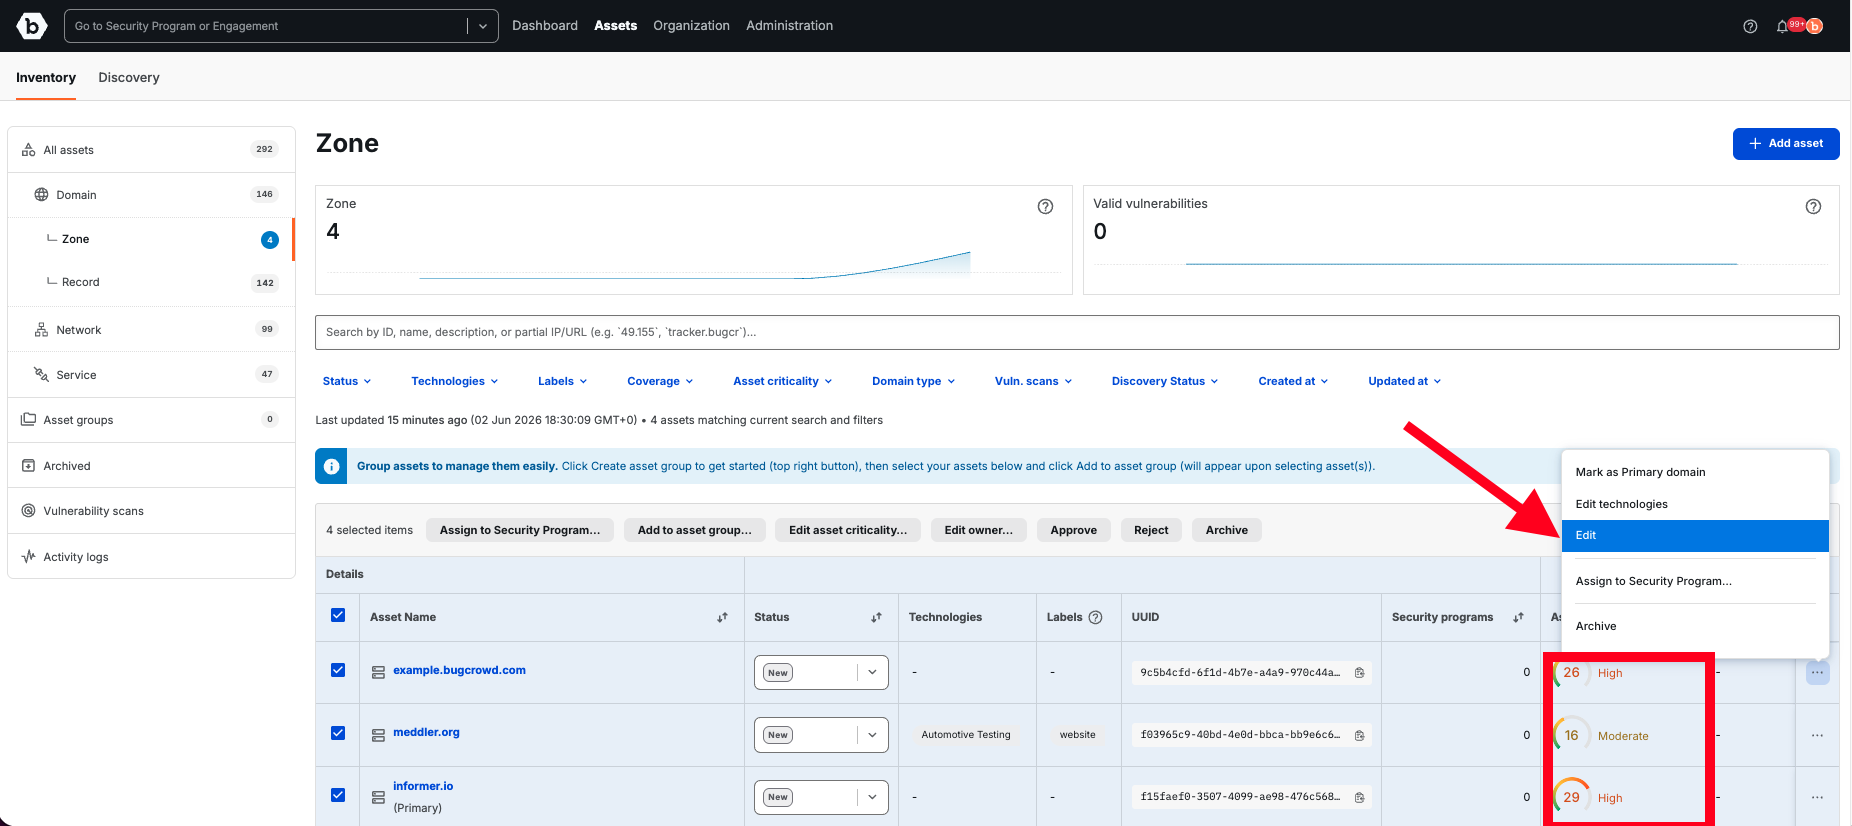
Tip: For an asset to be automatically queued for vulnerability scanning or eligible for on-demand scanning it must be both approved and have asset criticality assigned.
2. Verify assets are queued
In the asset table, check the Vuln Scan Queued column. Filter by Vuln. Scans then Scheduled to see which assets have entered the queue.
Tip: Score scale: 31-40 = Critical, 21-30 = High, 11-20 = Moderate, 0-10 = Low. Critical-scored assets are front-of-queue.
3. Trigger an immediate scan if needed
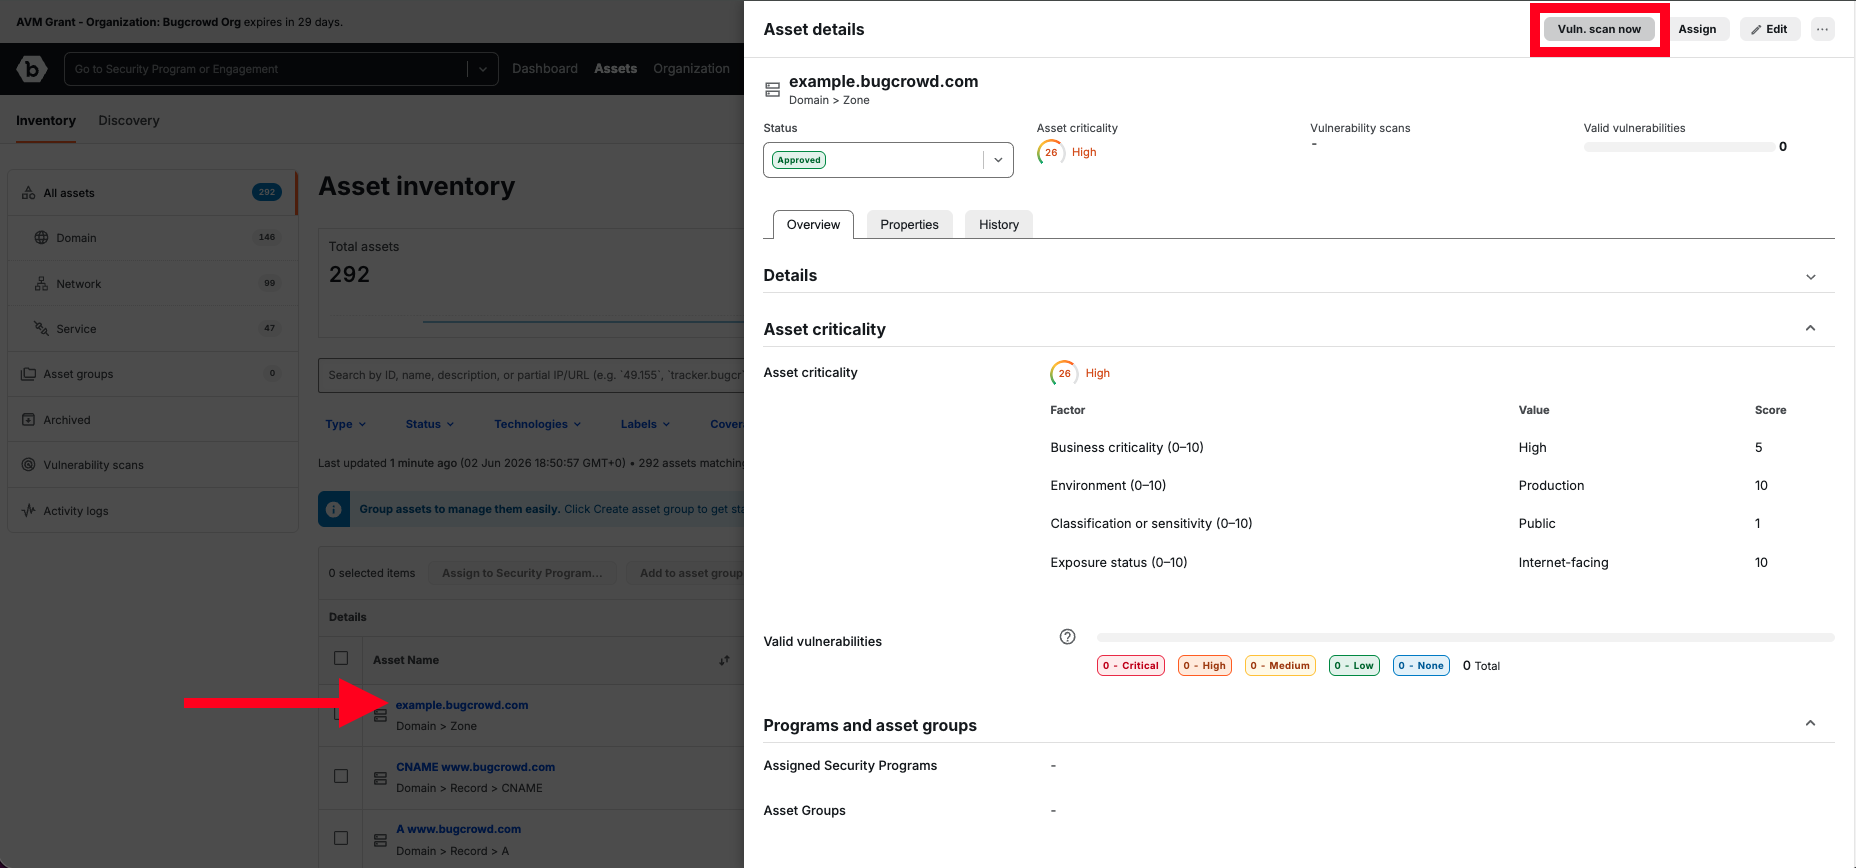
Open any approved asset’s detail page and click Vuln. scan now button to bypass the queue schedule and run immediately. Use this for newly approved critical assets where you cannot wait for the next scheduled batch. Note that button will change to “Scanning…” and vulnerability scans will show as “In Progress”.
4. Review vulnerability scan findings
Navigate to Vulnerability scans and click the number below Latest scan results.
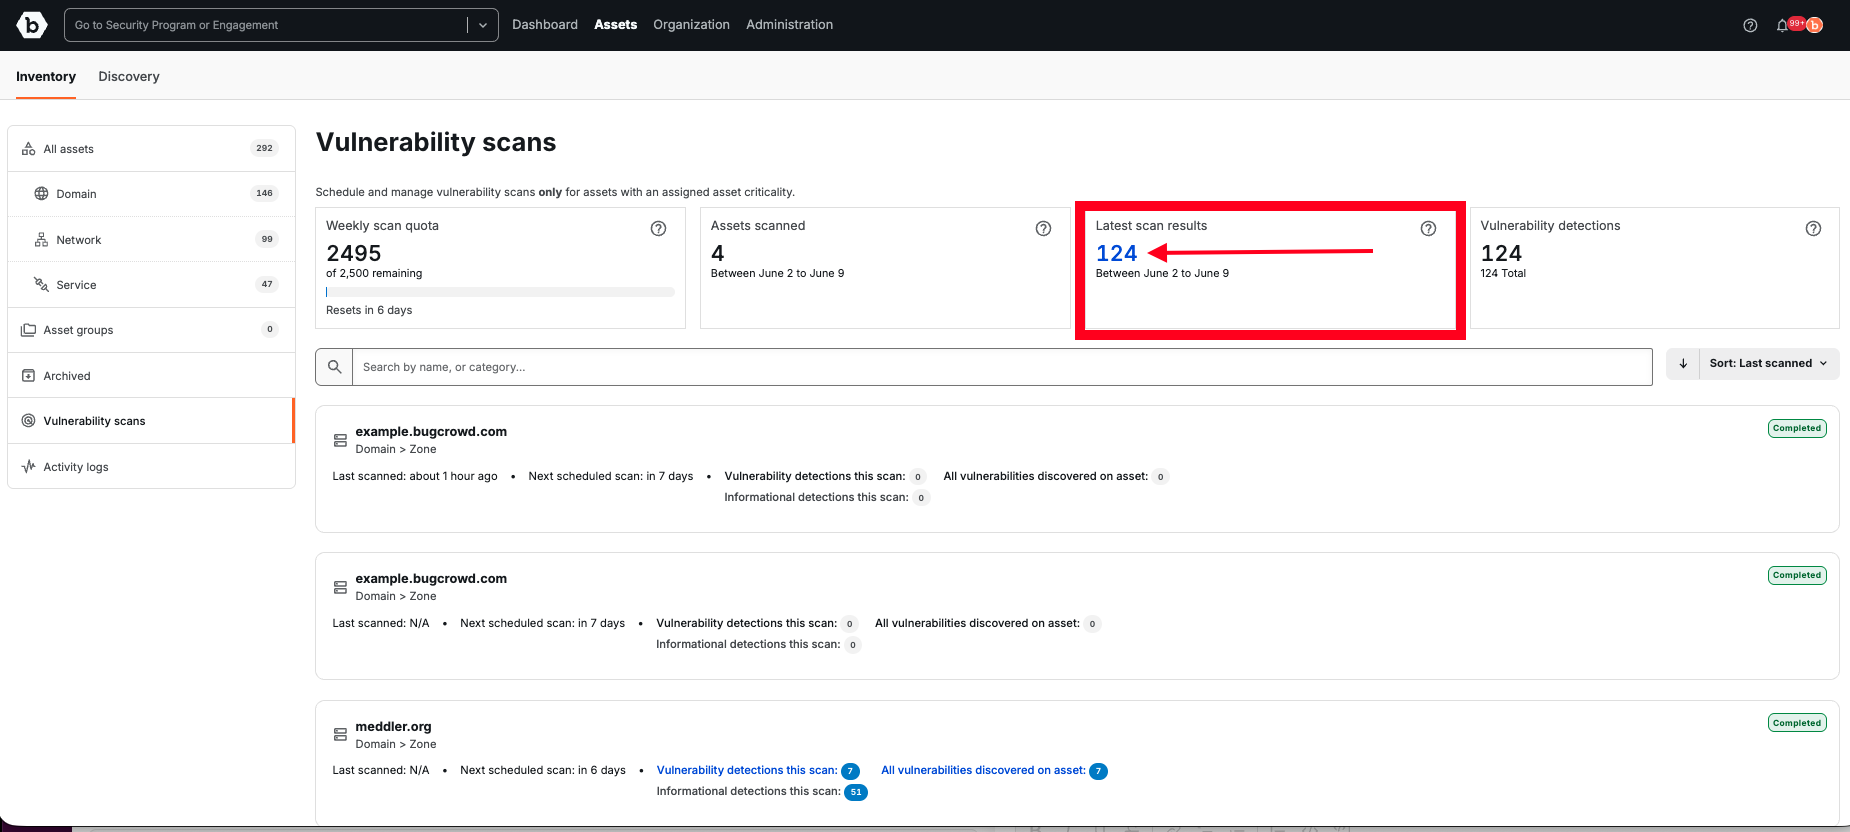
Tip: These are total findings identified in the most recent vulnerability scan of the selected assets. They are a summary of unique, non-remediated vulnerabilities found during the current scan period. Any vulnerabilities already marked as remediated are excluded.
It is strongly recommended that customers allow-list the IPs shown in the table within the reference document below to ensure the proper functioning of the vulnerability scanners. The IP ranges are also region-specific and depend on which scanner pool is selected. The table identifies each regional cloud sensor and, for allow list purposes, its IP address ranges. These IP address ranges are exclusive to Tenable as the provider of vulnerability scanning.
Ref: Tenable Documentation on IP ranges
5. Triage and assign findings in the Security Inbox
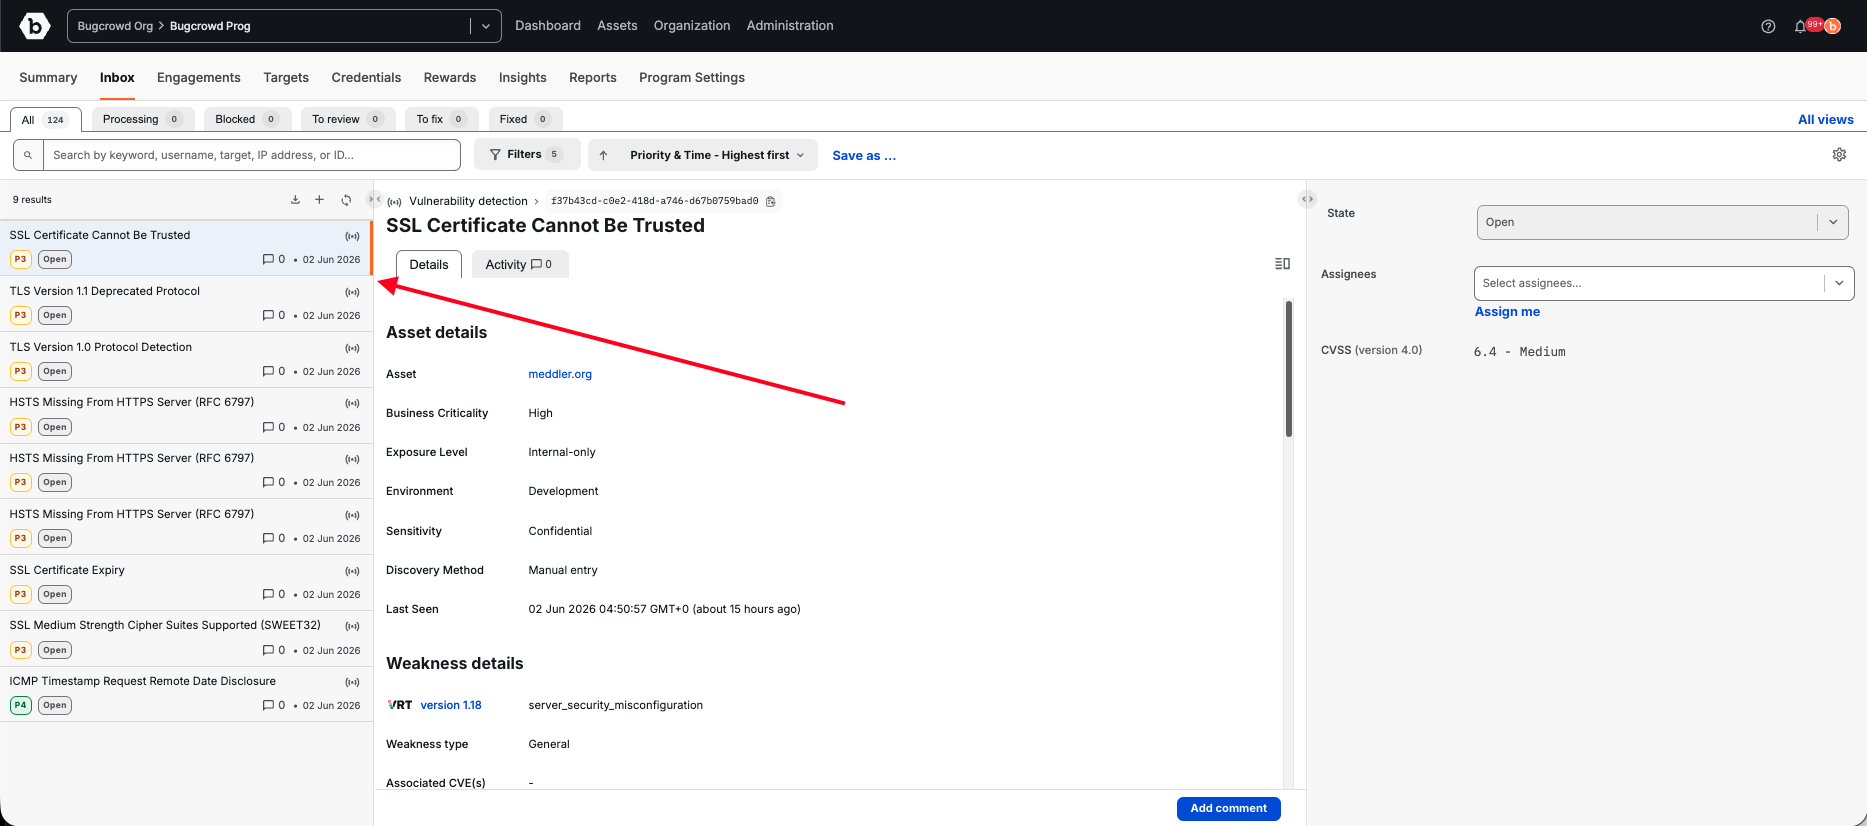
Open Filters then Issue Type then Vulnerability detection to isolate automated scan results from researcher submissions. Save this as a view (e.g., Automated Scans) by clicking Save as … for one-click access. By clicking each finding in the Inbox, it shows Asset Context, CVSS score, and Weakness Details with proof of detection. Use the State dropdown on each finding to progress it: Open then In review then Confirmed or False positive. Assign a team member via the Assignees field. Use the Activities tab for a full audit trail of who touched each finding and when.
Tip: Scan findings indicate potential exposure. Bugcrowd researcher findings are human-validated. Treat confirmed scan findings as triage candidates, not guaranteed critical issues.
6. Monitor quota and scan history
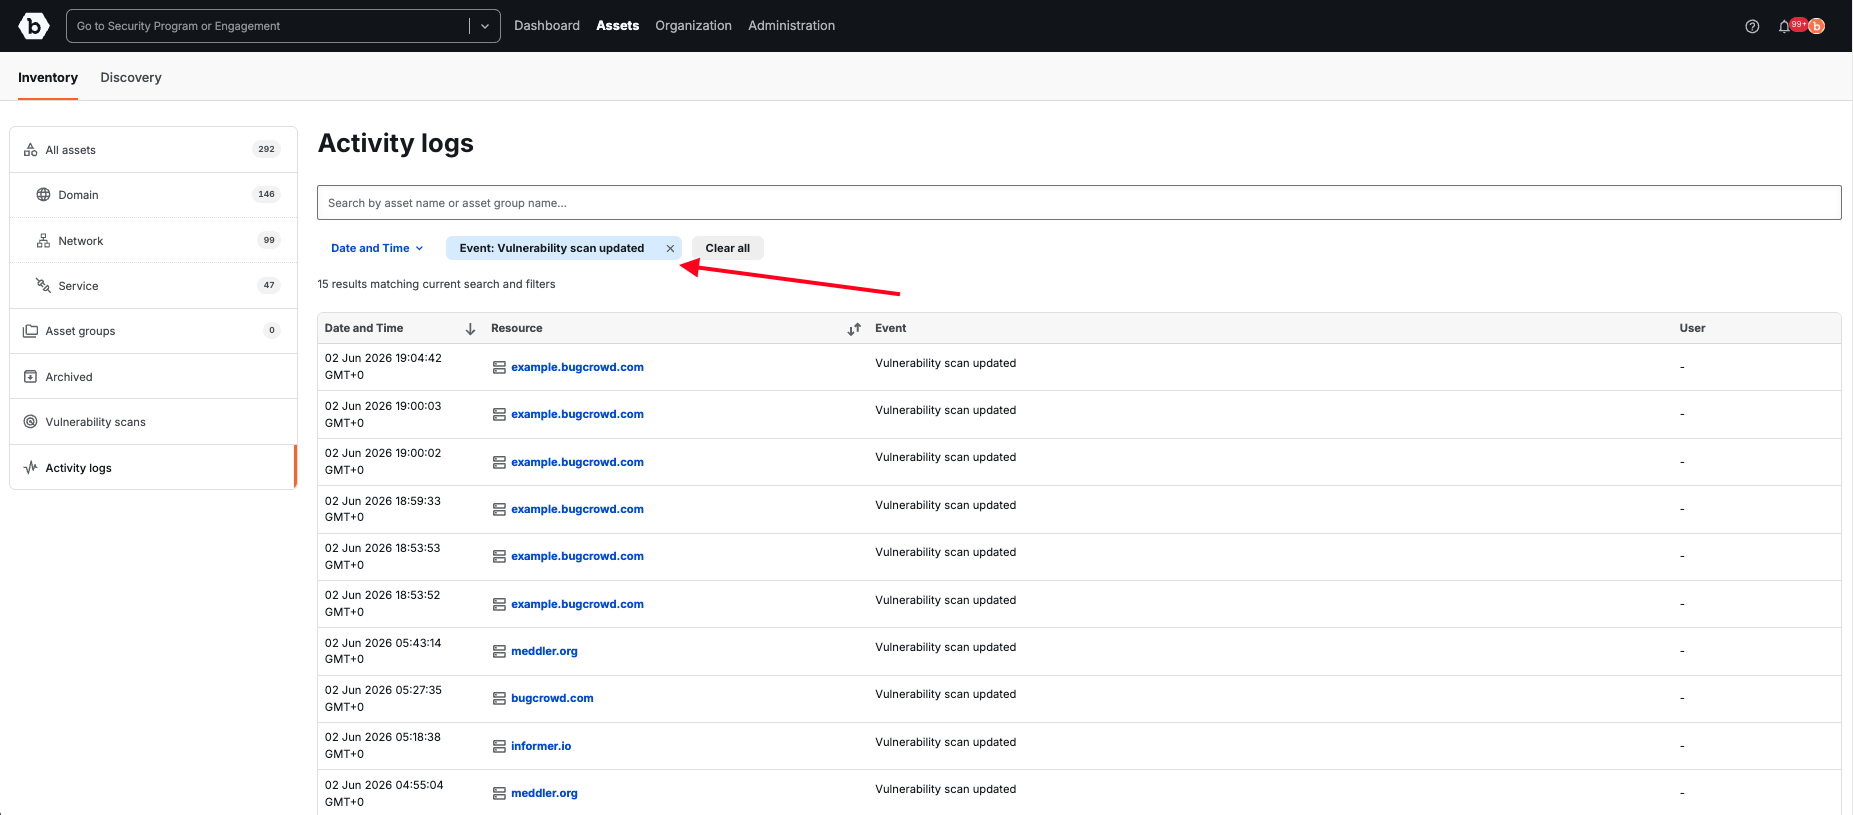
Track scan status (In Progress, Completed, Failed) in the Vulnerability scans tab on any asset detail page. Review the Activity Logs (Assets then Activity logs, filter by Vulnerability scan updated) for a timestamped audit trail across your entire estate. Standard customer accounts can scan 10 assets per week and this allocation is viewable on the Vulnerability scans tab as Weekly scan quota.
You now have an ongoing, prioritized view of externally detectable vulnerabilities across your approved asset inventory. The next step is doing an autonomous pentest to discover, validate, and exploit vulnerabilities in your newly discovered attack surface.
7. Reporting for application owners and leadership
Generate on-demand dashboards and exportable reports so application owners, business unit leads, and compliance stakeholders can see vulnerability posture and discovered attack surface without waiting on a manual data pull.
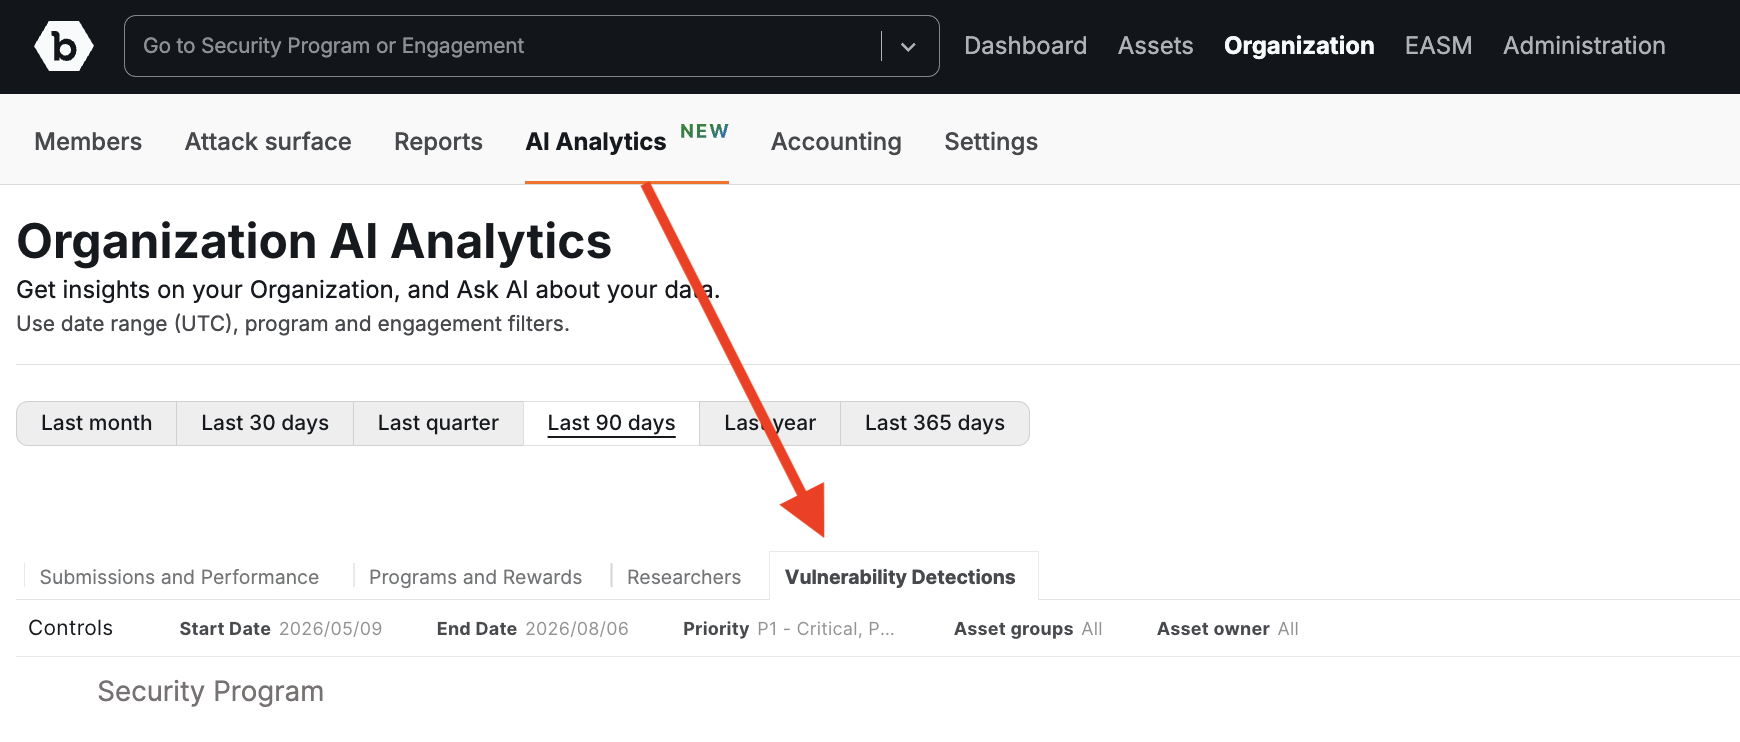
Navigate to Organization then AI Analytics, then click the Vulnerability Detections tab. Filter by date range, vulnerability priority, asset group, or asset owner to scope the view to a specific business unit or asset owner.
Note: This dashboard does not currently use an LLM, so Ask AI is disabled for this report tab.
A DNS records export gives you a point-in-time inventory of your discovered attack surface — asset names, types, and discovery source — filterable by creation date range. This is an artifact for auditors and boards used to that format. Use it to show stakeholders what’s new in scope since the last reporting period, to reconcile discovered assets against what leadership believes is owned, or to hand an auditor a defensible record of estate growth over a quarter — without waiting on engineering for a manual pull.
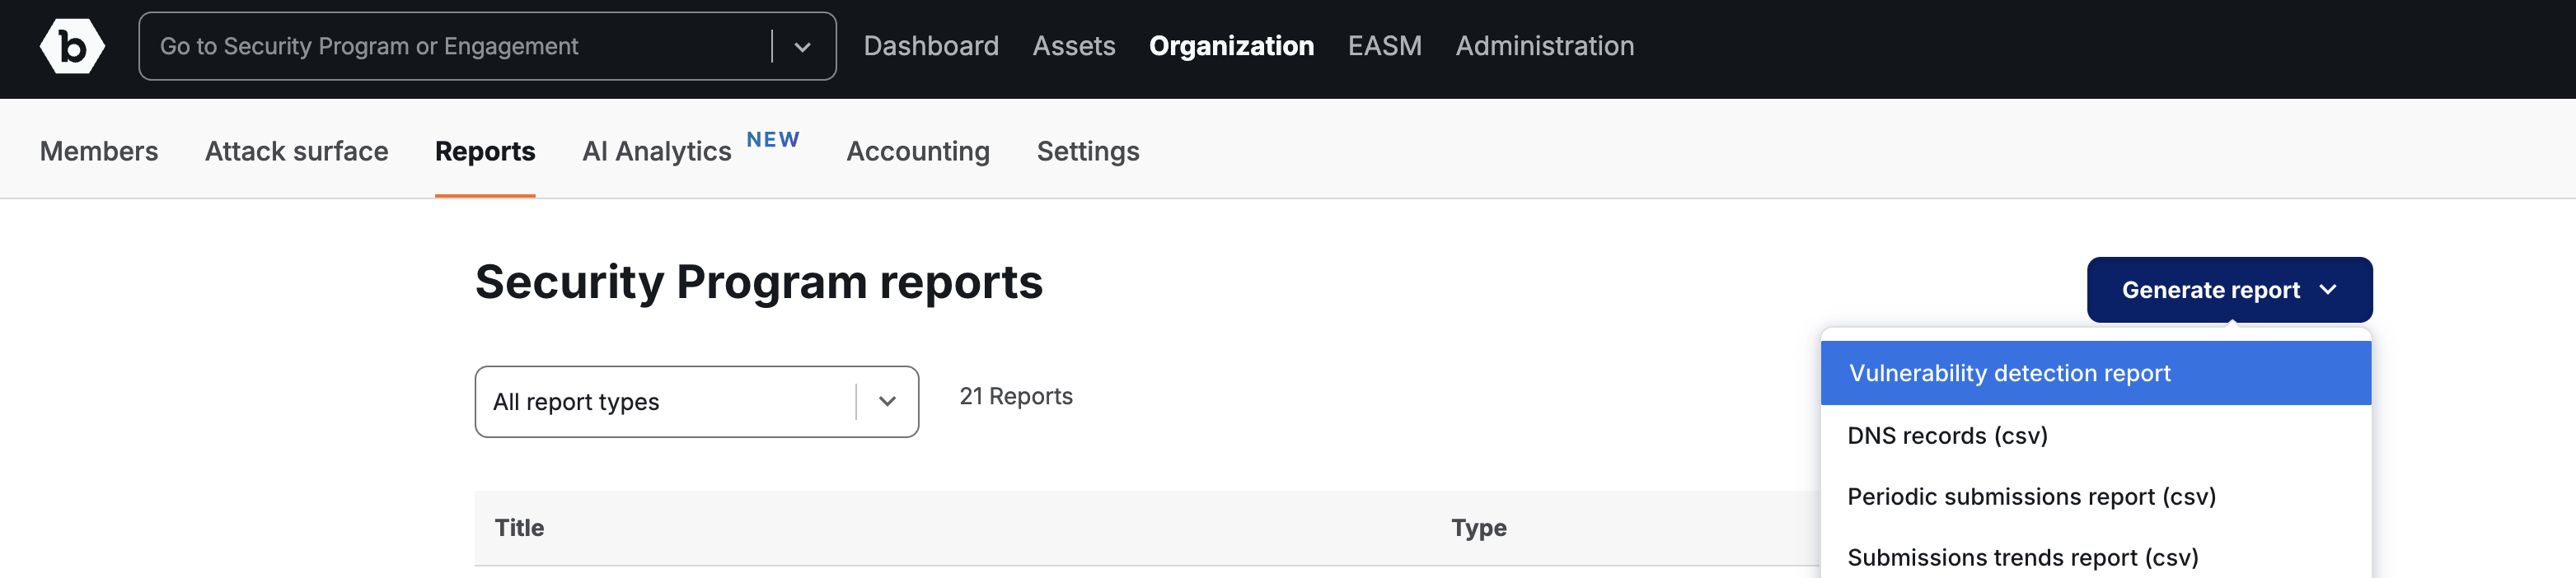
For the downloadable artifact of DNS records in your Asset inventory, go to Organization then Reports, click Generate report, and select DNS records (csv) from the dropdown. Provide a Report Title and Date Range, then click Generate report. You’ll receive an email from notifying you when the report is ready. All Owner roles can access and download generated reports from the Reports page.

For a PDF summary of the vulnerability findings on that discovered attack surface — scoped by date range, CVSS severity, and asset filters, and grouped by asset or by vulnerability — go to Organization then Reports, click Generate report, and select Vulnerability Detection Report instead.
Reports are timestamped point-in-time snapshots, not live documents — regenerate as needed for updated board or audit materials.
Together, this closes the loop from asset discovery through baseline coverage to stakeholder reporting.
For further information, see: