- Overview
- Finding Vulnerability Detections in Security Inbox
- Informational Finding Visibility
- Severity-Based Prioritization
- Understand finding sources
- Reviewing the Data
- Updating the Detection State
- Assignment and Audit Trail
- Reporting
Overview
Vulnerability detections are automated findings generated from our Tenable Nessus scan integration. These results are pushed directly to your designated Security Program, allowing you to monitor your attack surface on an ongoing basis and manage automated scan results alongside your crowdsourced submissions.
Finding Vulnerability Detections in Security Inbox
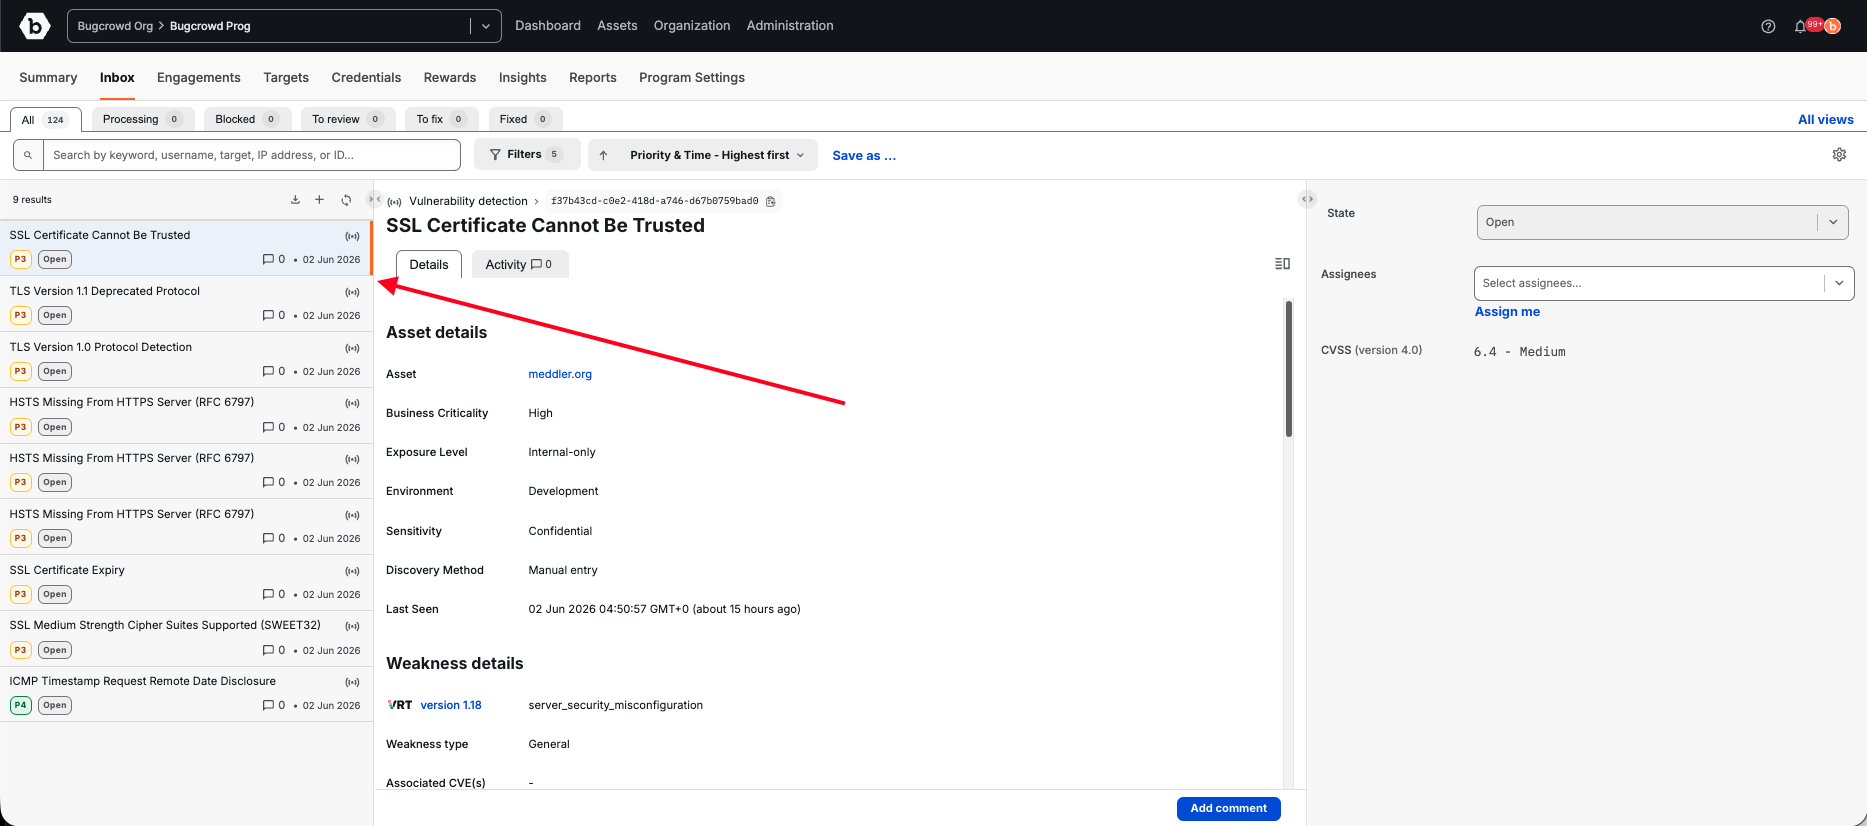
Vulnerability detections are identified by the signal icon in your Inbox list. To isolate these from manual researcher submissions:
- Open Filters: Click the Filters button at the top of the Inbox.
- Select Issue Type: Under General details, check the box for Vulnerability detection.
- Save View: You can Save as… a new view (e.g., Automated Scans) to access this list with one click in the future.
Tip: For further information on integrations, see”:Linking a Vulnerability Detection to Jira
Informational Finding Visibility
Informational Nessus findings (e.g., “Nessus Scan Information,” “SYN Scanners”) are hidden from your inbox by default to reduce noise – use the Show informational toggle to reveal them at any time. A count of informational findings from your most recent scan is always visible on the Vulnerability Scans page so nothing is permanently out of sight. Historical findings are also hidden by default and can be surfaced using the same toggle.
Severity-Based Prioritization
Findings are automatically sorted by Vulnerability Rating Taxonomy (VRT), which is derived from CVSS score, with zero-score and unassigned informational results filtered out by default – a banner indicates when findings are hidden so you always know your full count. It distinguishes between system-projected CVSS scores and user-confirmed scores, and both can be edited directly on the finding. Priority-based filters (P1, P2, P3) and recency (Time) ordering are selected by default across Submissions and Vulnerability detections in the Security Inbox.
Understand finding sources
The Security Inbox shows findings from multiple sources in one view:
- Vulnerability scan findings: From automated scanning of your approved assets
- Bugcrowd testing findings: From bug bounty programs, penetration tests, and VDPs.
Each finding is labeled with its source. You can filter by source if you are working a specific queue.
Note that vulnerability scan findings indicate potential exposure. Findings from Bugcrowd testing programs are researcher-validated and represent confirmed exploitability.
Reviewing the Data
Each finding contains specific metadata to help you prioritize:
- Asset Context: View the Business Criticality and Exposure Level to understand the risk profile of the affected host.
- Weakness Details: These fields provide technical details. For example, the Description field provides the specific proof discovered by the scan, such as service banners or response packets.
- CVSS Filters: Use CVSS filters to focus on higher impact detections (e.g., Critical 9.0 - 10.0 or High 7.0 - 8.9).
- Severity: The CVSS score in the right-hand sidebar provides a standardized numerical rating (e.g., 2.6) to help gauge impact.
Updating the Detection State
As you process these findings, use the State dropdown in the right-hand sidebar to update the status. This keeps your security posture accurate and clears the Open queue.
| State | Description |
|---|---|
| Open | New findings awaiting initial triaging. |
| In review | Currently being investigated. |
| Confirmed | Validated as a real risk that requires a fix. |
| False positive | The scan result is incorrect or the risk is already mitigated elsewhere. |
| Remediated | The vulnerability has been patched or the configuration updated. |
Assignment and Audit Trail
- Assignees: Use the Assignees field to tag the specific team member responsible for the fix.
- Activity Feed: Switch to the Activities tab to see the history of the detection, including when it was first reported and who has changed its status.
Tip: One Security Program must be designated to receive Vulnerability Detection results. If you need to change which program receives these automated findings, please contact your Bugcrowd account team to update your integration settings.
Reporting
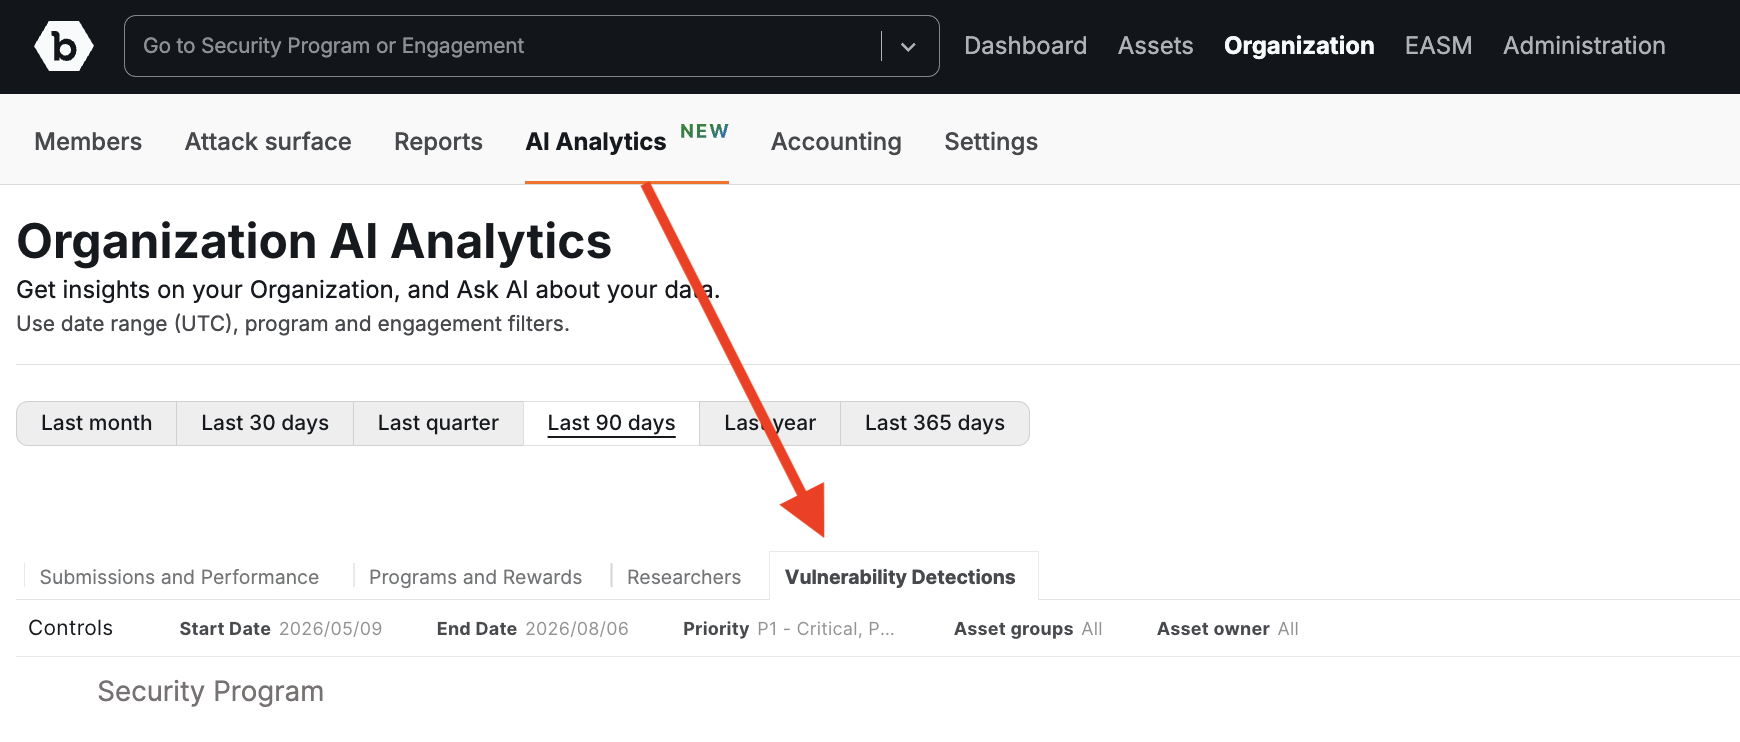
Once findings are triaged, surface them in aggregate via Organization then AI Analytics then Vulnerability Detections for priority trends, open-vs-resolved views, and asset criticality breakdowns — filterable by date, asset group, vulnerability priority, and asset owner.
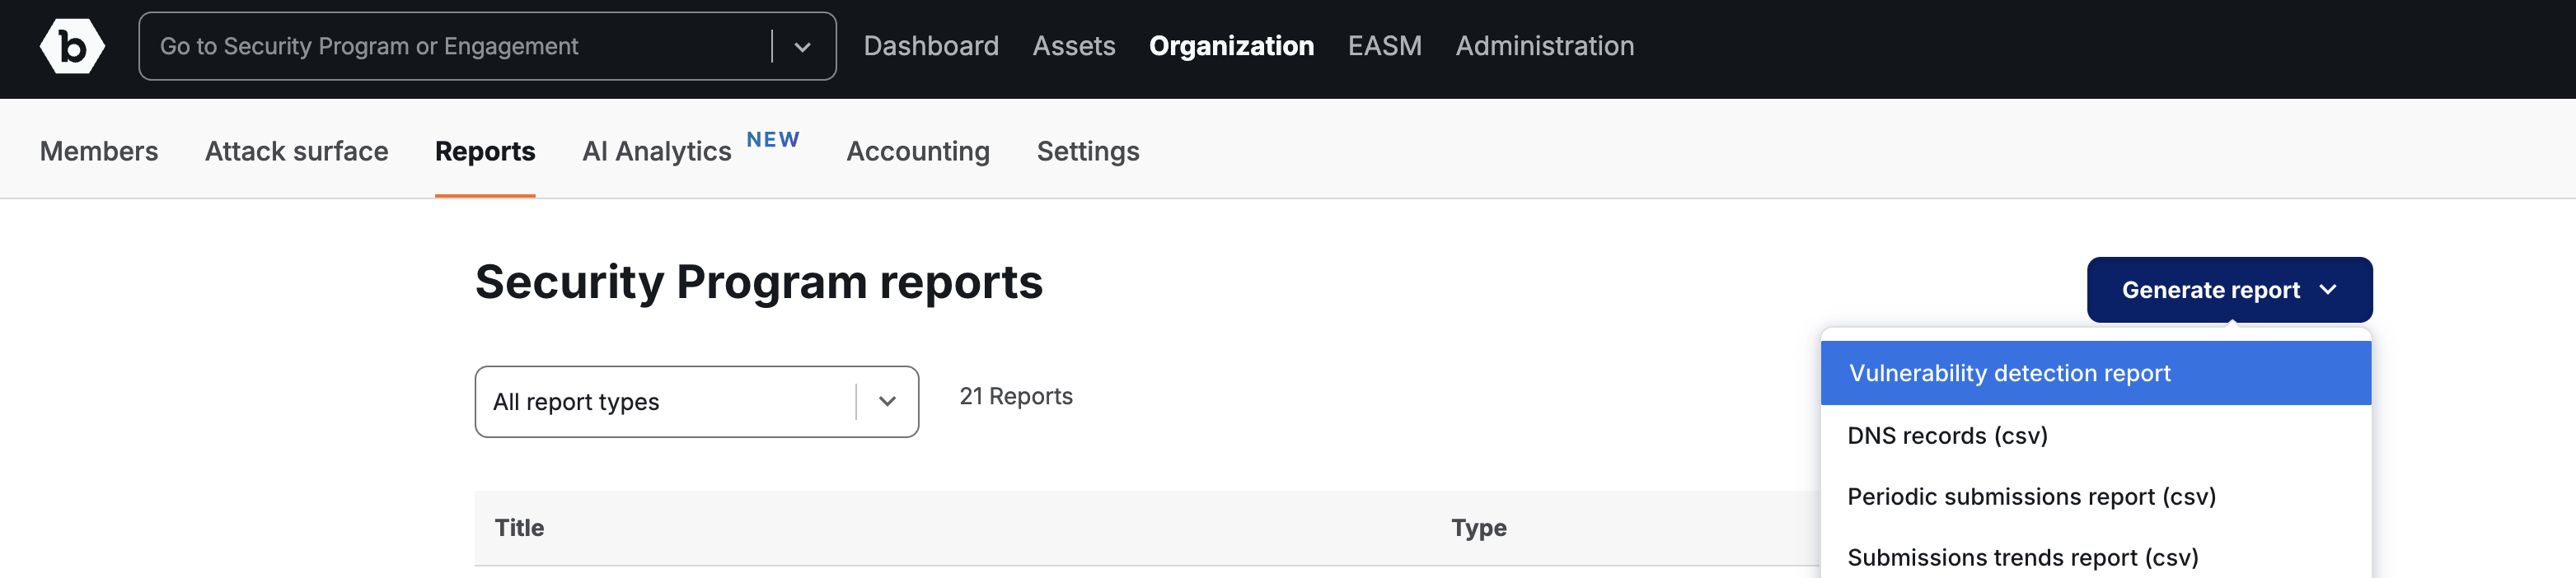
For a downloadable artifact, generate a DNS records (csv) report from Organization then Reports to hand to auditors or leadership.

For a detailed PDF summary of the findings themselves — scoped by date range, CVSS severity, and asset filters, and grouped by asset or by vulnerability — generate a Vulnerability Detection Report from Organization then Reports instead.
Tip: Reports are timestamped, point-in-time snapshots — regenerate as needed for updated board or audit materials.
For further information, see: