- Inventory Management & Risk Scoring
- Scan Eligibility: What gets in the queue? -
- Queueing & Prioritization
- The Scanning Process
- Auditing & Results
- User Control: How to stop a scan? -
Efficient vulnerability management begins with knowing what you have and how critical it is. This guide will walk you through the process of prioritizing your assets for the vulnerability scanning process.
Inventory Management & Risk Scoring
Before an asset can be scanned, it must be properly identified and prioritized within your Asset Inventory.
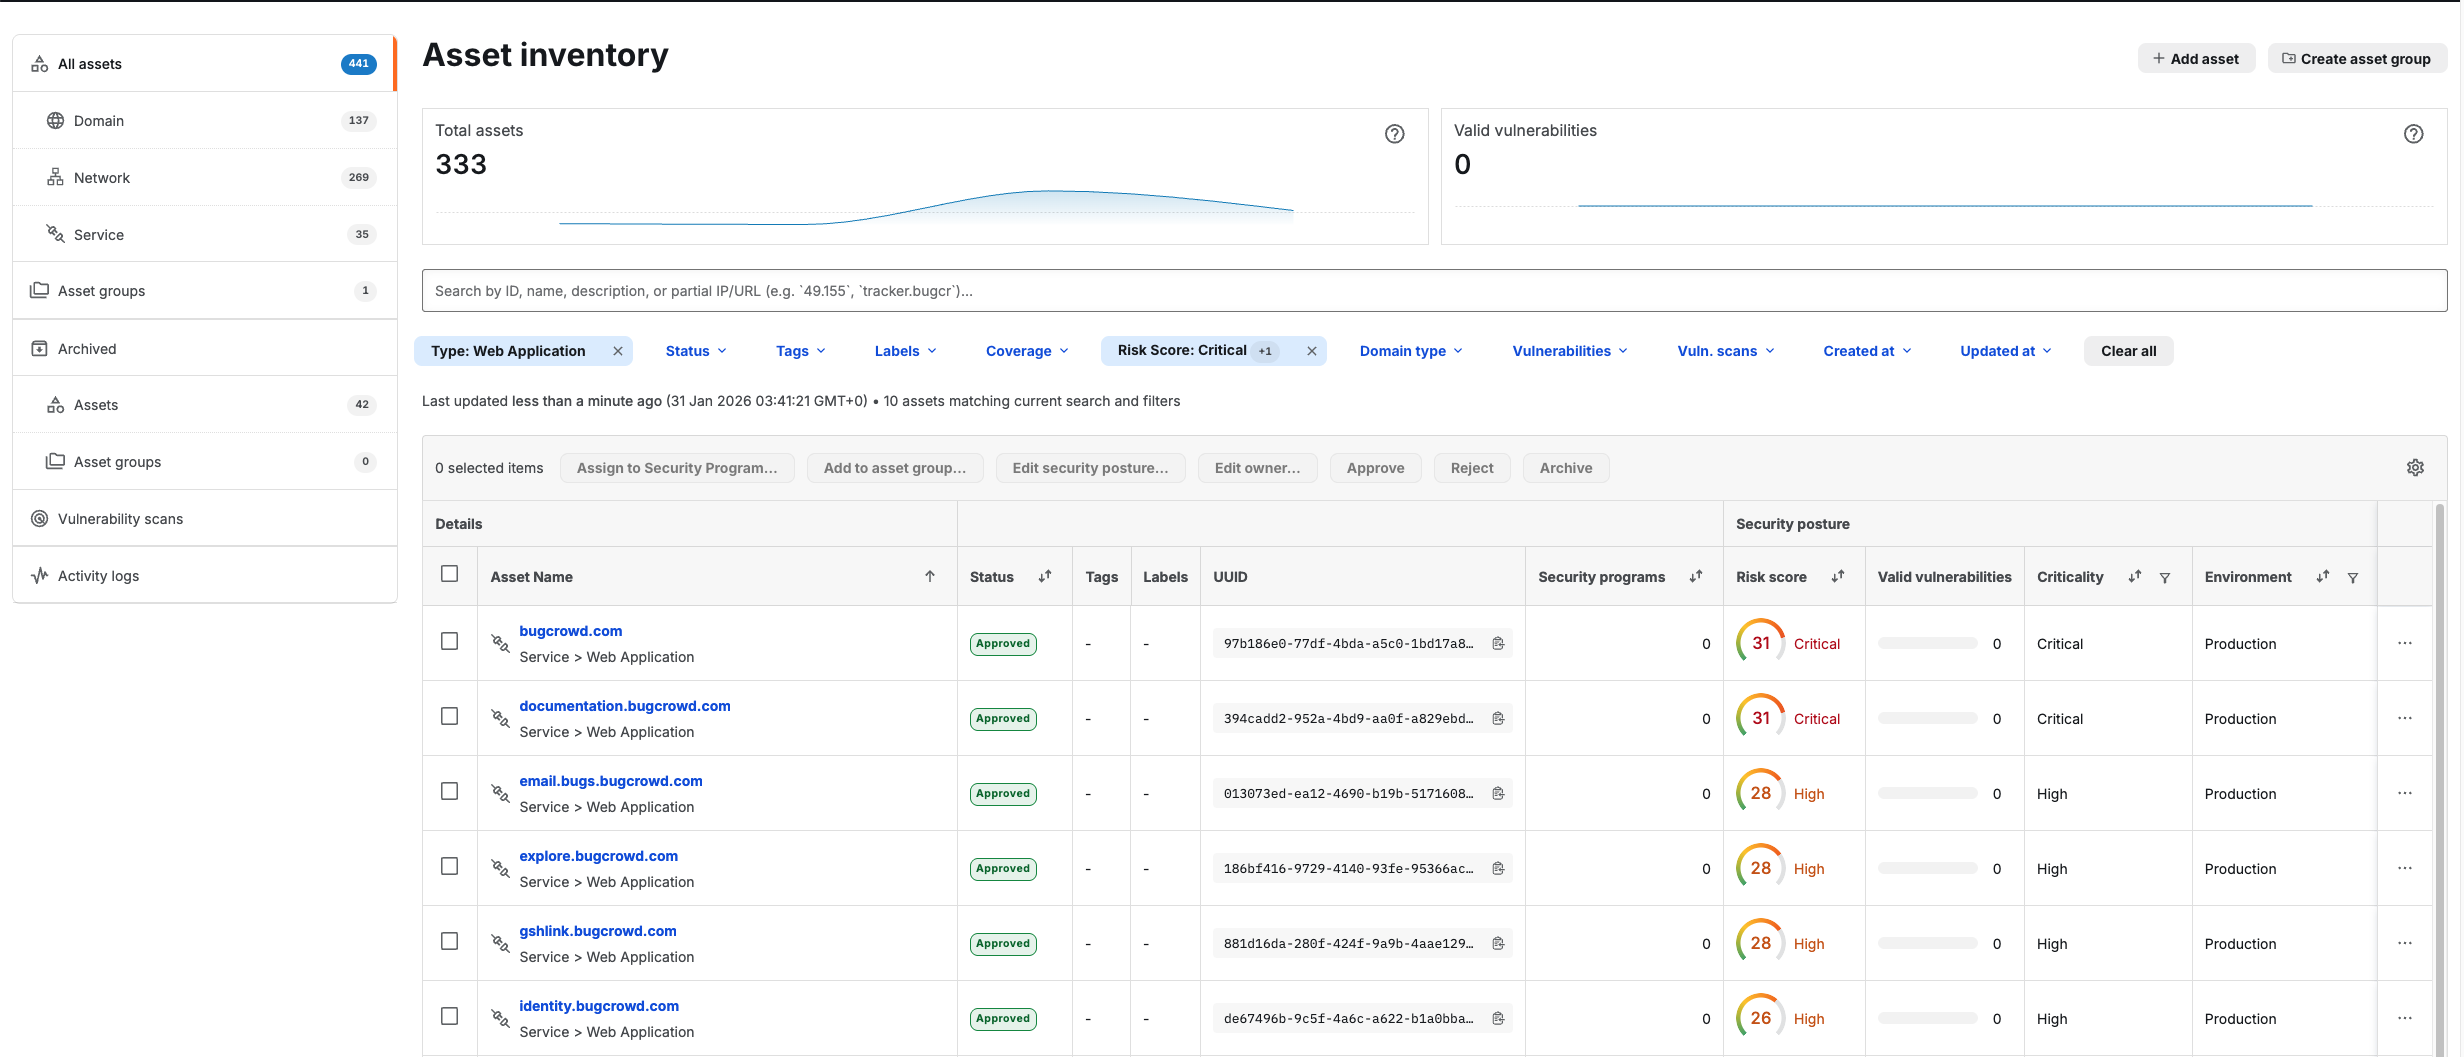
Reviewing Assets
Use the Asset Inventory dashboard to see a bird’s-eye view of your total assets, such as Domains, Networks, and Services.
Assigning Risk Scores
Vulnerability scanning is prioritized based on the Risk Score (Critical to Low). Assets with higher risk scores will be prioritized (see Asset Risk Score for more details).
Approval Workflow
Ensure assets are in the “Approved” status to be eligible for automated security programs.
Scan Eligibility: What gets in the queue? -
For an asset to be automatically queued for scanning, it must meet two specific conditions:
- Status is “Approved”: Only assets explicitly marked as “Approved” in the inventory are eligible.
- Risk Score is Present: An asset must have an assigned Risk Score to enter the workflow (e.g., Critical, High, or Moderate).
Queueing & Prioritization
The system manages the scanning list through a continuous, two-step process:
- Continuous Queueing: Every 5 minutes, the scheduler checks for new eligible assets and adds them to the queue.
-
Dynamic Prioritization: The queue is automatically reordered based on two levels:
- Primary (Risk Score): Assets with the highest Risk Scores are moved to the front of the line.
- Tie-Breaker (Asset Age): If multiple assets have the same Risk Score, the oldest asset (based on the “Created at” date) is scanned first.
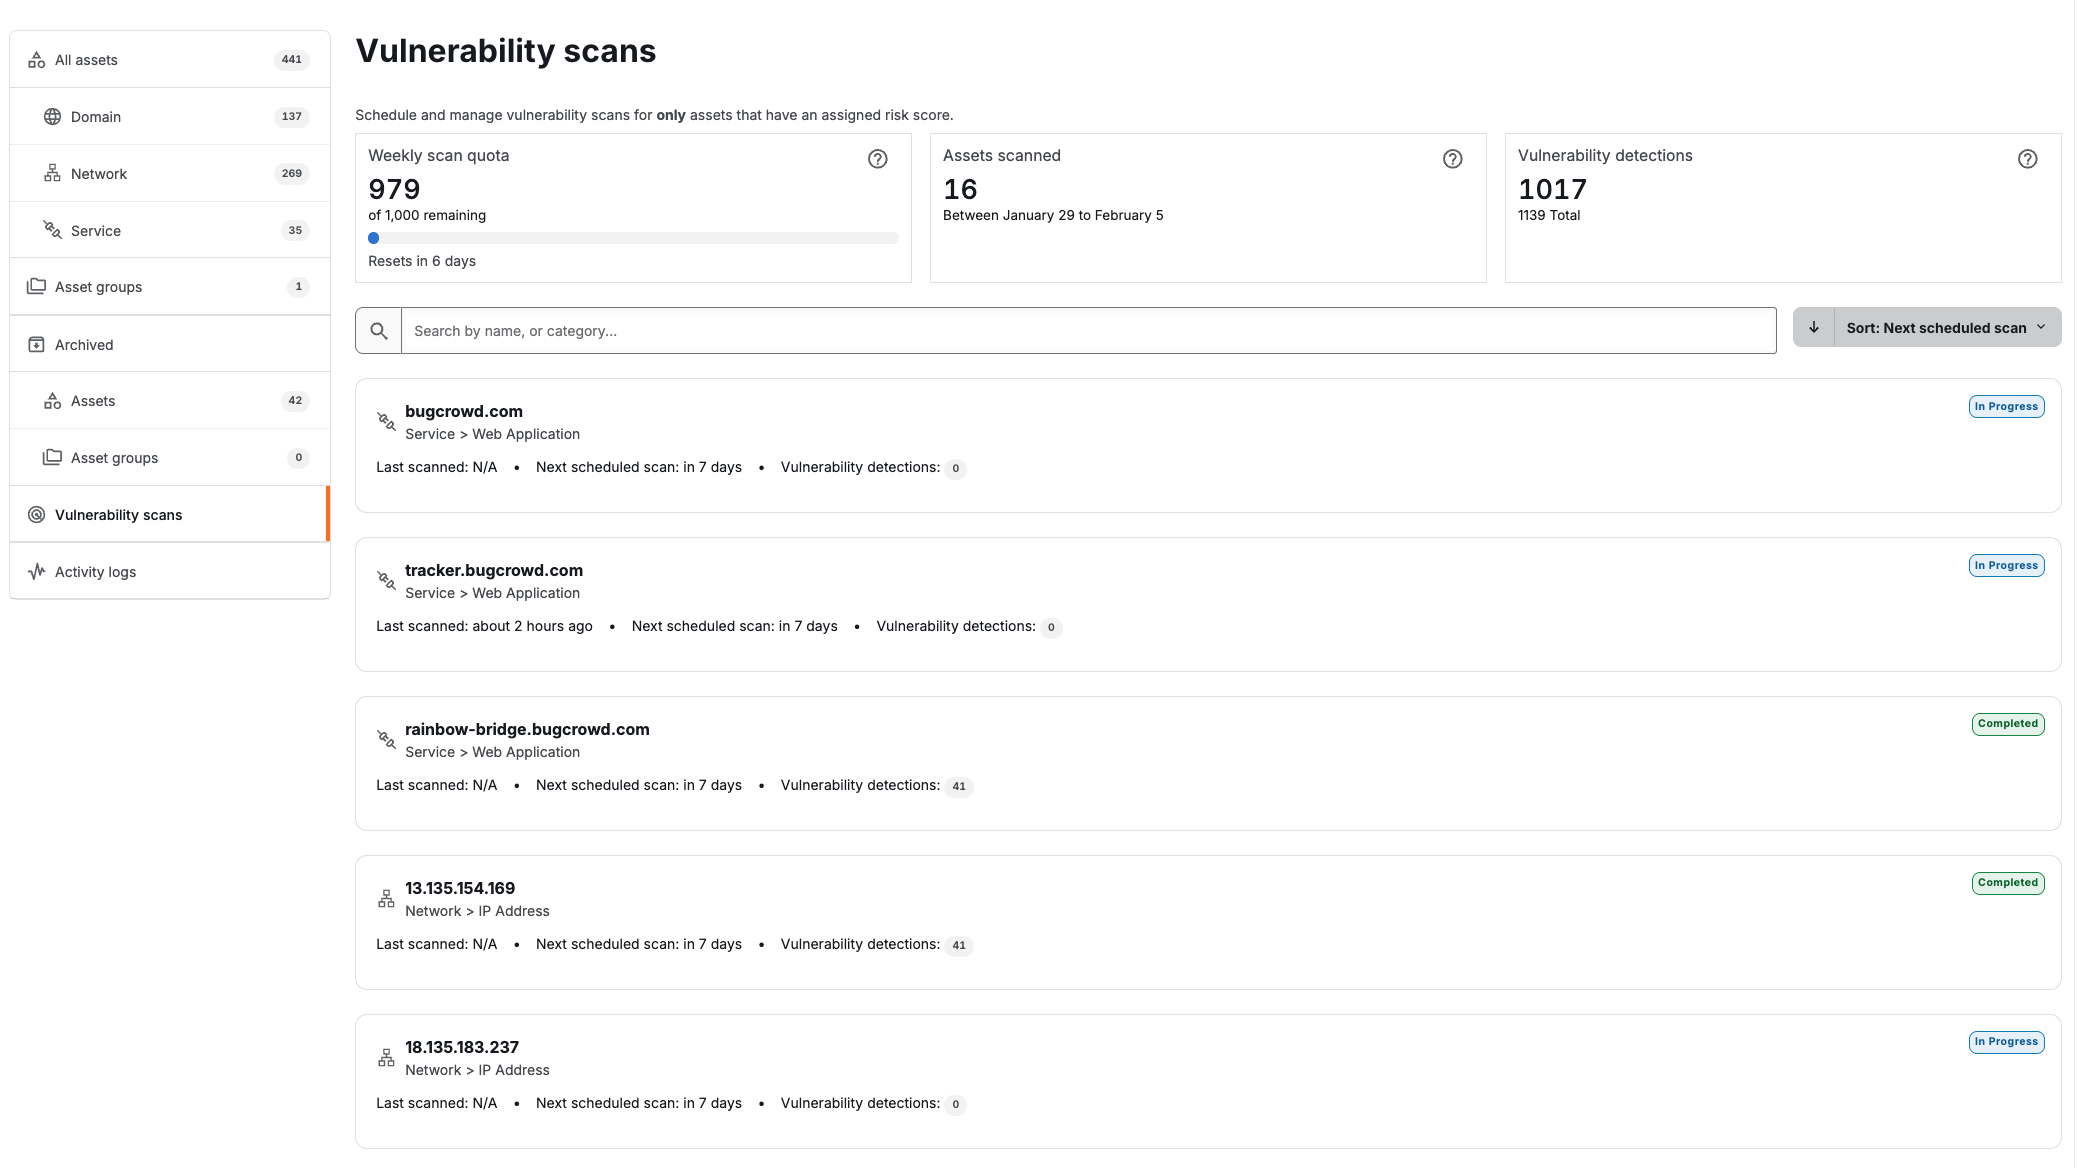
The Scanning Process
The transition from “queued” to “scanning” depends on your specific settings and limits:
- Scheduled Frequency: Assets are not scanned immediately upon being queued; they are sent to scan based on your organization’s set frequency, such as weekly or quarterly.
- Batching & Quota: When the scheduled time arrives, the scheduler sends a “batch” of the highest-priority assets while respecting your available scan quota.
- In-Progress Monitoring: You can view live scans in the Vulnerability scans tab, which displays an “In Progress” badge and the next scheduled scan date.
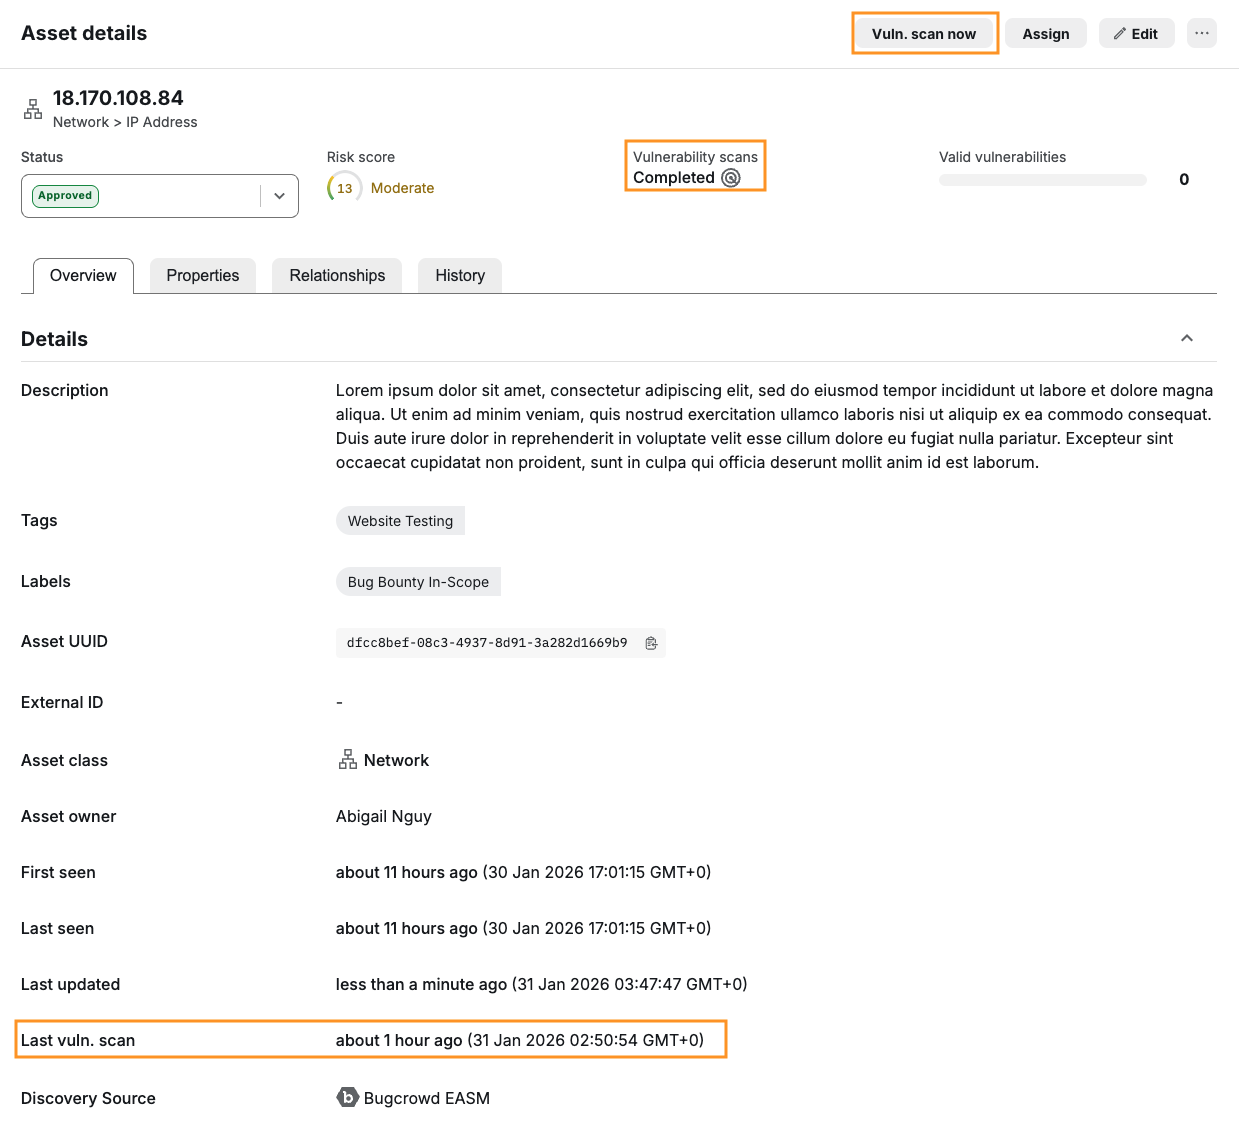
- Manual Override: If you need an immediate scan outside of the schedule, you can click “Vuln. scan now” in the Asset details on any individual asset.
Auditing & Results
Once a scan is triggered or completed, you can track the activity through multiple views:
- Activity Logs: Filter by the event Vulnerability scan updated to see a timestamped audit trail of when specific resources were refreshed.
-
Asset Details: The Asset details page shows:
- Vulnerability scans: The status of the vulnerability scan.
- Last vuln. Scan: The timestamp of the last scan.
| Status | Meaning | Action Required |
|---|---|---|
| In Progress | Scan is currently running. | Wait for completion; do not restart. |
| Completed | Scan finished successfully. | Review the ‘Vulnerability Detections’ count. |
| N/A | Initial scan completed. | Check Next scheduled scan date for next scheduled scan. |
User Control: How to stop a scan? -
To remove an asset from the scheduler’s queue, you must manually make it ineligible by:
- Un-approving the asset: Changing its status from “Approved”.
- Removing the Risk Score: Clearing the score removes it from the prioritization logic.
- Archiving the asset: Moving the asset to the “Archived” section.
Considerations
- Lowering a Risk Score (e.g., from Critical to Moderate) will not stop the scan. It will only lower the asset’s priority in the queue, potentially resulting in it not being scanned if your quota is exhausted by higher-priority items.
- Monitor your quota and if your “Weekly scan quota” is near zero, contact your Account Manager to increase your limit.