- Overview
- Finding Detections in Security Inbox
- Reviewing the Data
- Updating the Detection State
- Assignment & Audit Trail
Overview
Vulnerability detections are automated findings generated from our OpenVAS integration. These results are pushed directly to your designated Security Program, allowing you to monitor your attack surface continuously and manage automated scan results alongside your crowdsourced submissions.
Finding Detections in Security Inbox
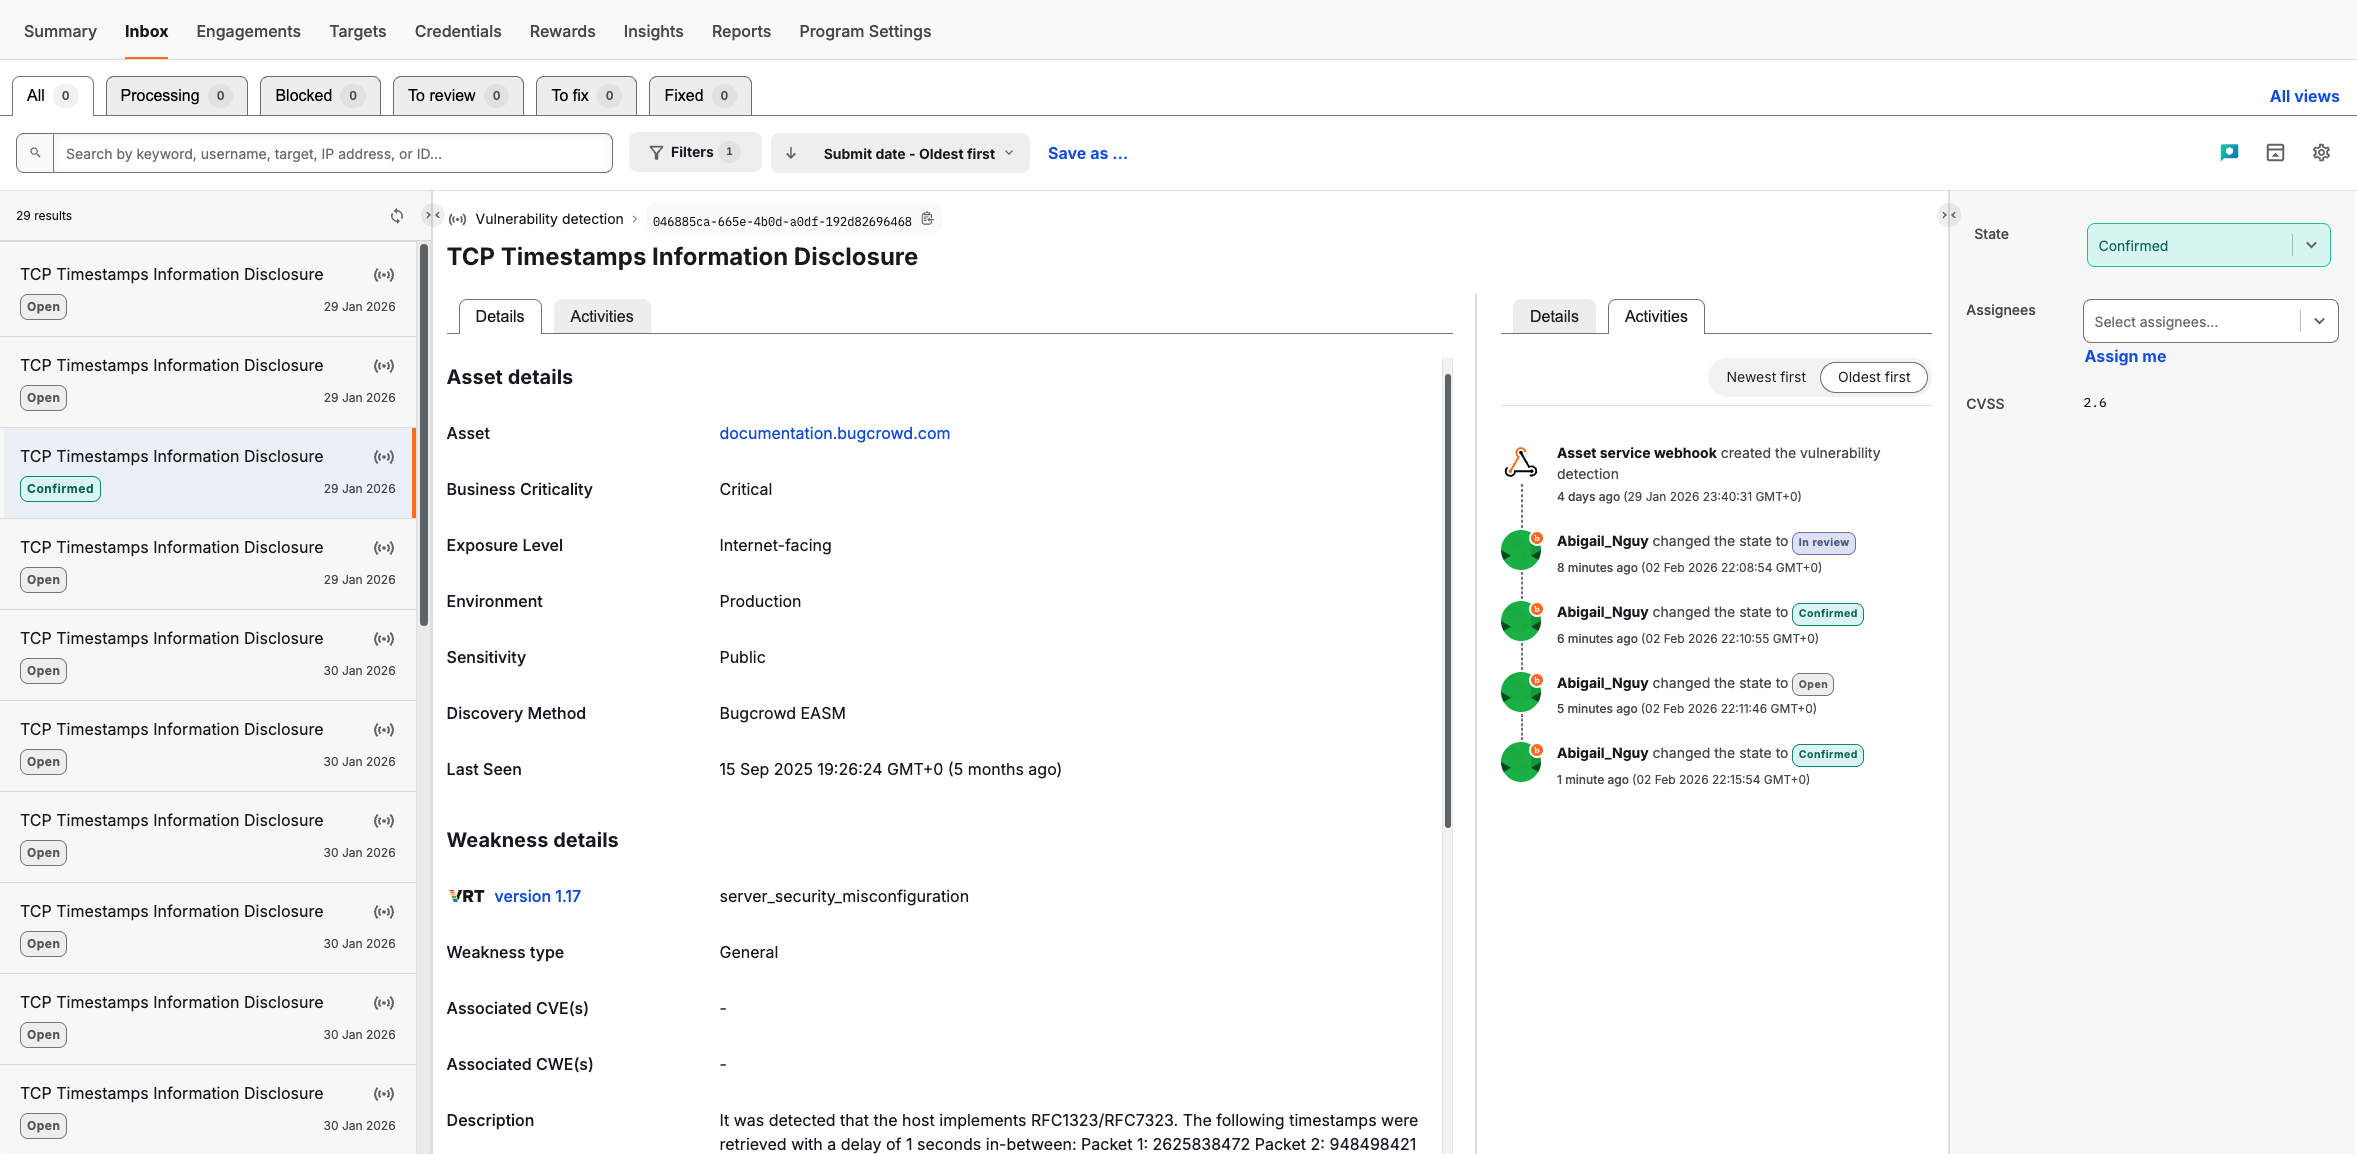
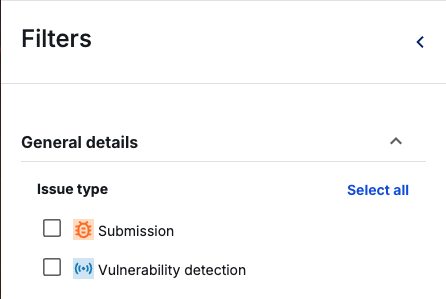
Vulnerability detections are identified by the “signal” icon in your Inbox list. To isolate these from manual researcher submissions:
- Open Filters: Click the Filters button at the top of the Inbox.
- Select Issue Type: Under General details, check the box for Vulnerability detection.
- Save View: You can “Save as…“ a new view (e.g., “Automated Scans”) to access this list with one click in the future.
Reviewing the Data
Each finding contains specific metadata to help you prioritize:
- Asset Context: View the Business Criticality and Exposure Level to understand the risk profile of the affected host.
- Weakness Details: These fields provide technical details. For example, the Description field provides the specific proof discovered by the scan, such as service banners or response packets.
- CVSS Filters: Use CVSS filters to focus on higher impact detections (e.g., Critical 9.0 - 10.0 or High 7.0 - 8.9).
- Severity: The CVSS score in the right-hand sidebar provides a standardized numerical rating (e.g., 2.6) to help gauge impact.
Updating the Detection State
As you process these findings, use the State dropdown in the right-hand sidebar to update the status. This keeps your security posture accurate and clears the “Open” queue.
| State | Description |
|---|---|
| Open | New findings awaiting initial triaging. |
| In review | Currently being investigated. |
| Confirmed | Validated as a real risk that requires a fix. |
| False positive | The scan result is incorrect or the risk is already mitigated elsewhere. |
| Remediated | The vulnerability has been patched or the configuration updated. |
Assignment & Audit Trail
- Assignees: Use the “Assignees” field to tag the specific team member responsible for the fix.
- Activity Feed: Switch to the Activities tab to see the history of the detection, including when OpenVAS first reported it and who has changed its status.
Tip: One Security Program must be designated to receive Vulnerability Detection results. If you need to change which program receives these automated findings, please contact your Account Manager to update your integration settings.