- Understanding the Security Posture Report
- Security Posture Report Sections
- Generating Security Posture Report
Understanding the Security Posture Report
The Security Posture Report provides information about the type, severity, the number of vulnerabilities received, your team’s ability to quickly act, and learn from findings. This report helps in identifying trends in response and resolution times, and changes to the received vulnerabilities. Based on industry benchmarks, you can quickly map your progress compared to industry peers. The report is generated as a PDF file.
Security Posture Report Sections
The Security Posture Report includes the following sections:
- Executive Summary: Provides the purpose of the report and summarizes the report details.
- Resolution Trend: Includes a graph that shows how quickly your organization is resolving submissions. It shows the time taken between acceptance and resolution for submissions.
- Opportunities: Provides information about how your organization is performing compared to the peers in your industry. Based on this information along with an understanding of unique industry trends, Bugcrowd may recommend actions that can help to improve submission volume.
-
Security Posture: Provides information about the following:
- Number of open vulnerabilities for your program or engagement.
- Targets in your program or engagement that have the most submissions.
- Targets that require additional attention from your team.
- Submissions: Provides details of valid submissions for the last 30 days.
Generating Security Posture Report
To generate a Security Posture Report, follow these steps:
1. After logging into Crowdcontrol, select a program or engagement from the drop-down menu, and then click the Reports menu. The Reports page is displayed.

2. Click Generate report and then click Security Posture Report.

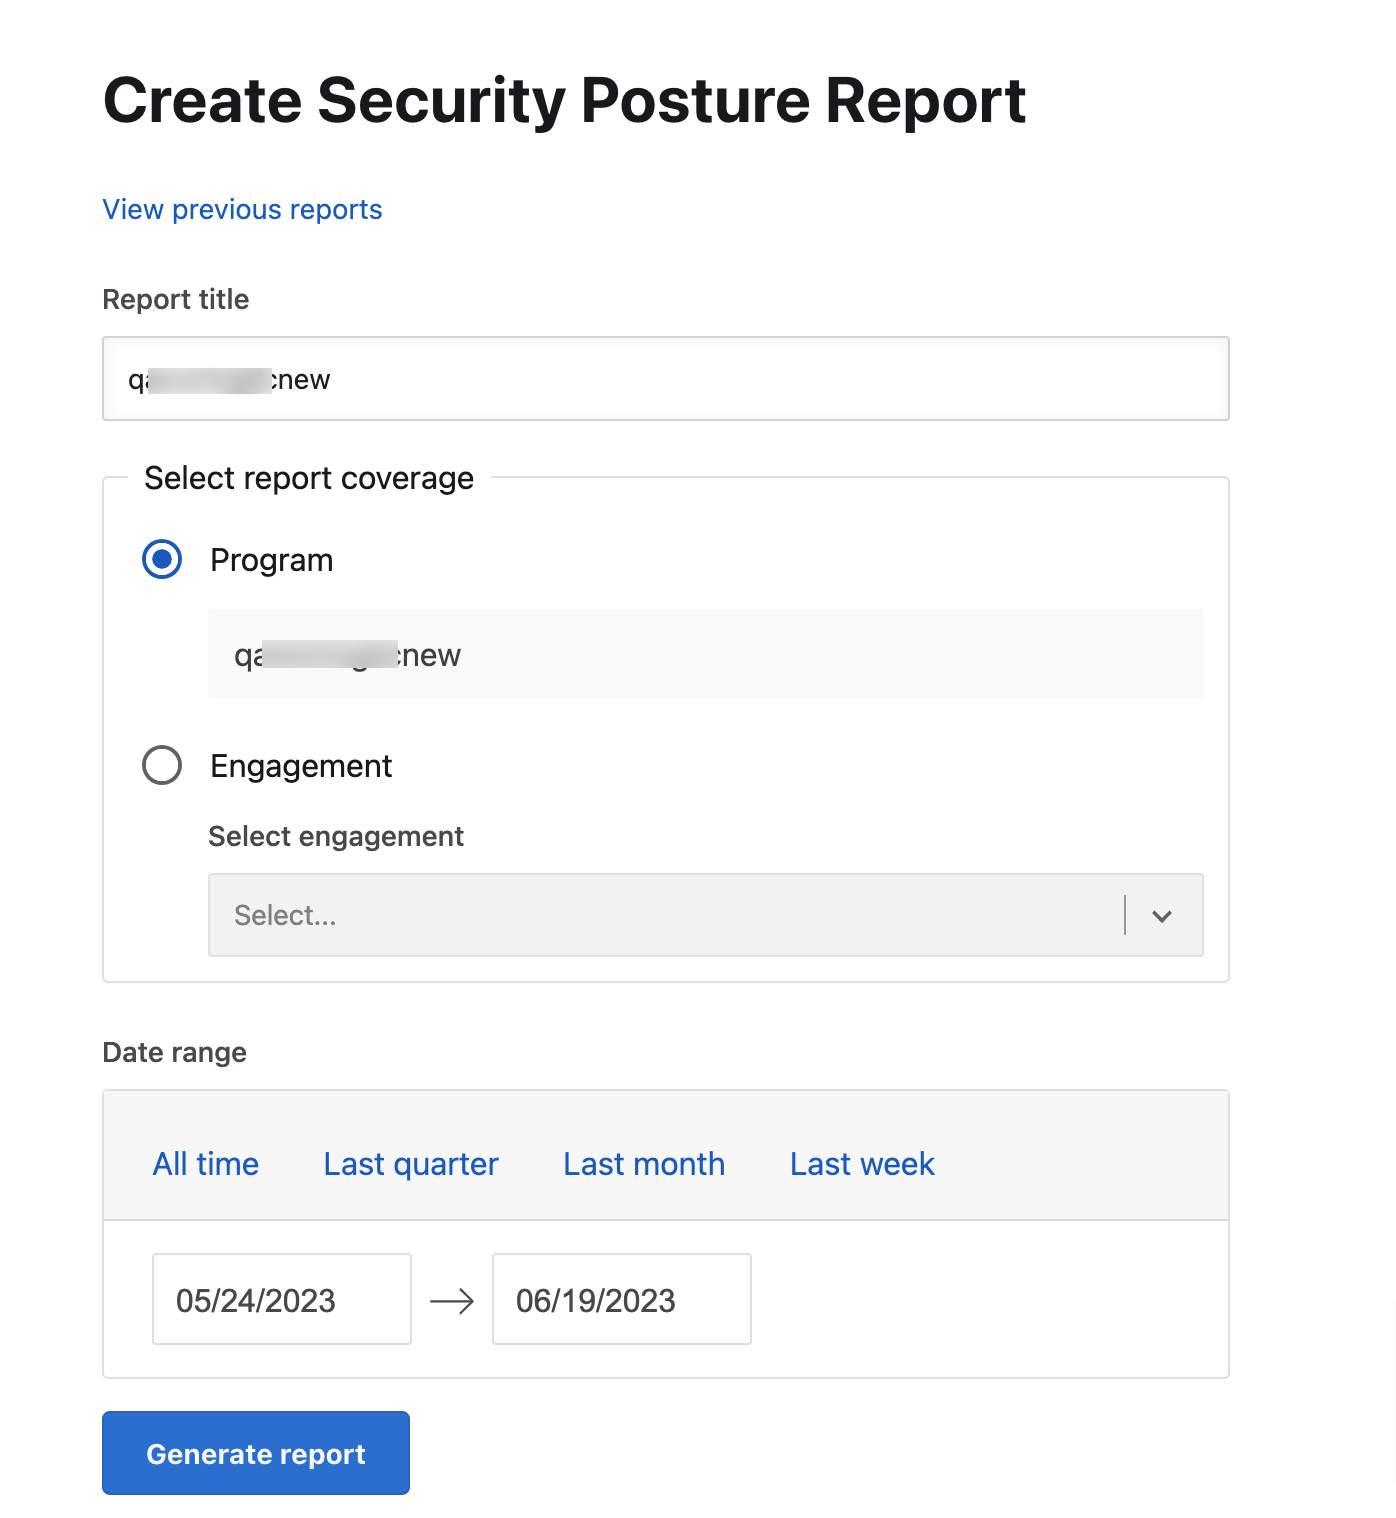
The Create Security Posture Report page is displayed.
3. Provide the following information:
- Report title: Title for the report.
- Select report coverage: Displays the program or engagement name for which you want to generate the report. The Program field is read-only, and the Engagement field allows you to select an engagement.
-
Date Range: Specify a data range for generating the report. You can also click any of the following to specify the date range:
- All time: Includes data since program or engagement was launched.
- Last quarter: Includes program or engagement data for the last three months of the previous calendar year.
- Last month: Includes program or engagement data for the first to last day of the previous calendar month.
- Last week: Includes program or engagement data for the last week calendar date from Monday to Saturday.

4. Click Generate report. You will receive an email to download the report.
The generated report is displayed as a link on the Reports page. Refresh the page to view the link.
5. Click the link to view the report details. The link opens the report on your system’s browser. You can view, download, and print the report. You can also view, download the report from the link received in your email.

Note: The report title link is active only after the PDF report is generated.
