- Authorizing Jira Cloud (OAuth 2.0)
- Authorizing Jira Data Center (OAuth 2.0)
- Authorizing Jira Using Username and Password
To manage issues within Jira, Crowdcontrol must have access to your instance. Bugcrowd provides OAuth solutions to enable this access, for Jira Cloud and Data Center products.
Note: You must have administrator access in Jira for authorizing Crowdcontrol to access your Jira account.
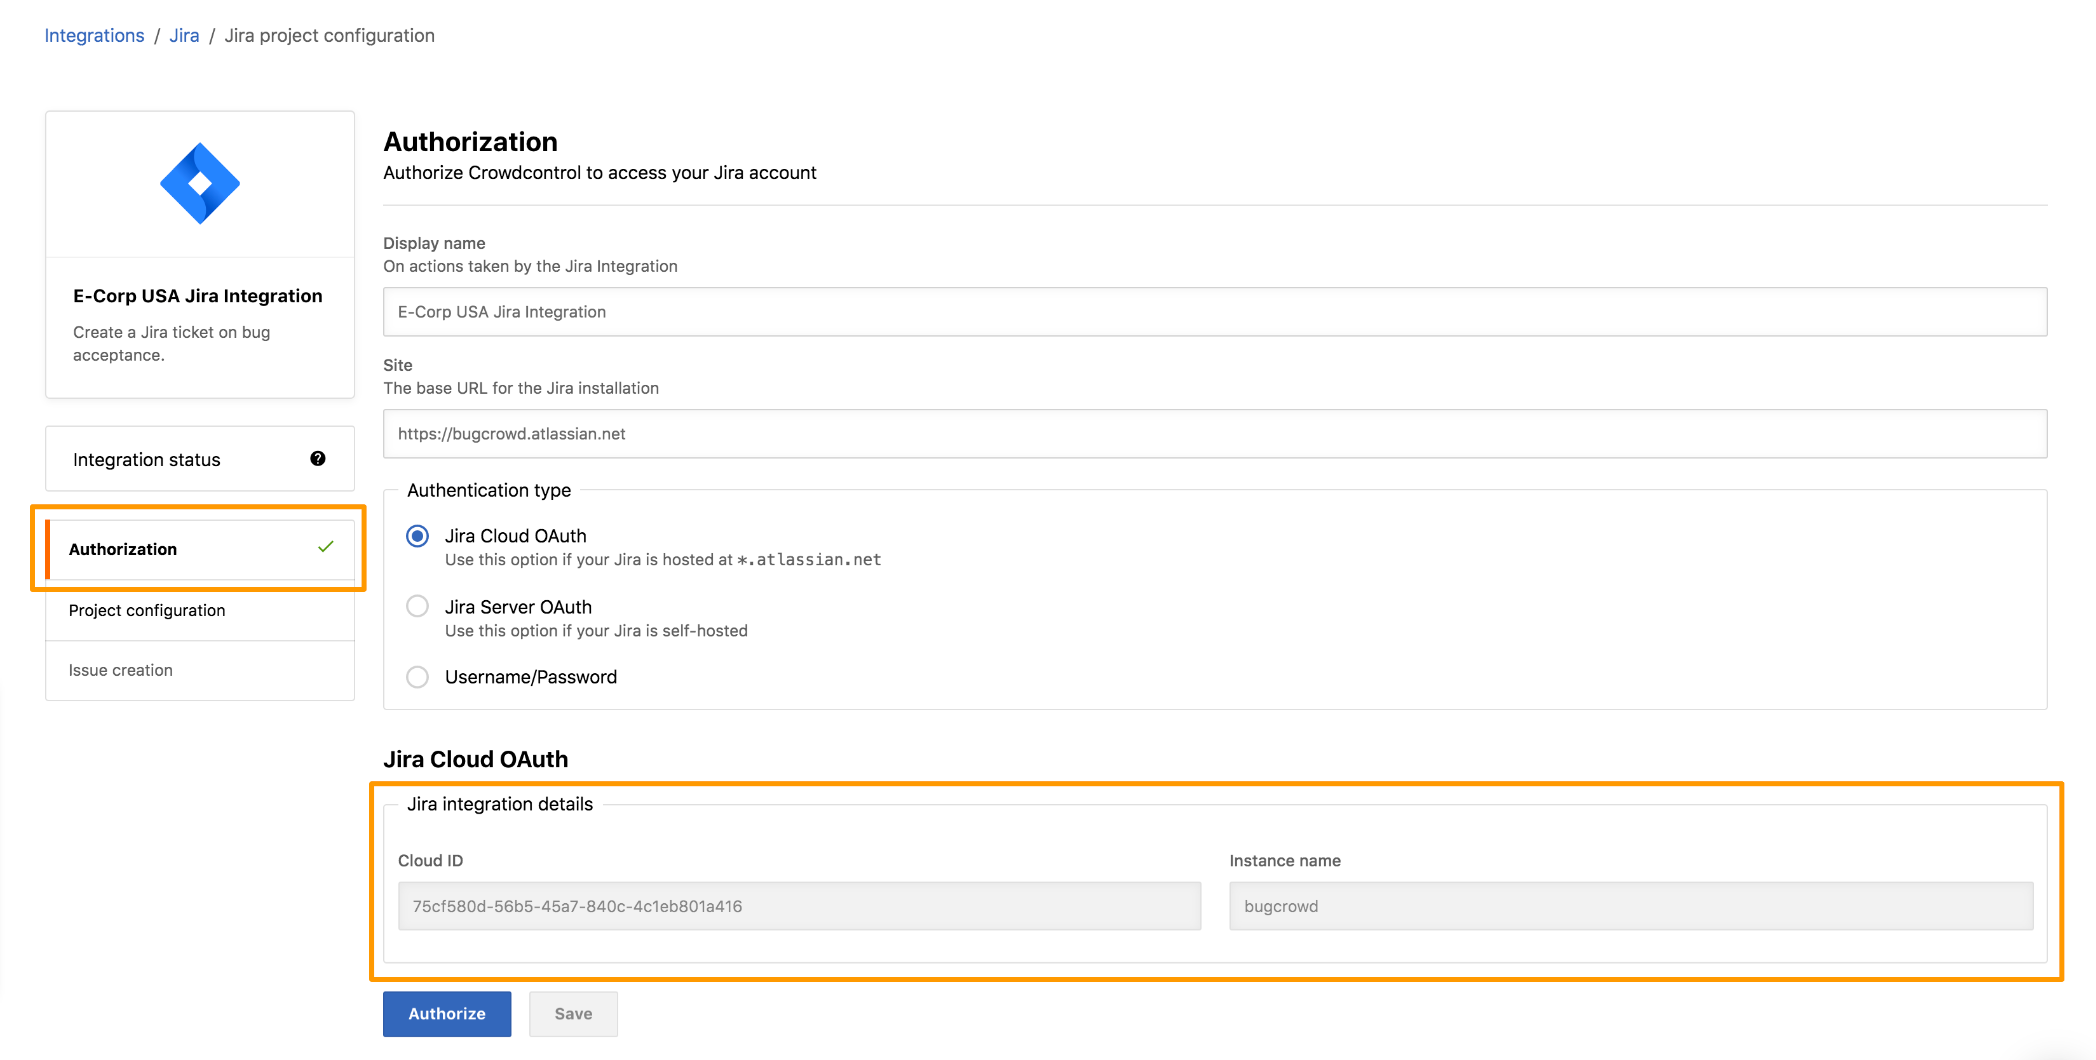
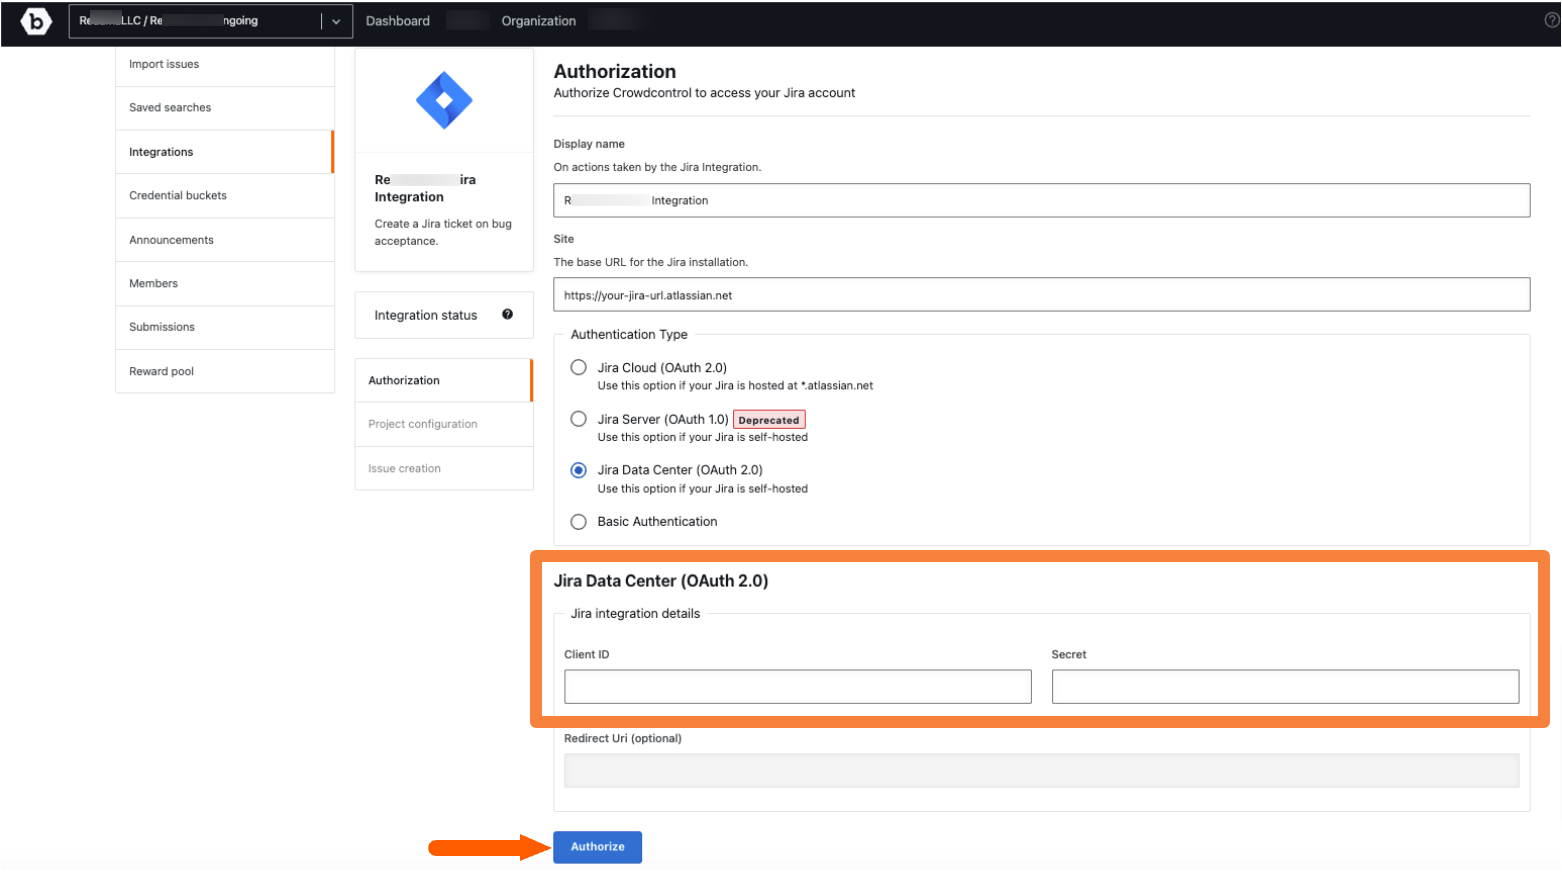
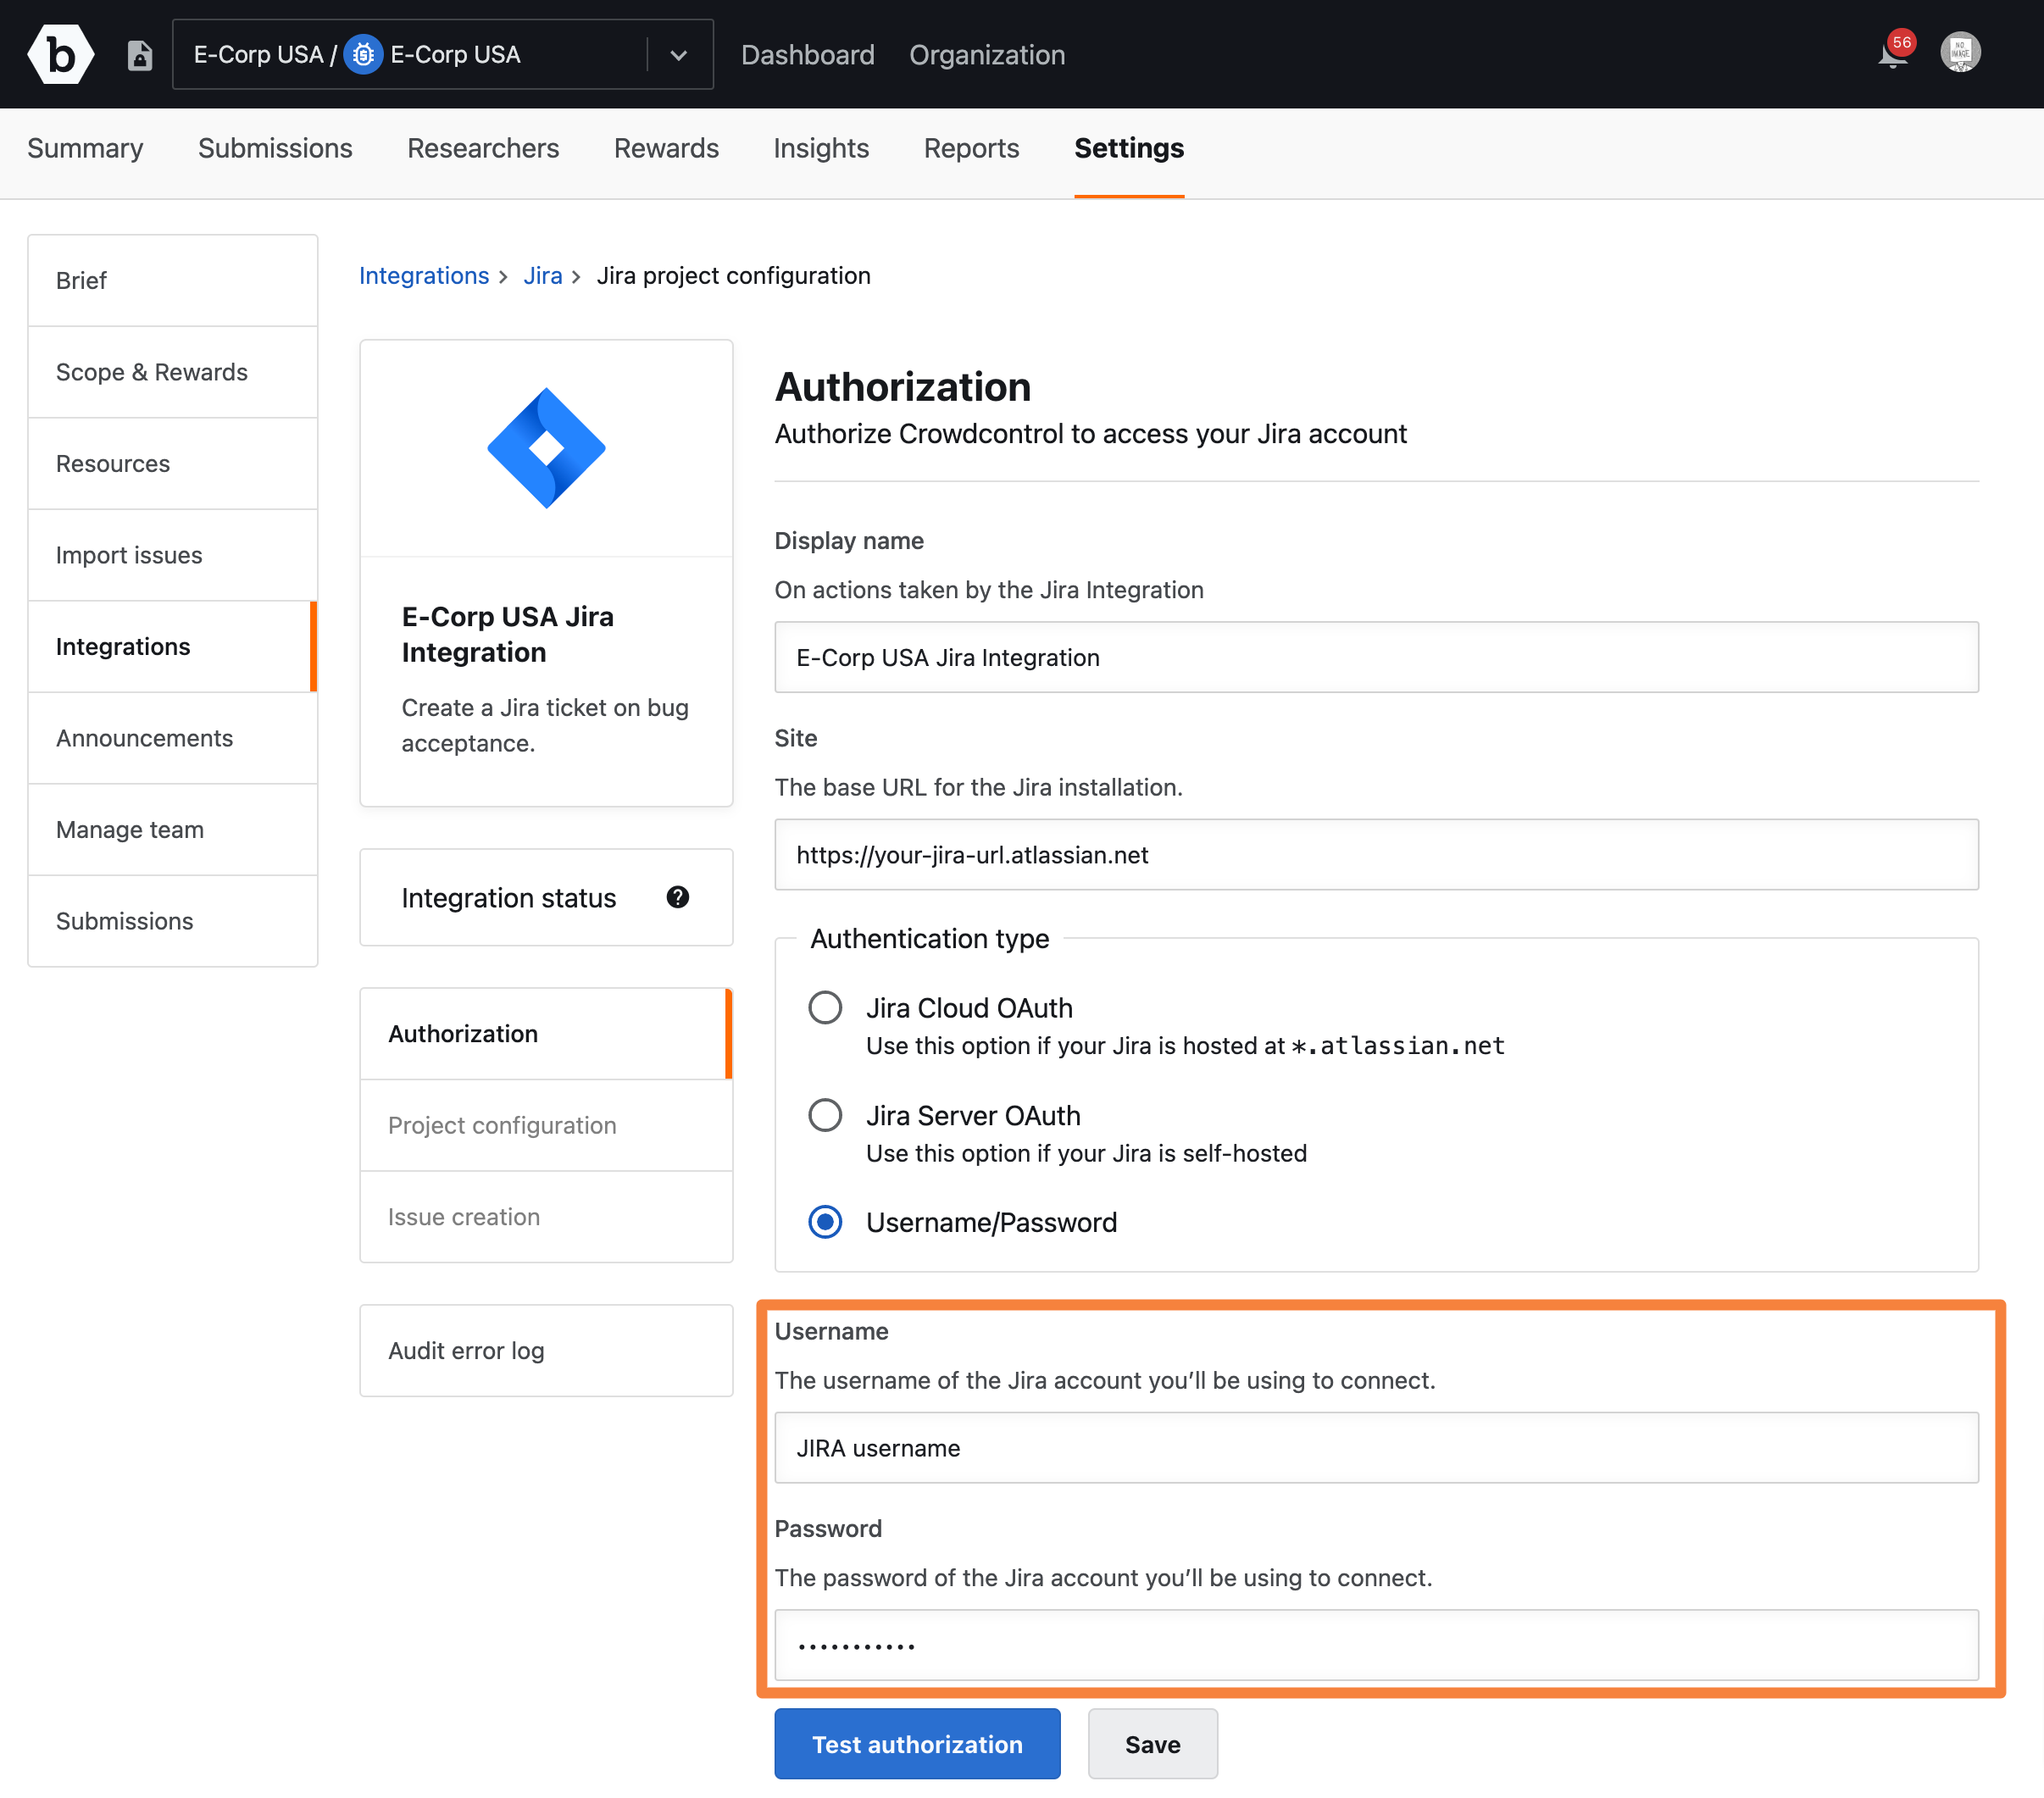
To authorize Crowdcontrol to access your Jira account, specify the following information on the Authorization page:
- Display name: Name for the integration.
- Site: URL for your Jira domain.
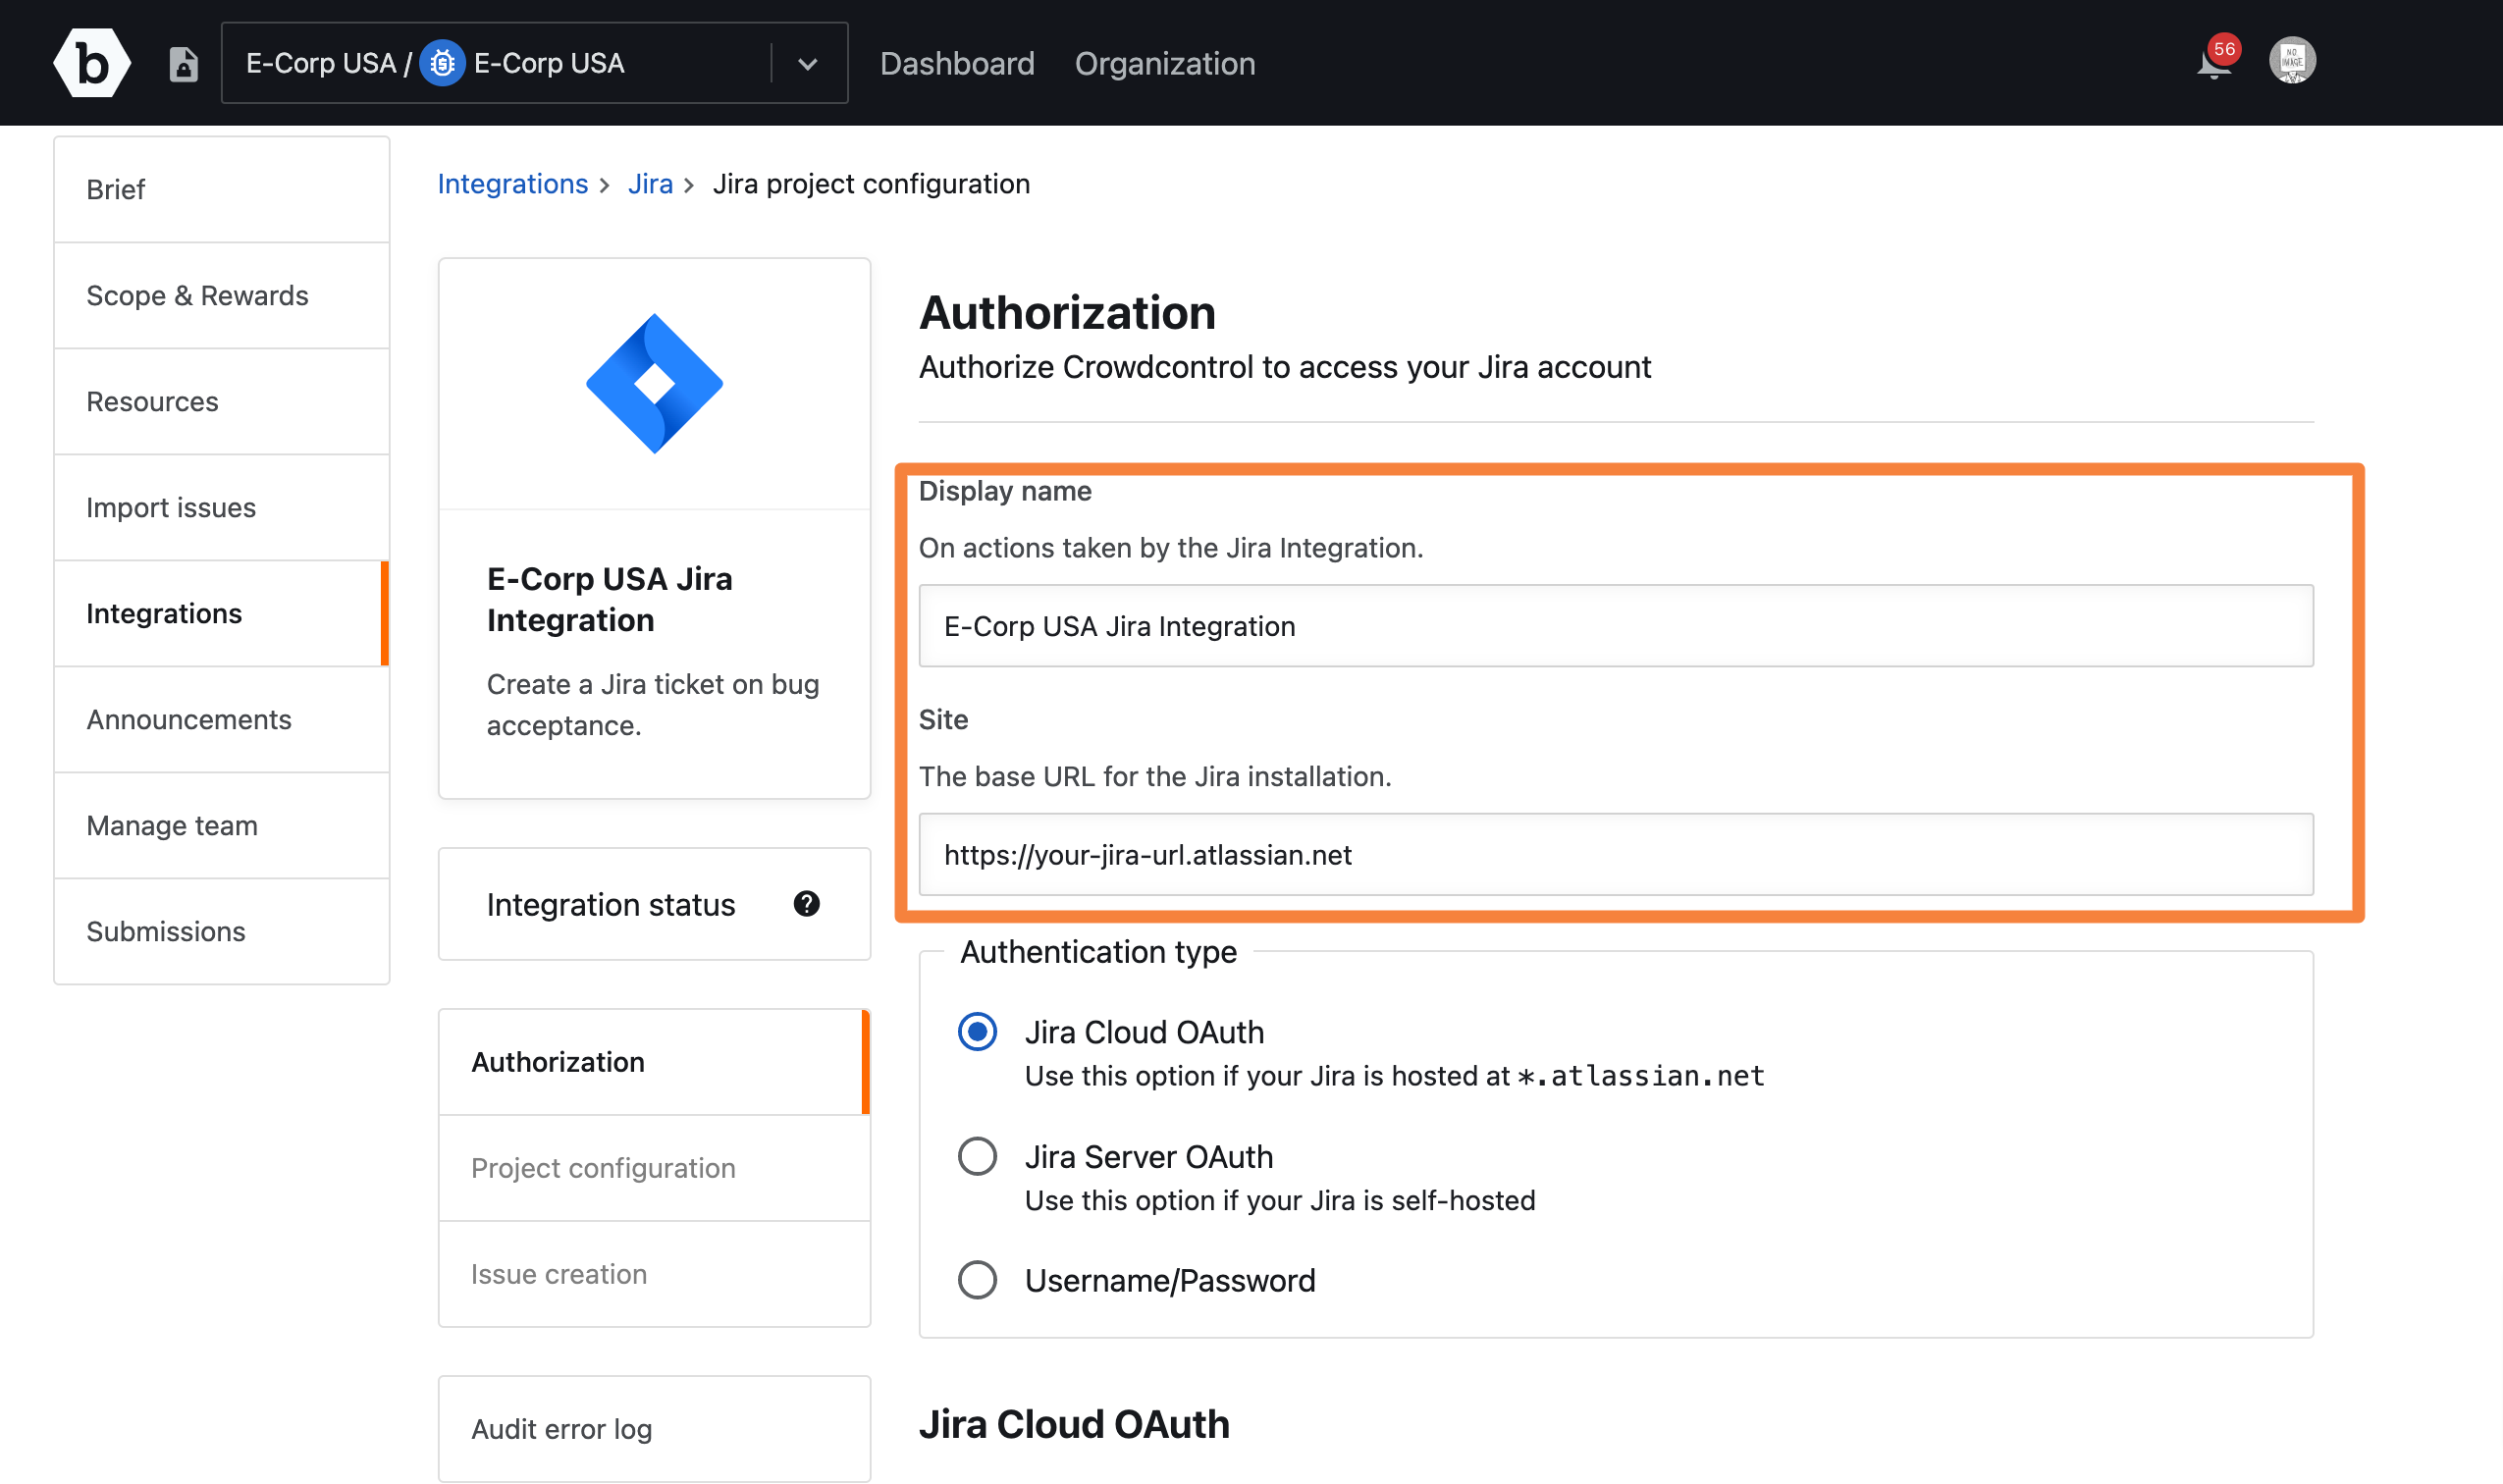
You can authorize Crowdcontrol to access Jira using Jira Cloud OAuth, Jira Data Center OAuth, or Username and password.
Clients must allow list the following IPs. The IPs are a cluster of proxies that provide high availability for outgoing integration requests.IPs:
- 52.1.126.10
- 52.86.183.27
- 52.86.229.29
Port:
- 443
The default port used for Jira is 443 SSL/TLS but it may vary depending on your Jira configuration. If you have any issues, please submit a support ticket through the Bugcrowd Support Portal.
Authorizing Jira Cloud (OAuth 2.0)
-
If your Jira instance is hosted at
*.atlassian.net, then select the Jira Cloud OAuth option.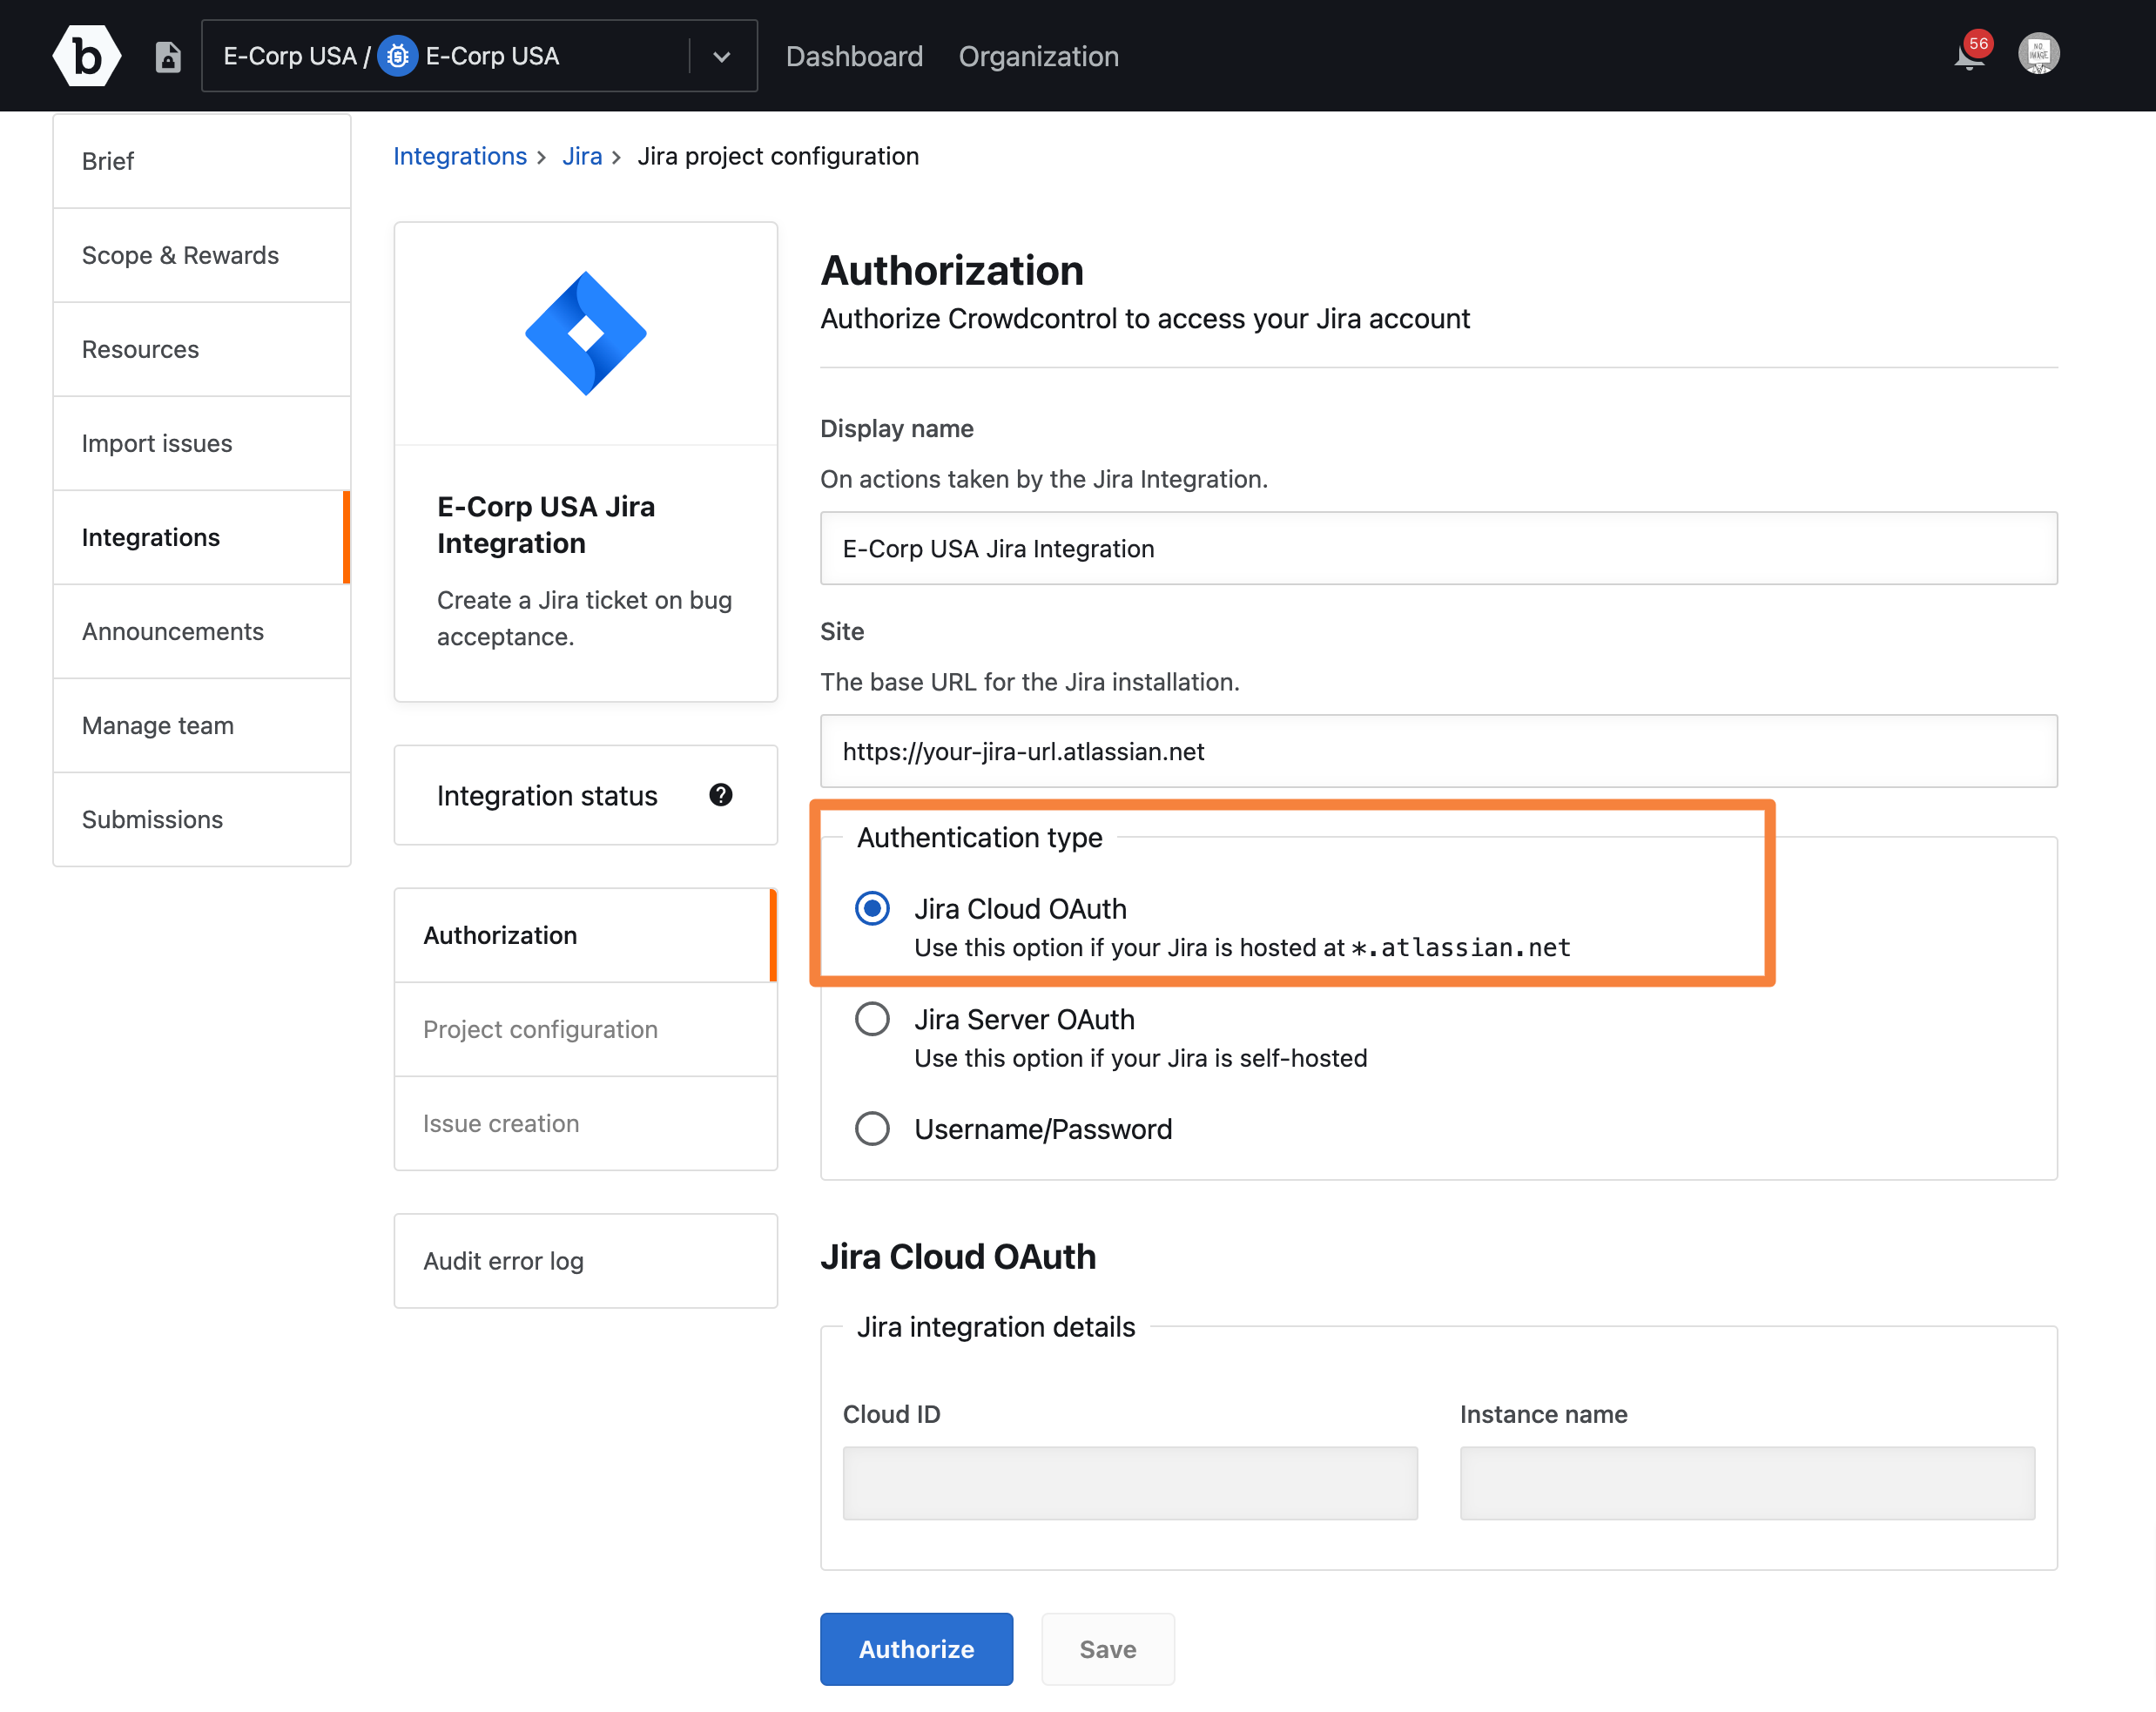
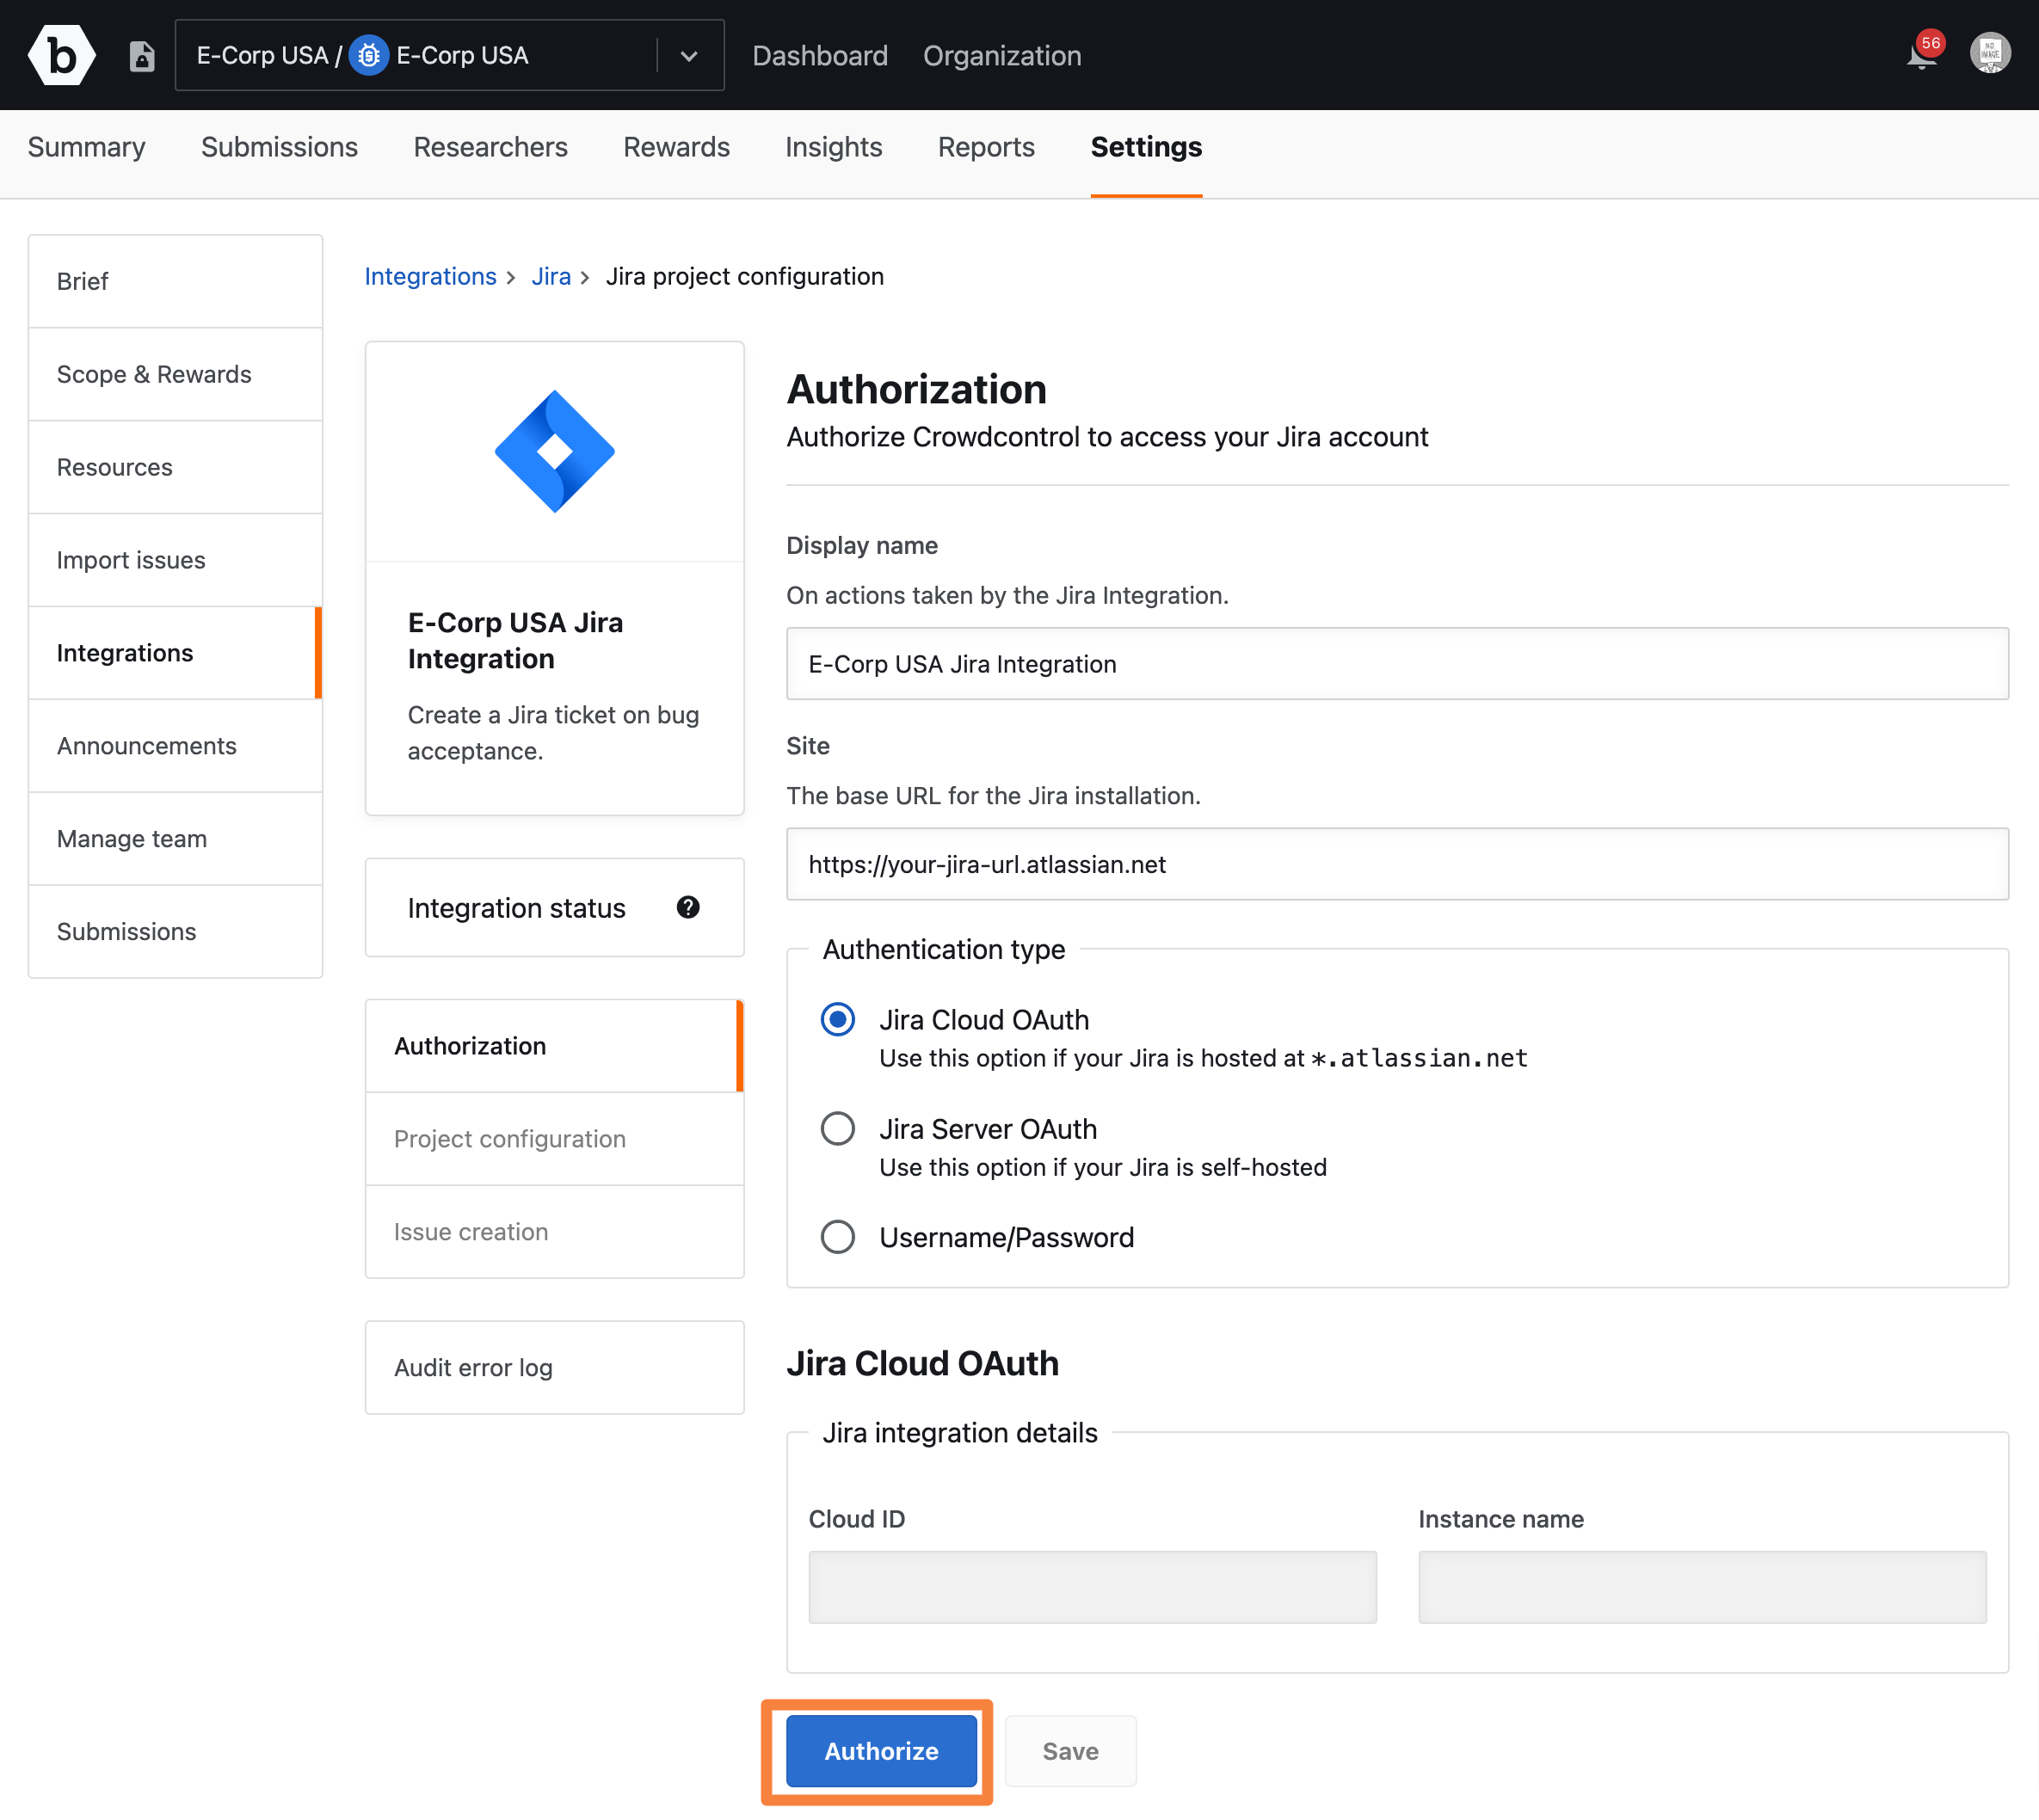
-
Click Authorize.
-
In Authorize for, select the Jira instance hosted at
*.atlassian.netand click Accept.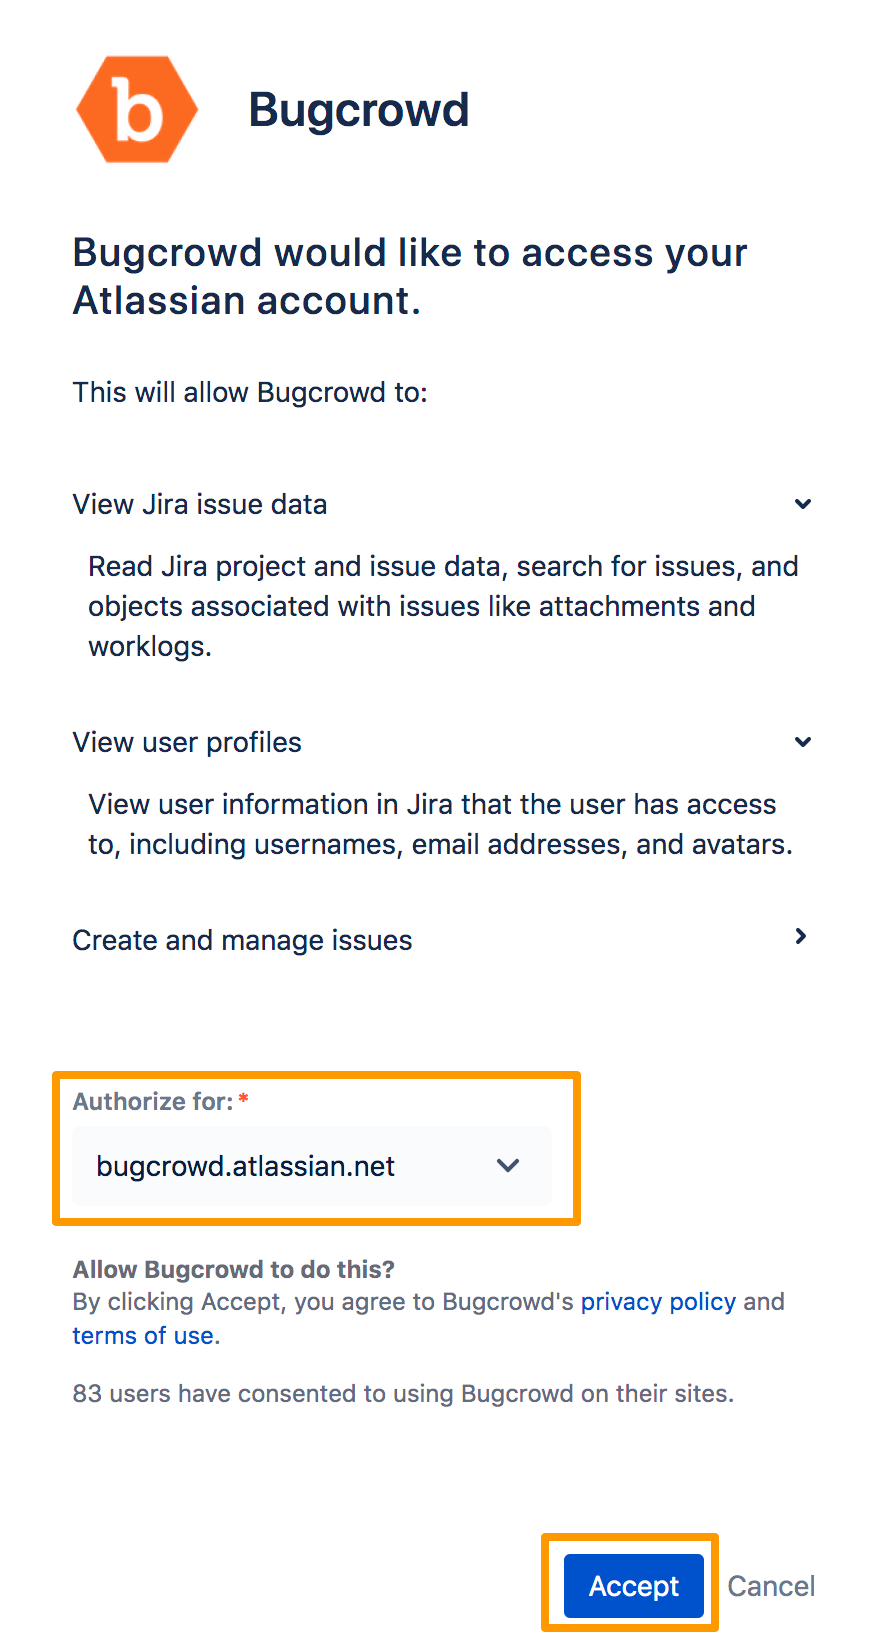
The Integration authorized message is displayed. Also, the Jira integration details section displays the Cloud ID and Instance name automatically, and Authorization in the left pane shows a tick mark indicating that authorization is complete for Jira Cloud.
After authorizing Jira Cloud, configure the Jira project. For information, see configuring Jira project.
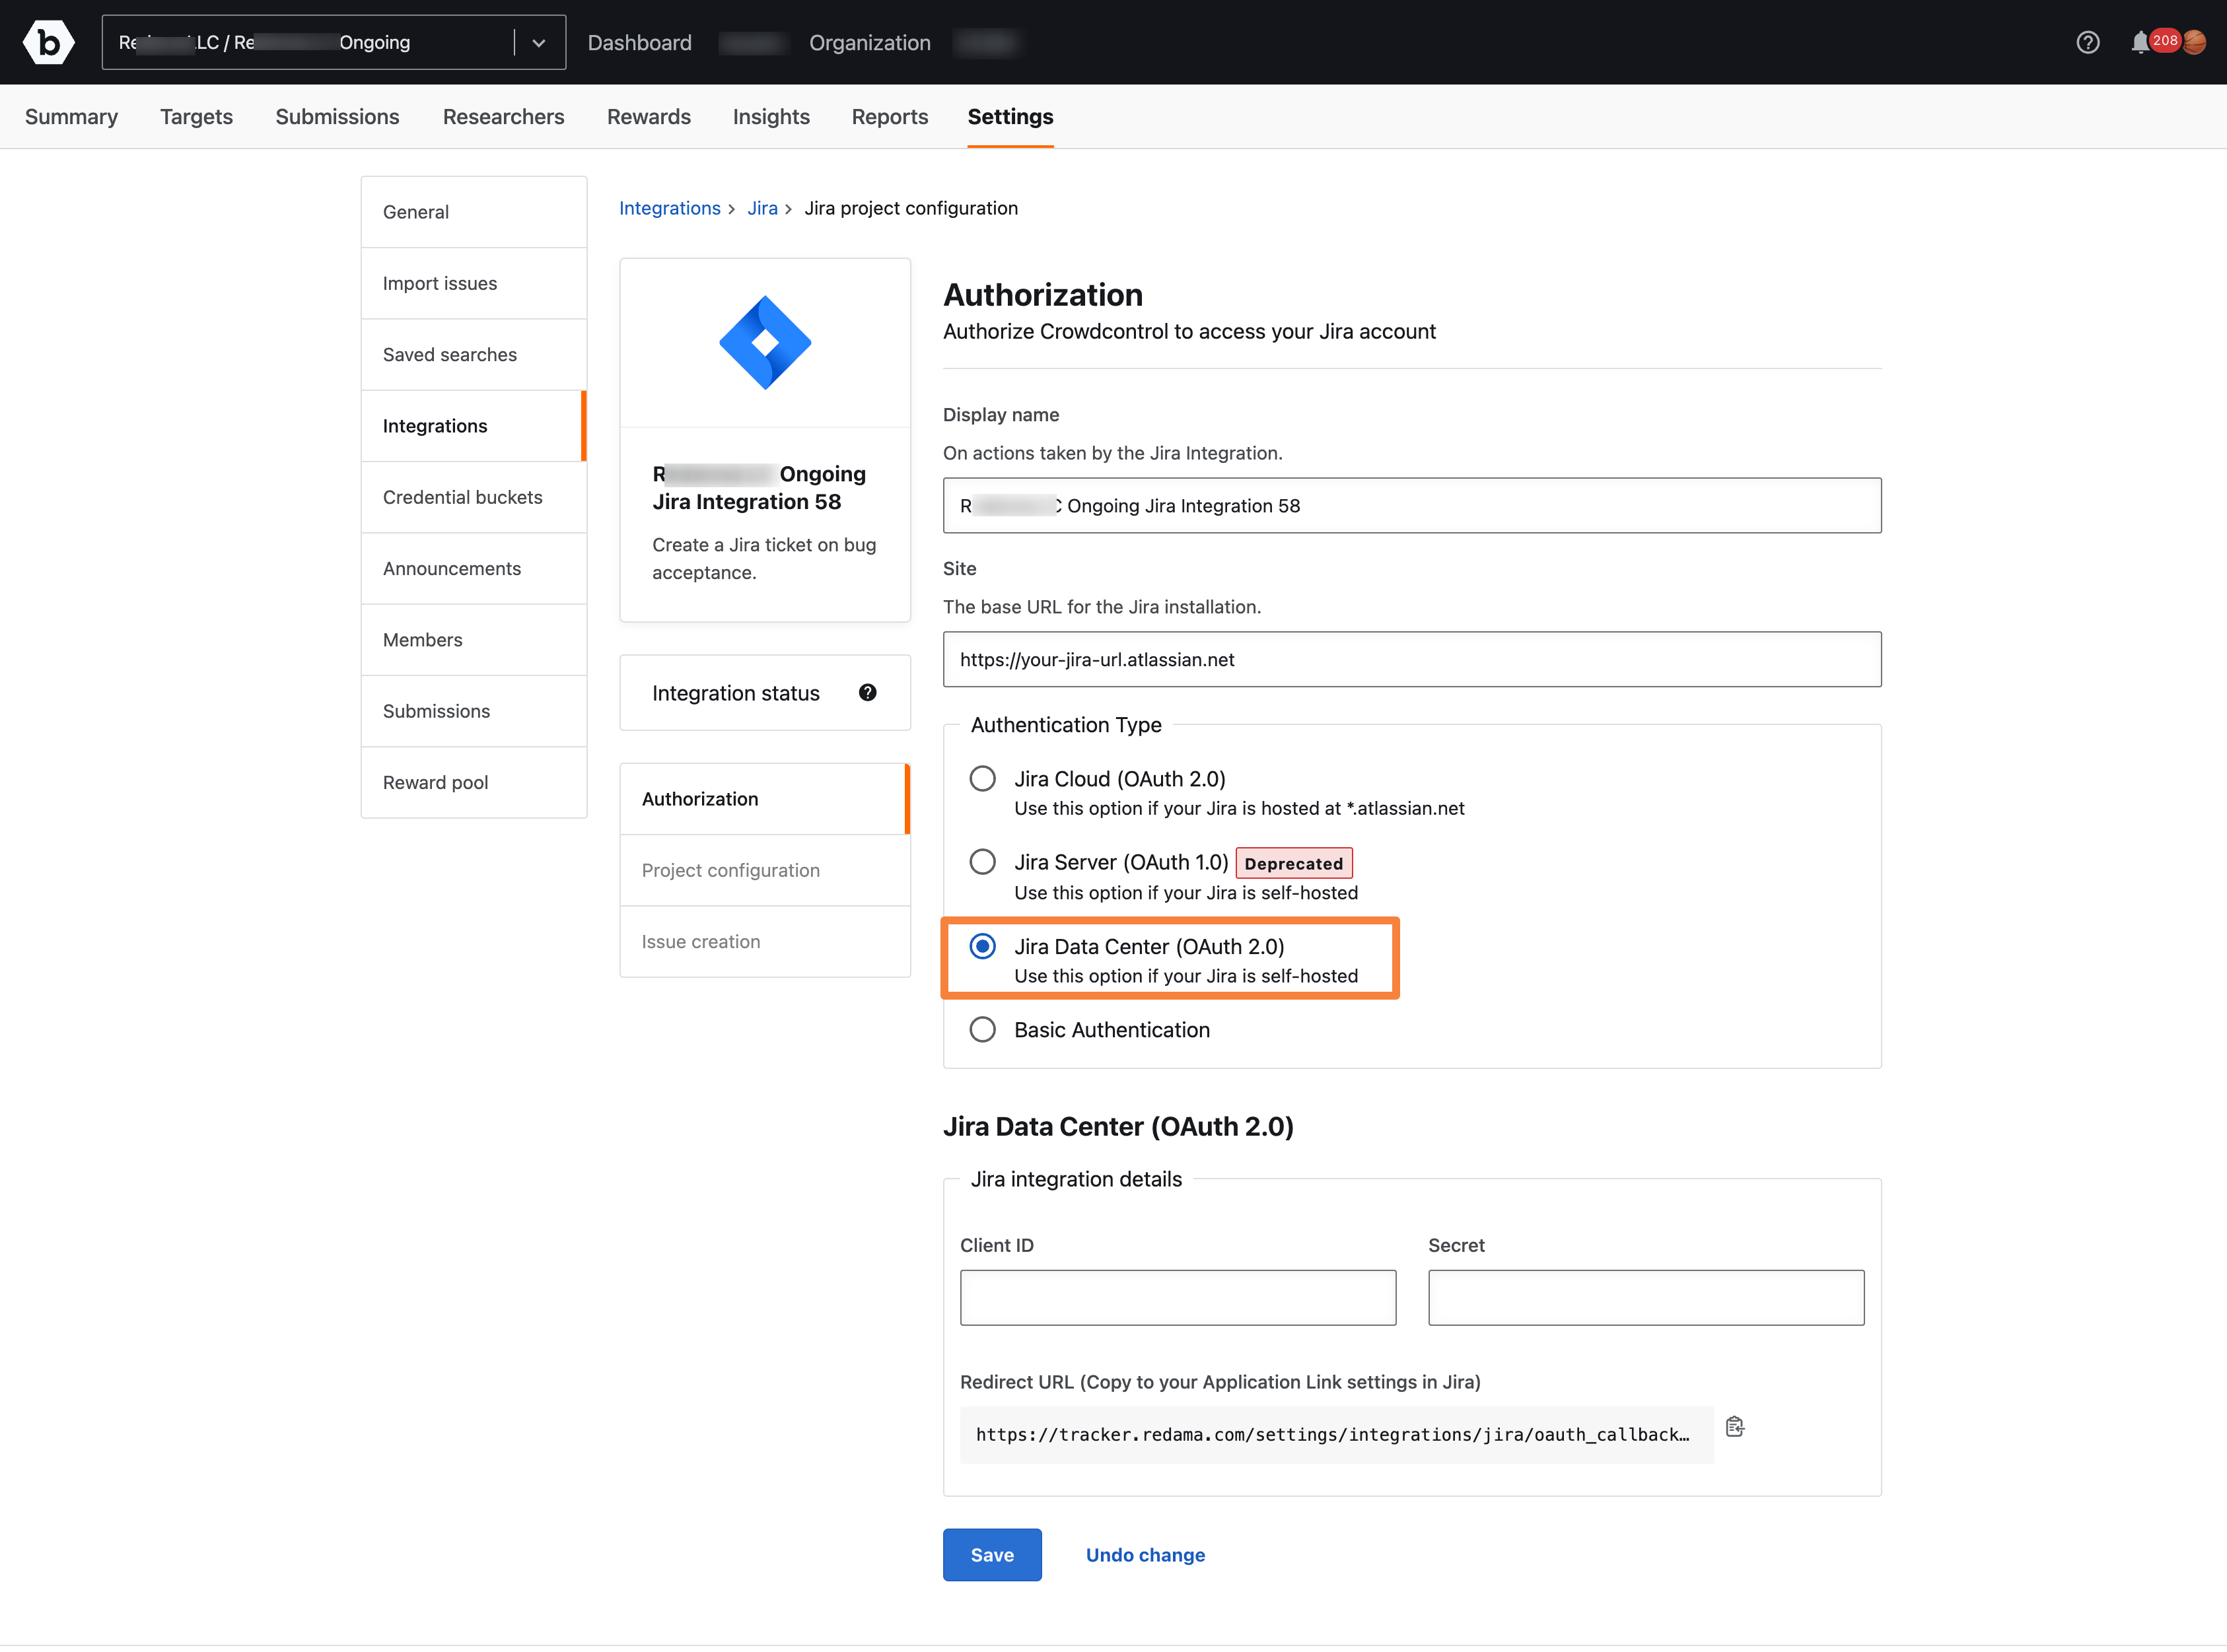
Authorizing Jira Data Center (OAuth 2.0)
-
If your Jira instance is self hosted Jira Data Center, select the Jira Data Center option.
-
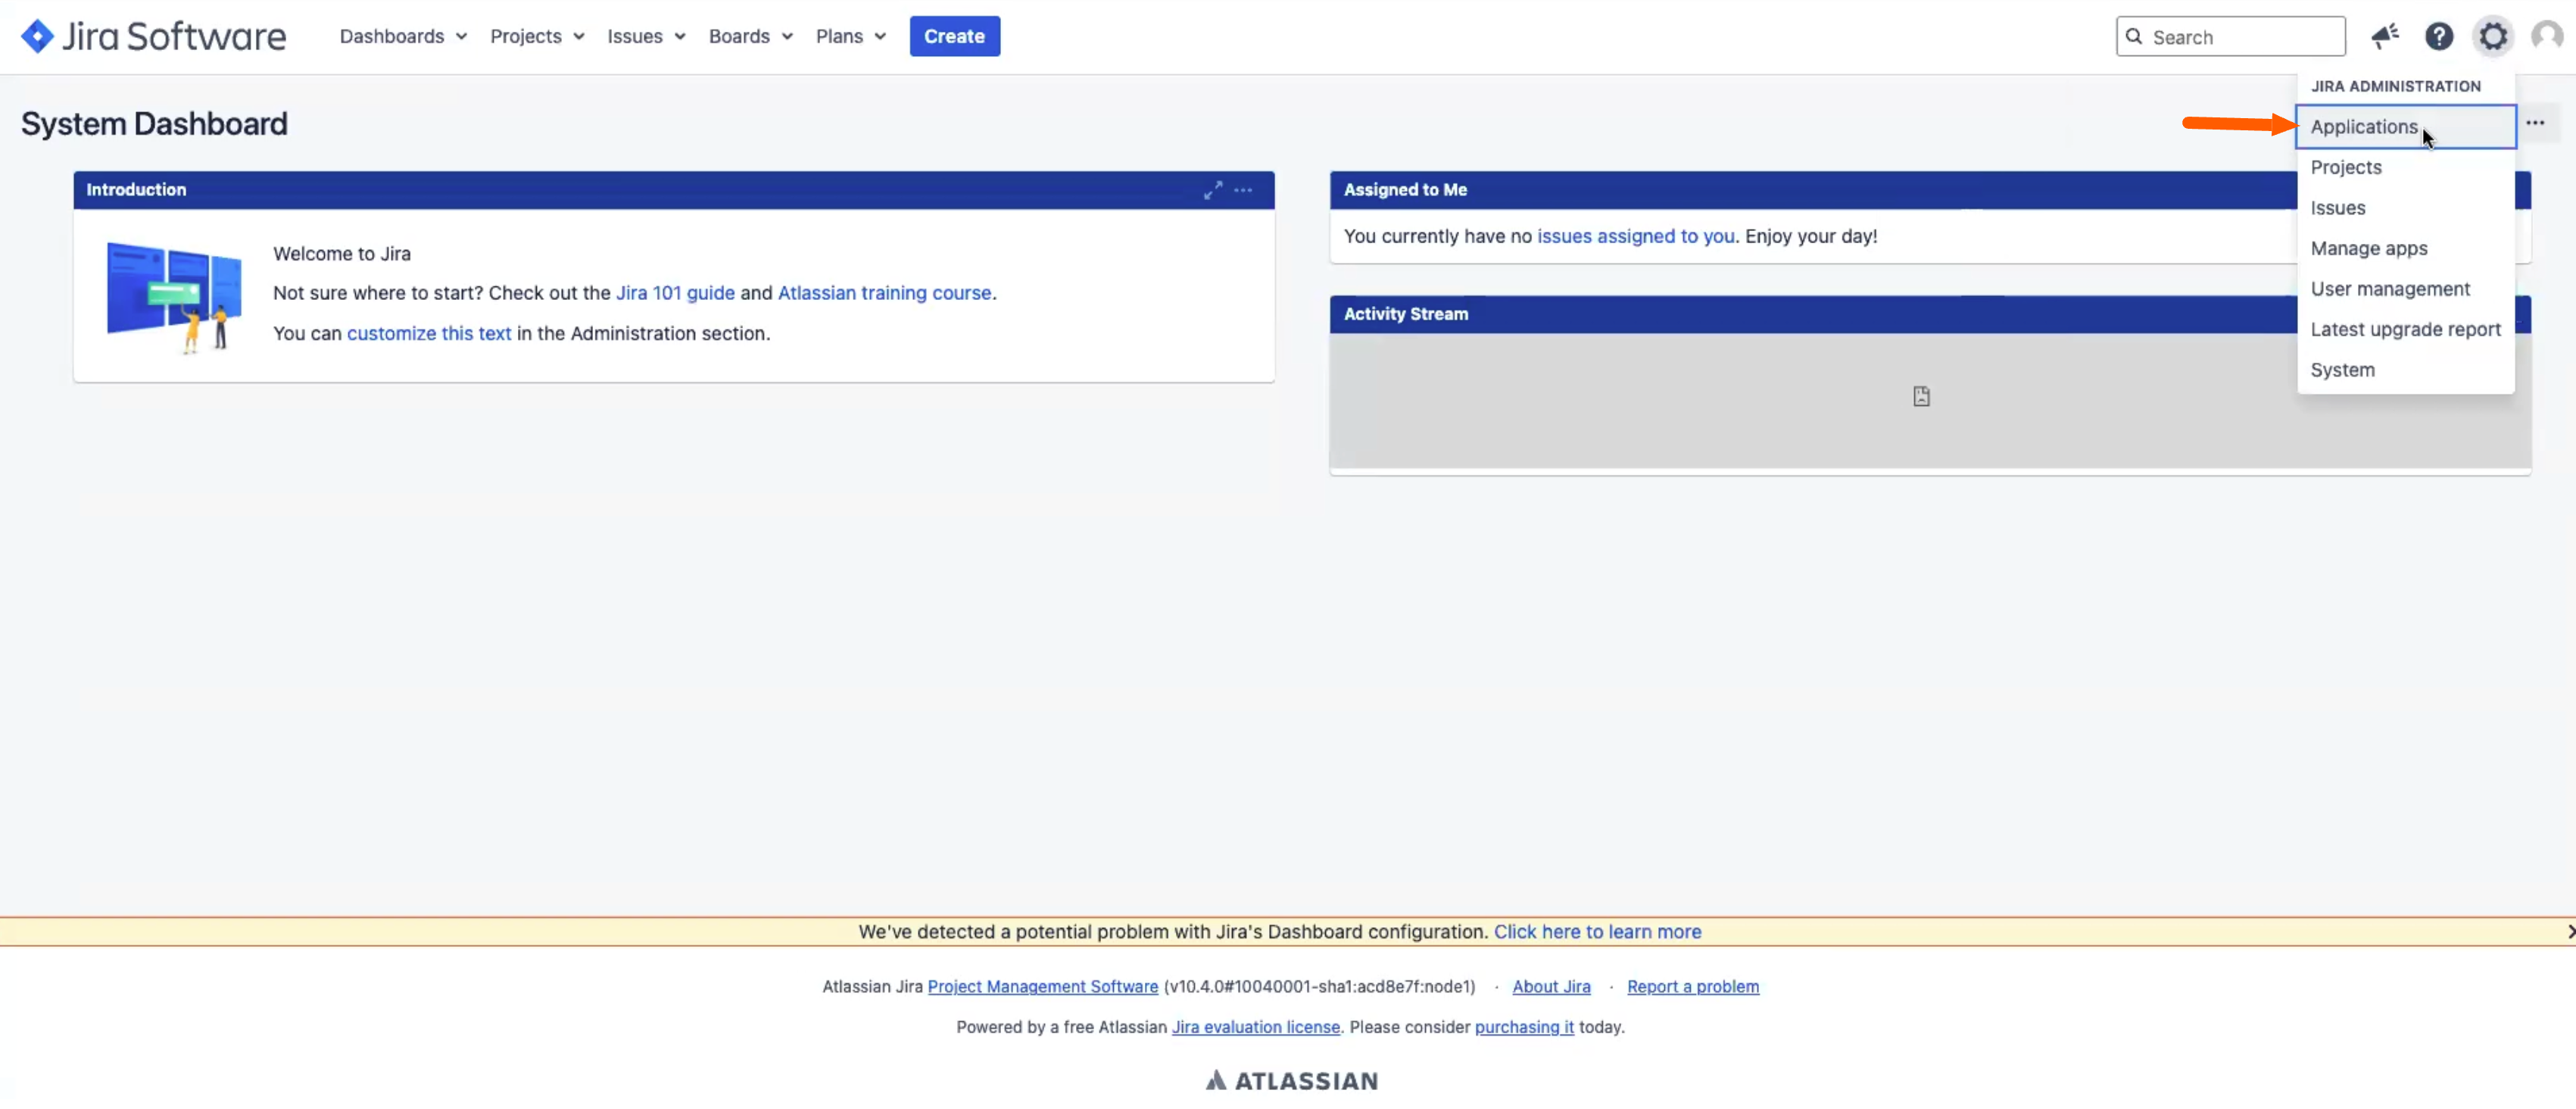
Log in to Jira and go to Settings > Applications.
-
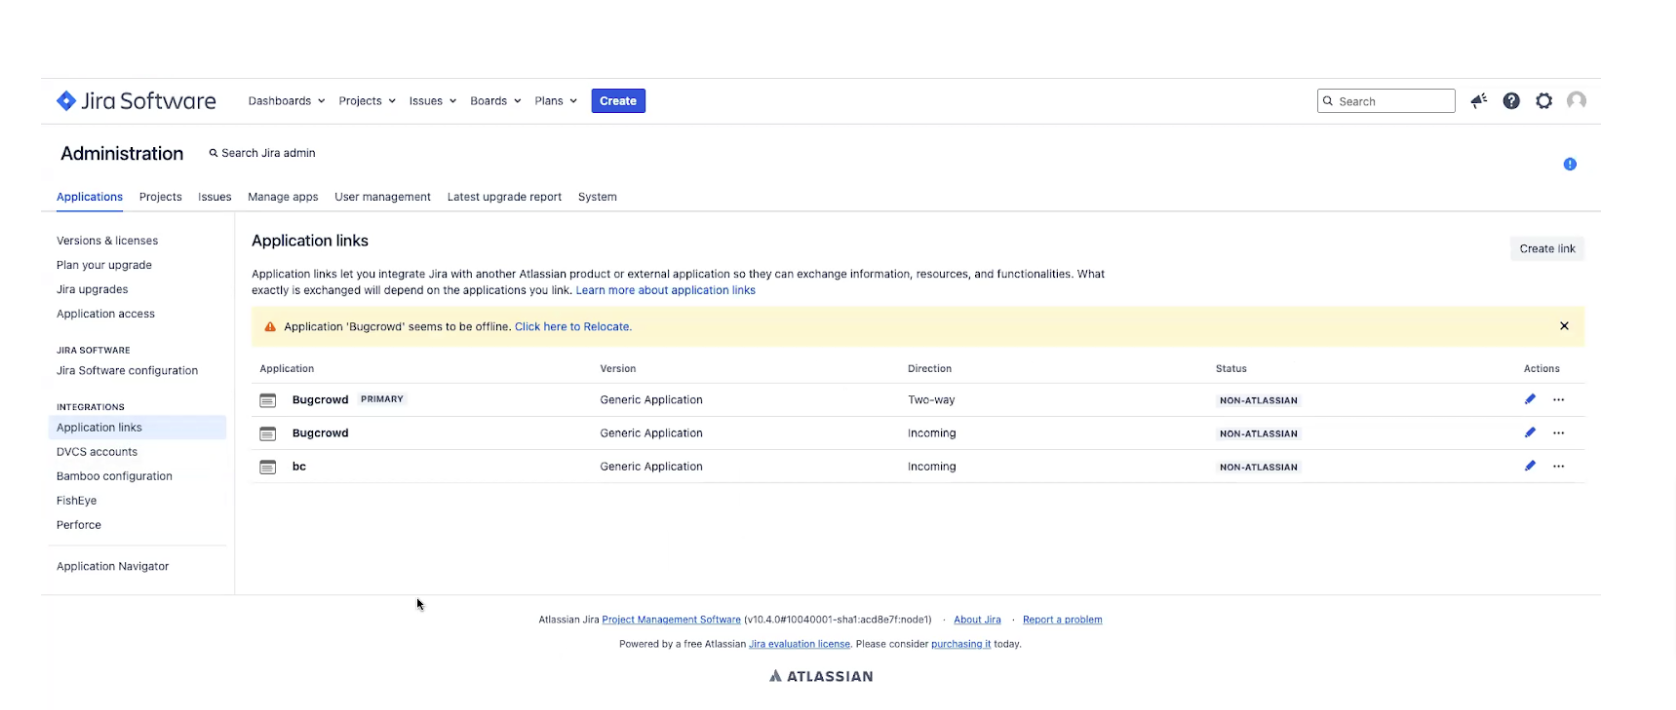
In Applications, click Application Links.

The Application Links page is displayed on the right.
-
Click on Create link on the top right of the table.
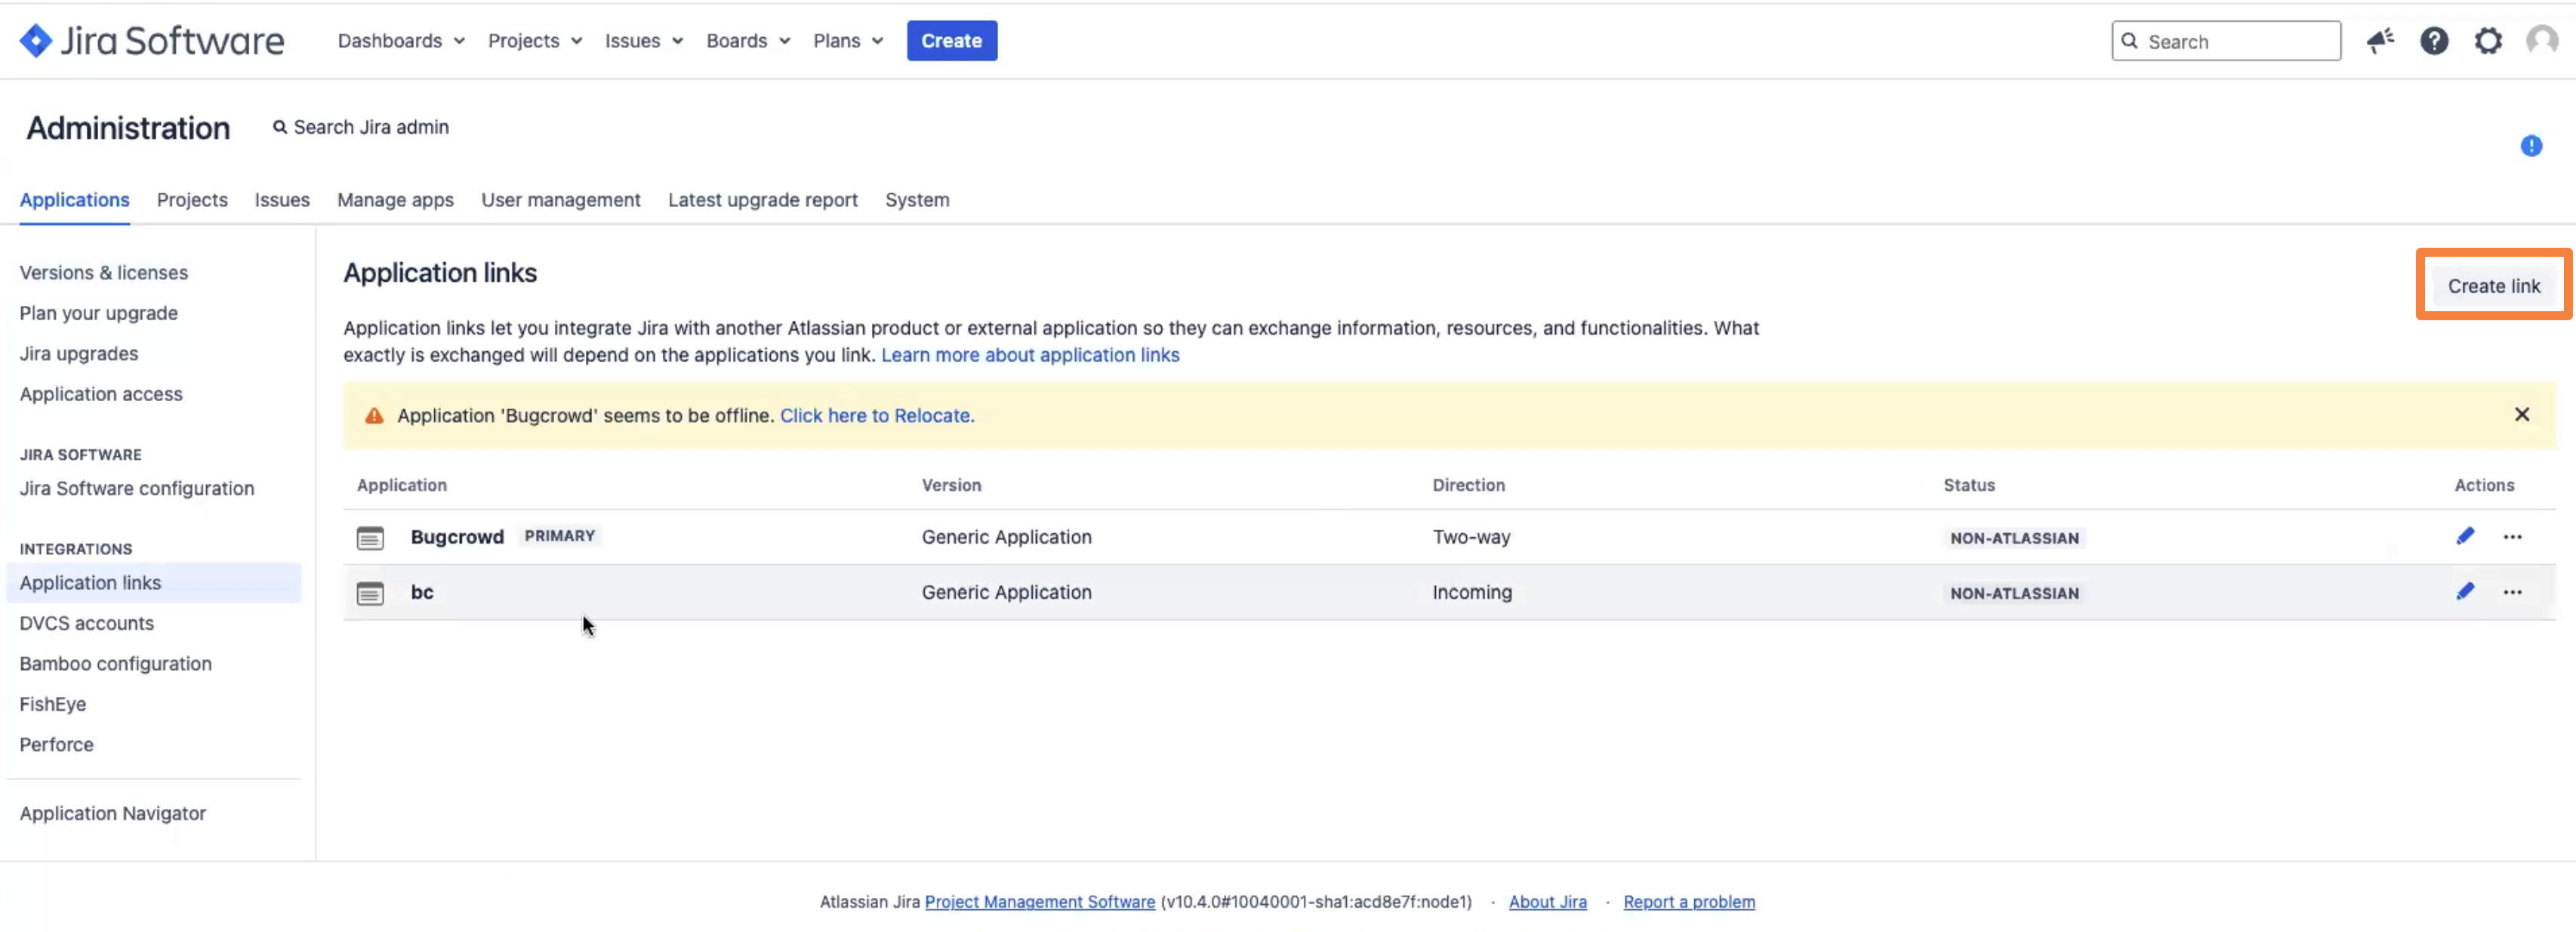
The Create link form is shown.
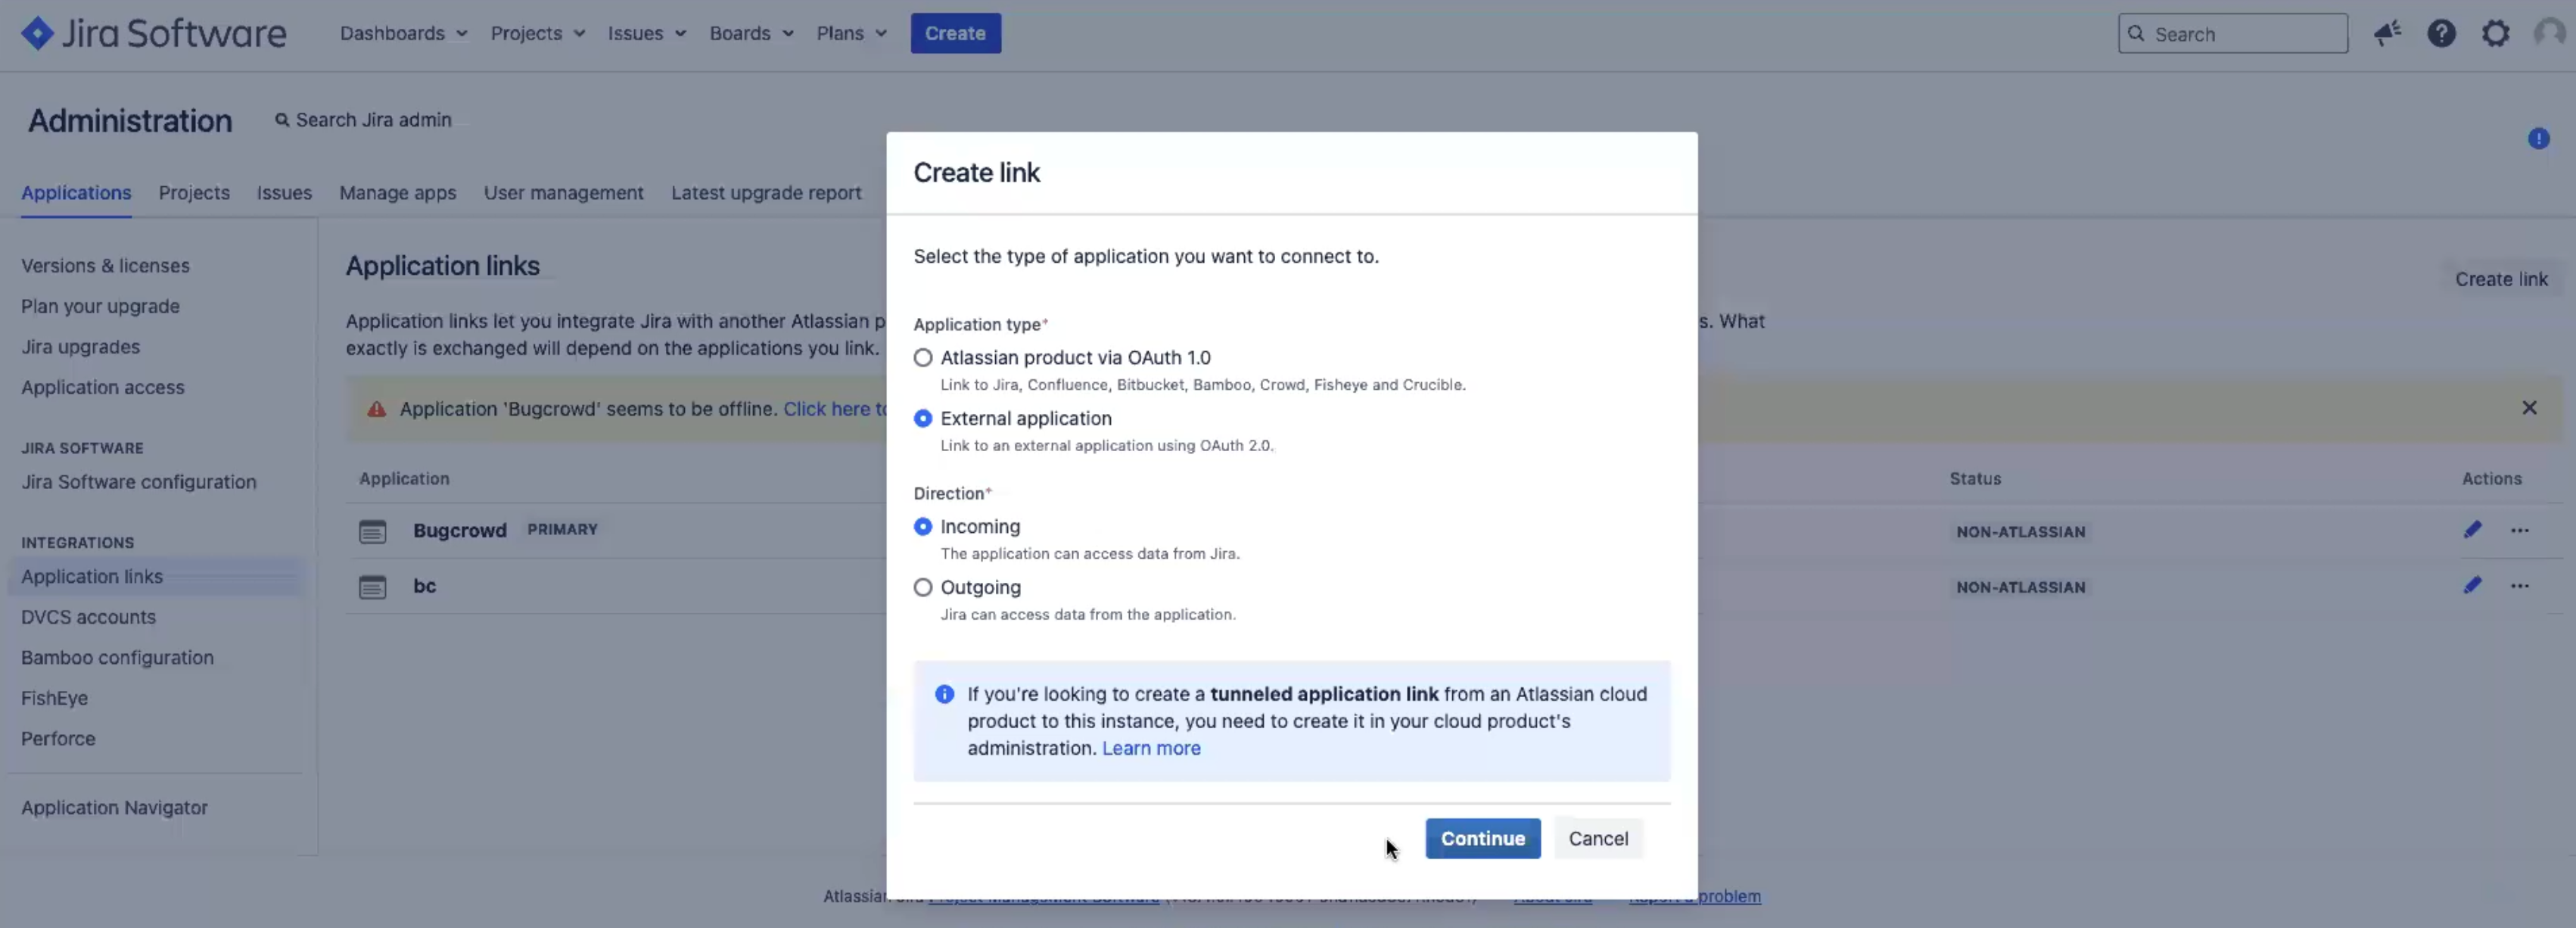
- In the Application type, select External application.
- In Direction, select Incoming.
- Click Continue.
-
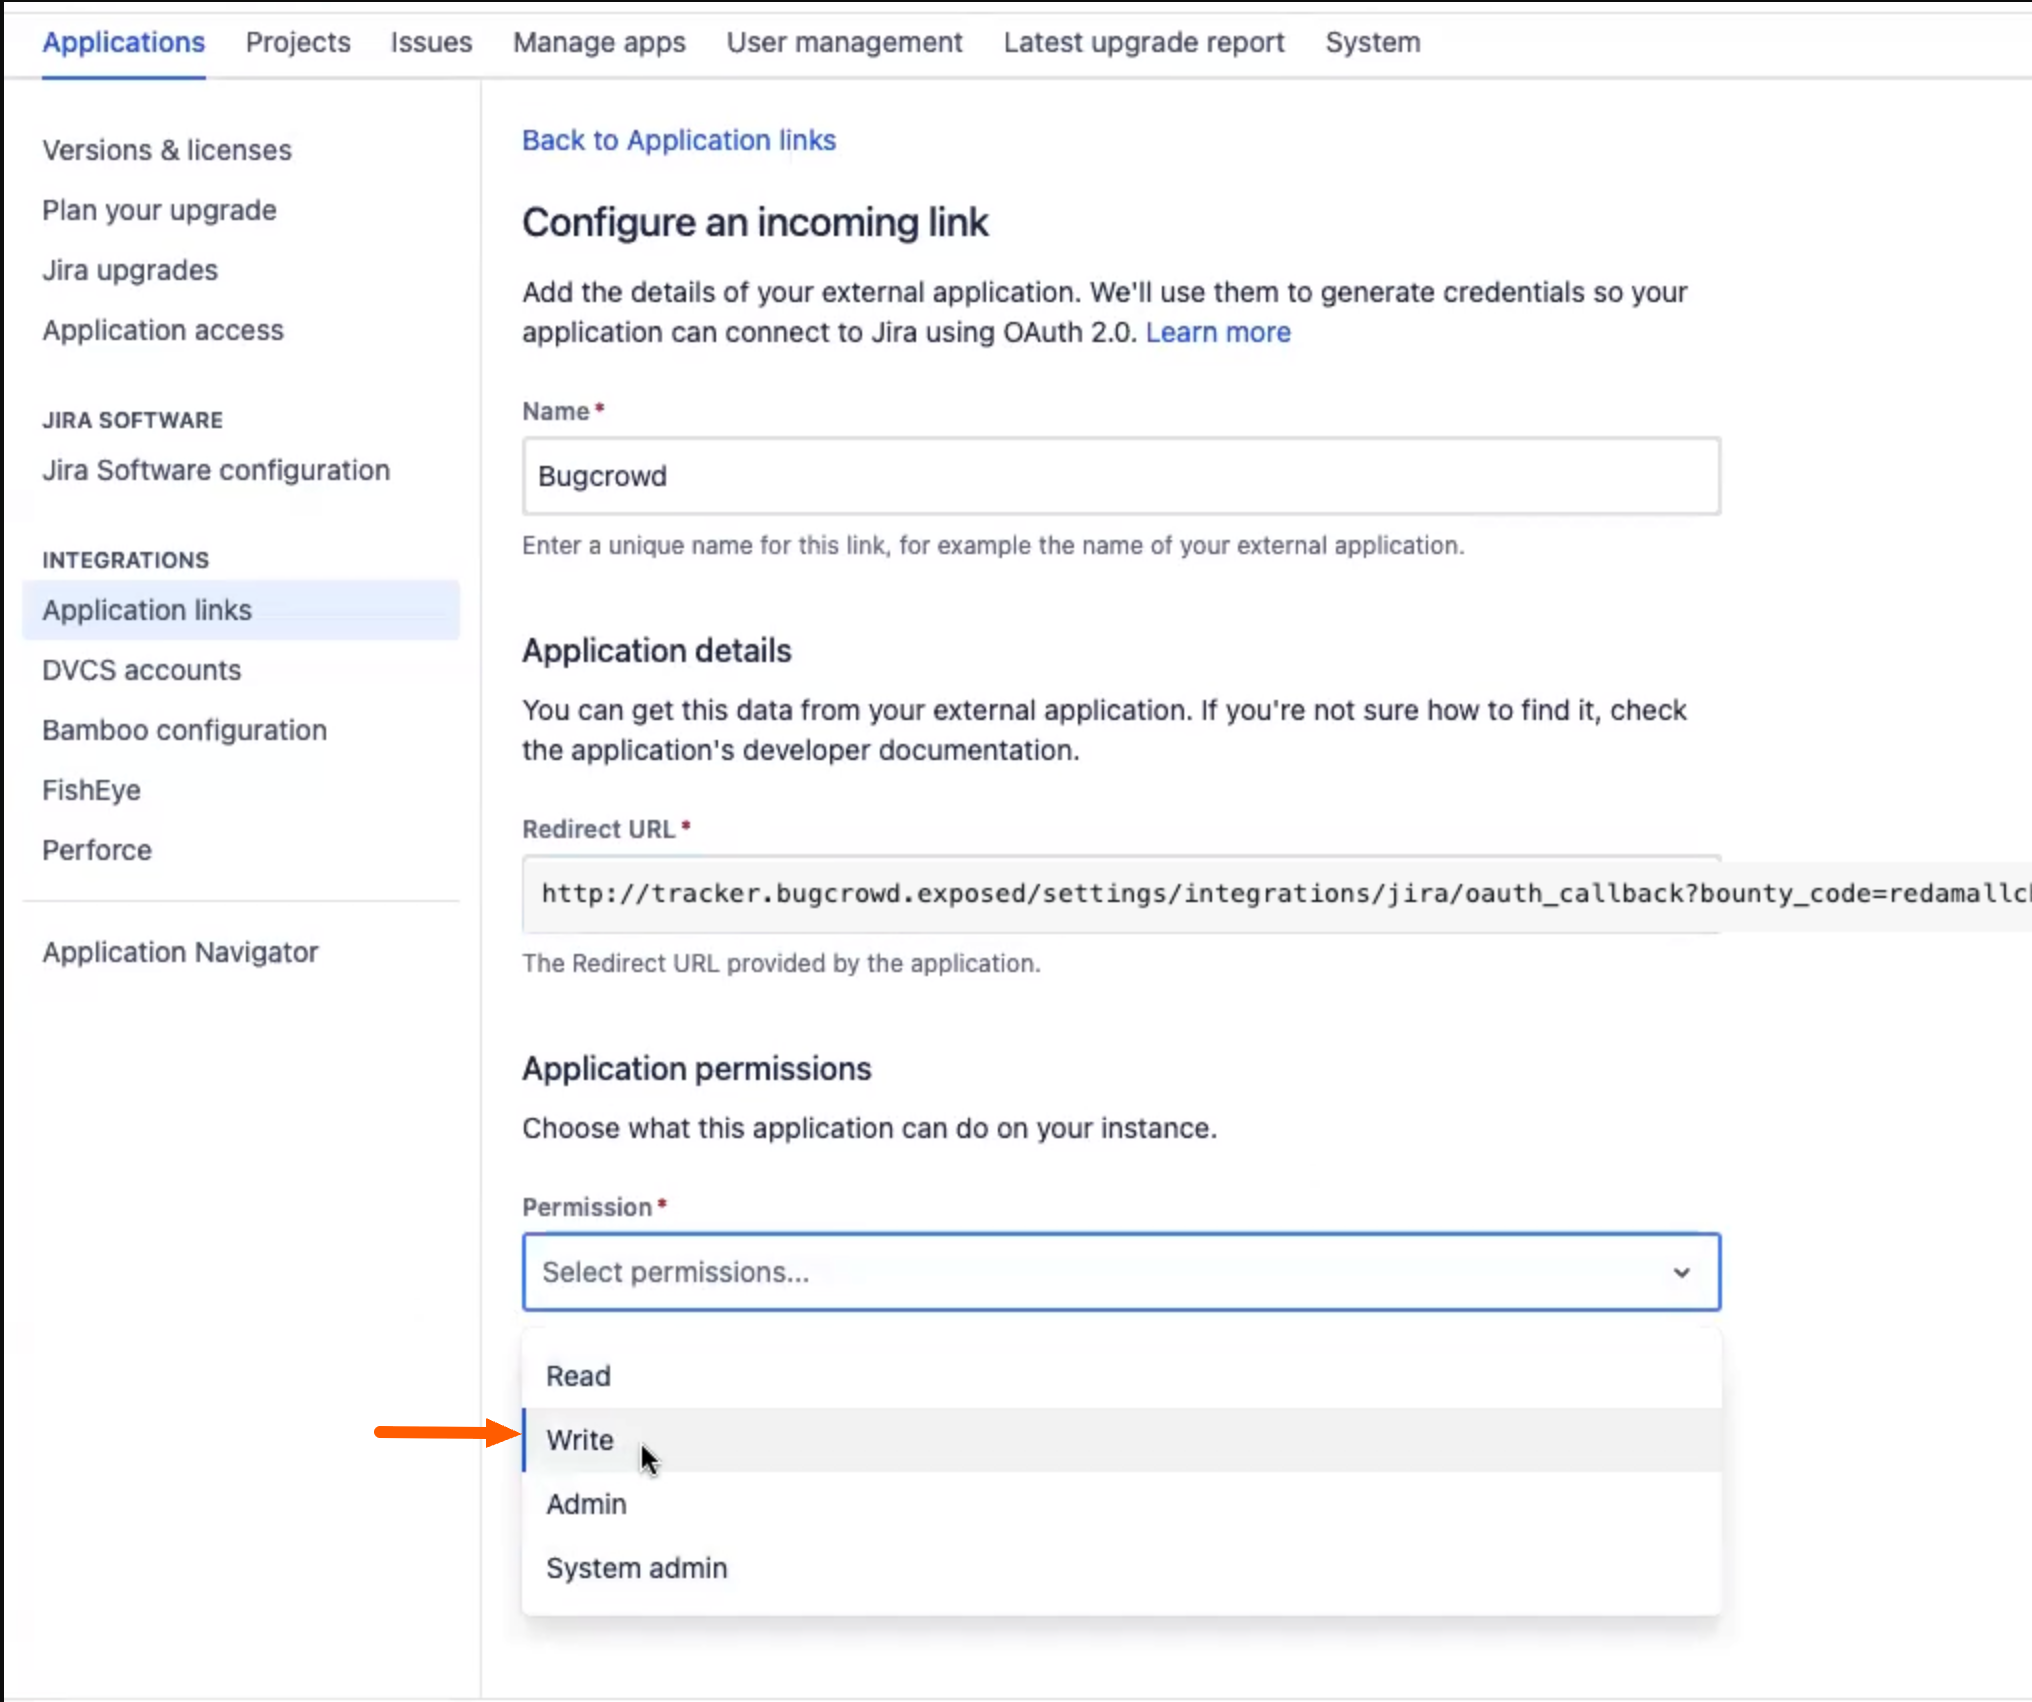
The Configure an incoming link page is shown.
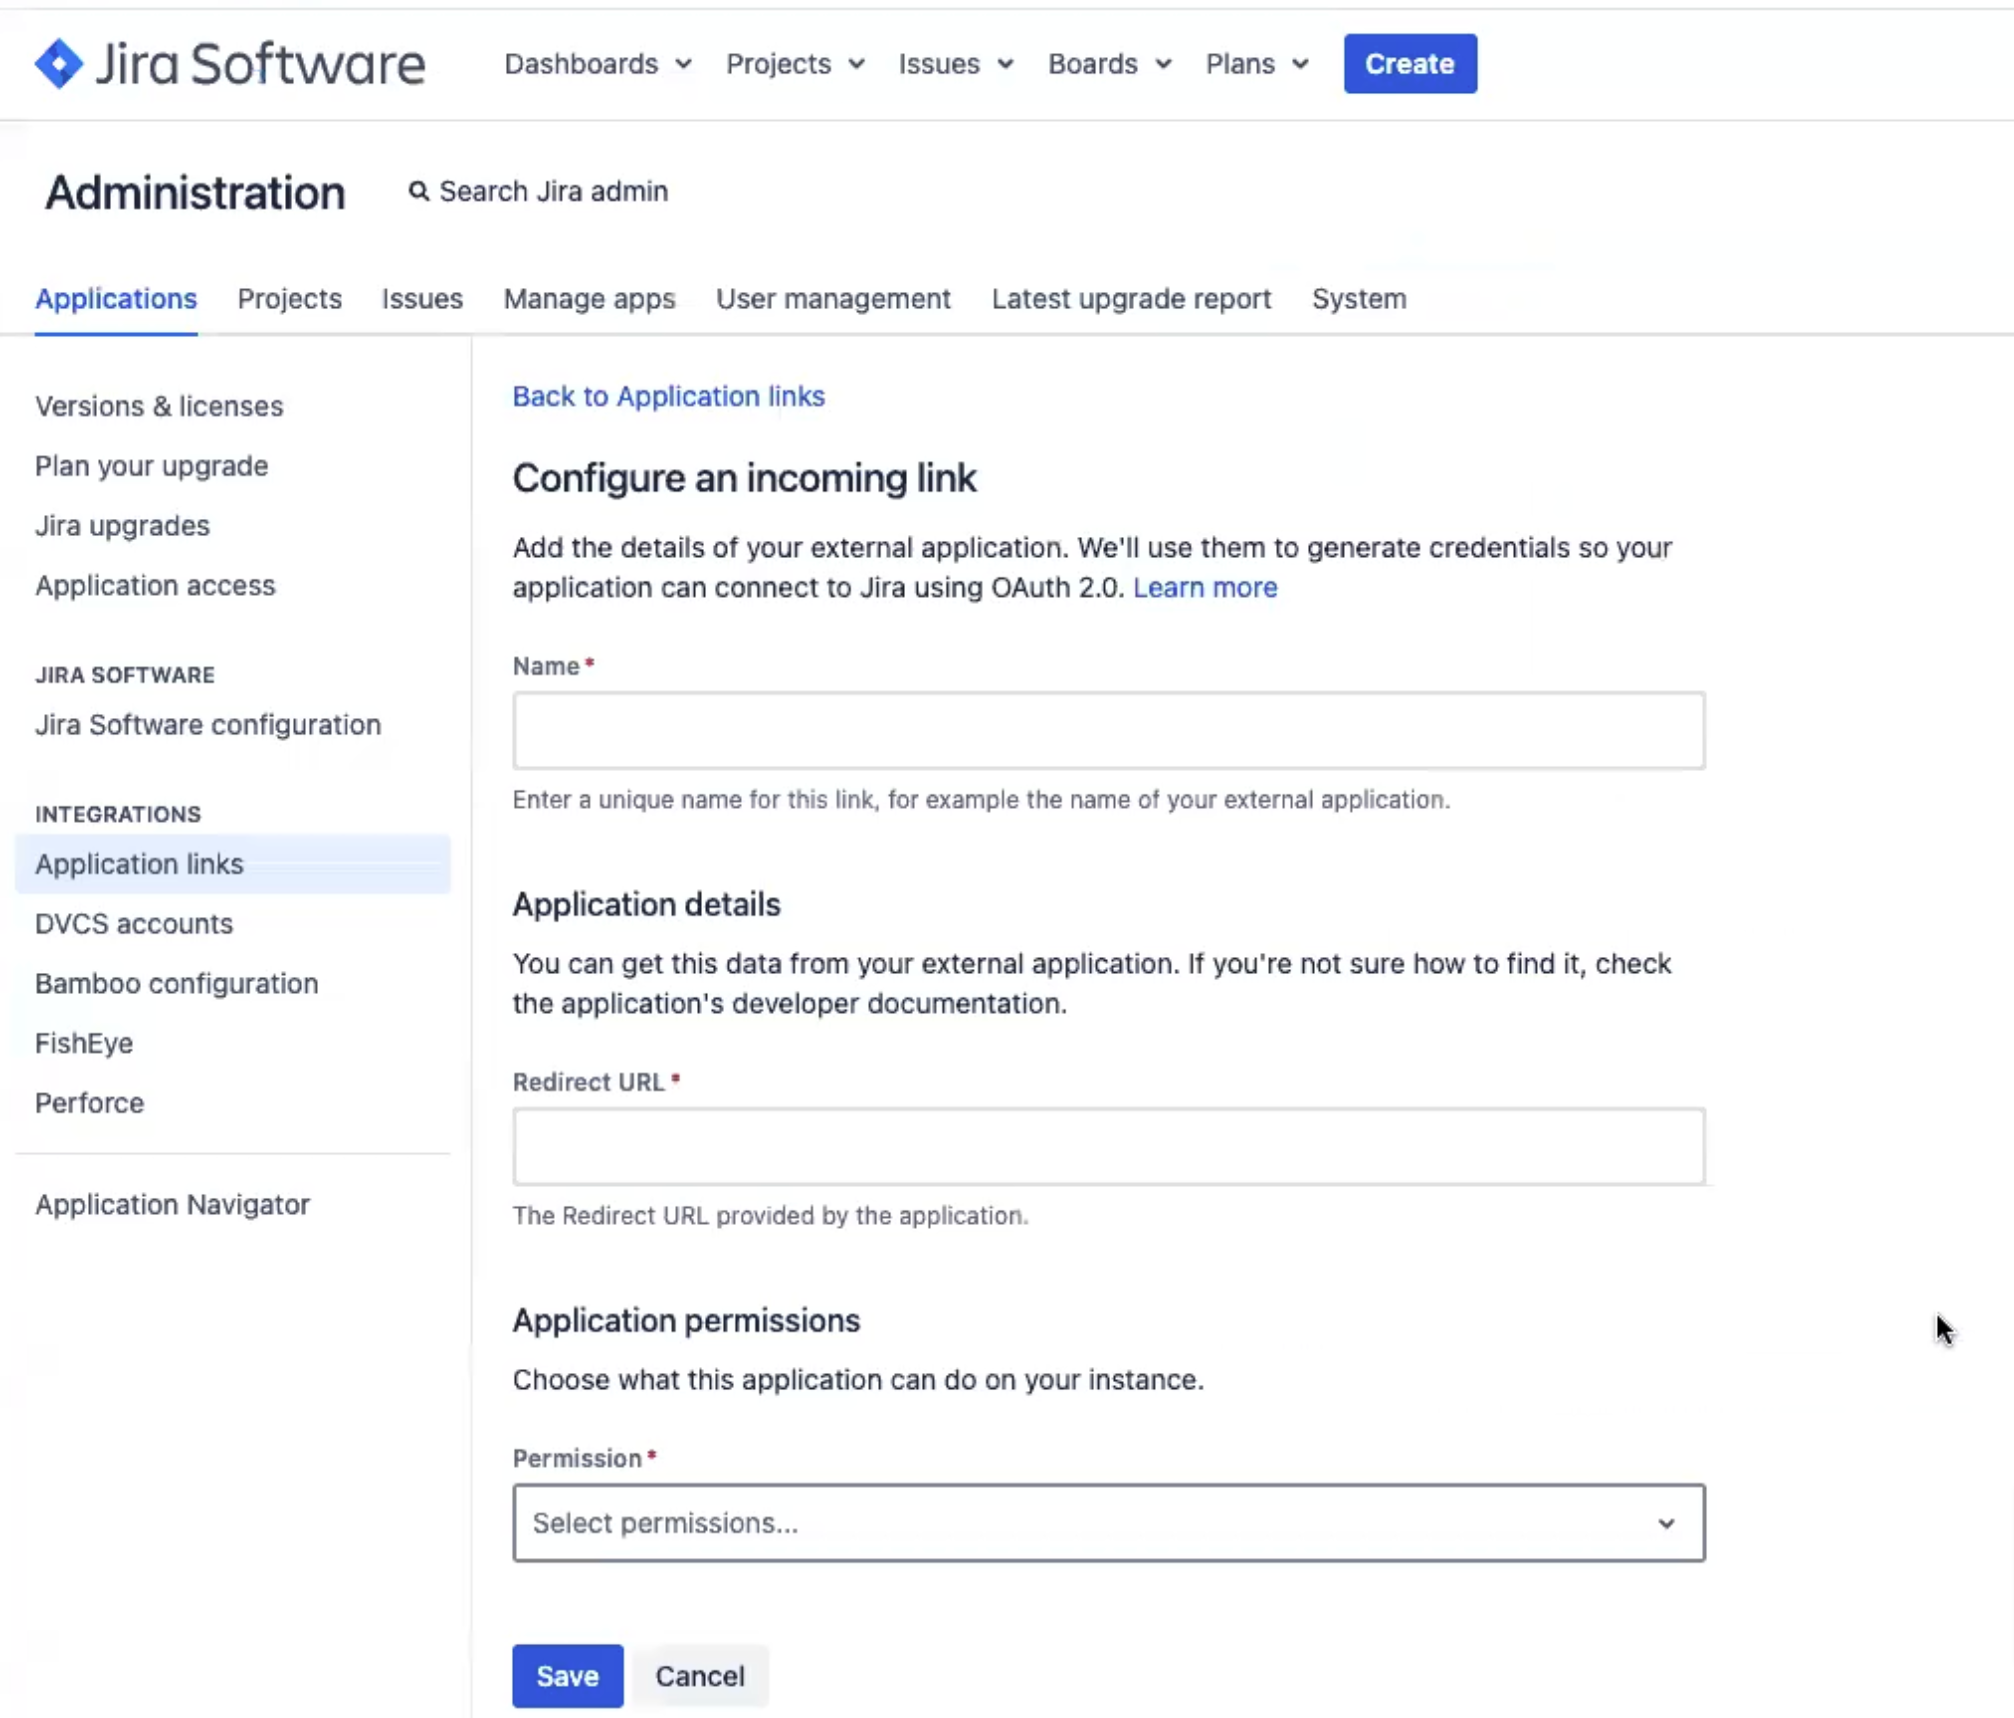
- Enter a name for the Integration.
- In the Redirect URL, paste the URL that you copied from the Bugcrowd integration page.
- In the Permission, select Write.
-
Click on Save.
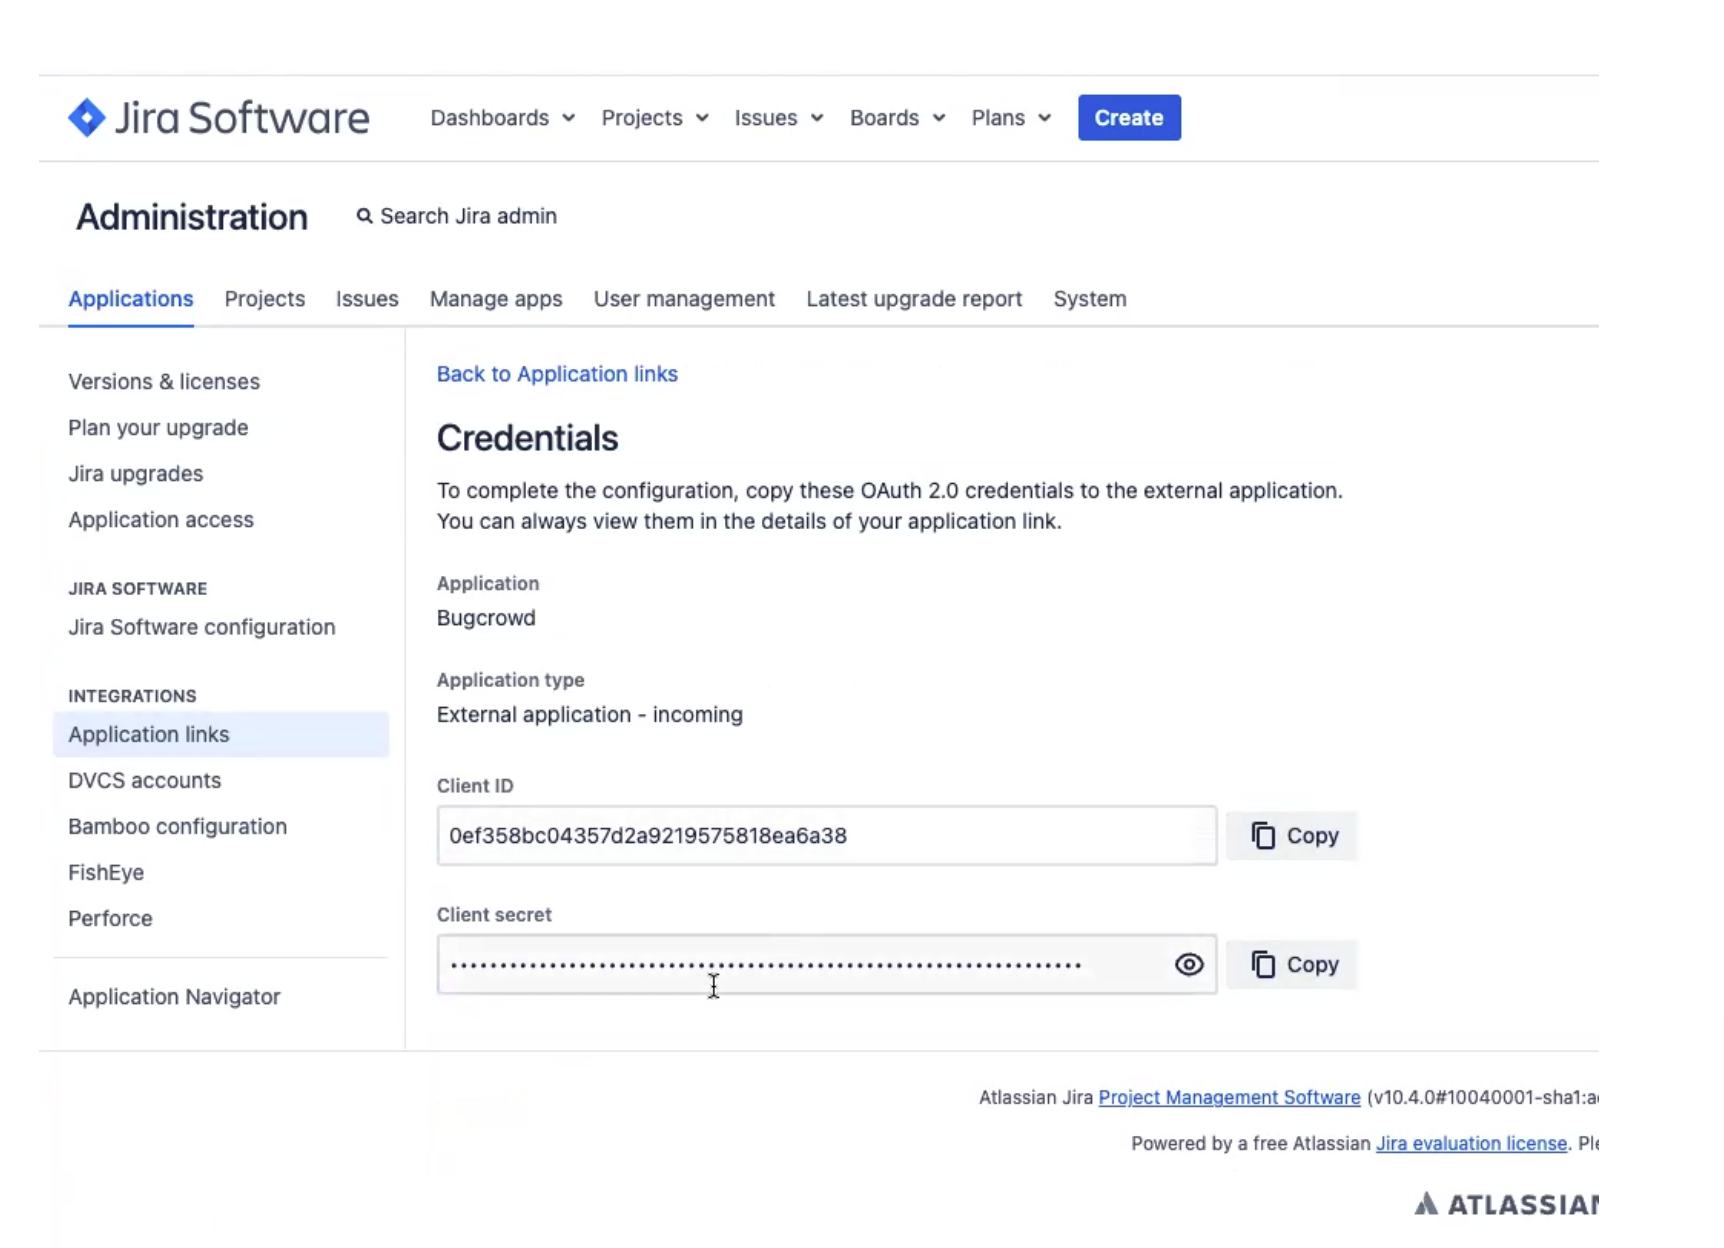
The Credentials page is displayed.
-
Copy the Client ID and Client secretfields.
Note: Please be sure to copy the Client secret. Once you leave the page the Client secret will not be available.
-
Now you will see the newly created Application link in the Application links page.
-
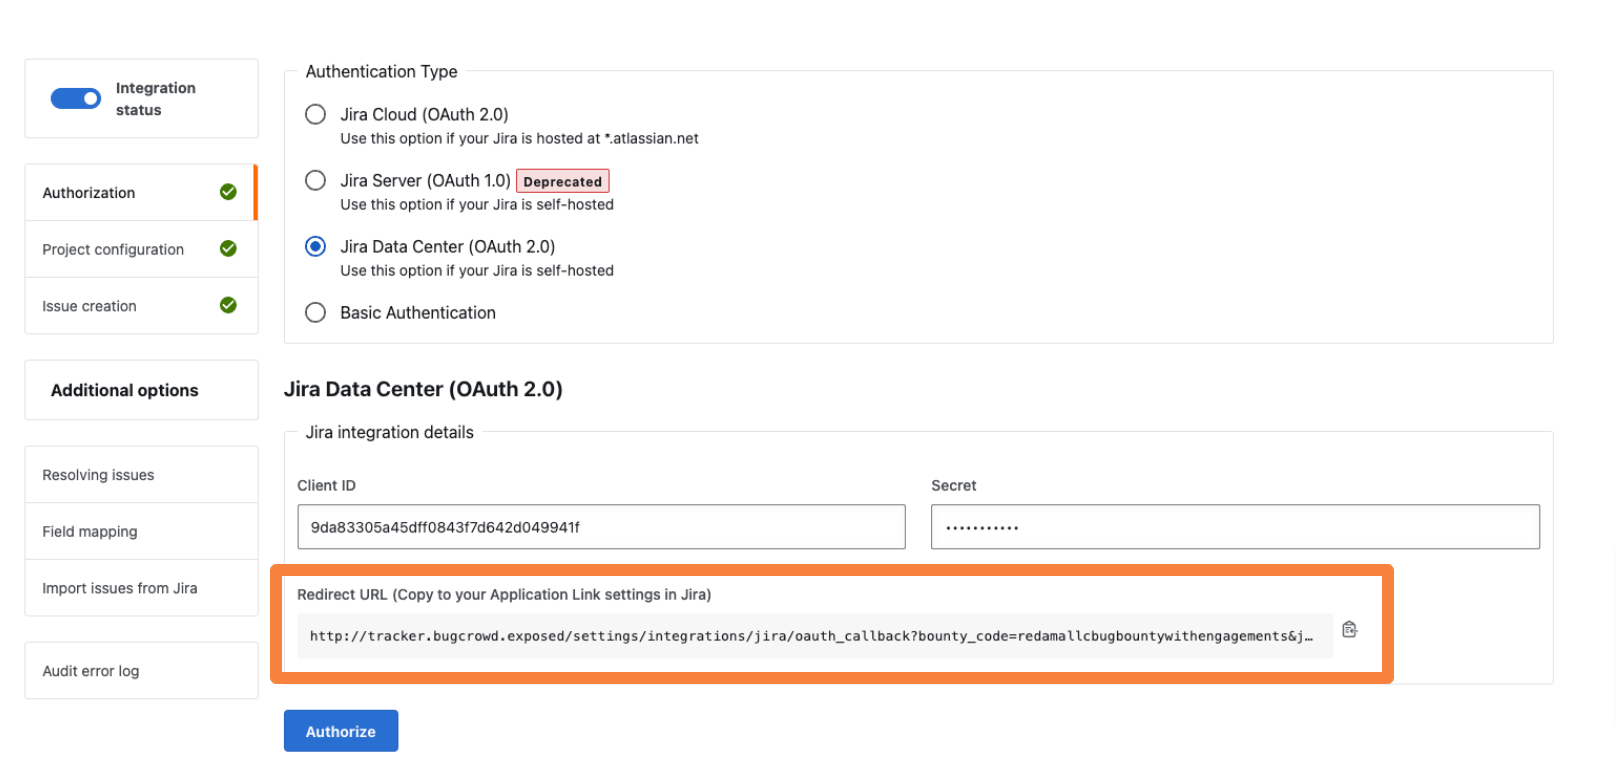
Paste the Client ID and Client secret in the Bugcrowd Integration page and click Authorize.authorize-jira-data-center
The Integration updated message is displayed. After authorizing Jira Data Center, configure the Jira project. For information, see configuring Jira project.
Authorizing Jira Using Username and Password
-
On the Jira Integration page, select the Basic Authentication option.
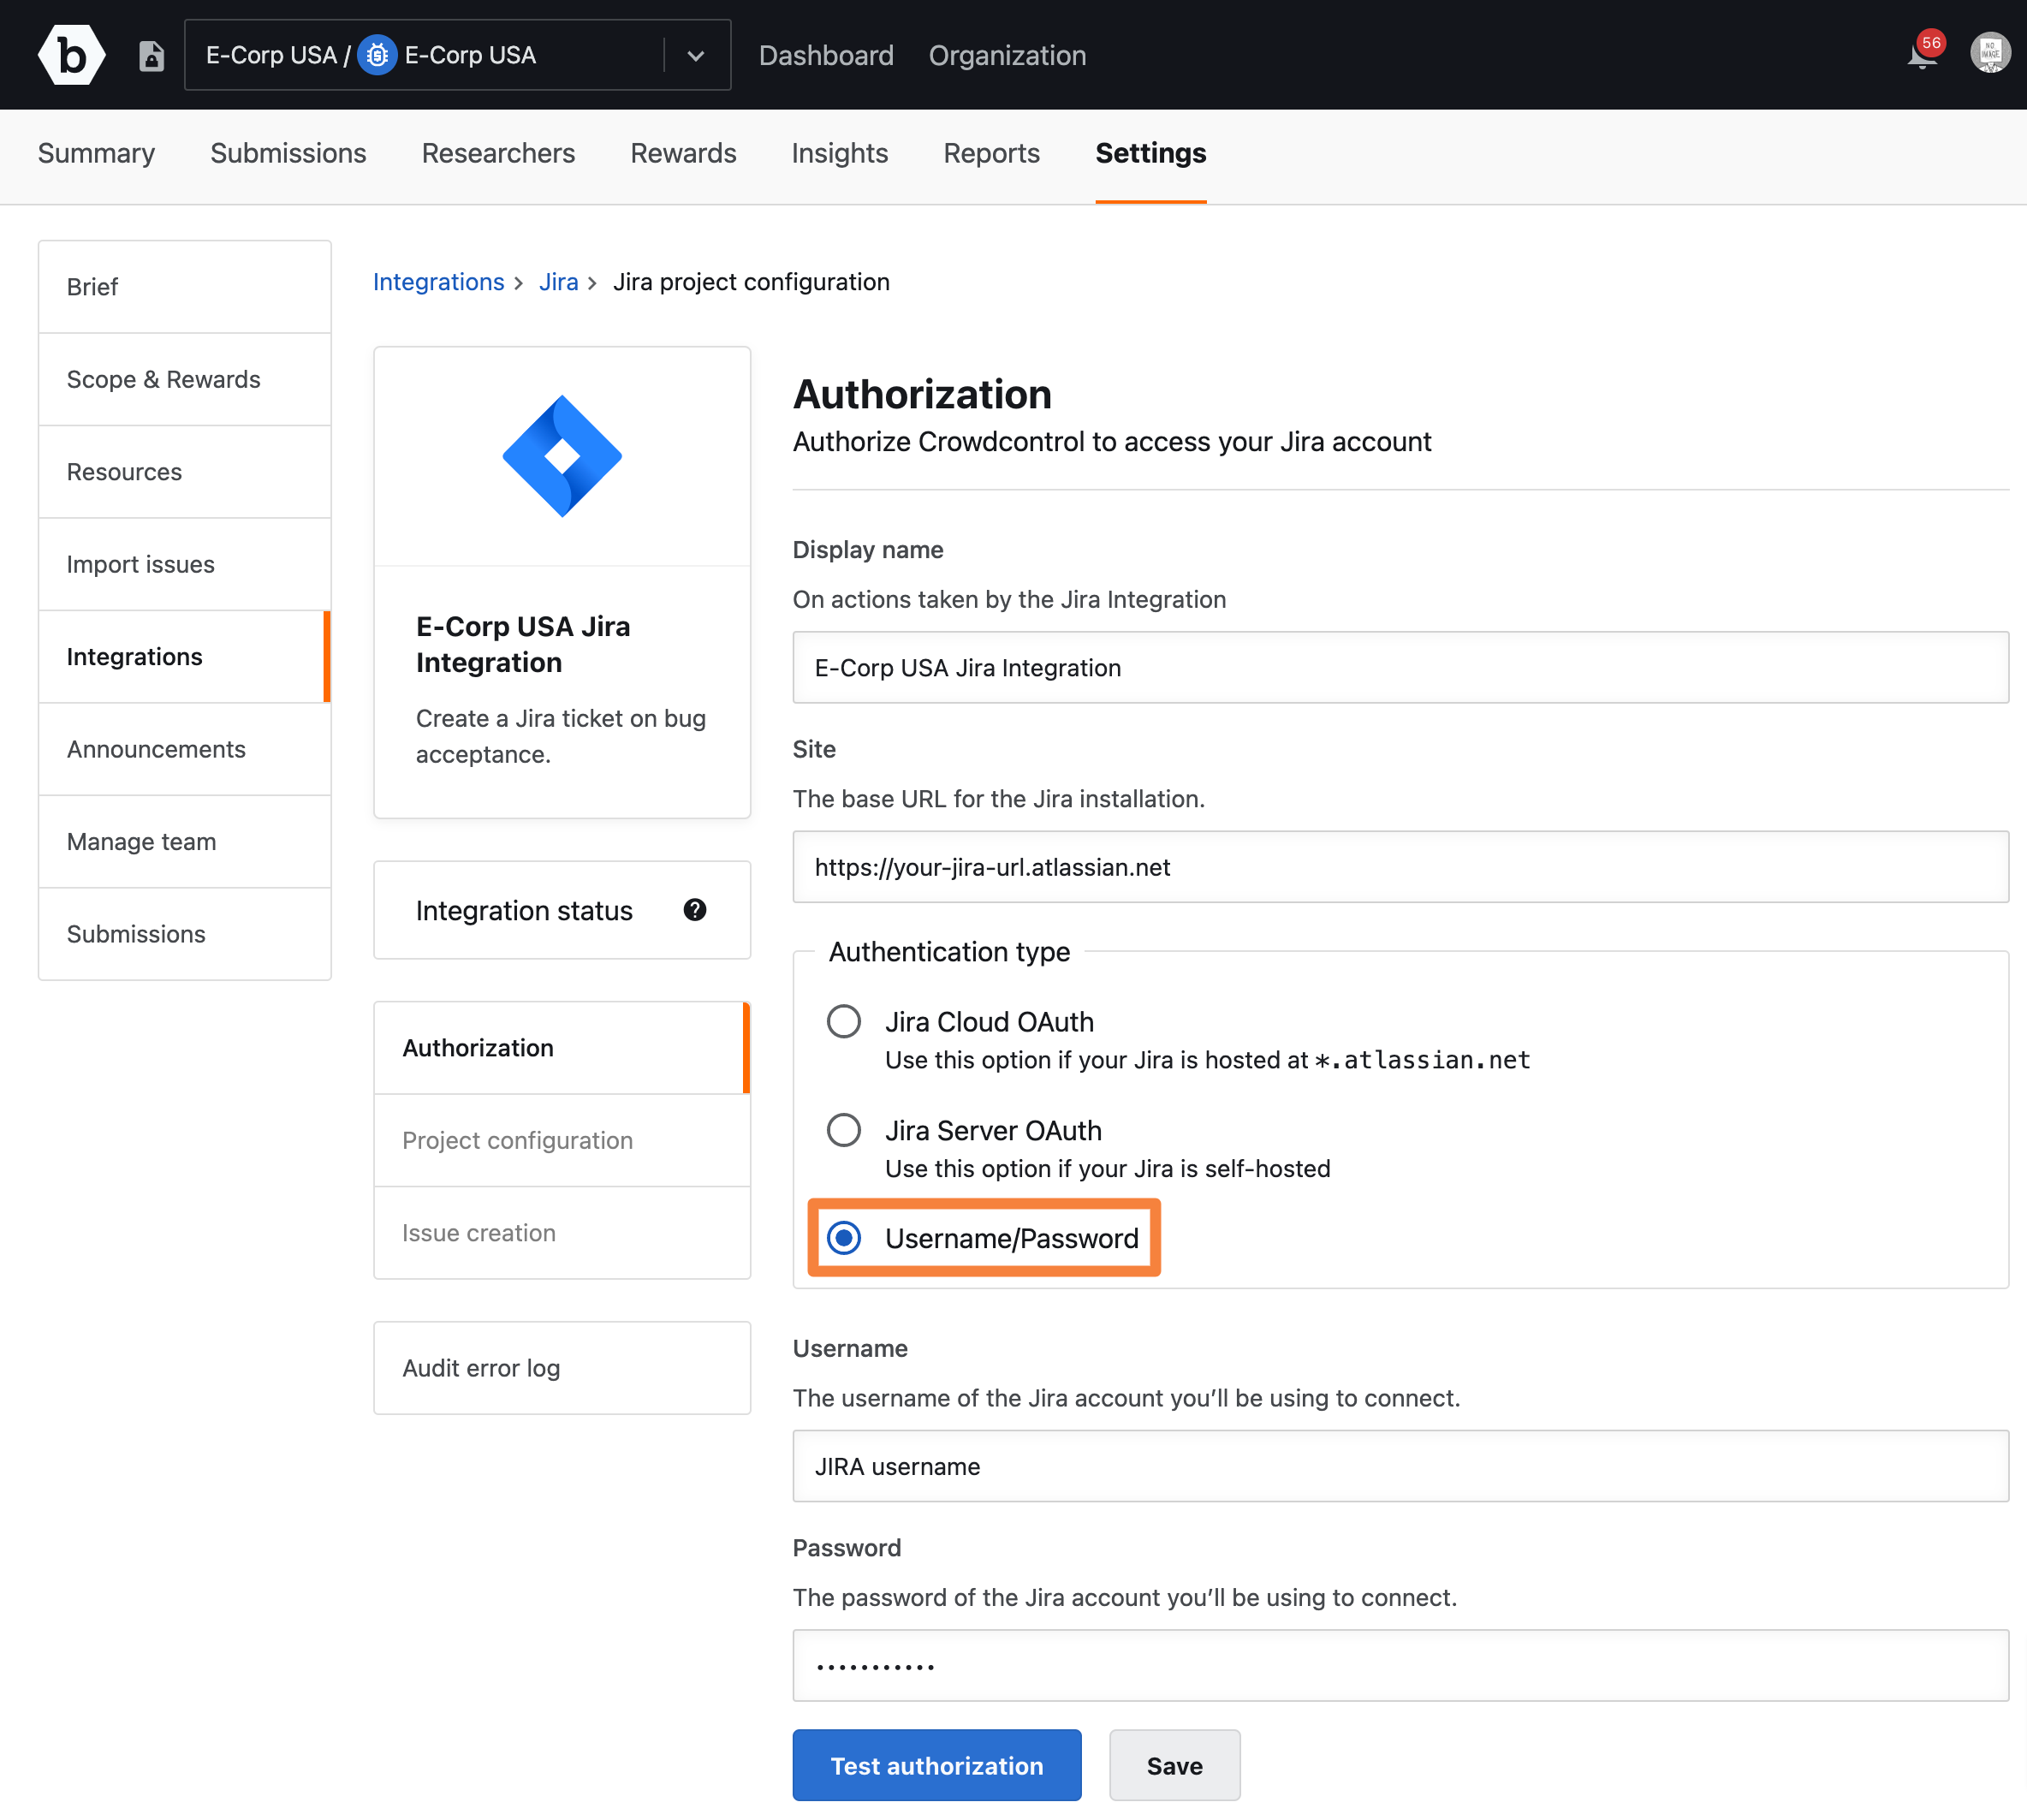
- Specify the following:
- Username: Your Jira user name.
- Password: API token generated in Jira. For information about generating API tokens, see Jira documentation.
-
Click Test authorization.
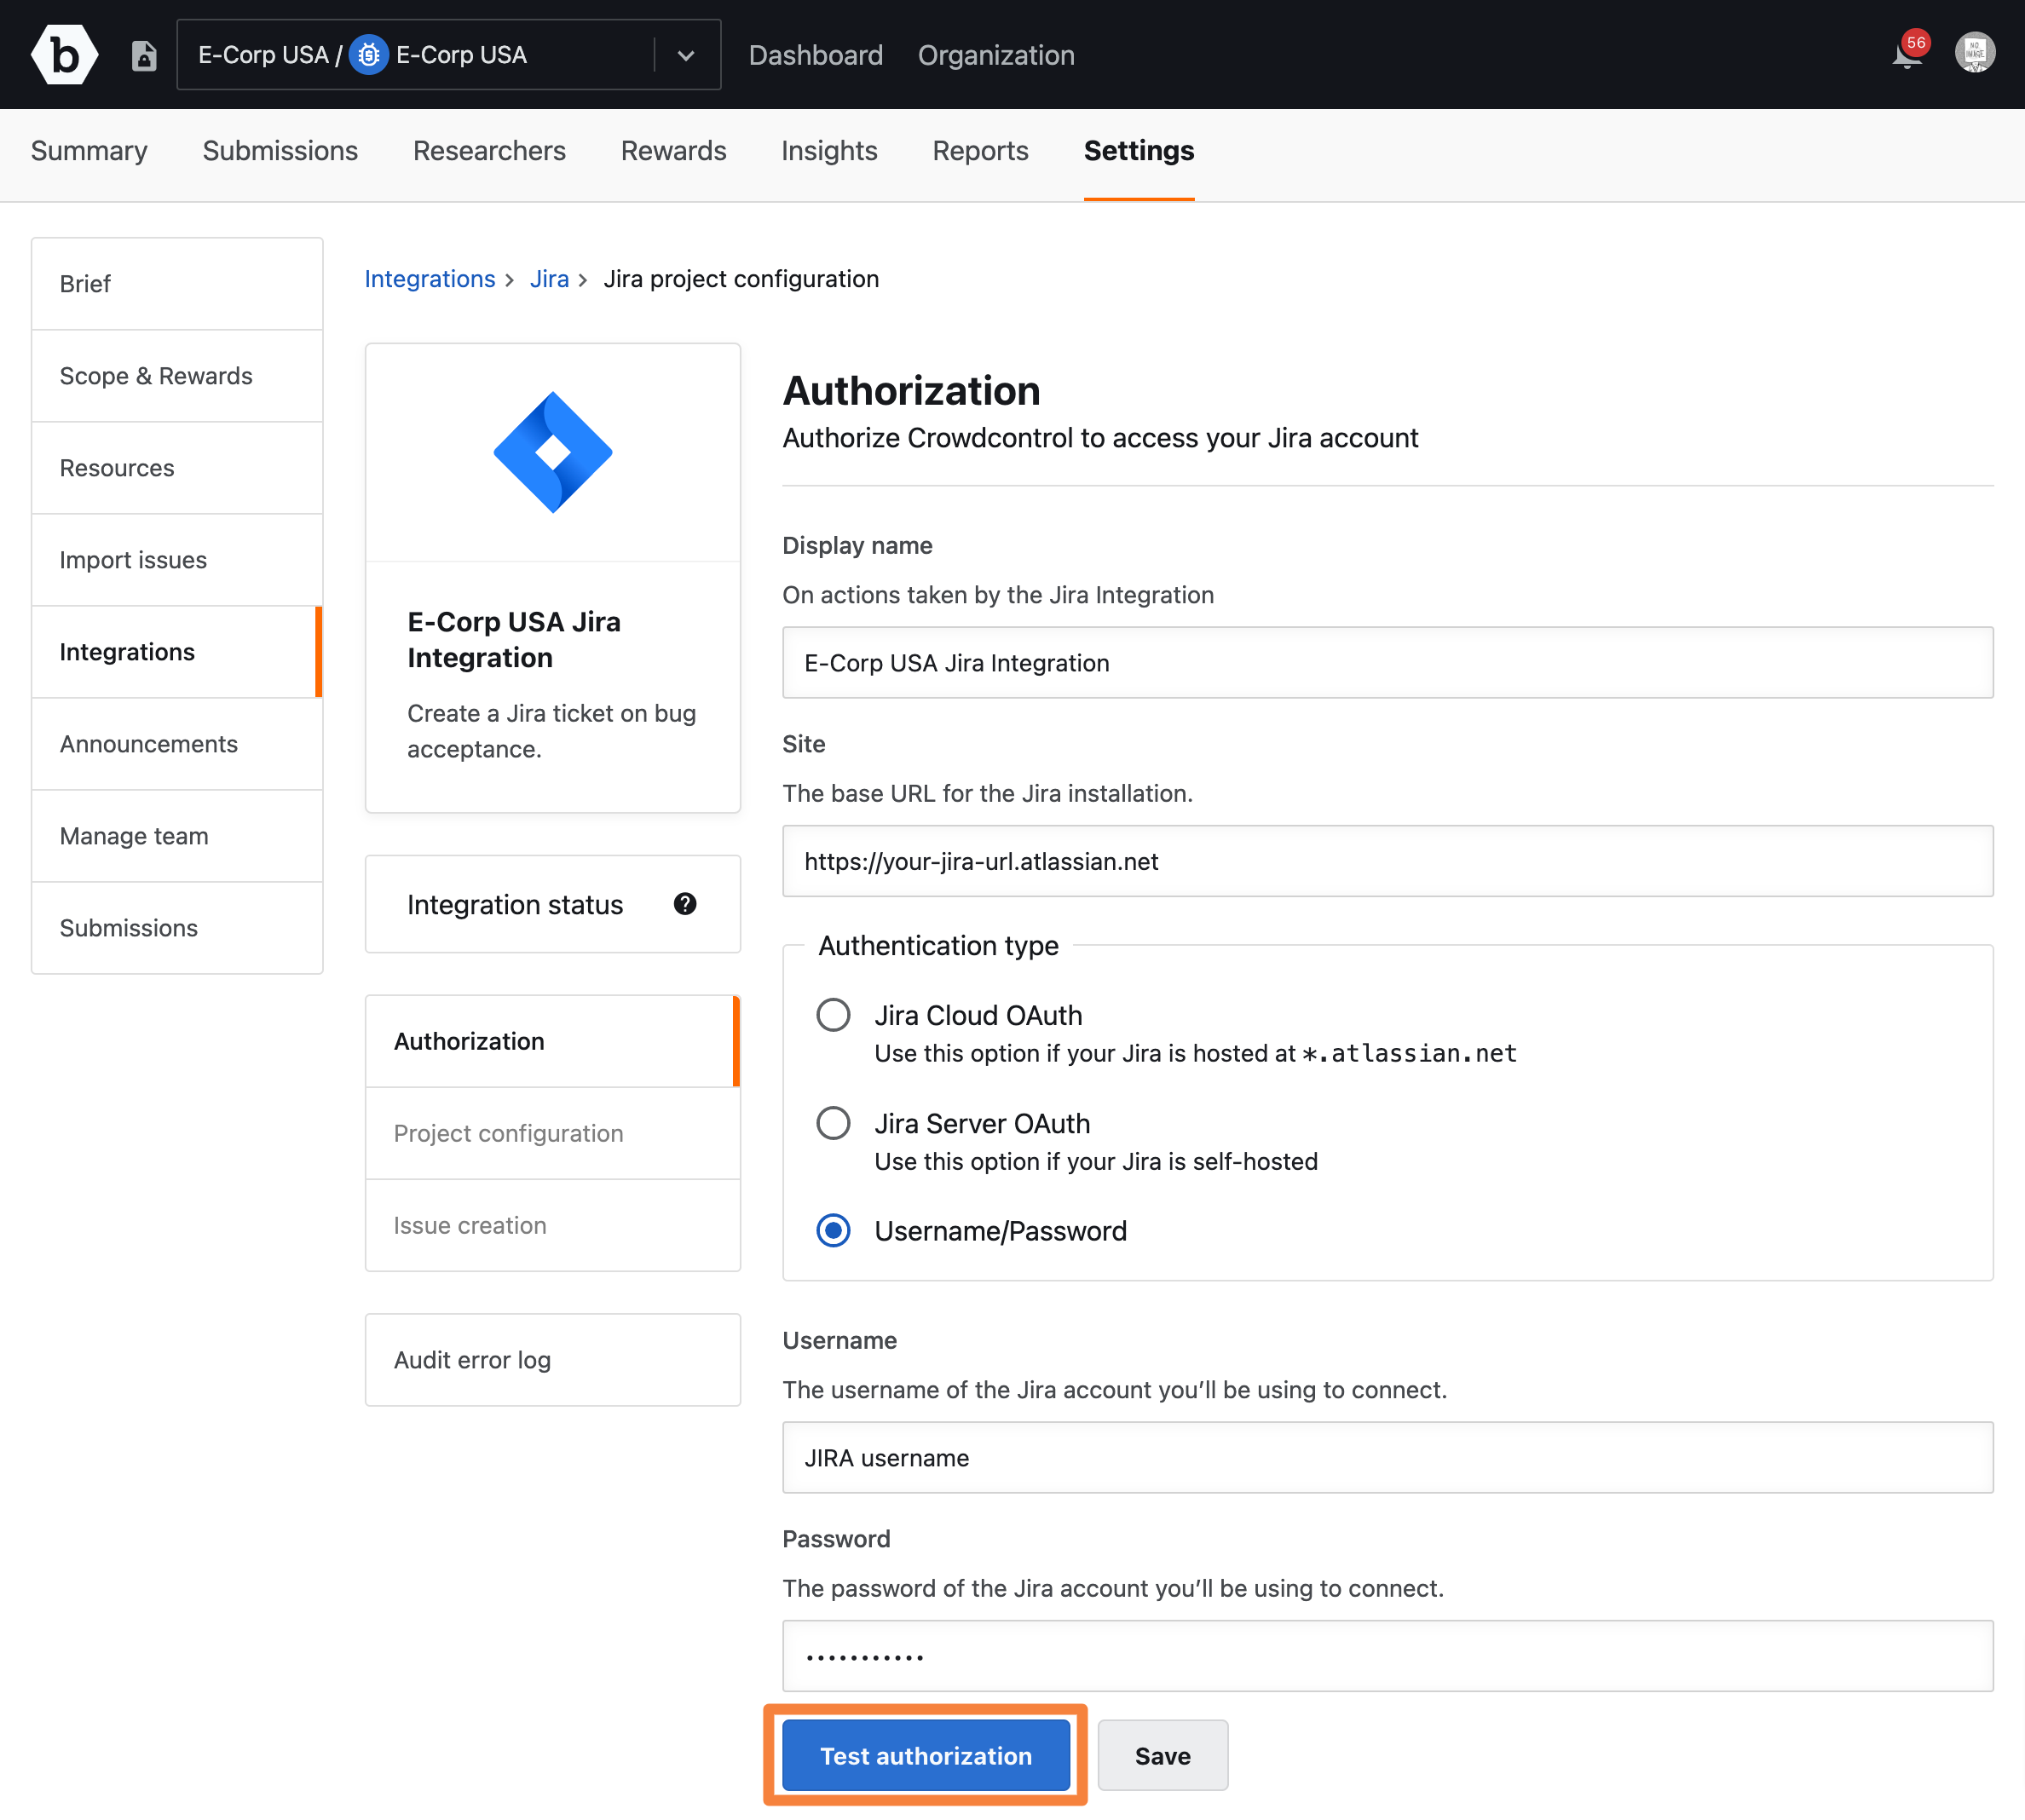
The Jira authentication successful message is displayed. After authorizing Jira, configure the Jira project. For information, see configuring Jira project.