- Setting Up IBM Security SOAR Integration
- Pushing Submissions to IBM Security SOAR
- Unlinking an IBM Security SOAR Incident
- Editing Existing IBM Security SOAR Integration
The Security SOAR integration is set up in the program’s settings and is specified to send notifications for activities in that program. There is no limitation on the number of projects that can be set up with the Security SOAR integration. To push or view an issue in Security SOAR, you must be authenticated as Bugcrowd will not collect any authentication permissions.
Setting Up IBM Security SOAR Integration
-
Select a program, go to Settings > Integrations.

-
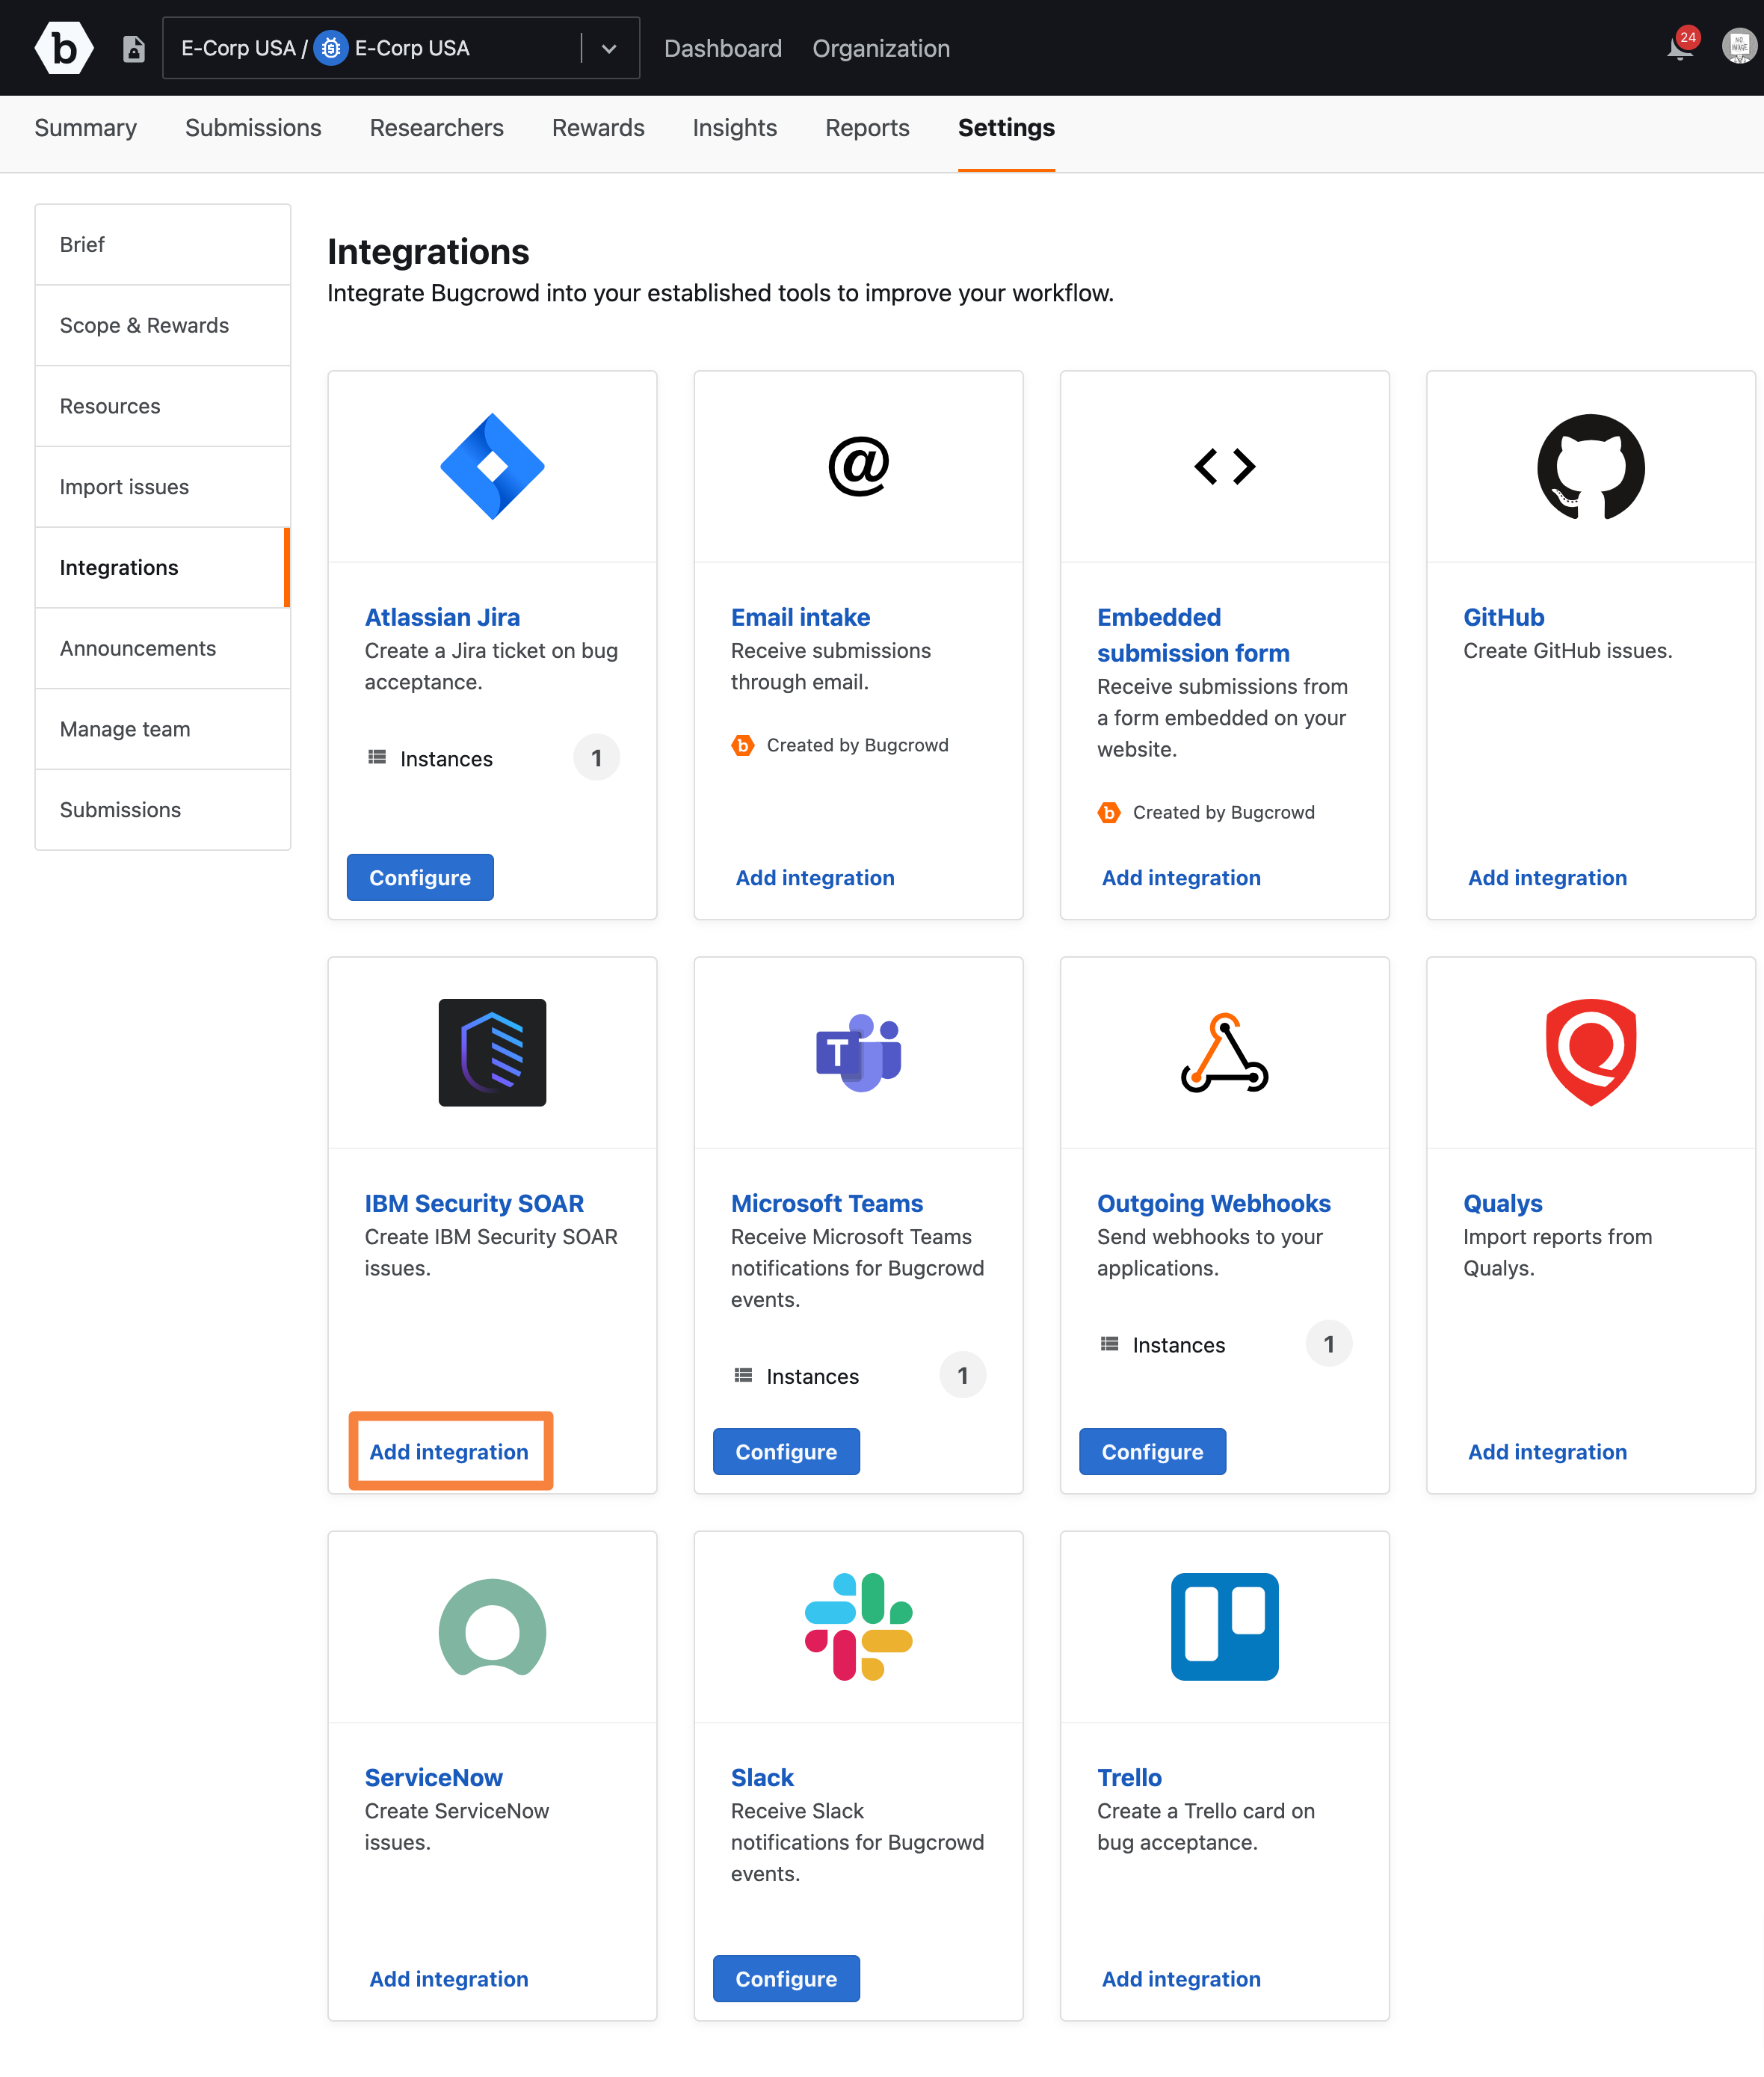
On the integrations page, go to IBM Security SOAR and click Add integration.
-
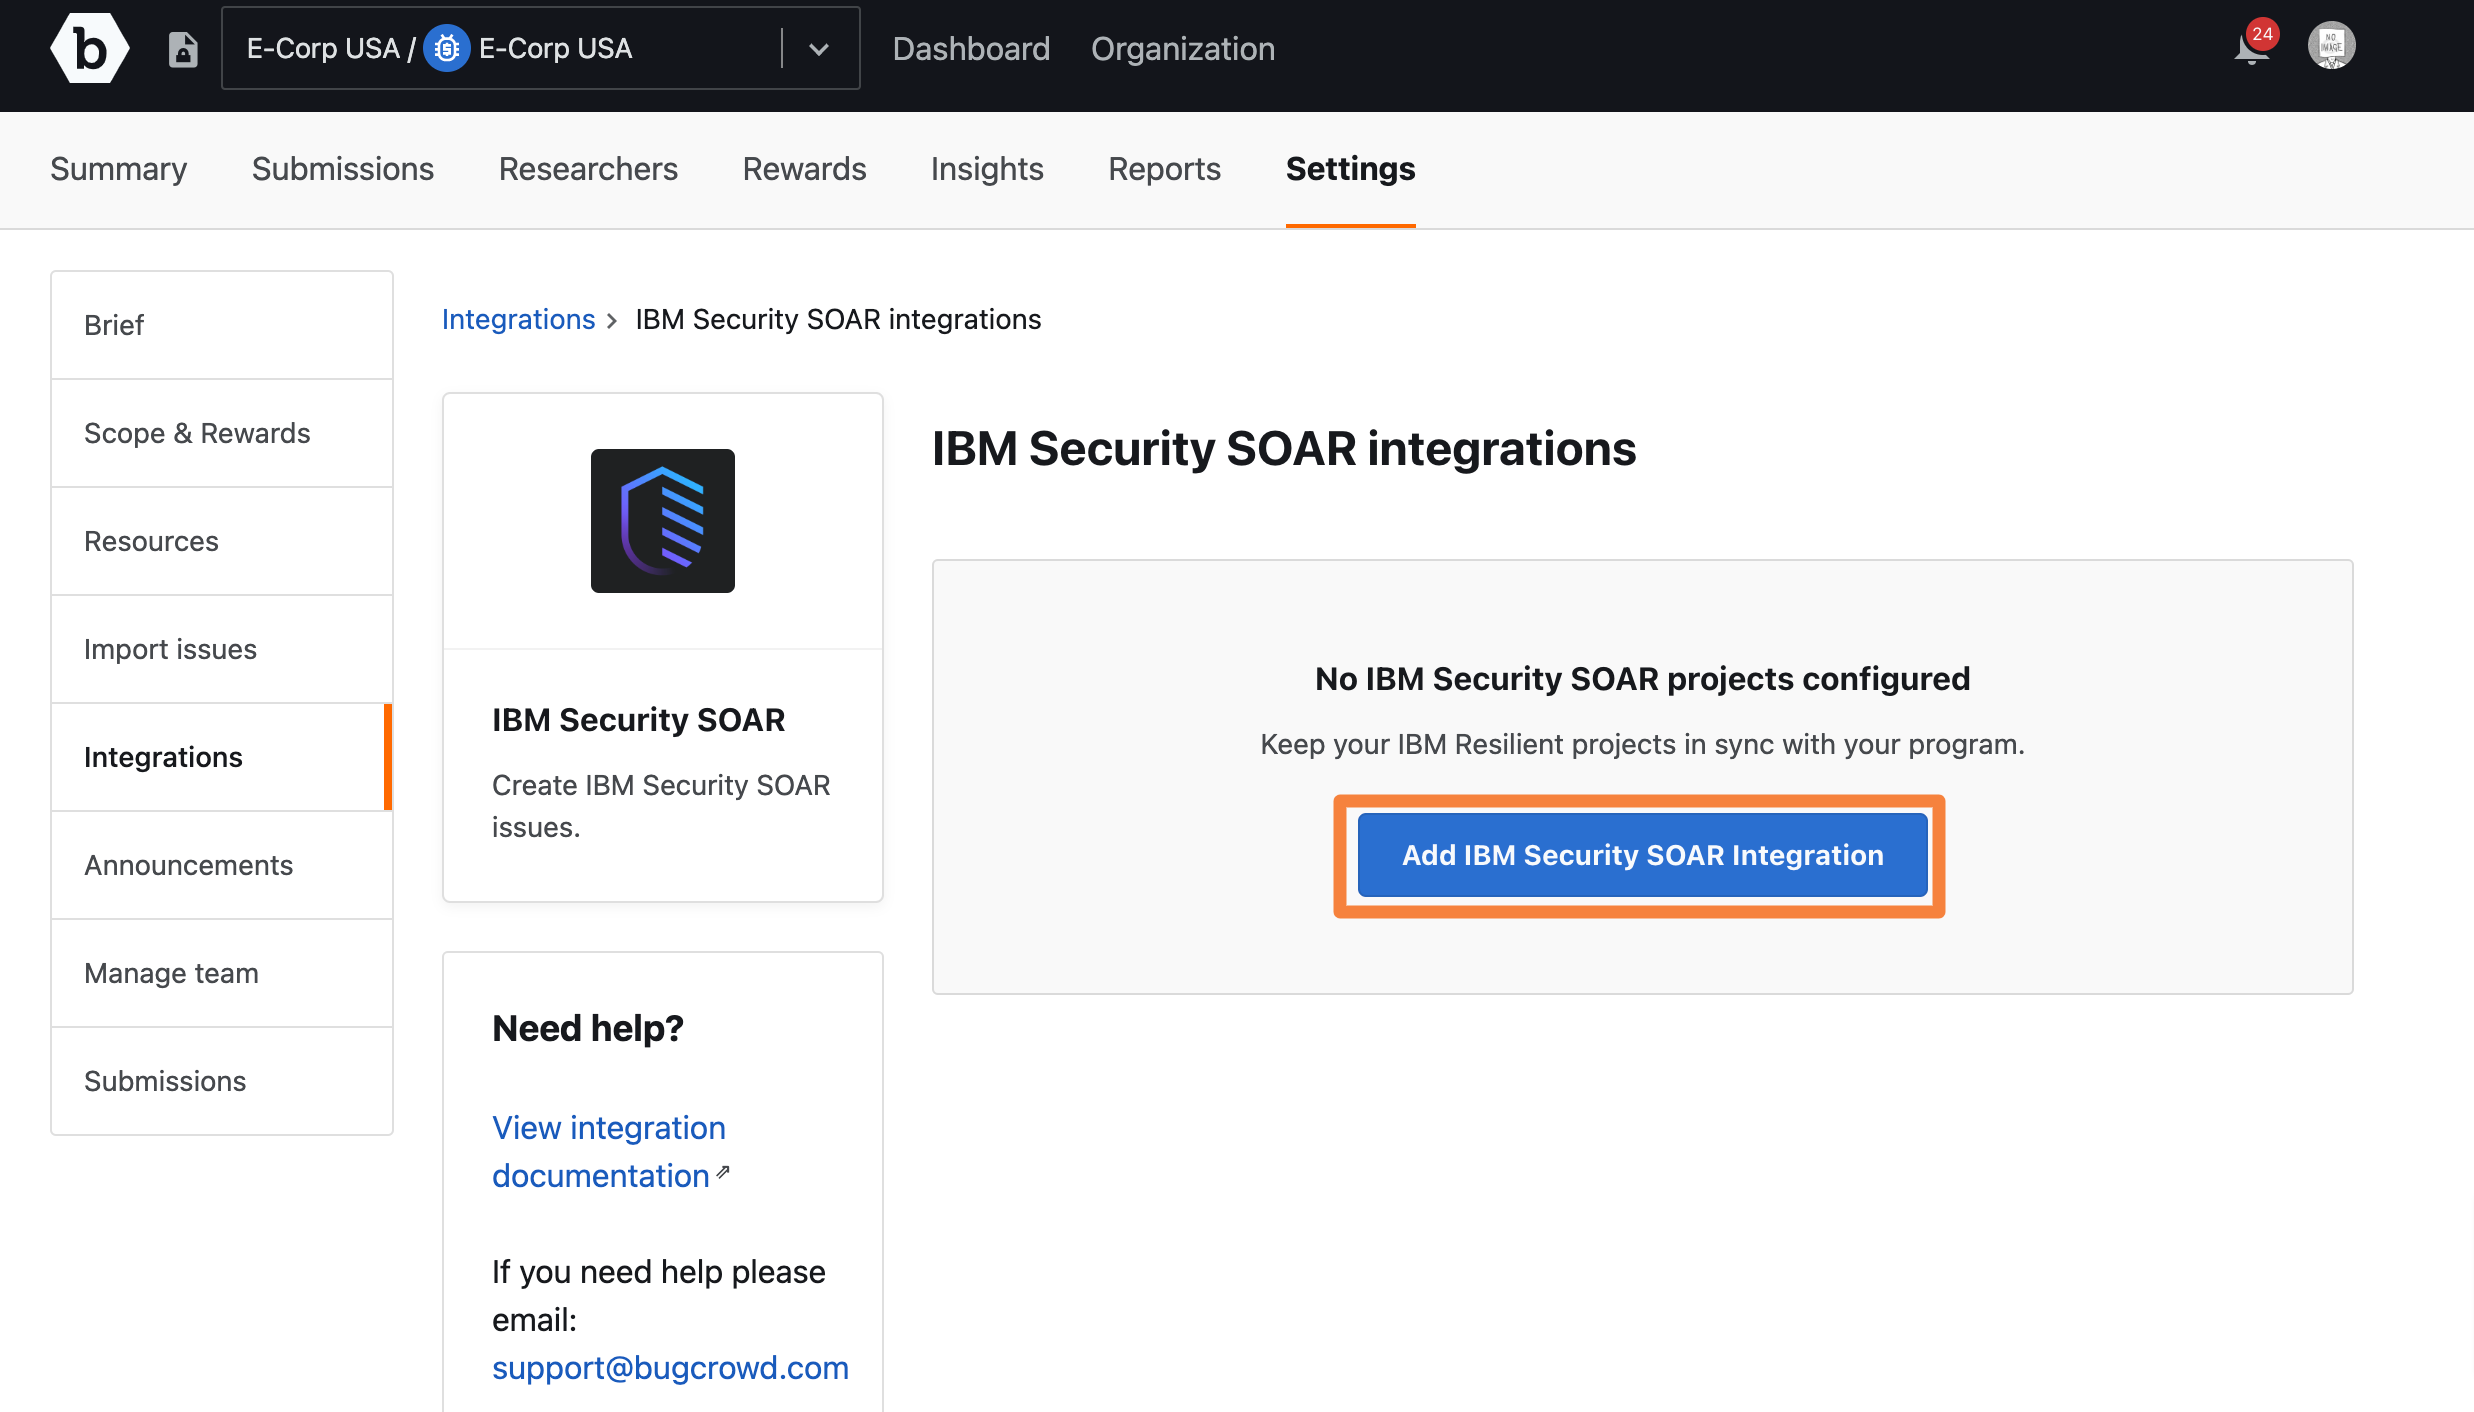
Click Add IBM Security SOAR Integration to setup your project.
-
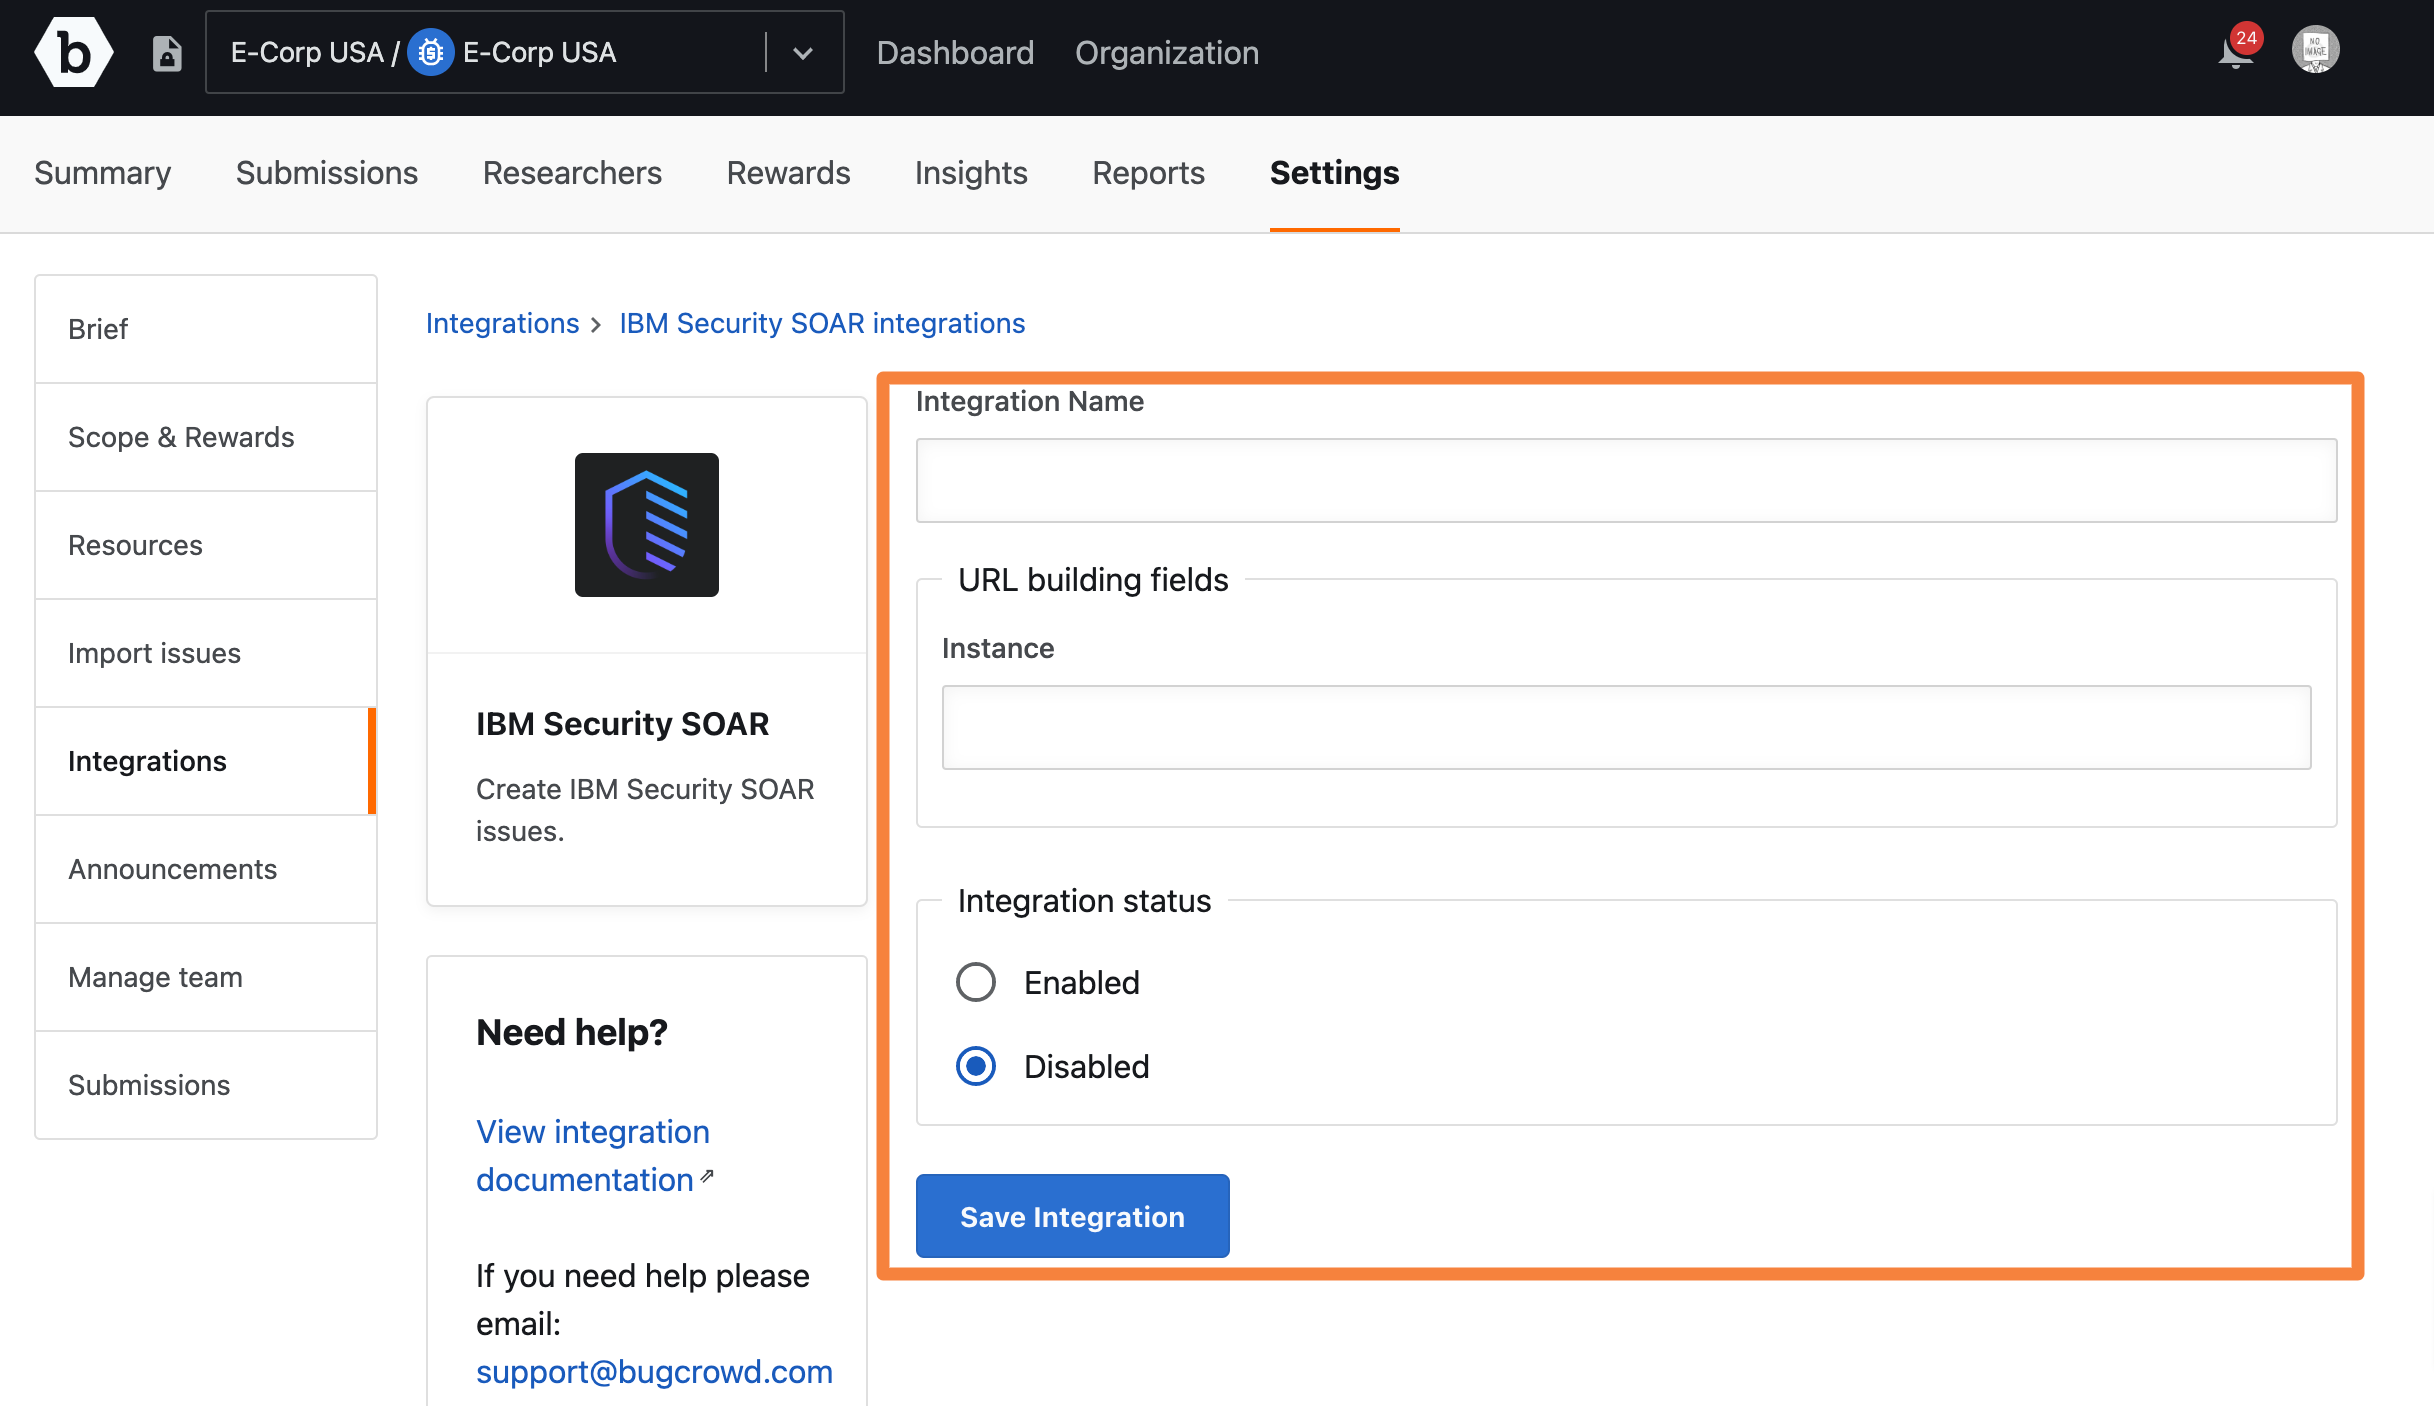
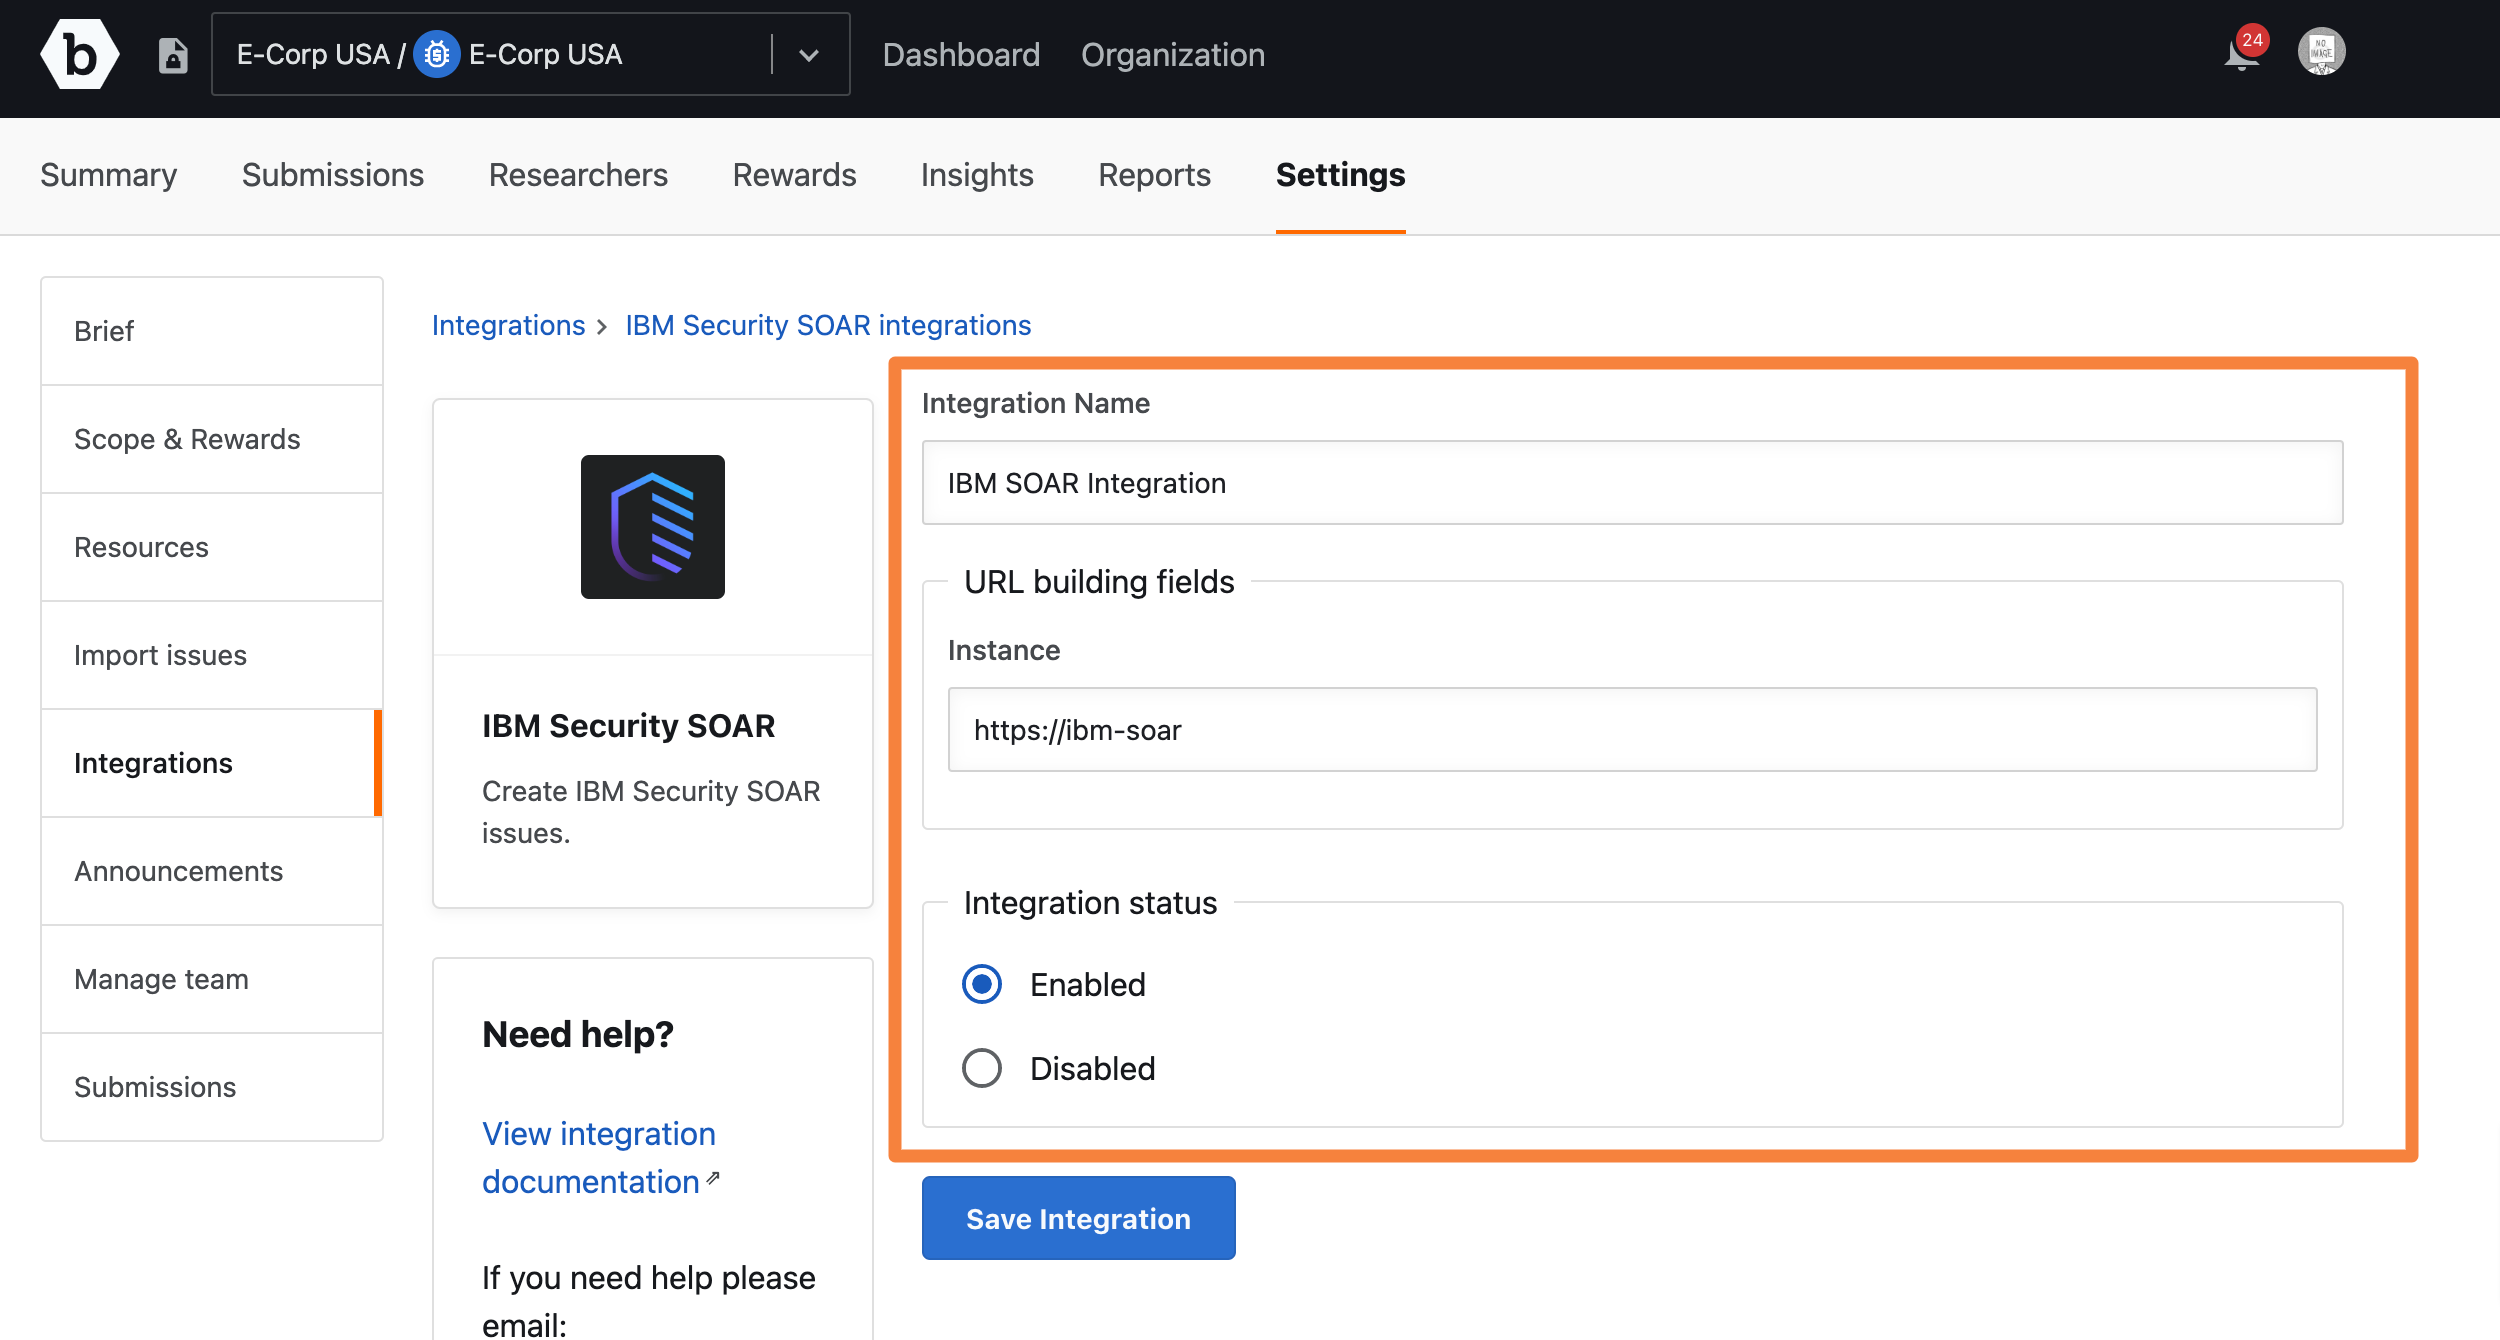
Specify the following information:
- Integration Name: Provide a name for the integration.
- Instance: Specify the Security SOAR instance URL.
- Integration status: Select Enabled for allowing submissions to be pushed to Security SOAR. By default, it is Disabled.
-
Click Save Integration.

The integration project is displayed in the IBM Security SOAR integrations page.
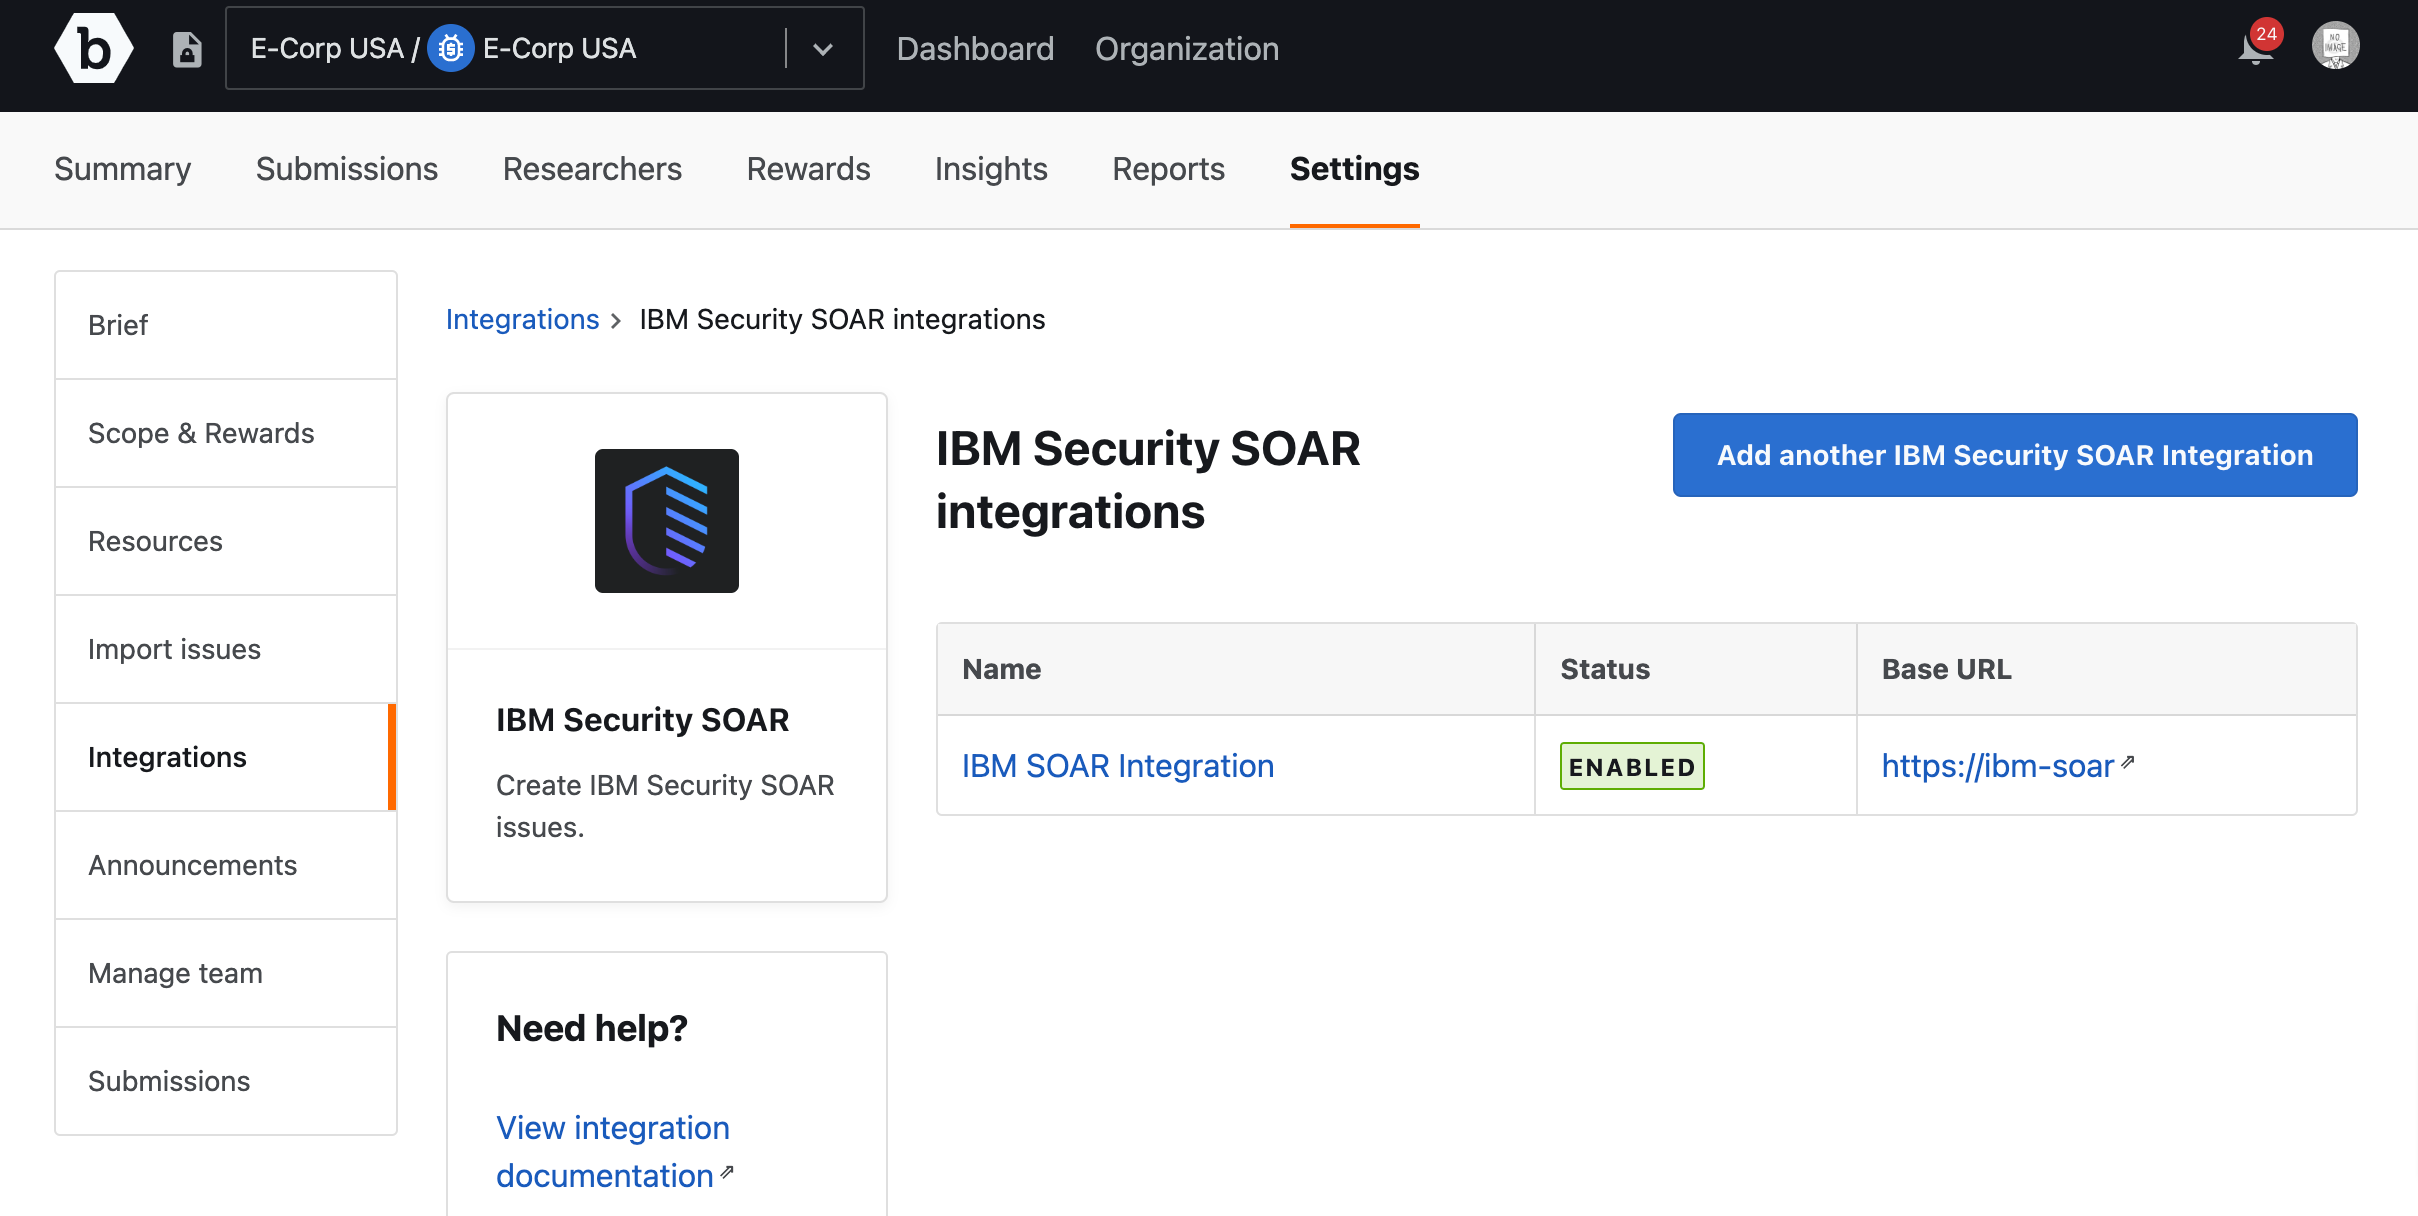
To setup another integration project, click Add another IBM Security SOAR Integration and perform the same steps.
If you have setup the Security SOAR integration project appropriately, then Connected is displayed on the Integrations page. It also shows the number of project instances that are configured.

You cannot delete a Security SOAR integration project. You can only disable the integration setup.
Pushing Submissions to IBM Security SOAR
-
After you have setup and enabled IBM Security SOAR integration, you can go to any submission and click Push to IBM Security SOAR.
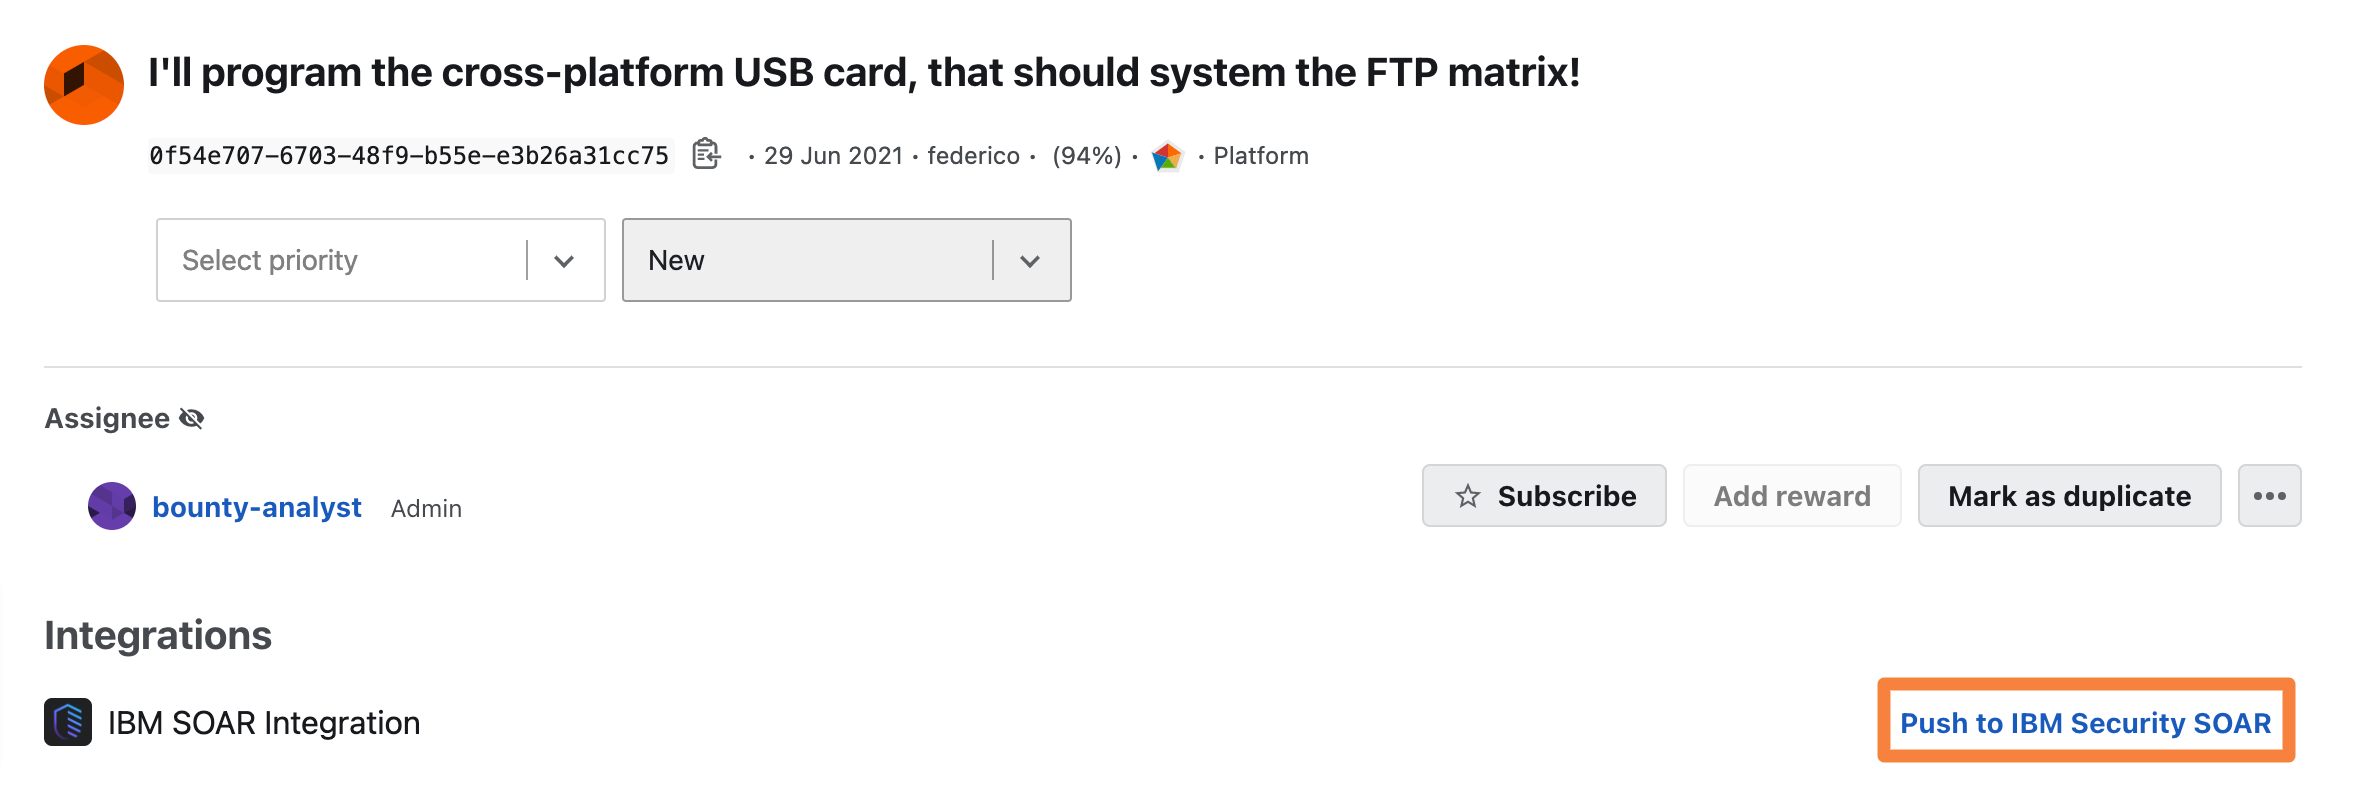
The Push to IBM SOAR Integration pop-up window is displayed.
If you have setup multiple integration projects, then the Push to IBM Security SOAR link will be displayed for each integration in the submission. You can push the submission to the required Security SOAR integration project.
-
To create the incident in Security SOAR, click Create the incident.
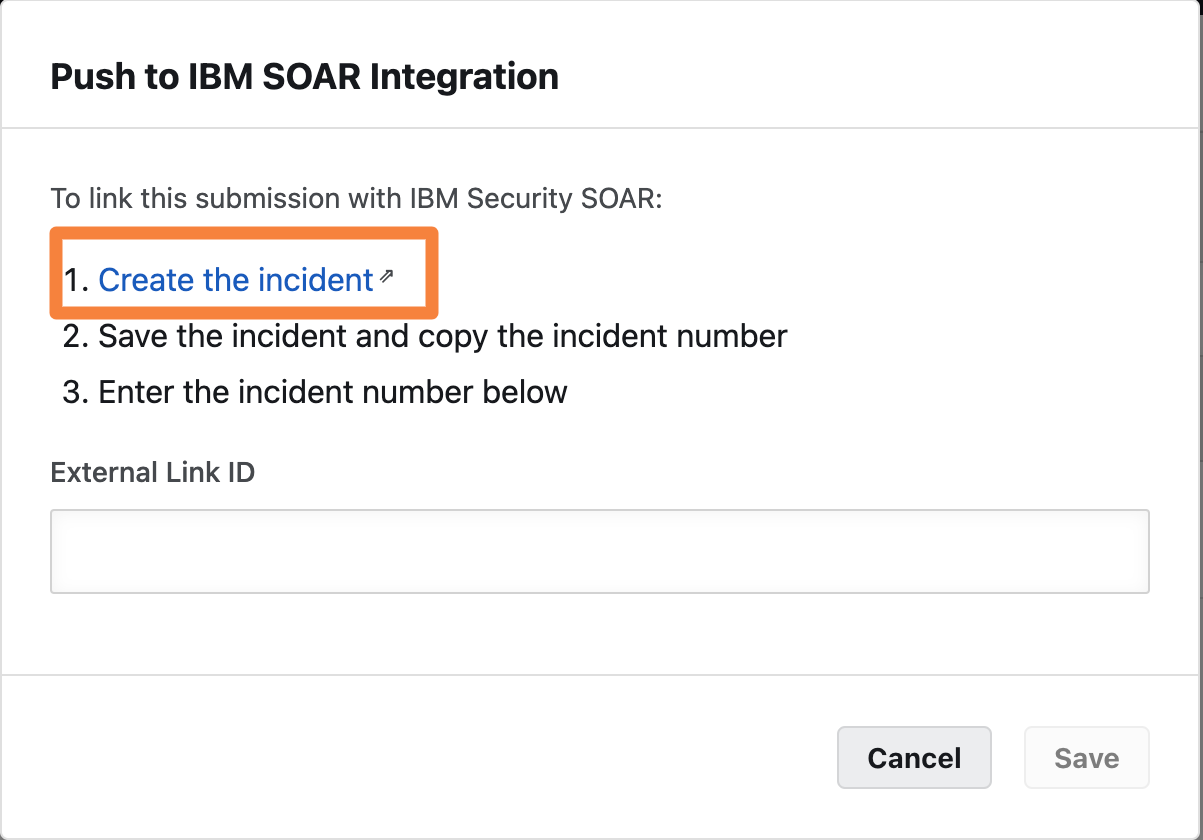
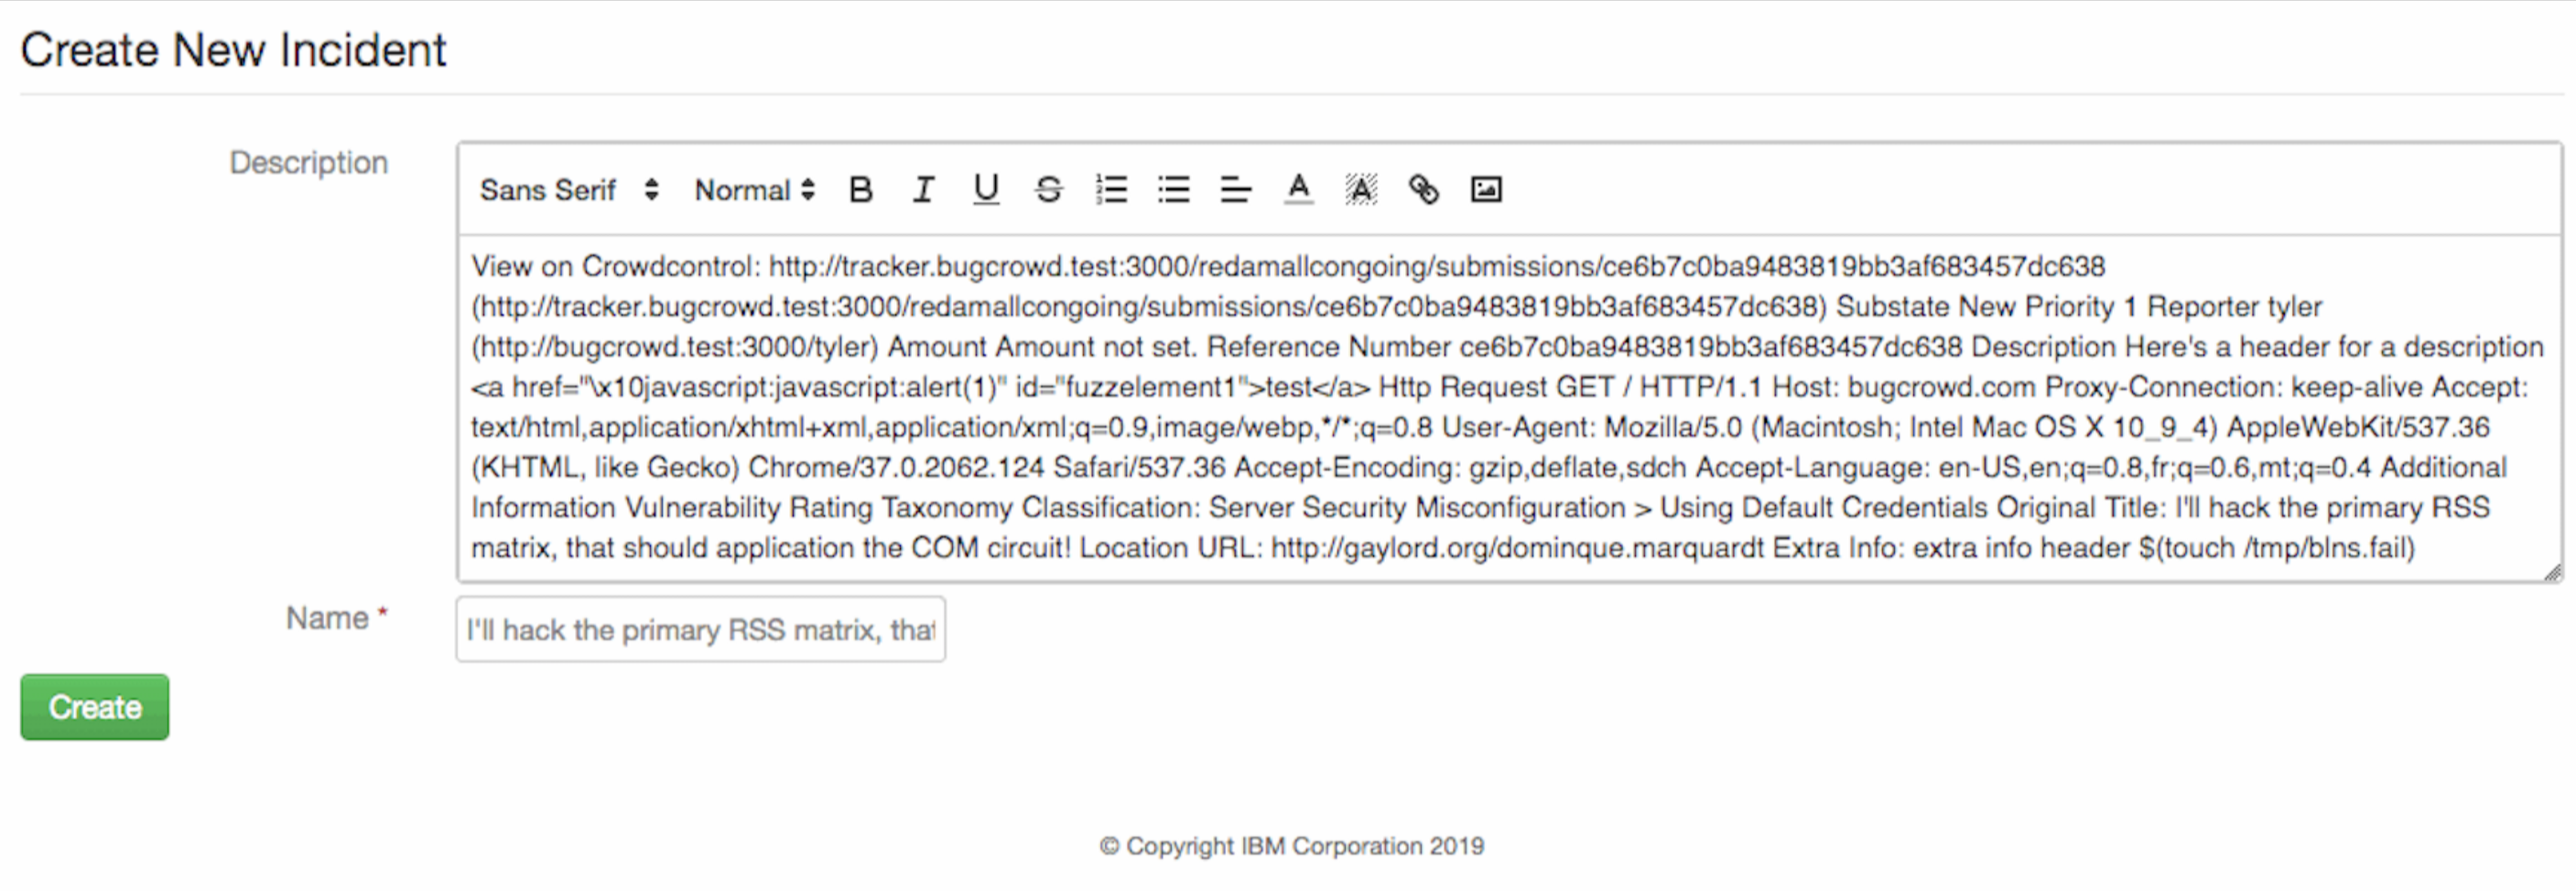
The Create New Incident page displays the contents of the submission. You can edit the information before creating the incident.
-
Click Create.
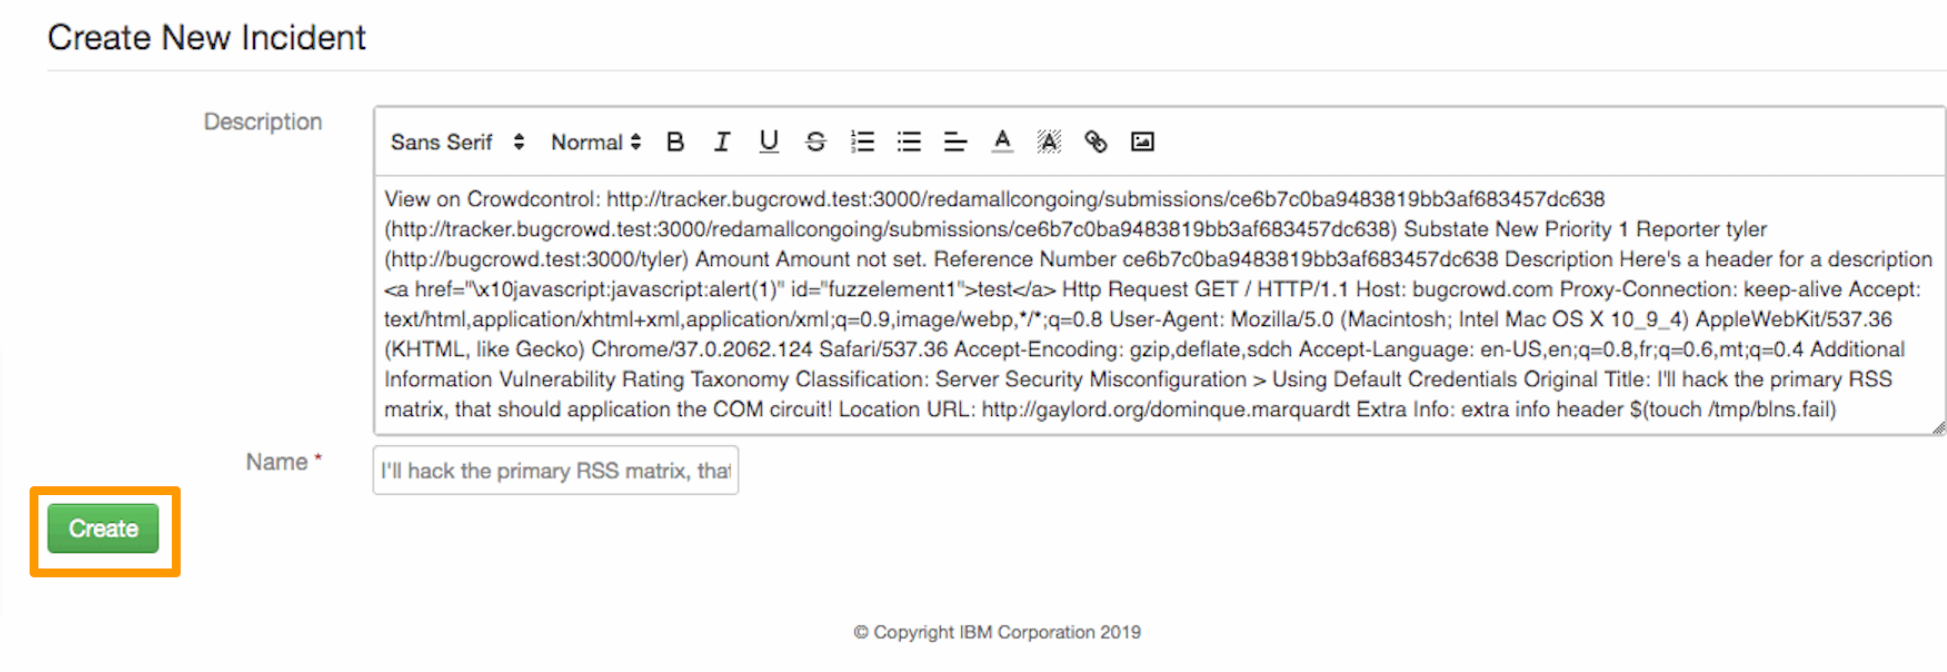
The incident is created in Security SOAR.
-
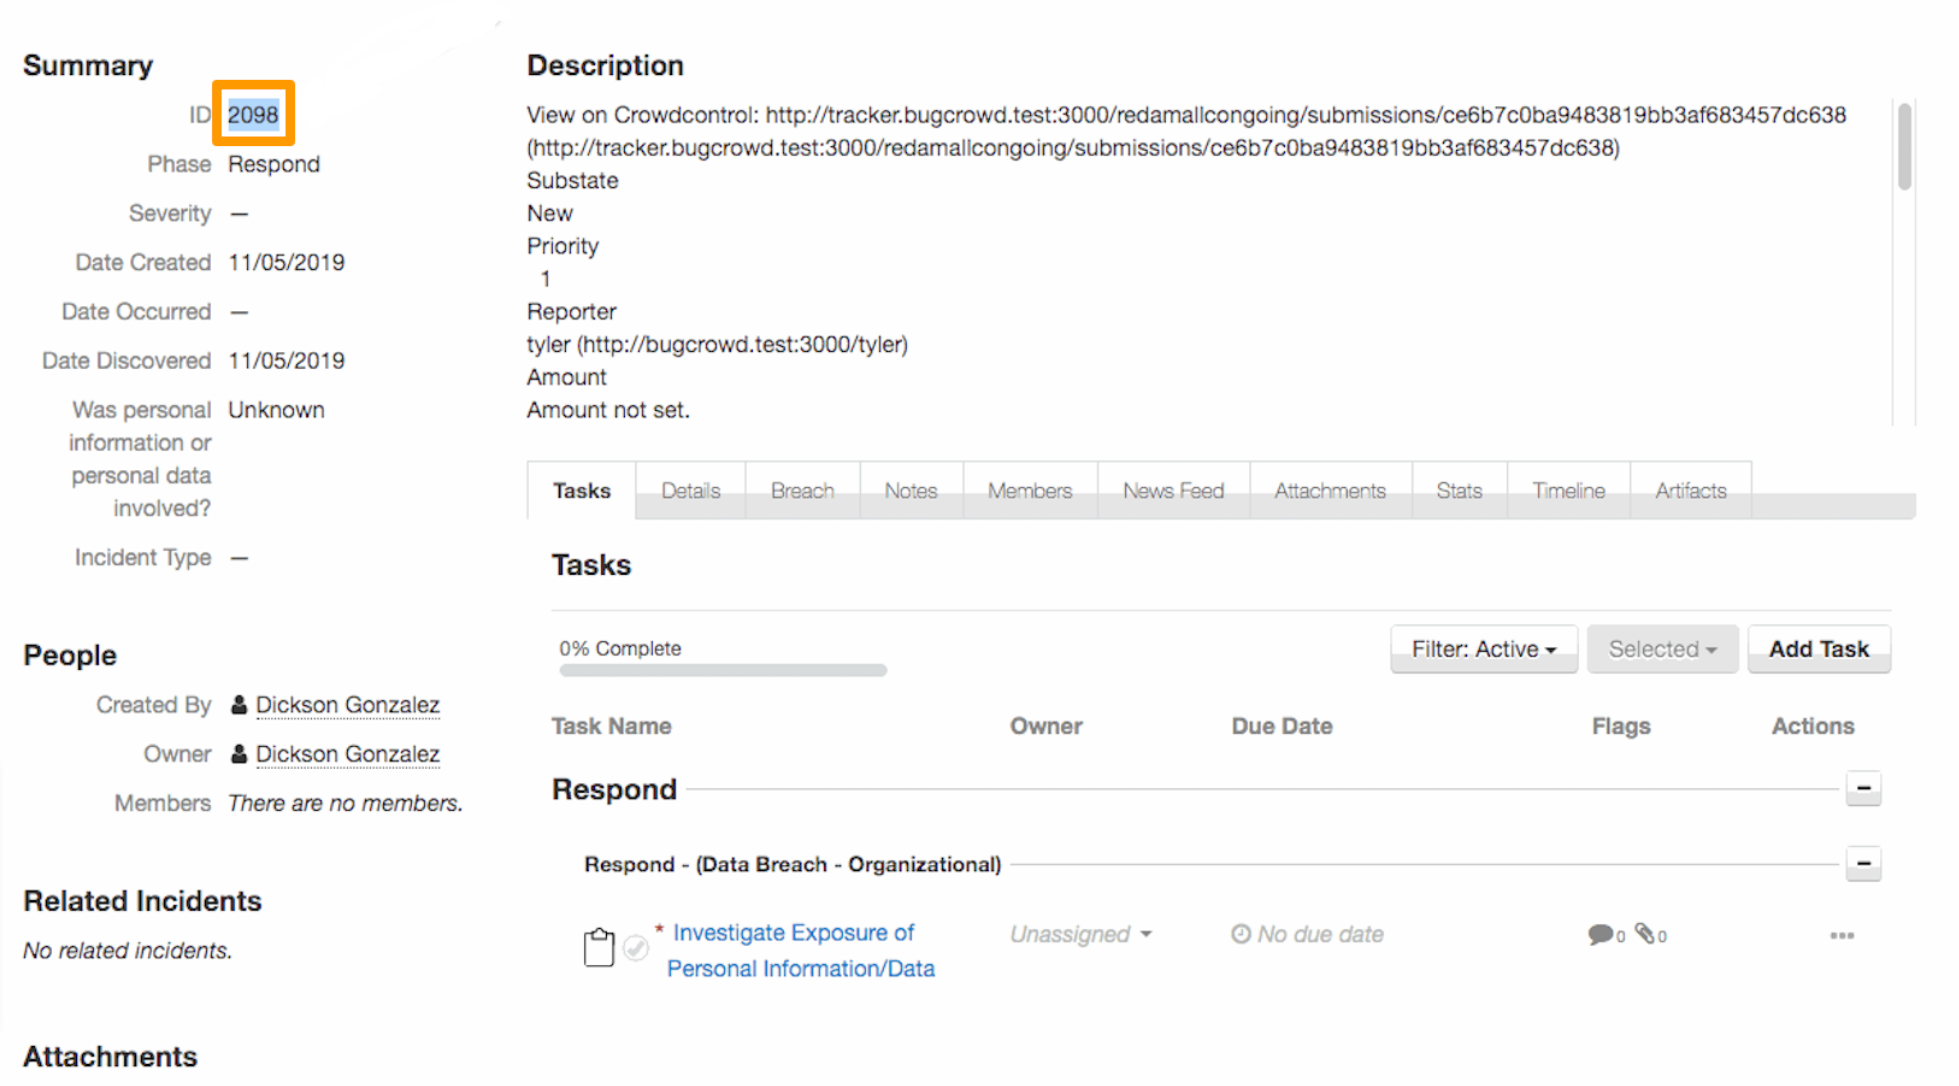
Copy the ID number from the incident page.
-
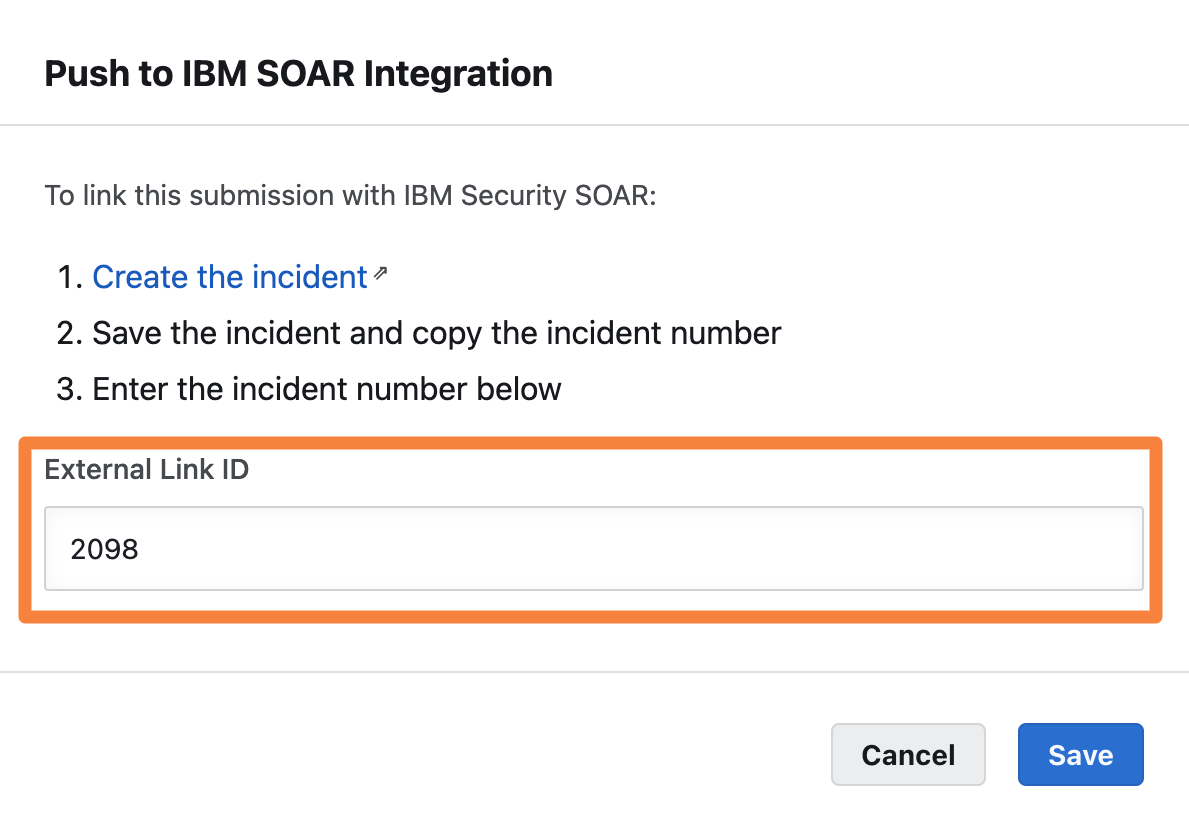
Go back to the Push to IBM SOAR Integration pop-up window and enter the incident number in External Link ID.
-
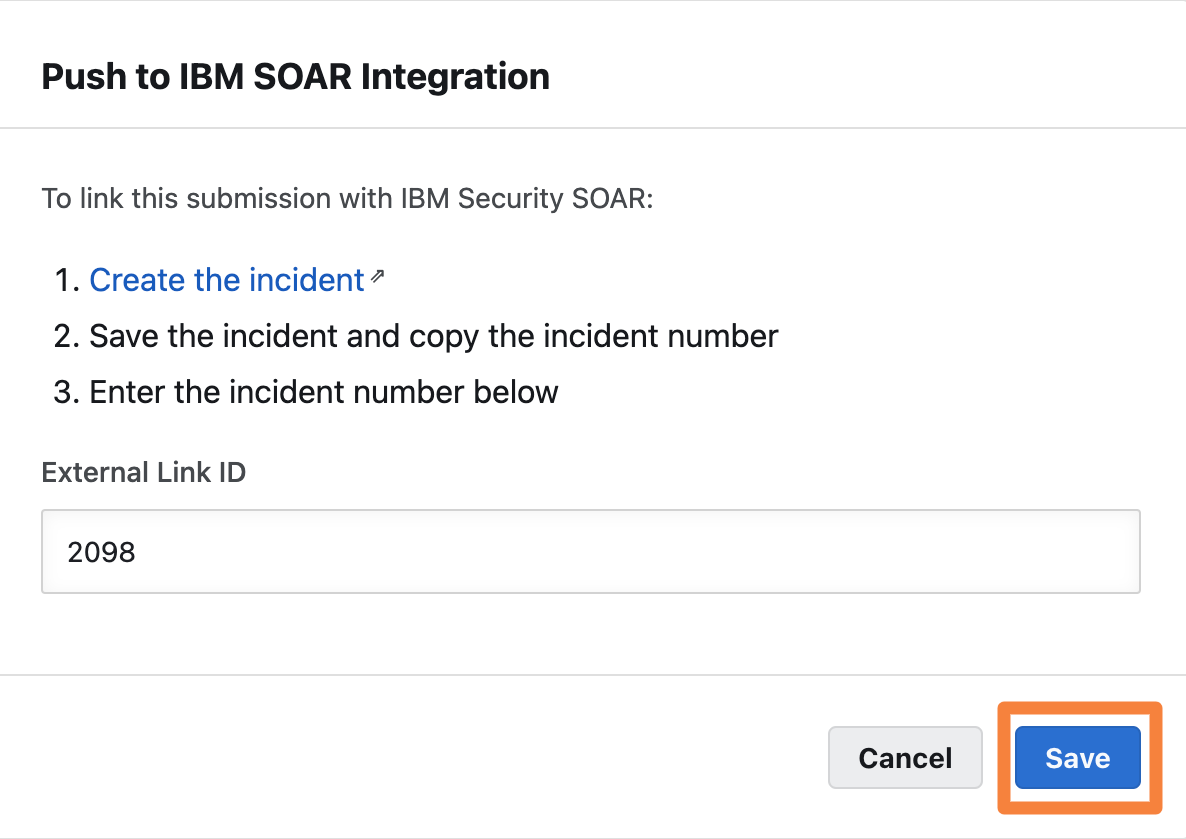
Click save.
The ID is displayed on the submission as a link. Click this link to access the Security SOAR incident within Crowdcontrol for further updates.

Unlinking an IBM Security SOAR Incident
-
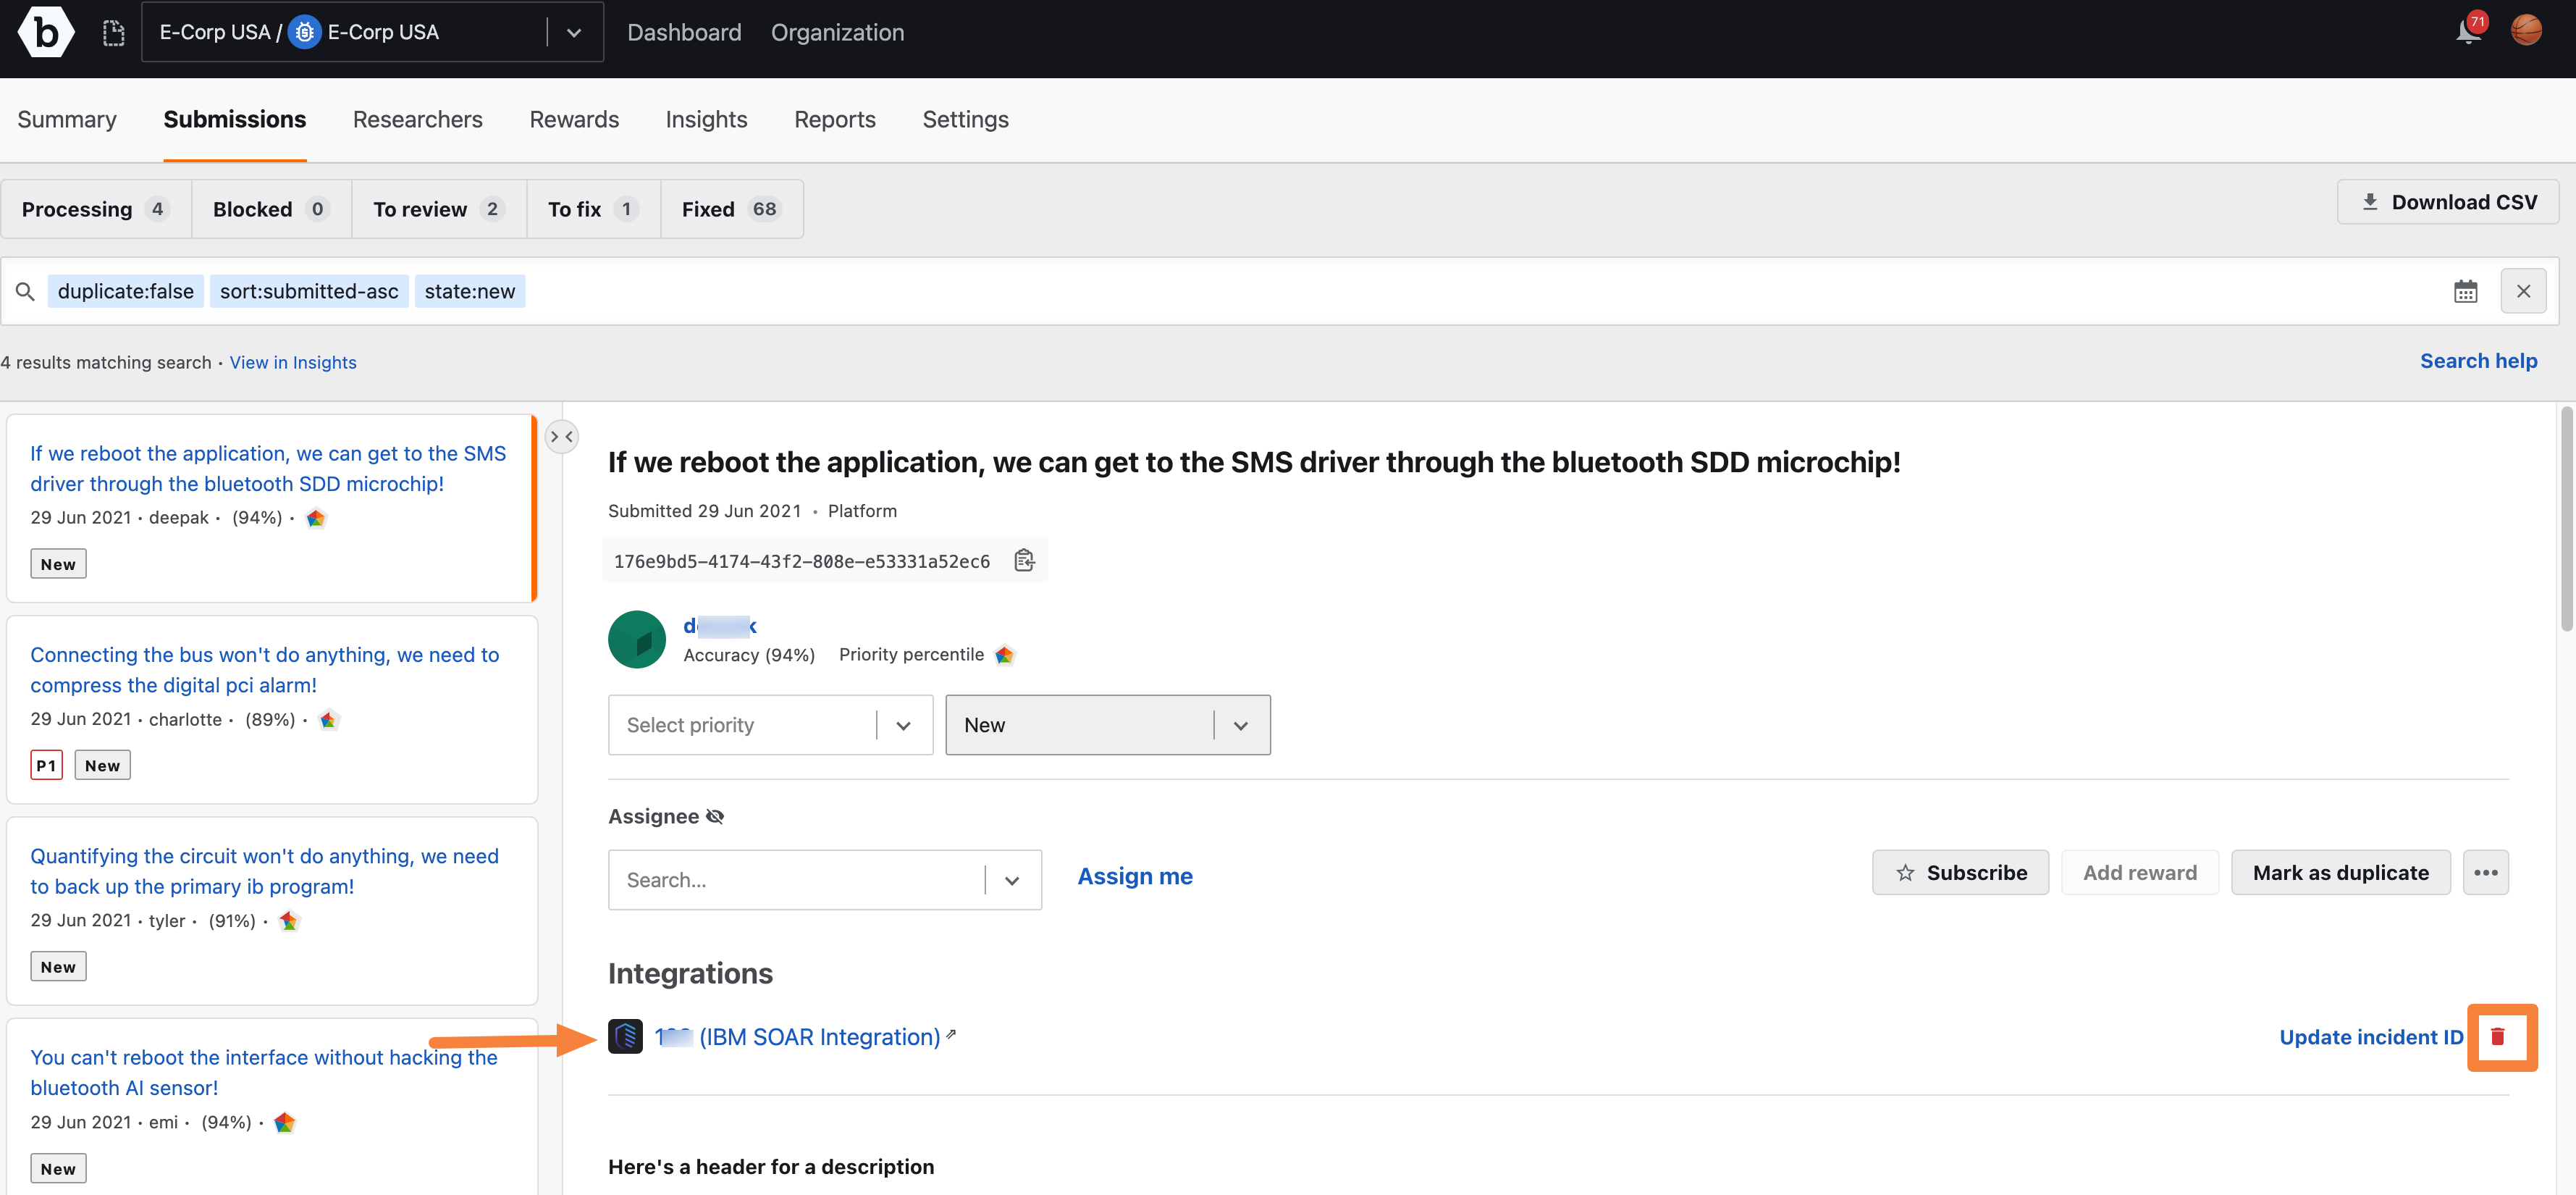
To unlink an IBM Security SOAR Incident, go the Submissions page and select the submission.
-
Click on the red bin icon adjacent to Update incident ID in the Integrations section.
-
Click Unlink to confirm unlinking the issue.

Editing Existing IBM Security SOAR Integration
To edit an existing IBM Security SOAR integration:
-
On the IBM Security SOAR Integrations page, click the integration that you want to edit.

-
Update the required information in the following fields:
- Integration Name: Update the name of the integration.
- Instance: Specify the Security SOAR instance URL.
- Integration status: Select Enabled to push submissions to Security SOAR. Else, select Disabled.
-
Click Save Integration.
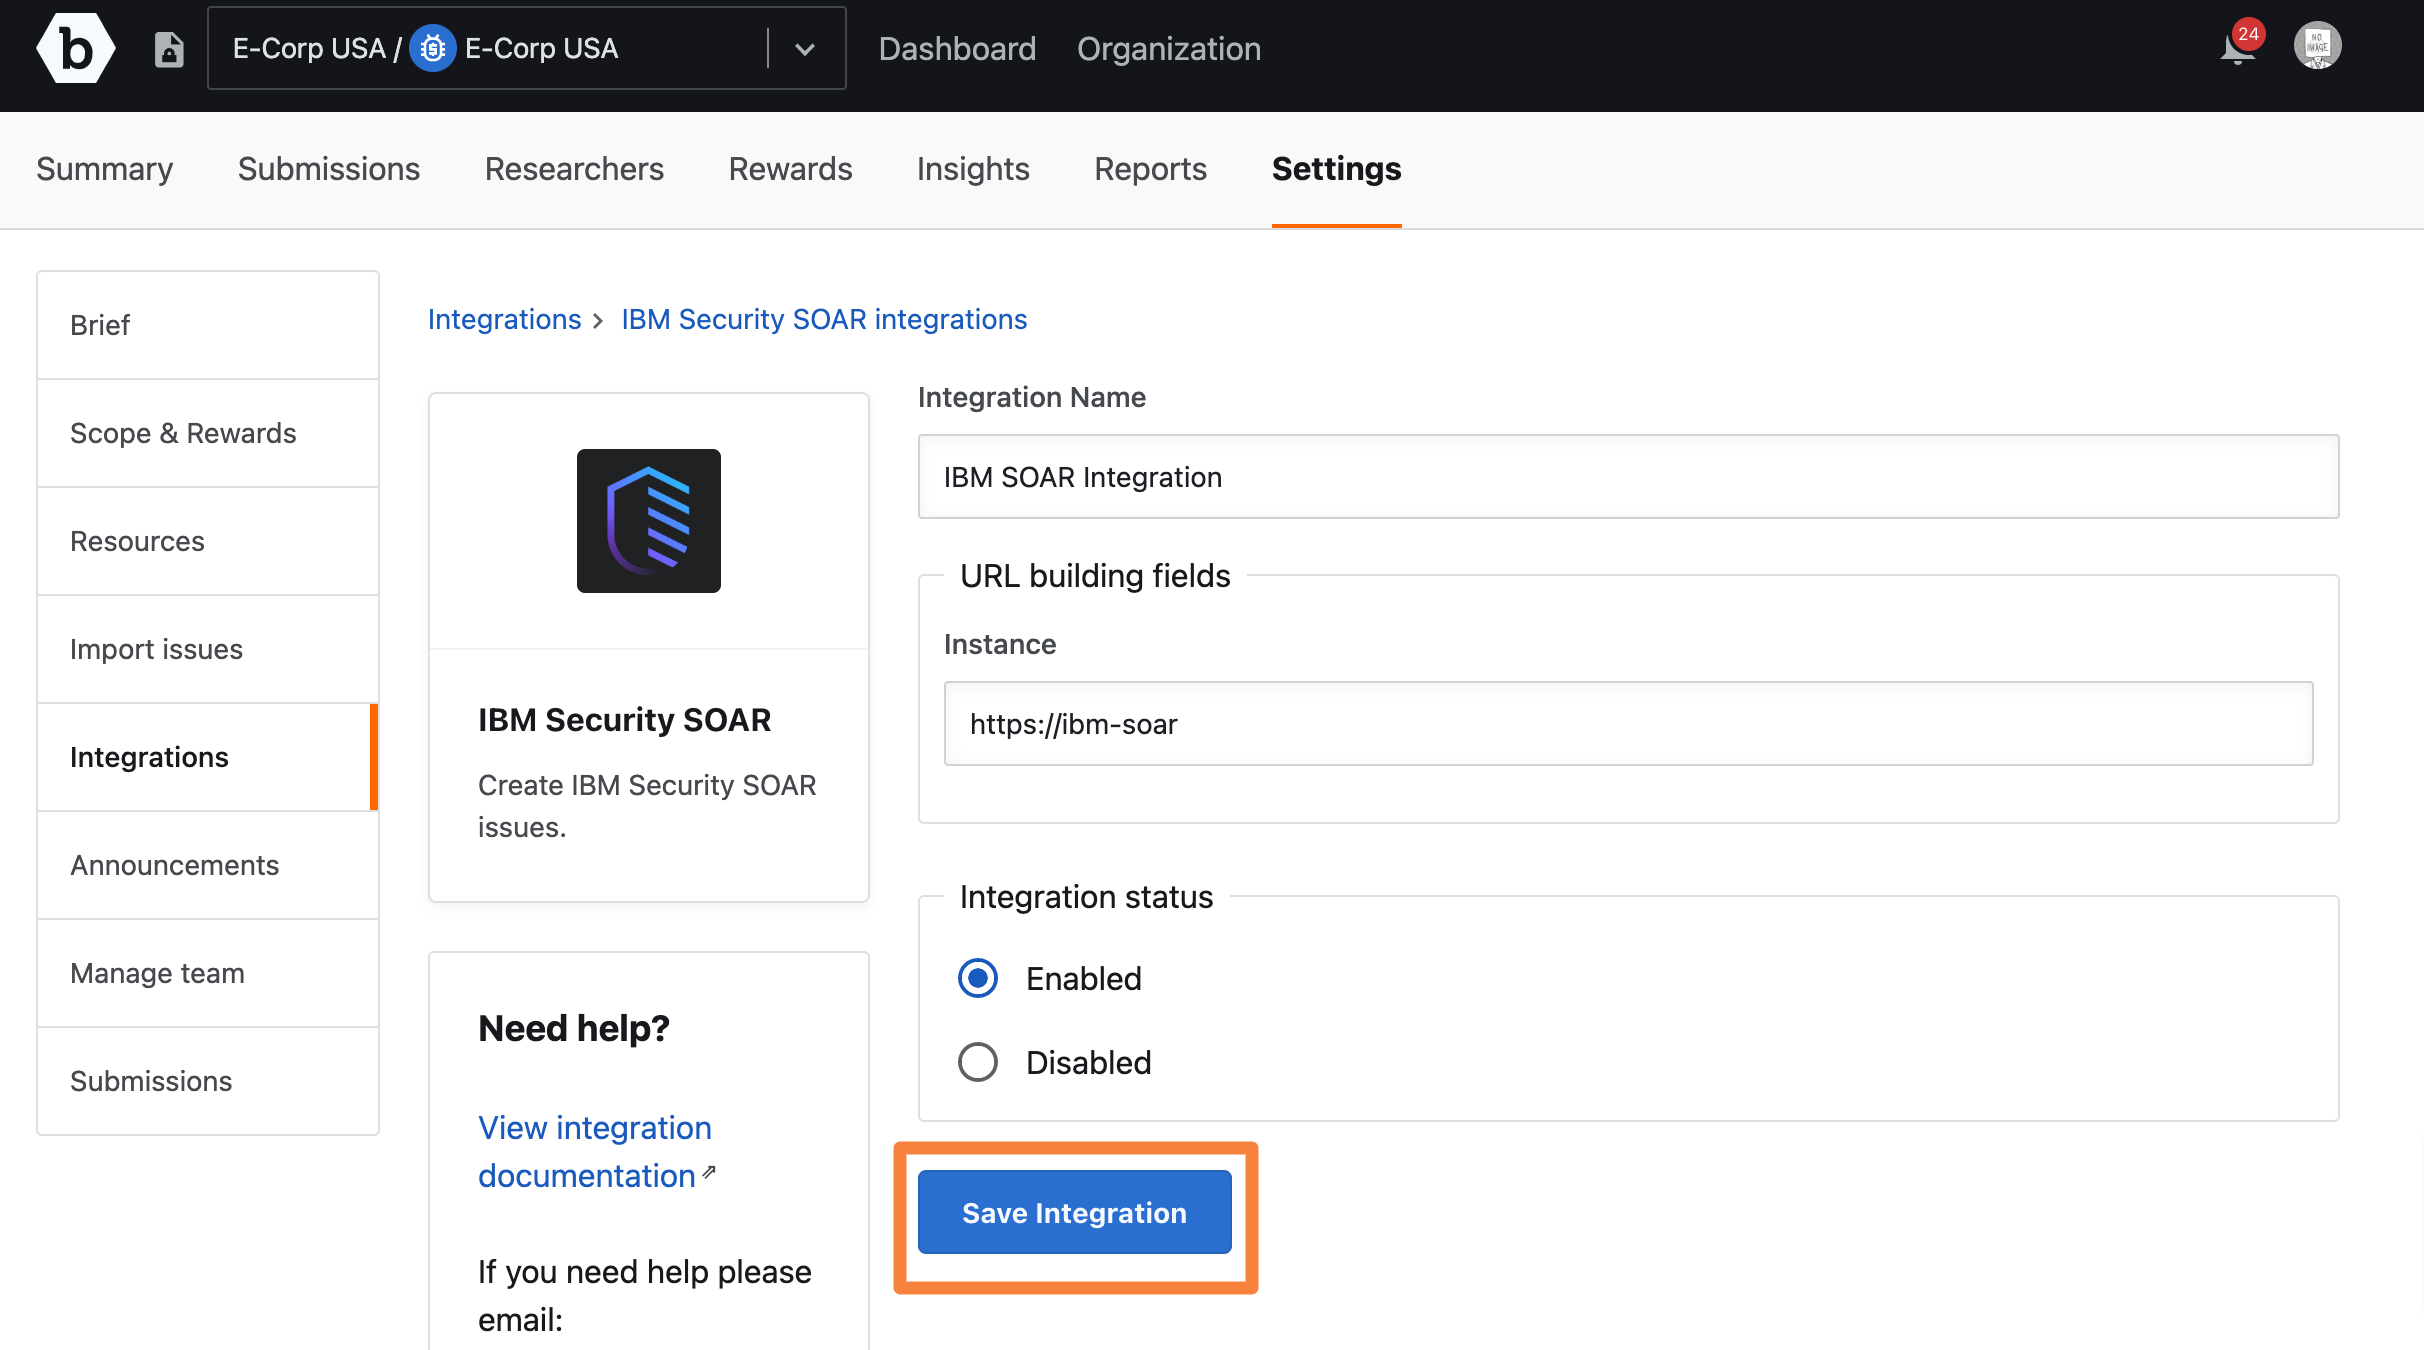
The integration project is saved.
