Bugcrowd Cloudflare Zero Trust (CF ZT) integration, provides:
- Researchers with secure access to customer environments.
- Customers with more visibility, and control on researcher activity against their targets.
More specifically, customers can:
- Start or stop researcher traffic as needed.
- Activate or deactivate targets, add or remove targets to the list.
- View researcher specific activity logs.
- See a list of URIs that researchers are using to access the targets.
The integration provides customers with more granular researcher level controls i.e. the ability to identify and track a researcher, and pause their activity.
Note: Researchers download and login to Cloudflare Zero Trust WARP client to access the test targets. Instructions to researchers on how to download and login to the WARP client are provided in the engagement brief.
Configuring Cloudflare Integration
The Cloudflare integration is set up in the program’s settings and is configured for a specific security program and the engagements present. There are no limitations to the number of programs that can be set up with the Cloudflare integration.
To configure the Cloudflare integration, follow these steps:
-
Navigate to your program Settings and select the Integrations tab.
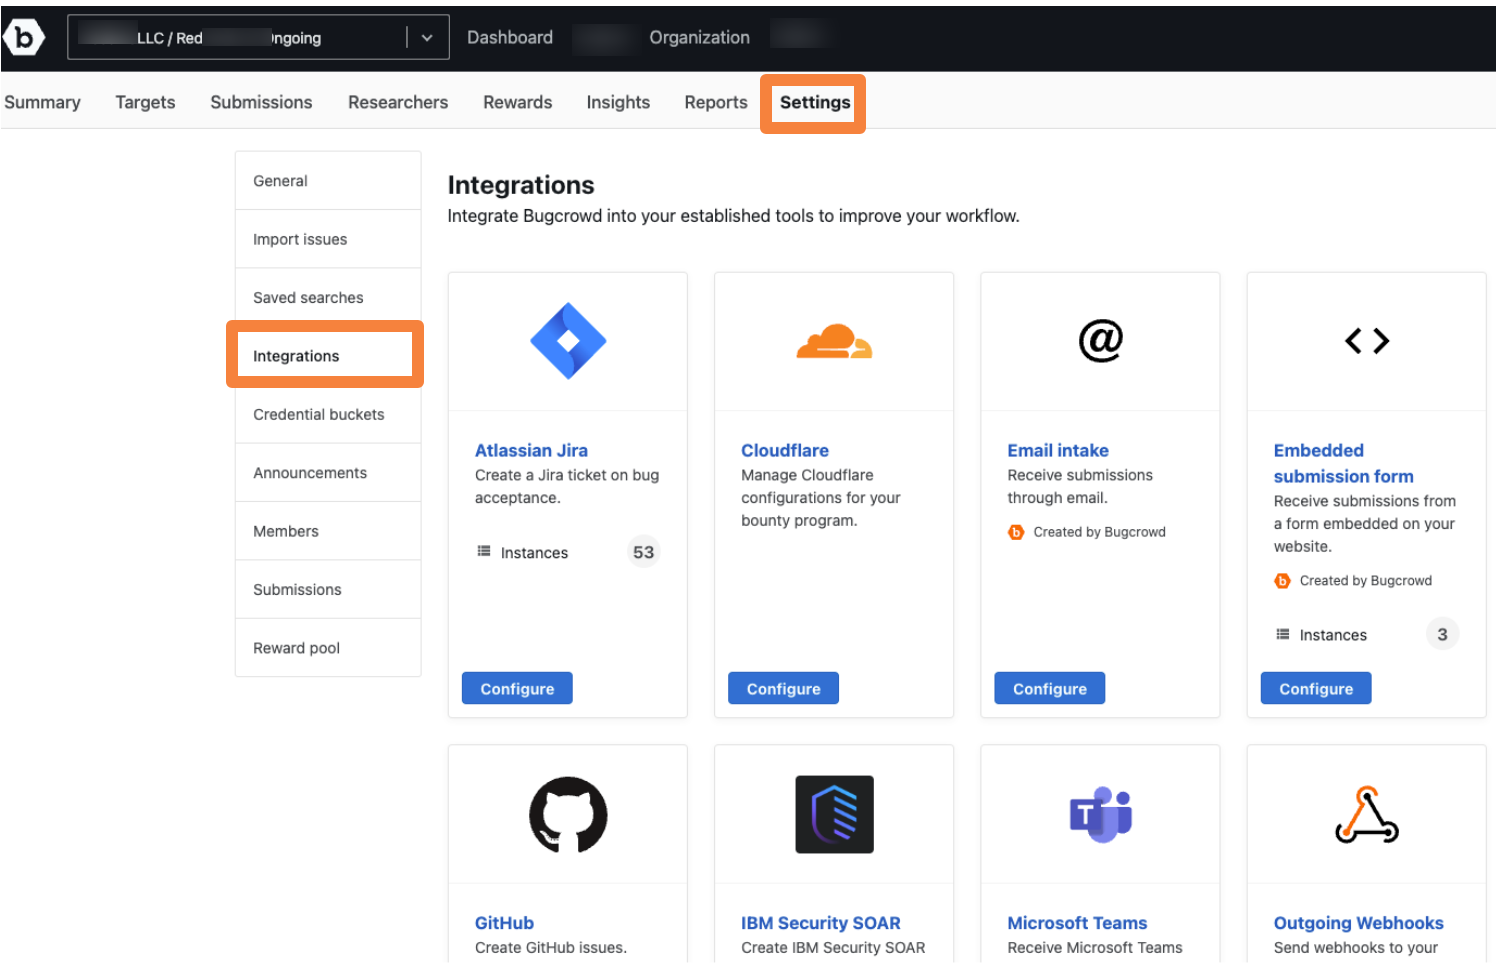
-
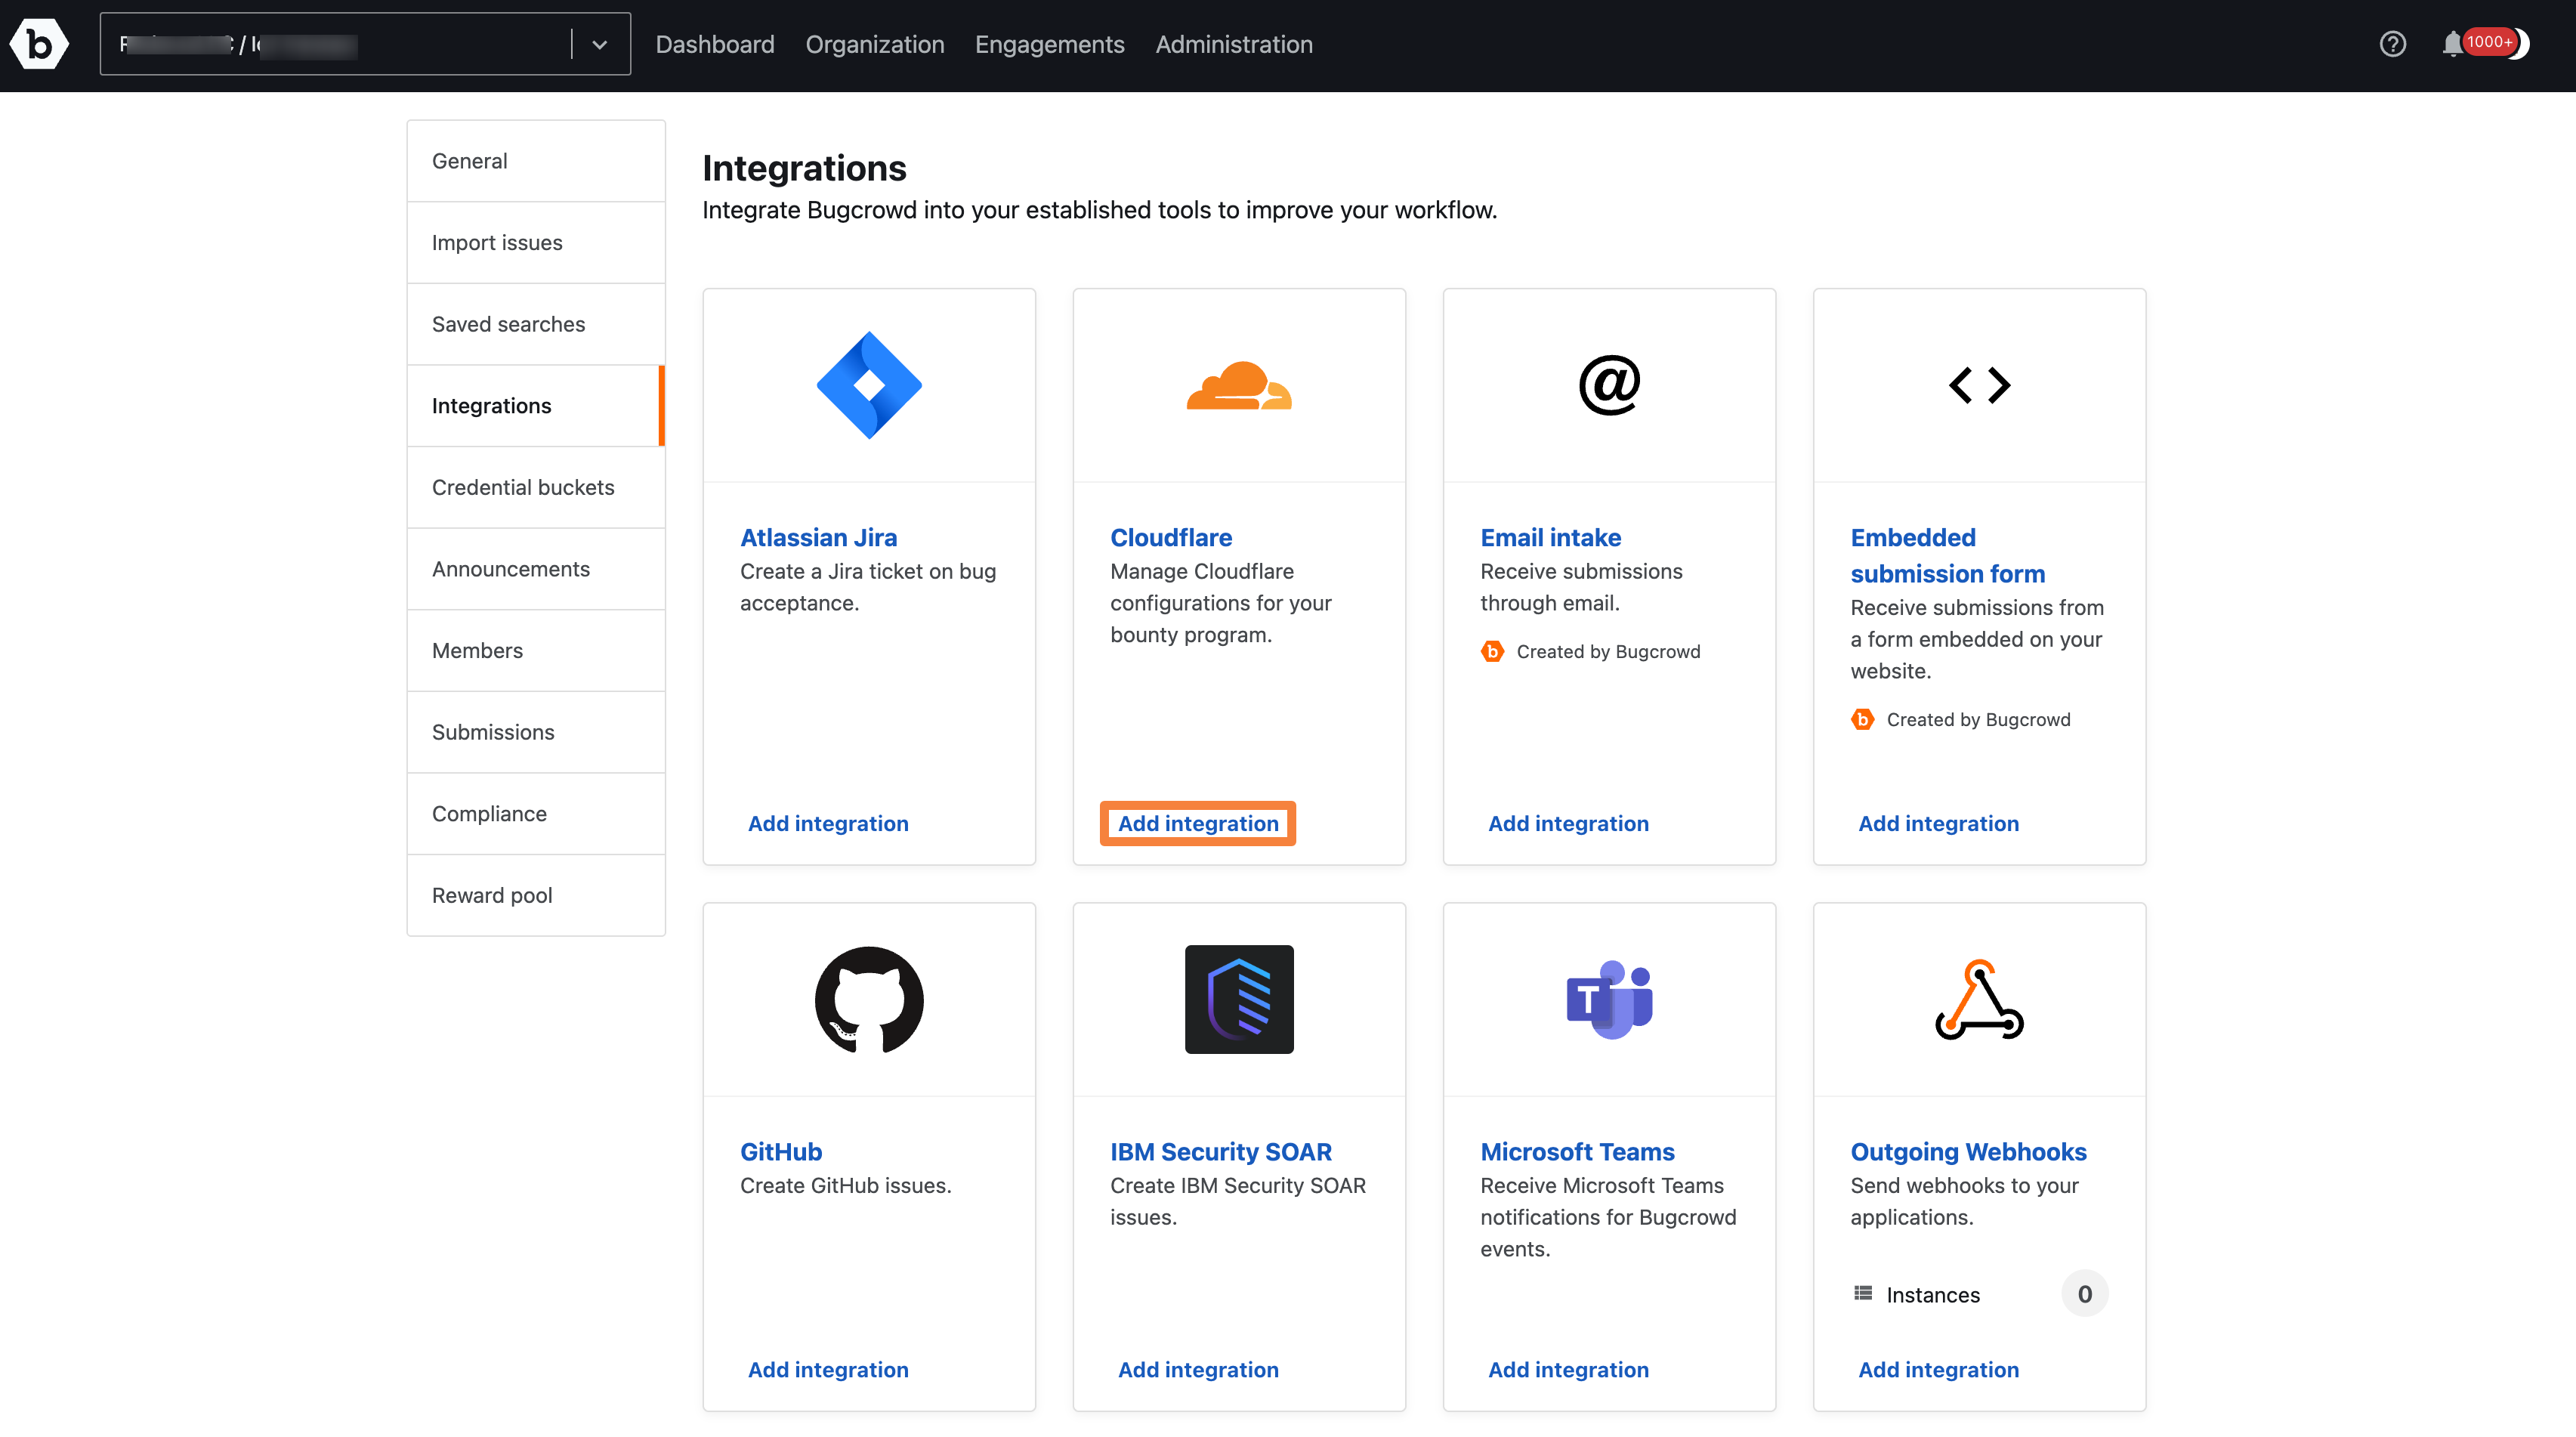
Click on Configure to manage the Cloudflare integration.
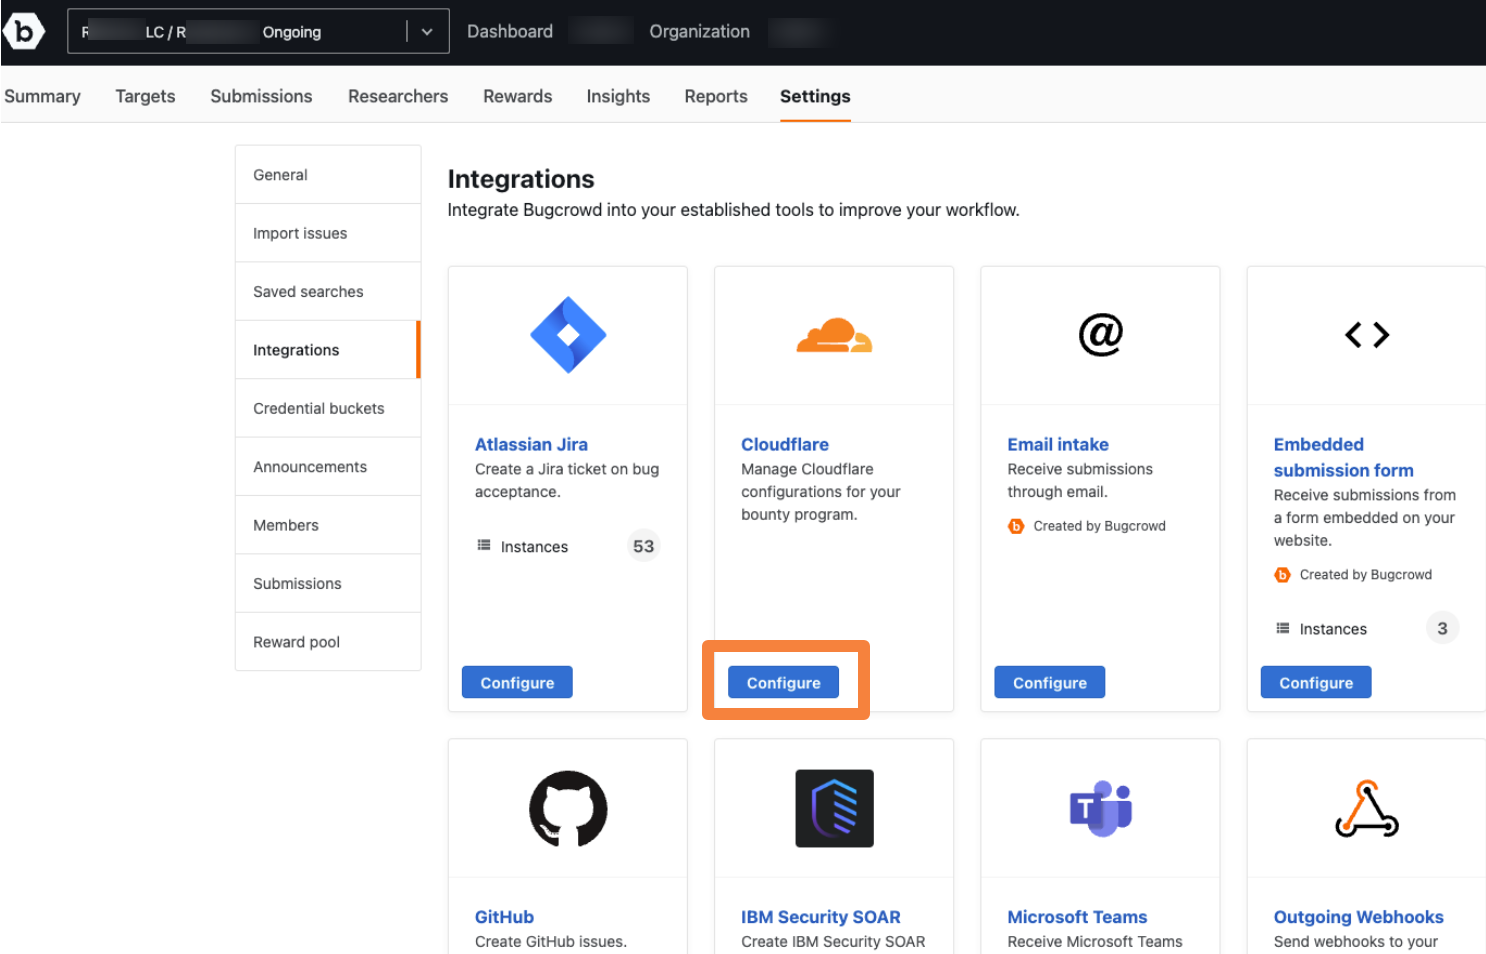
Note: If it is the first time setting up the Cloudflare integration for this program, the button will show Add Integration instead of Configure.
In the Cloudflare integration, there are four tabs Targets, Researchers, Tunnels, and Logs.
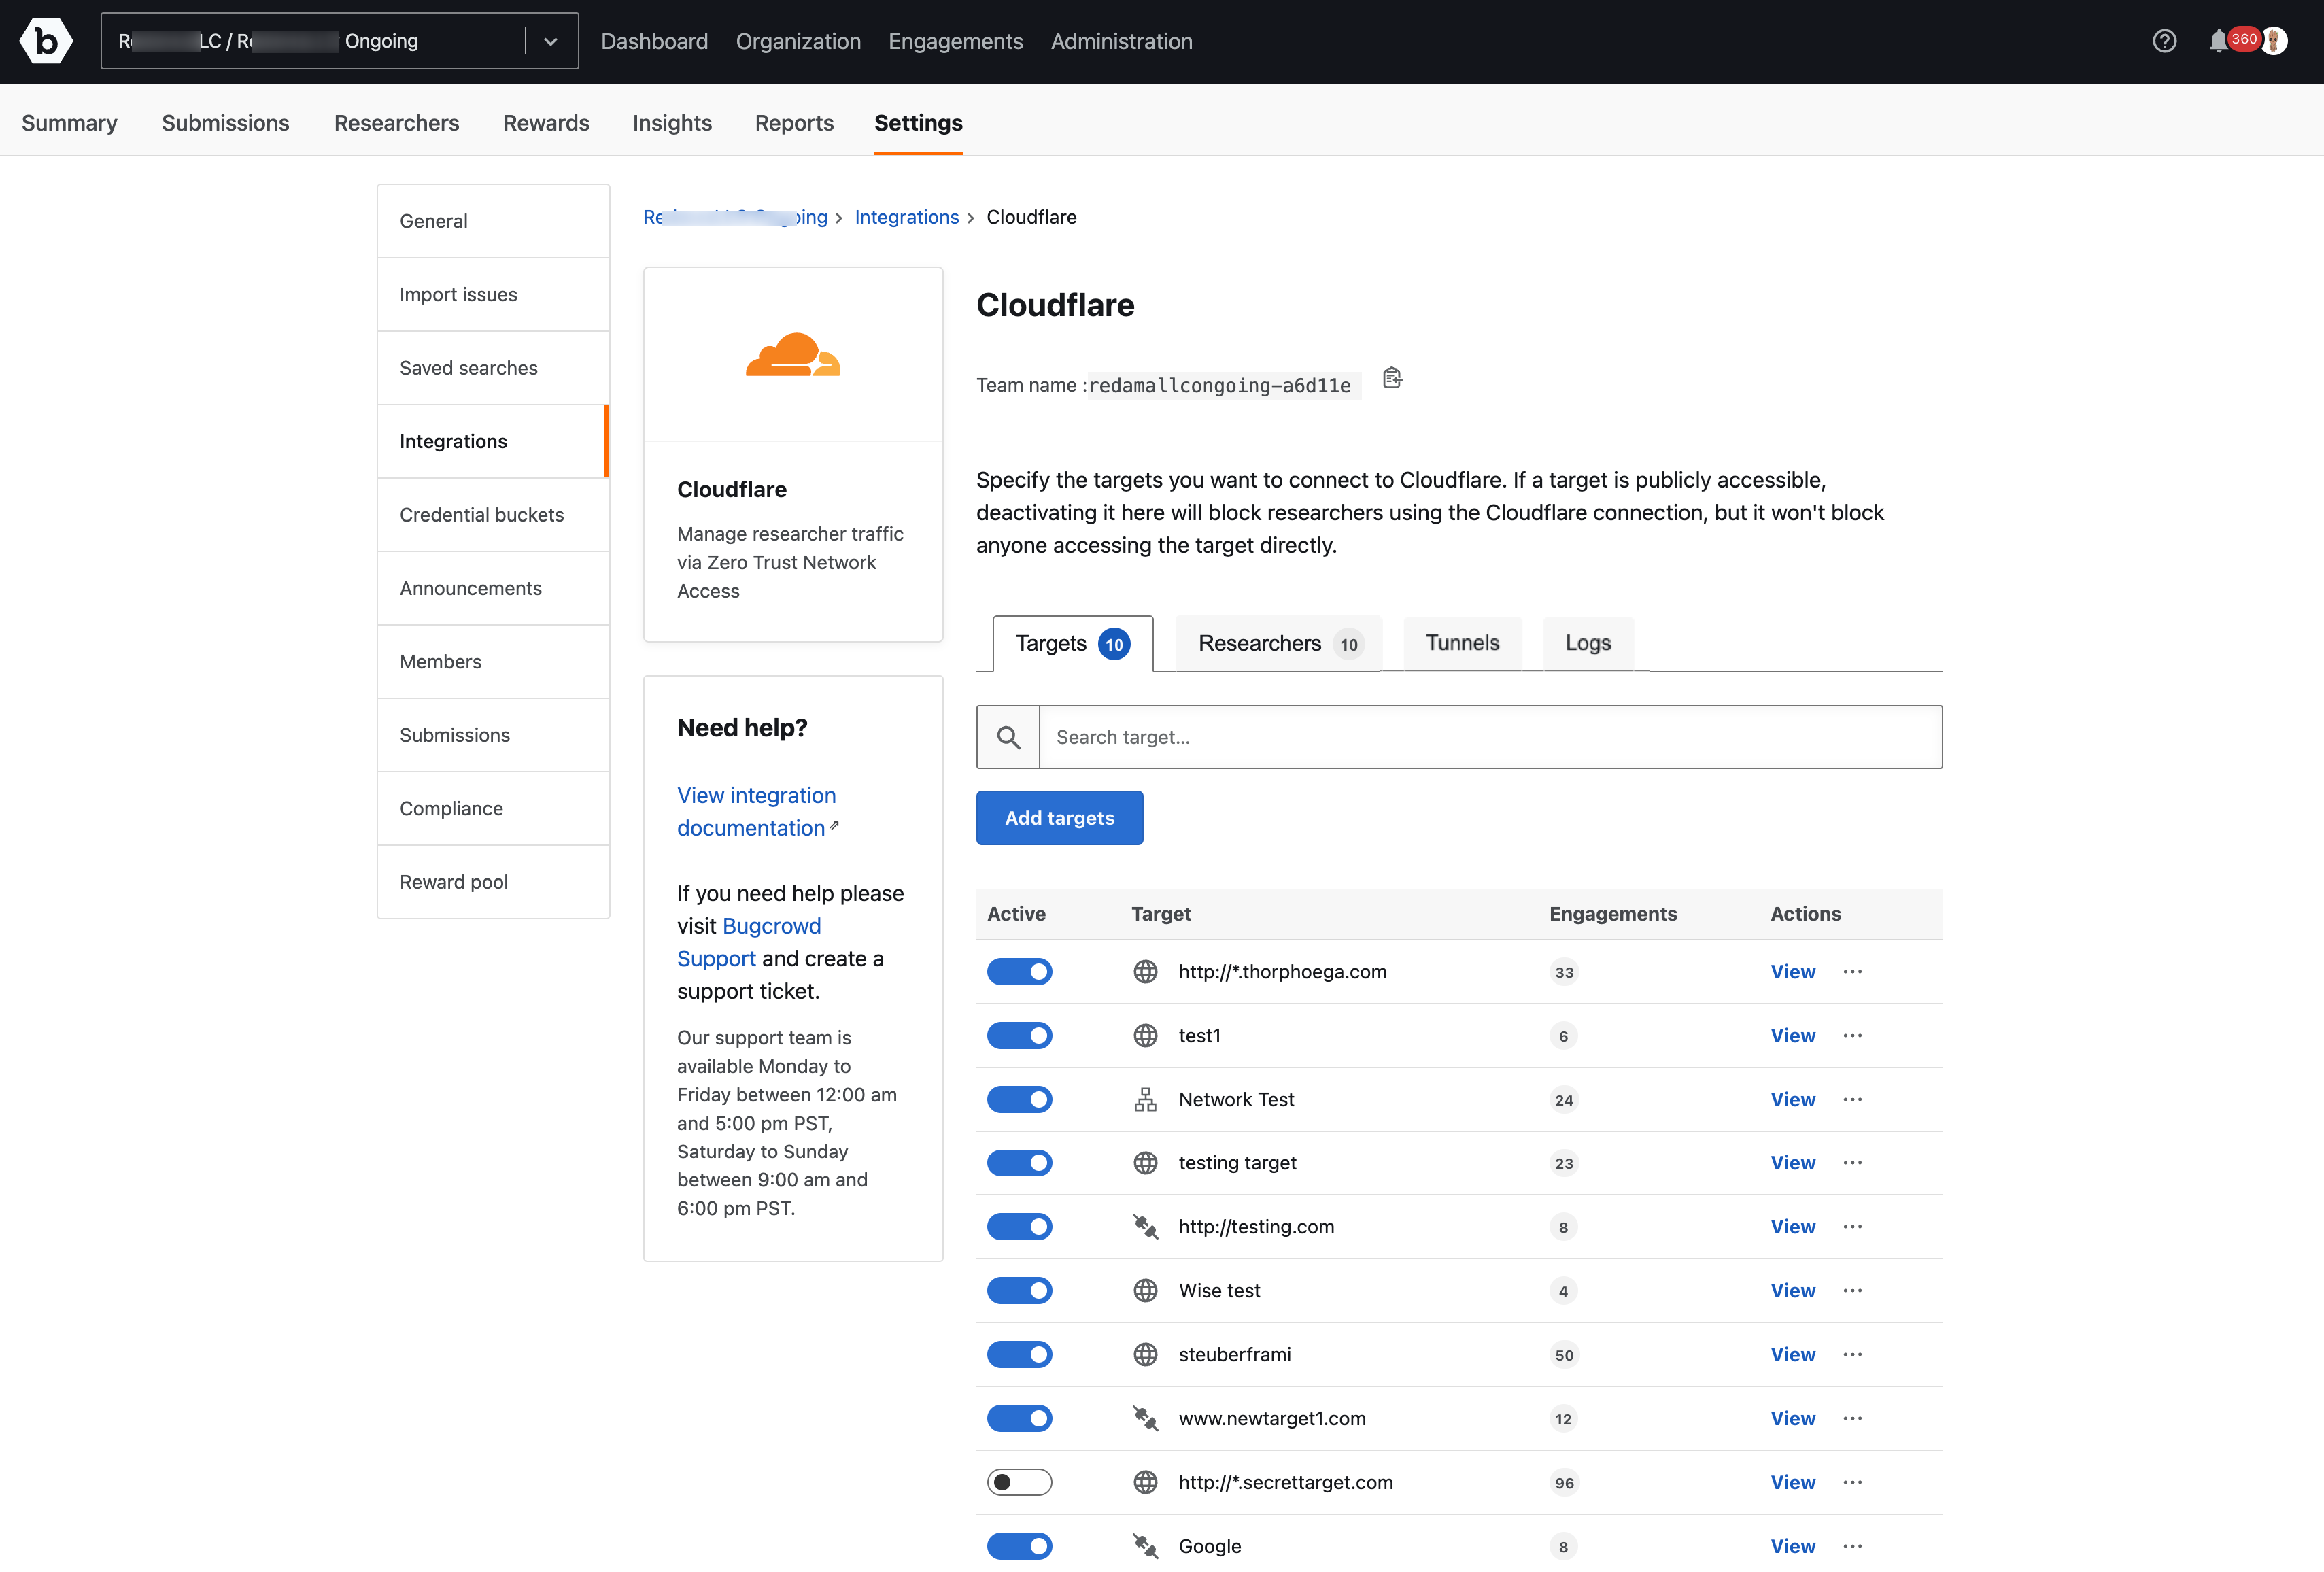
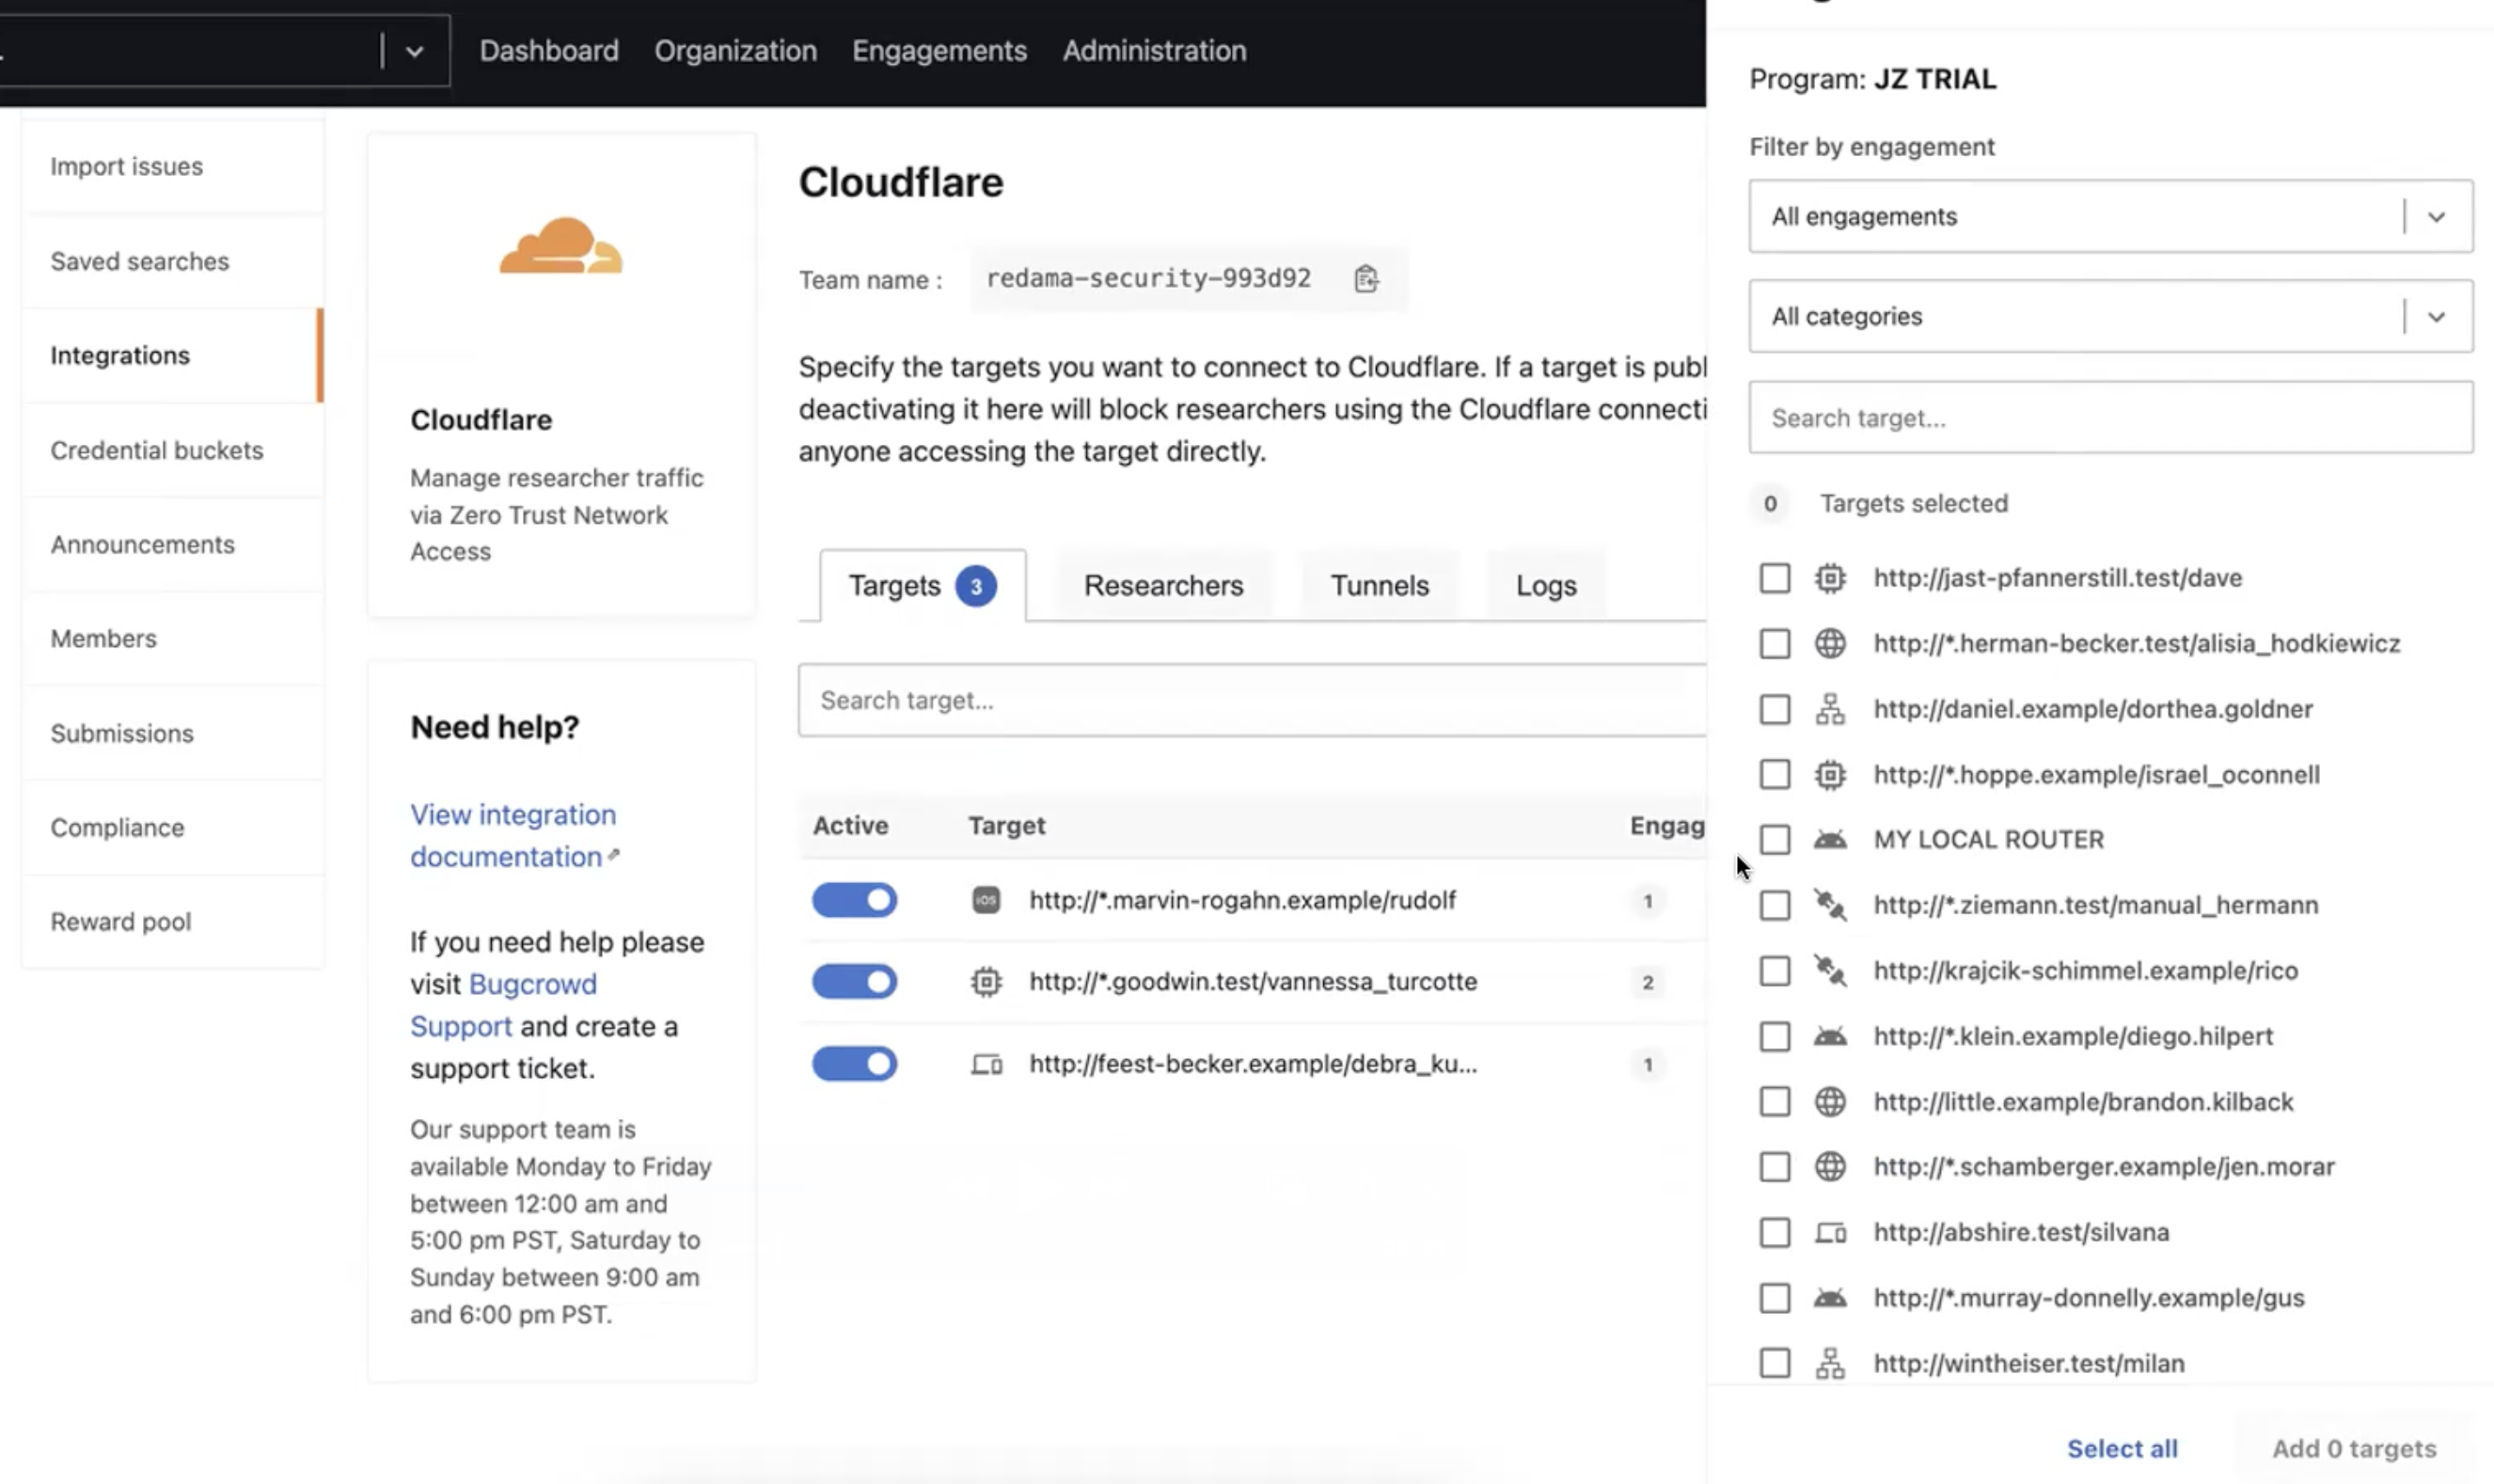
Managing Targets
The Targets tab shows the list of targets under consideration for the testing in the security program. Targets can be added or removed, activated or deactivated for researchers. If a target is deactivated, then the target will not be reachable for the researcher through the Cloudflare Zero trust client. No log will be captured for this target, until it is activated.
To manage the targets, follow these steps:
-
Click on Add targets.

-
Select targets from the list in the Targets drawer.
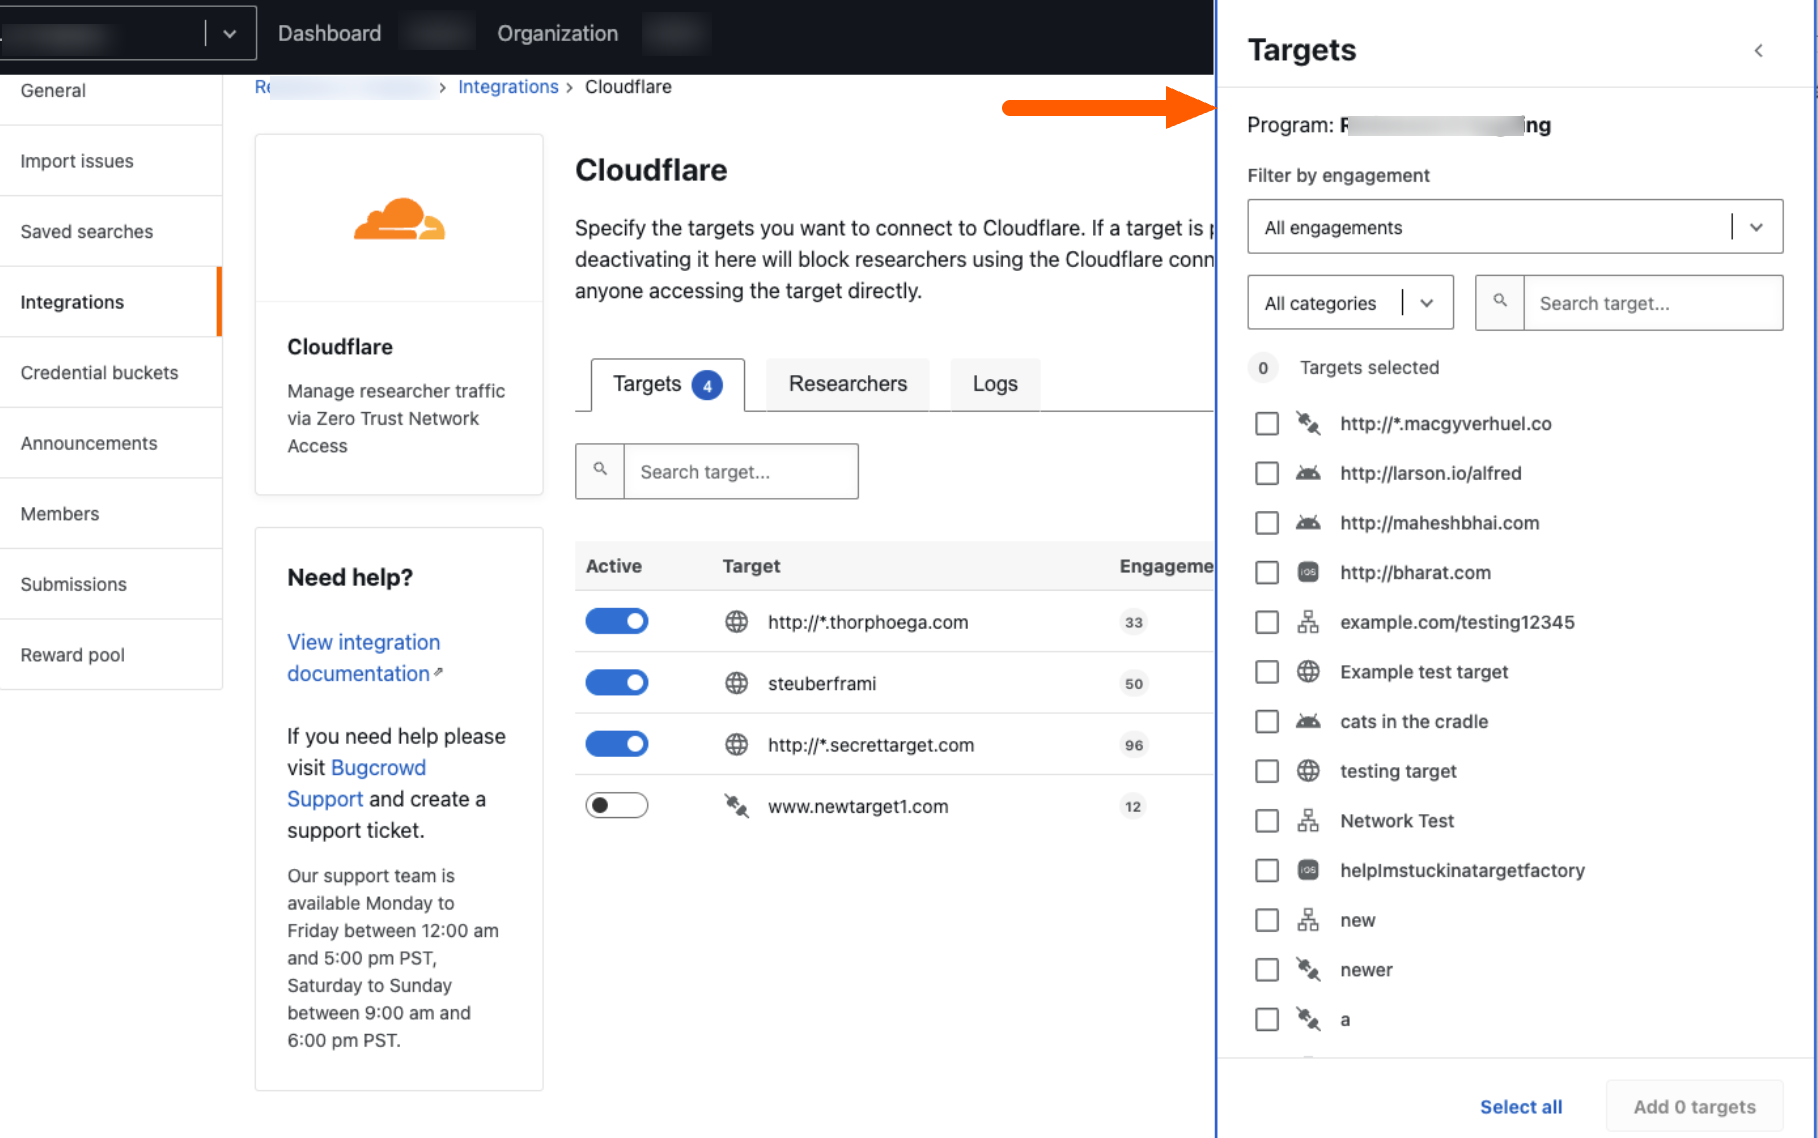
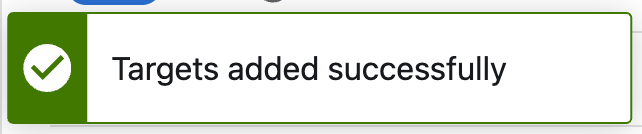
Once a target is added, a Target added successfully message is displayed.
-
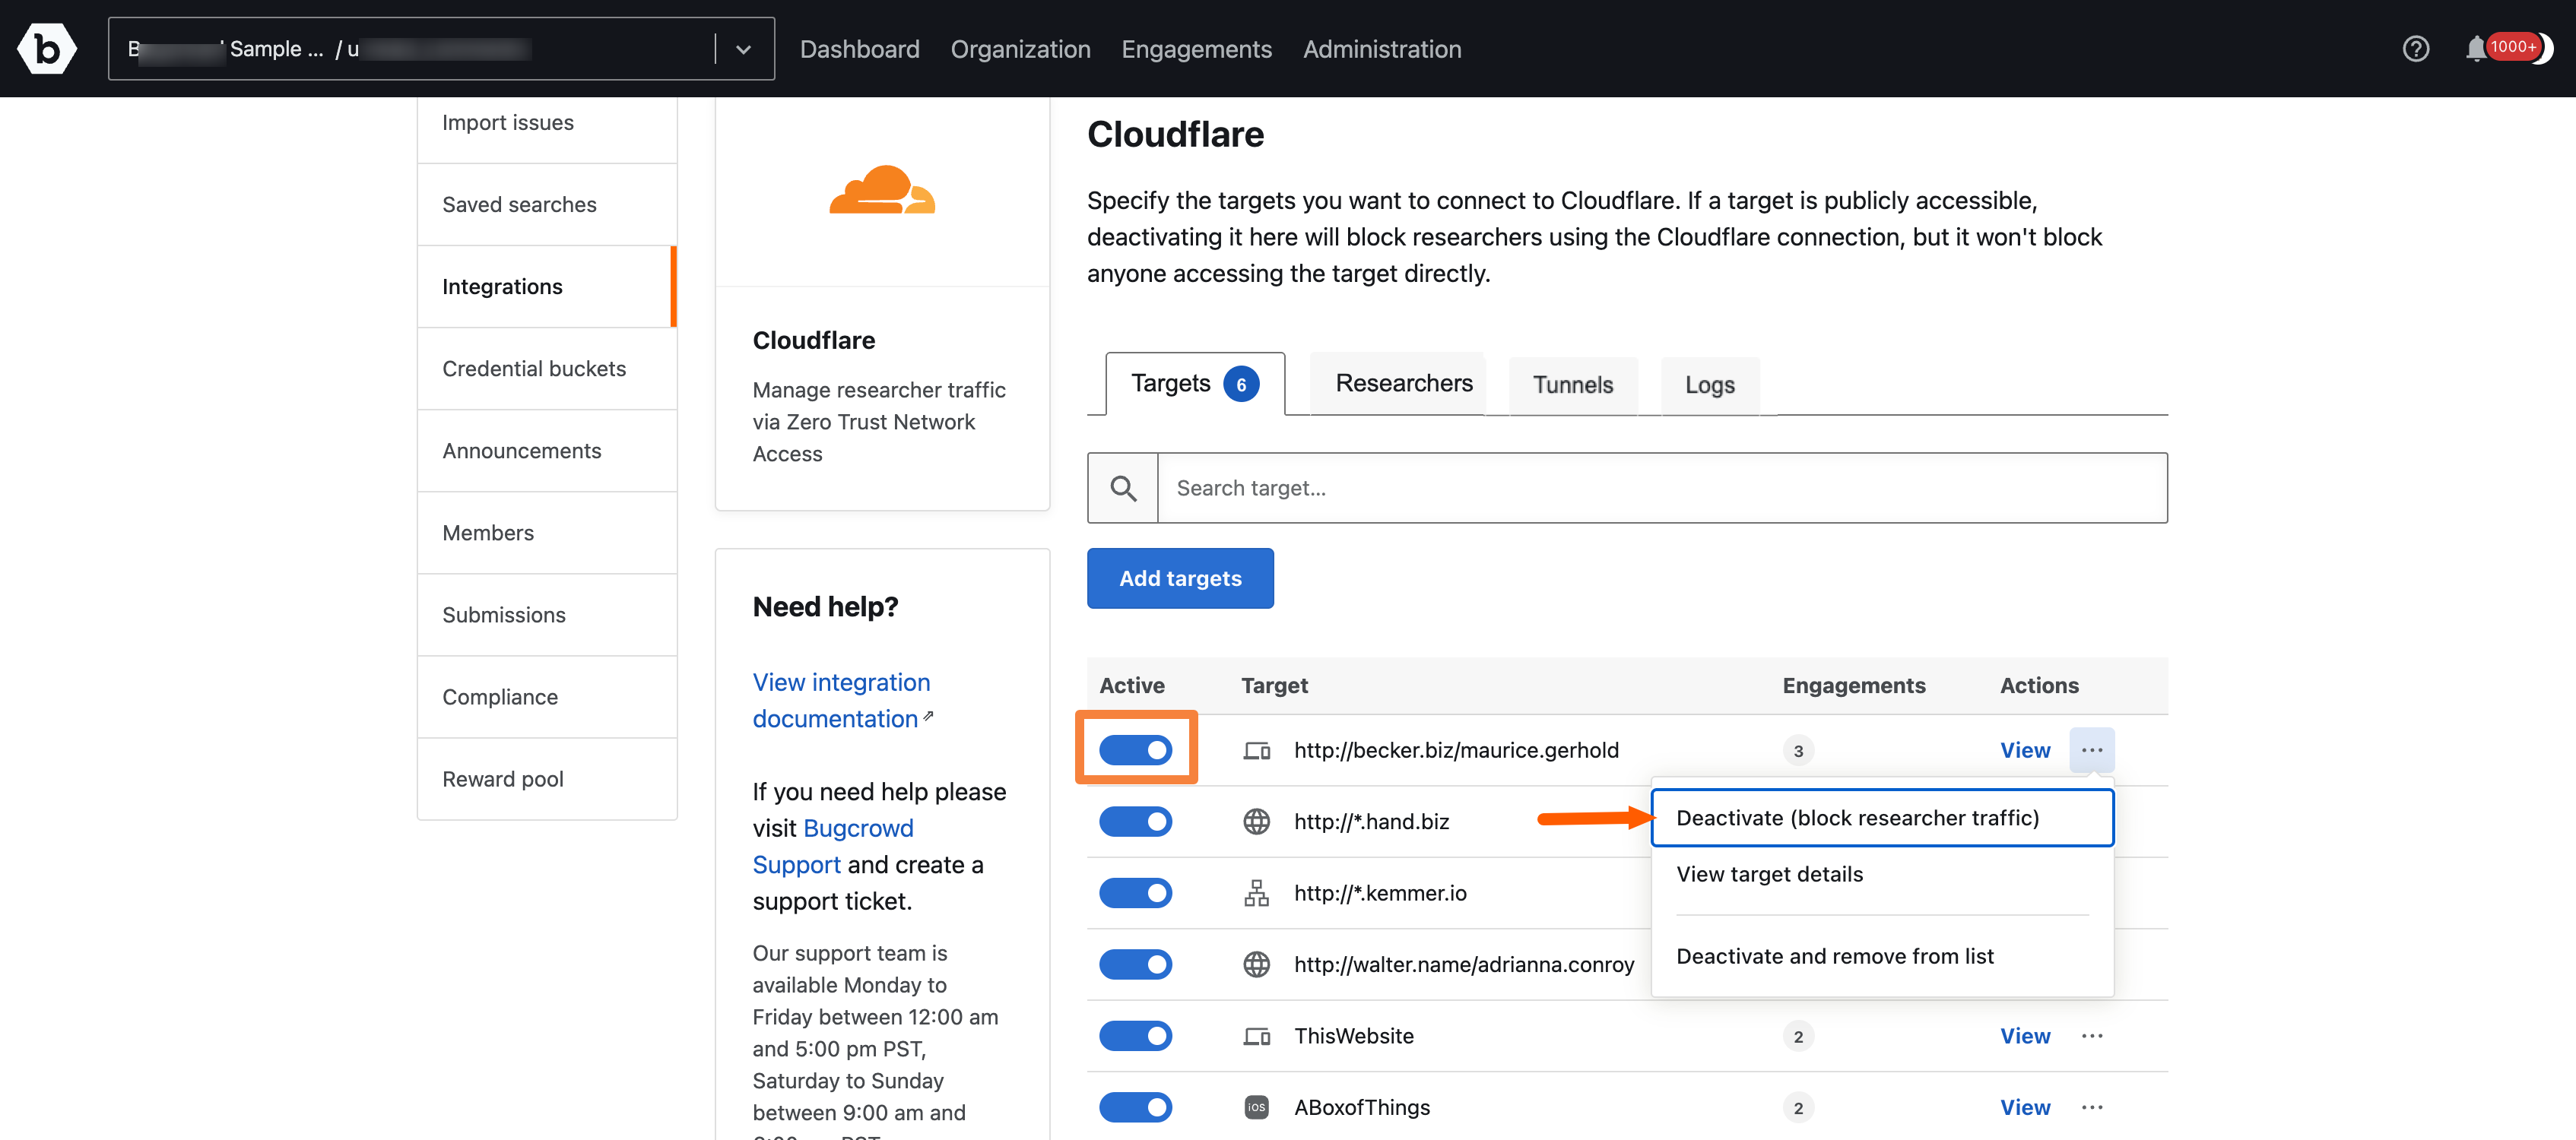
All added targets are listed in the Targets column. Click on the three dots adjacent to View in the Actions column.
-
Target can be deactivated by clicking on the Deactivate menu item or toggling the button in front of the target.
-
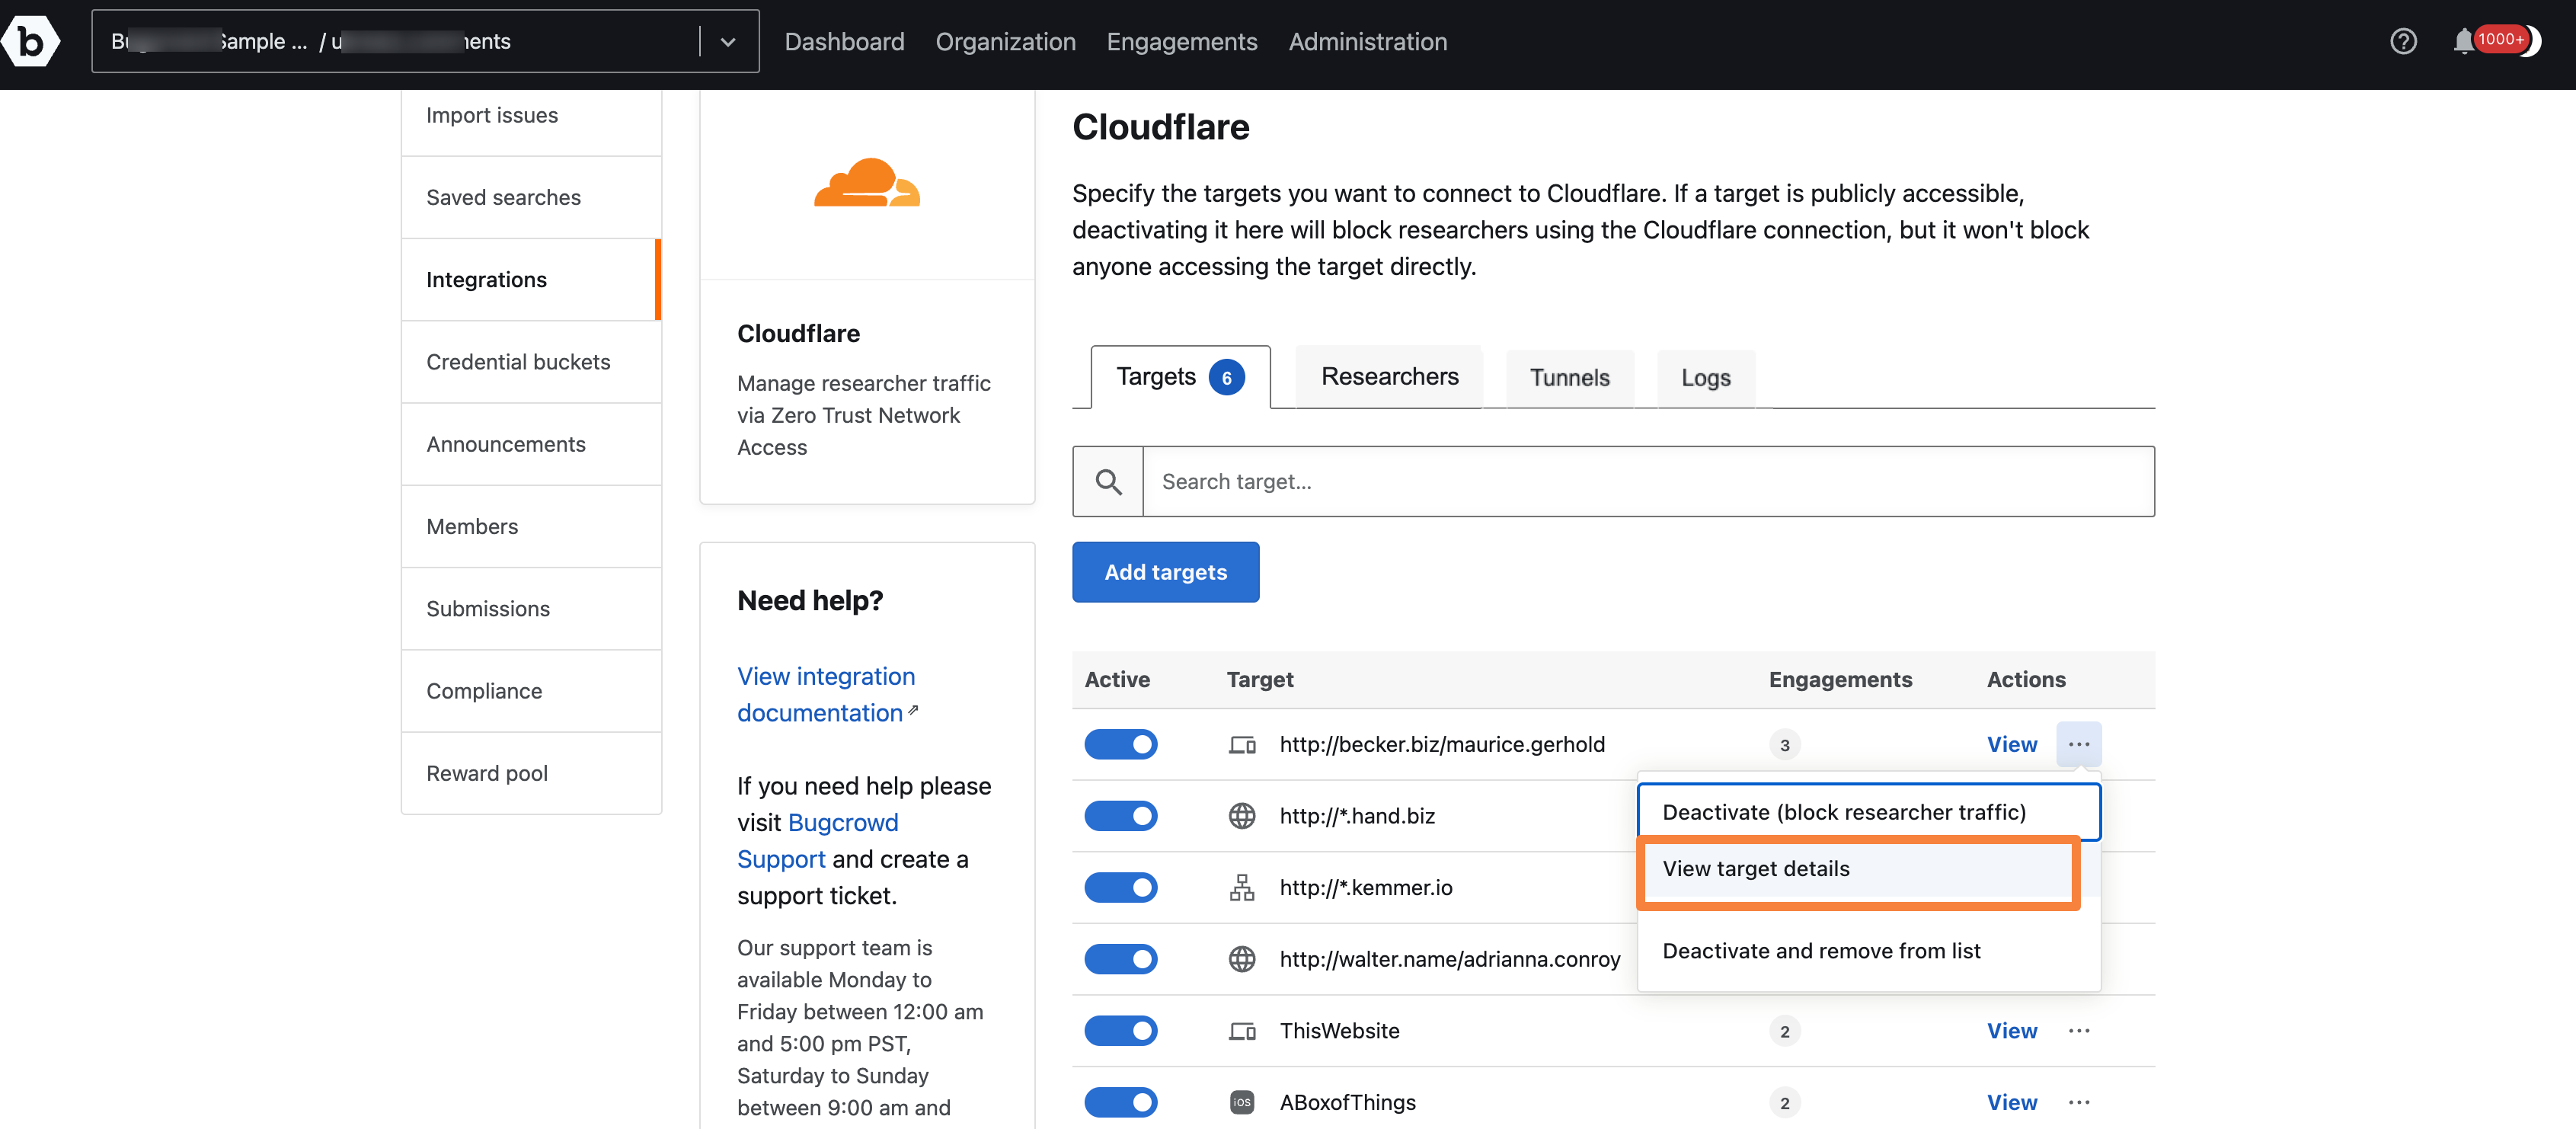
The target details can be viewed by clicking View target details.
-
It shows all the engagements that this target is used.

-
If there are a large number of targets present, then the search filter can be used to identify the specific targets.
-
Additional targets can also be added to this list by clicking the Add targets.
-
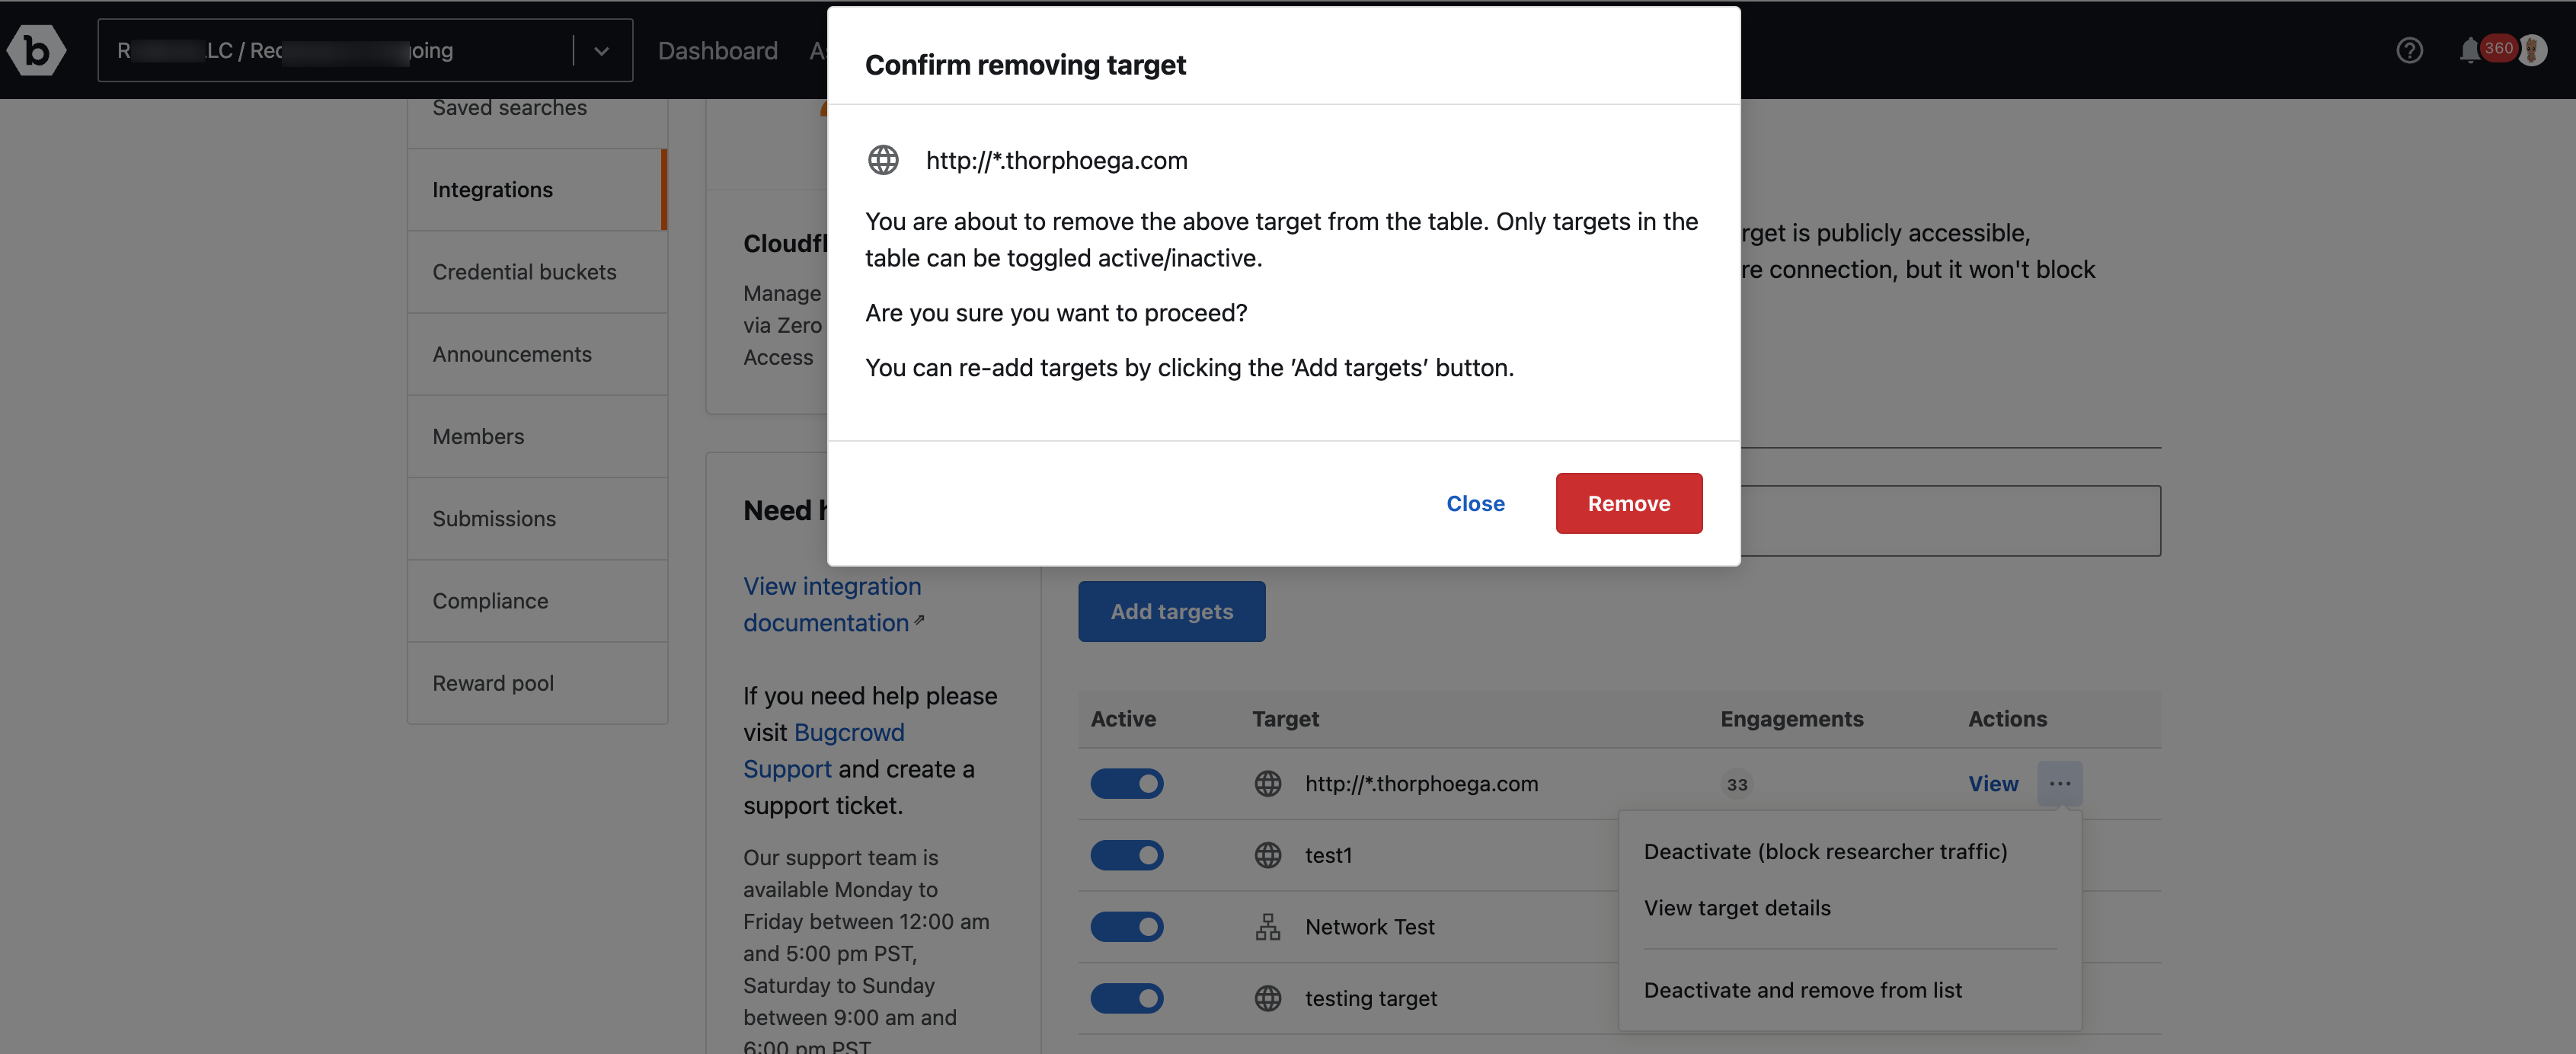
Targets can be removed from this list by clicking on the Deactivate and Remove from list in the menu.
A confirmation message appears. Click Remove to confirm.
Managing Researchers
-
To view the current set of researchers, click on the Researchers tab.
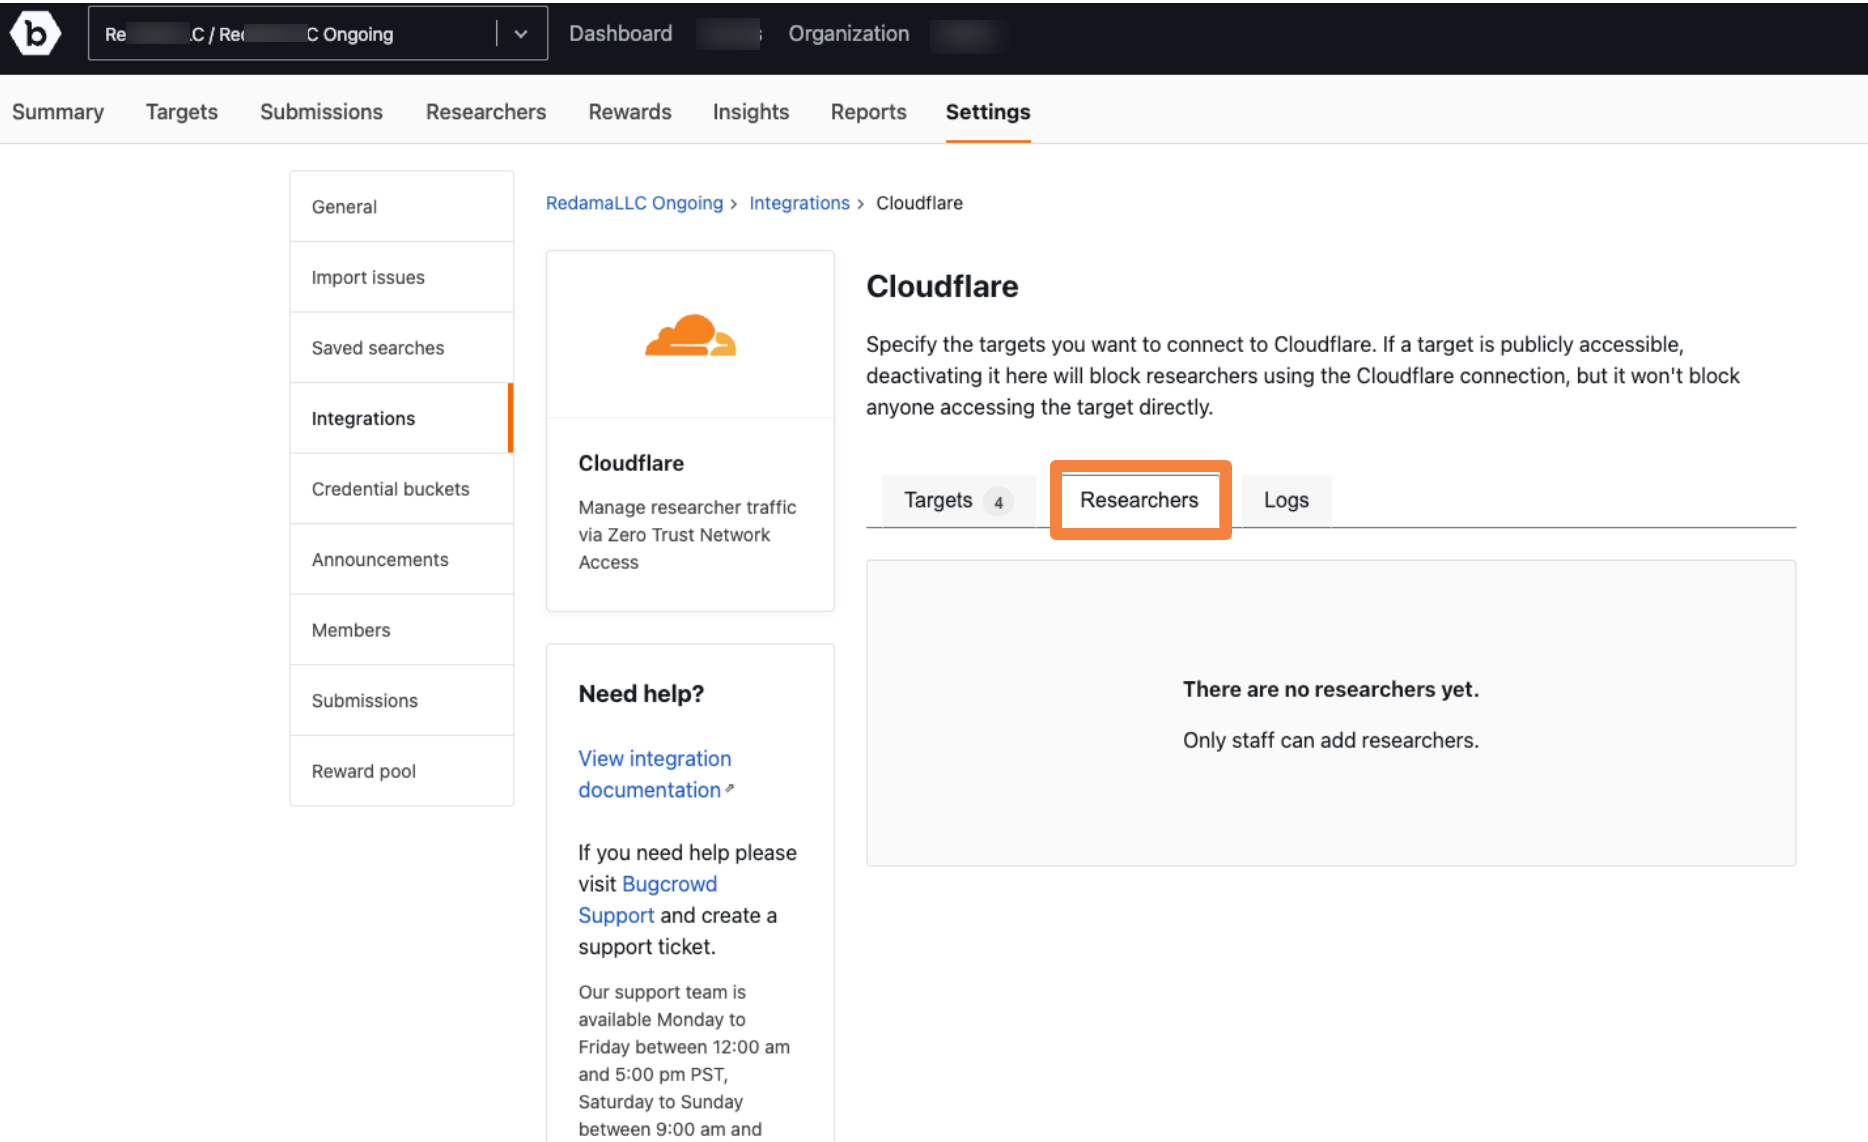
Researchers are added to the engagements when it is set up by the Bugcrowd Staff. Researchers can be added or removed only by the Bugcrowd team.
-
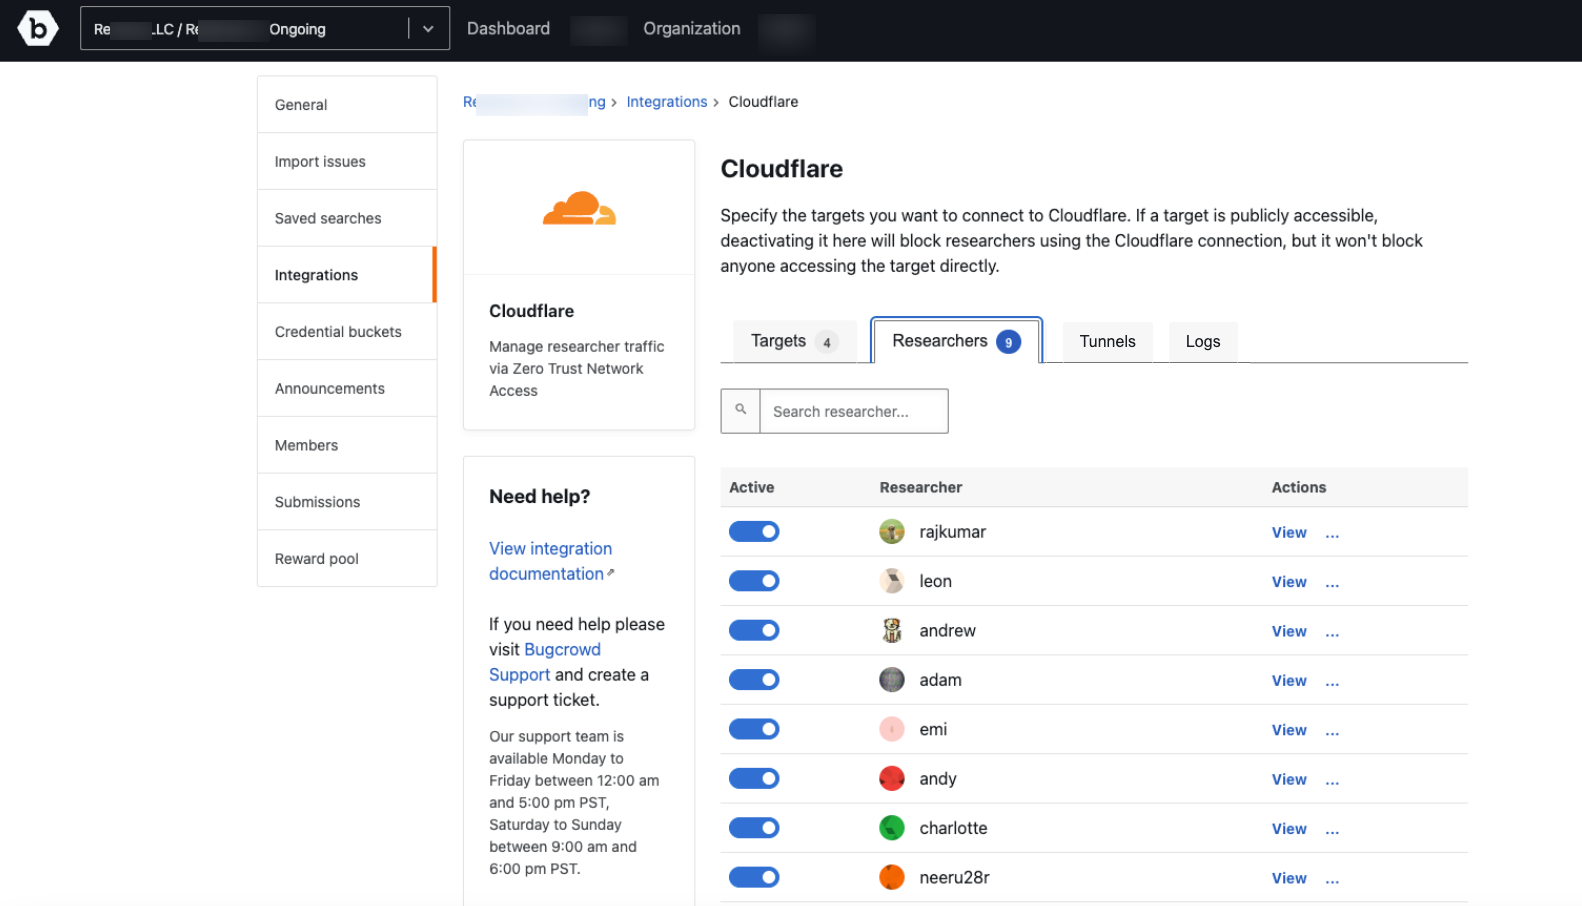
After the researchers are added, they are listed in the Researchers tab.
-
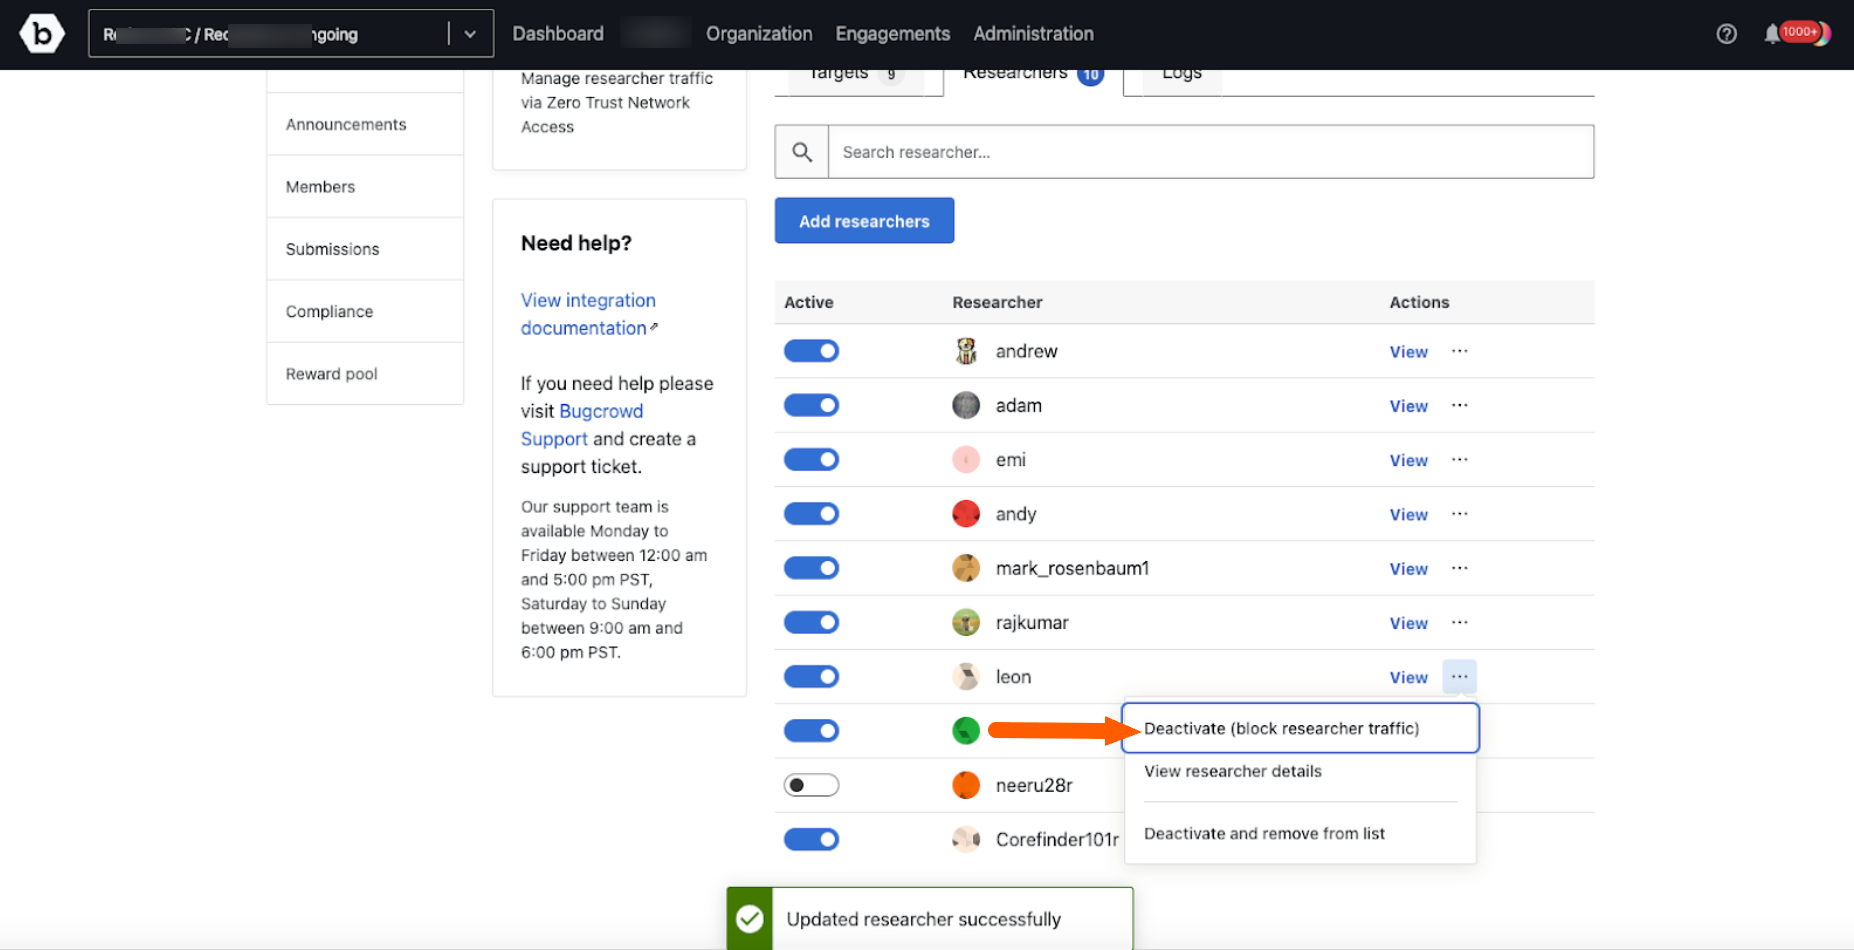
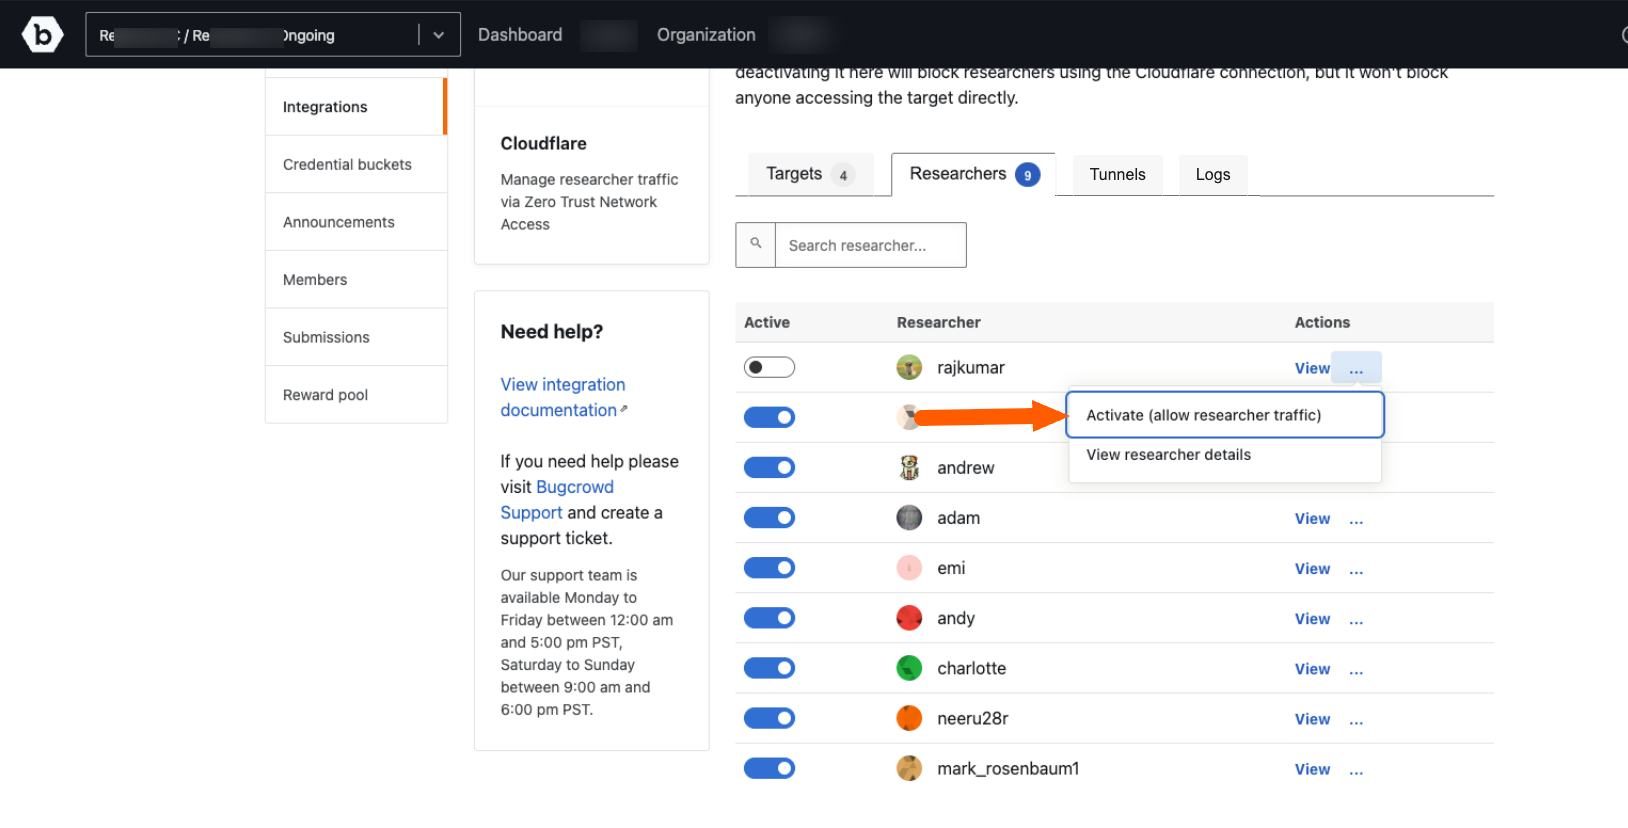
Click on the three dots next to the researcher to view the menu.
-
Click the Deactivate option in the menu to deactivate the researcher from doing further tests on the targets. A researcher can be activated again by clicking on Activate.
-
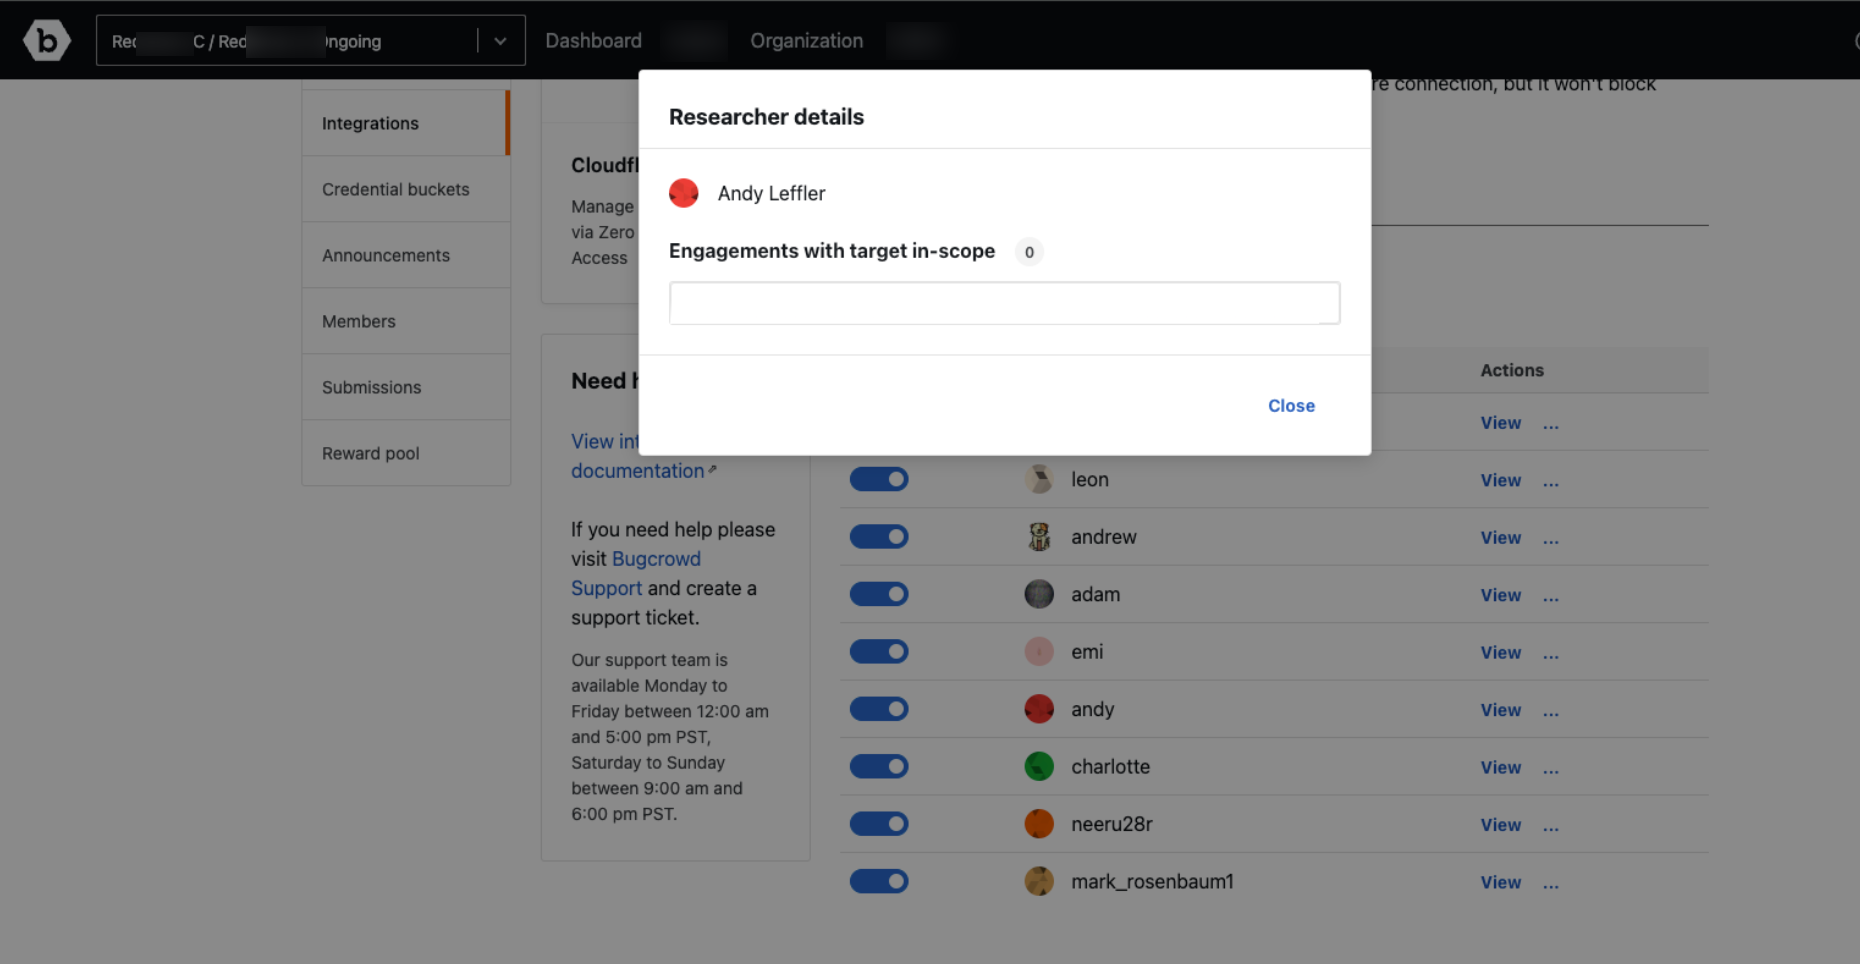
Click on View researcher details to view the list of engagements that the researcher belongs to which has the targets in the scope.
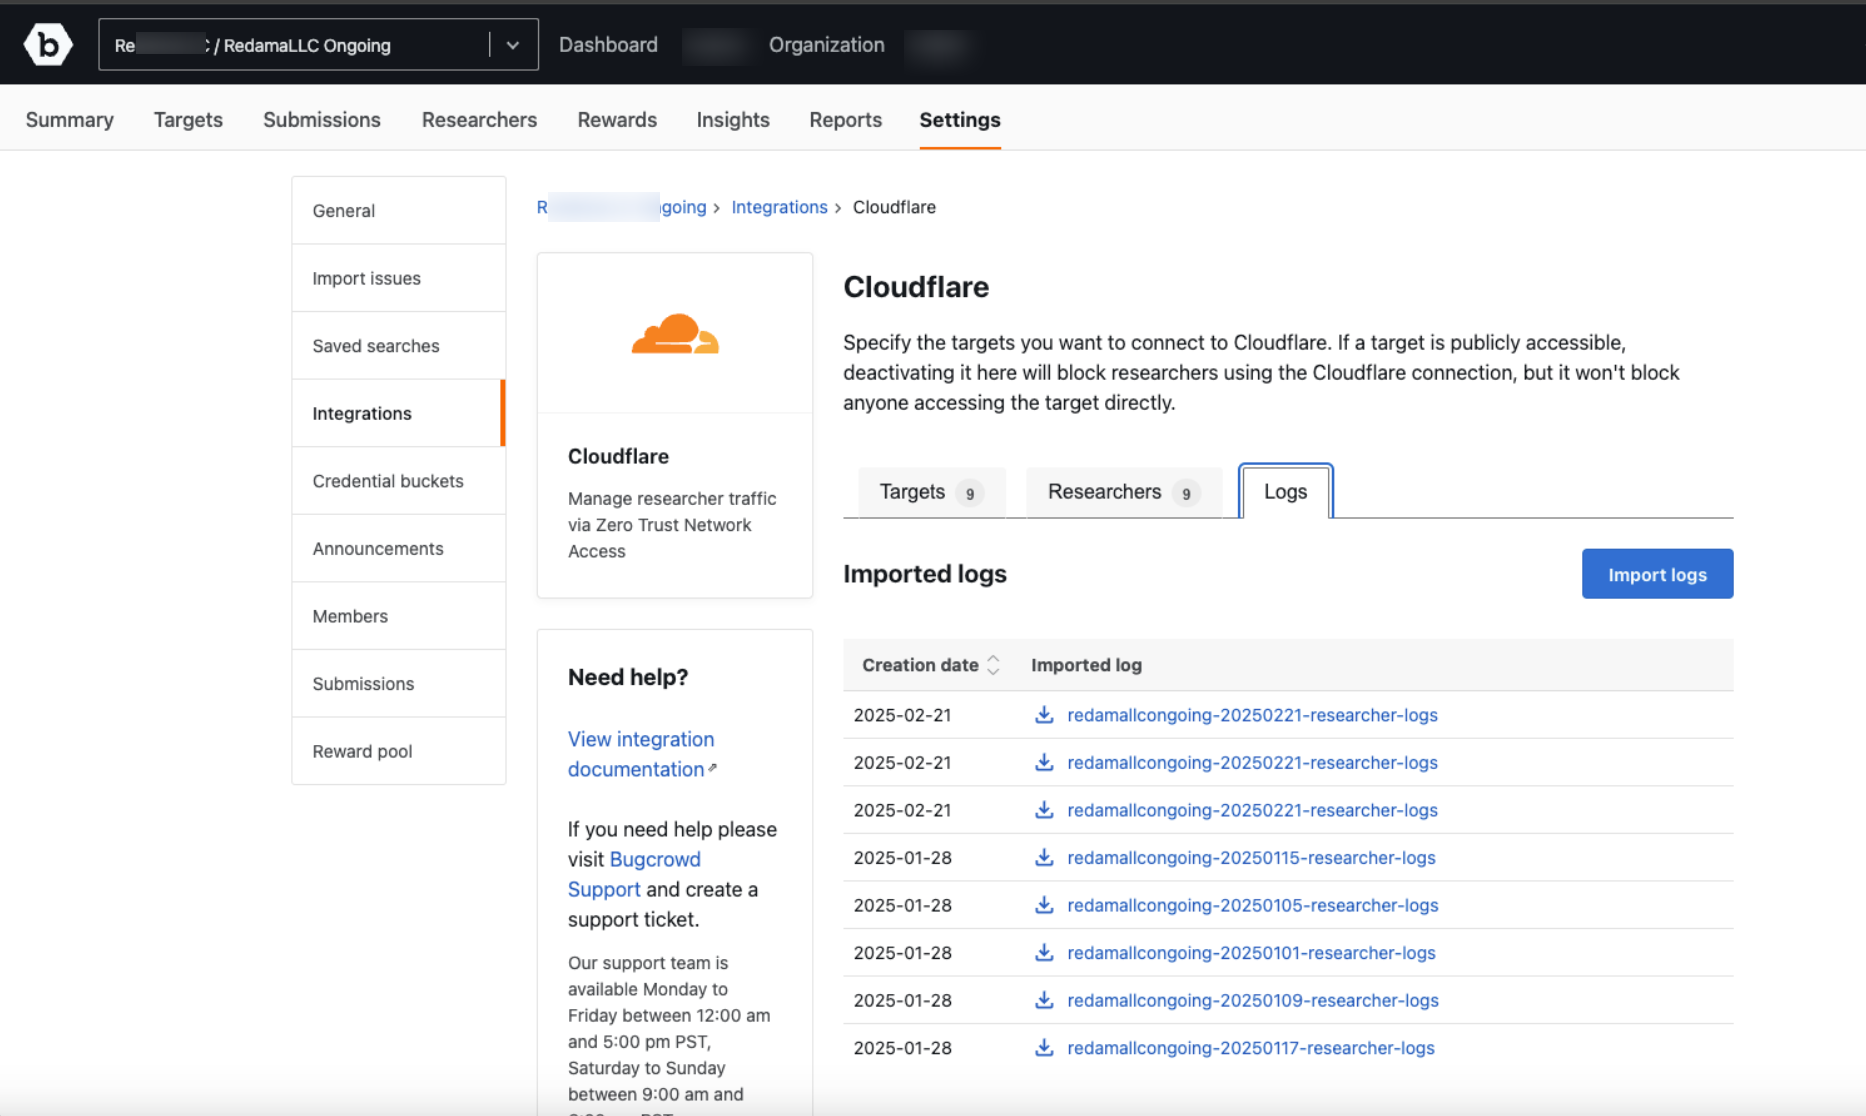
Managing Logs
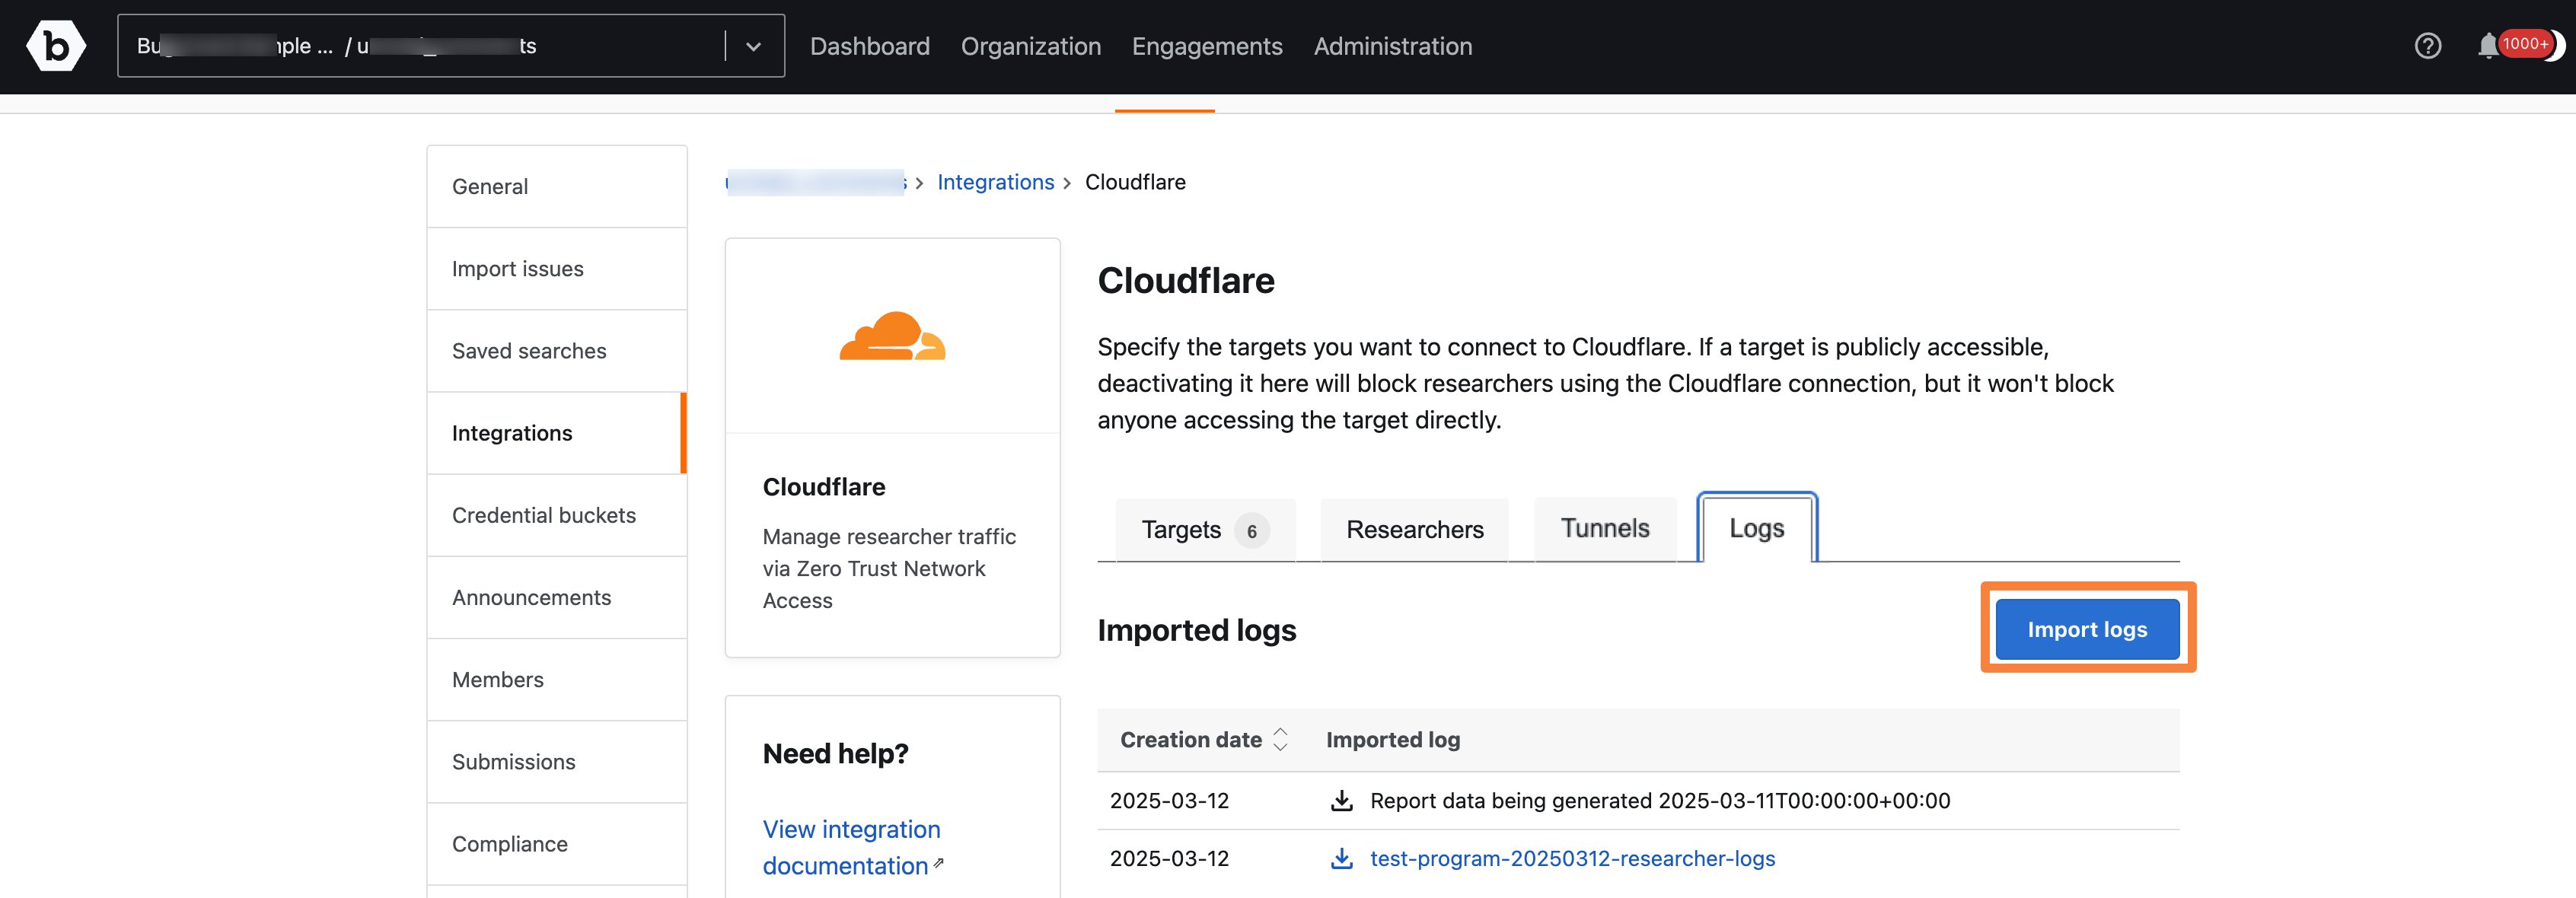
The Logs tab shows a list of all the logs available. You can import additional log files by selecting the date. All the activities on the activated targets for that day will be imported. The imported log file will show in the list and you can download the log file. Activities up to 30 days can be imported in the log file.
-
To import logs, click on the Import logs tab.
-
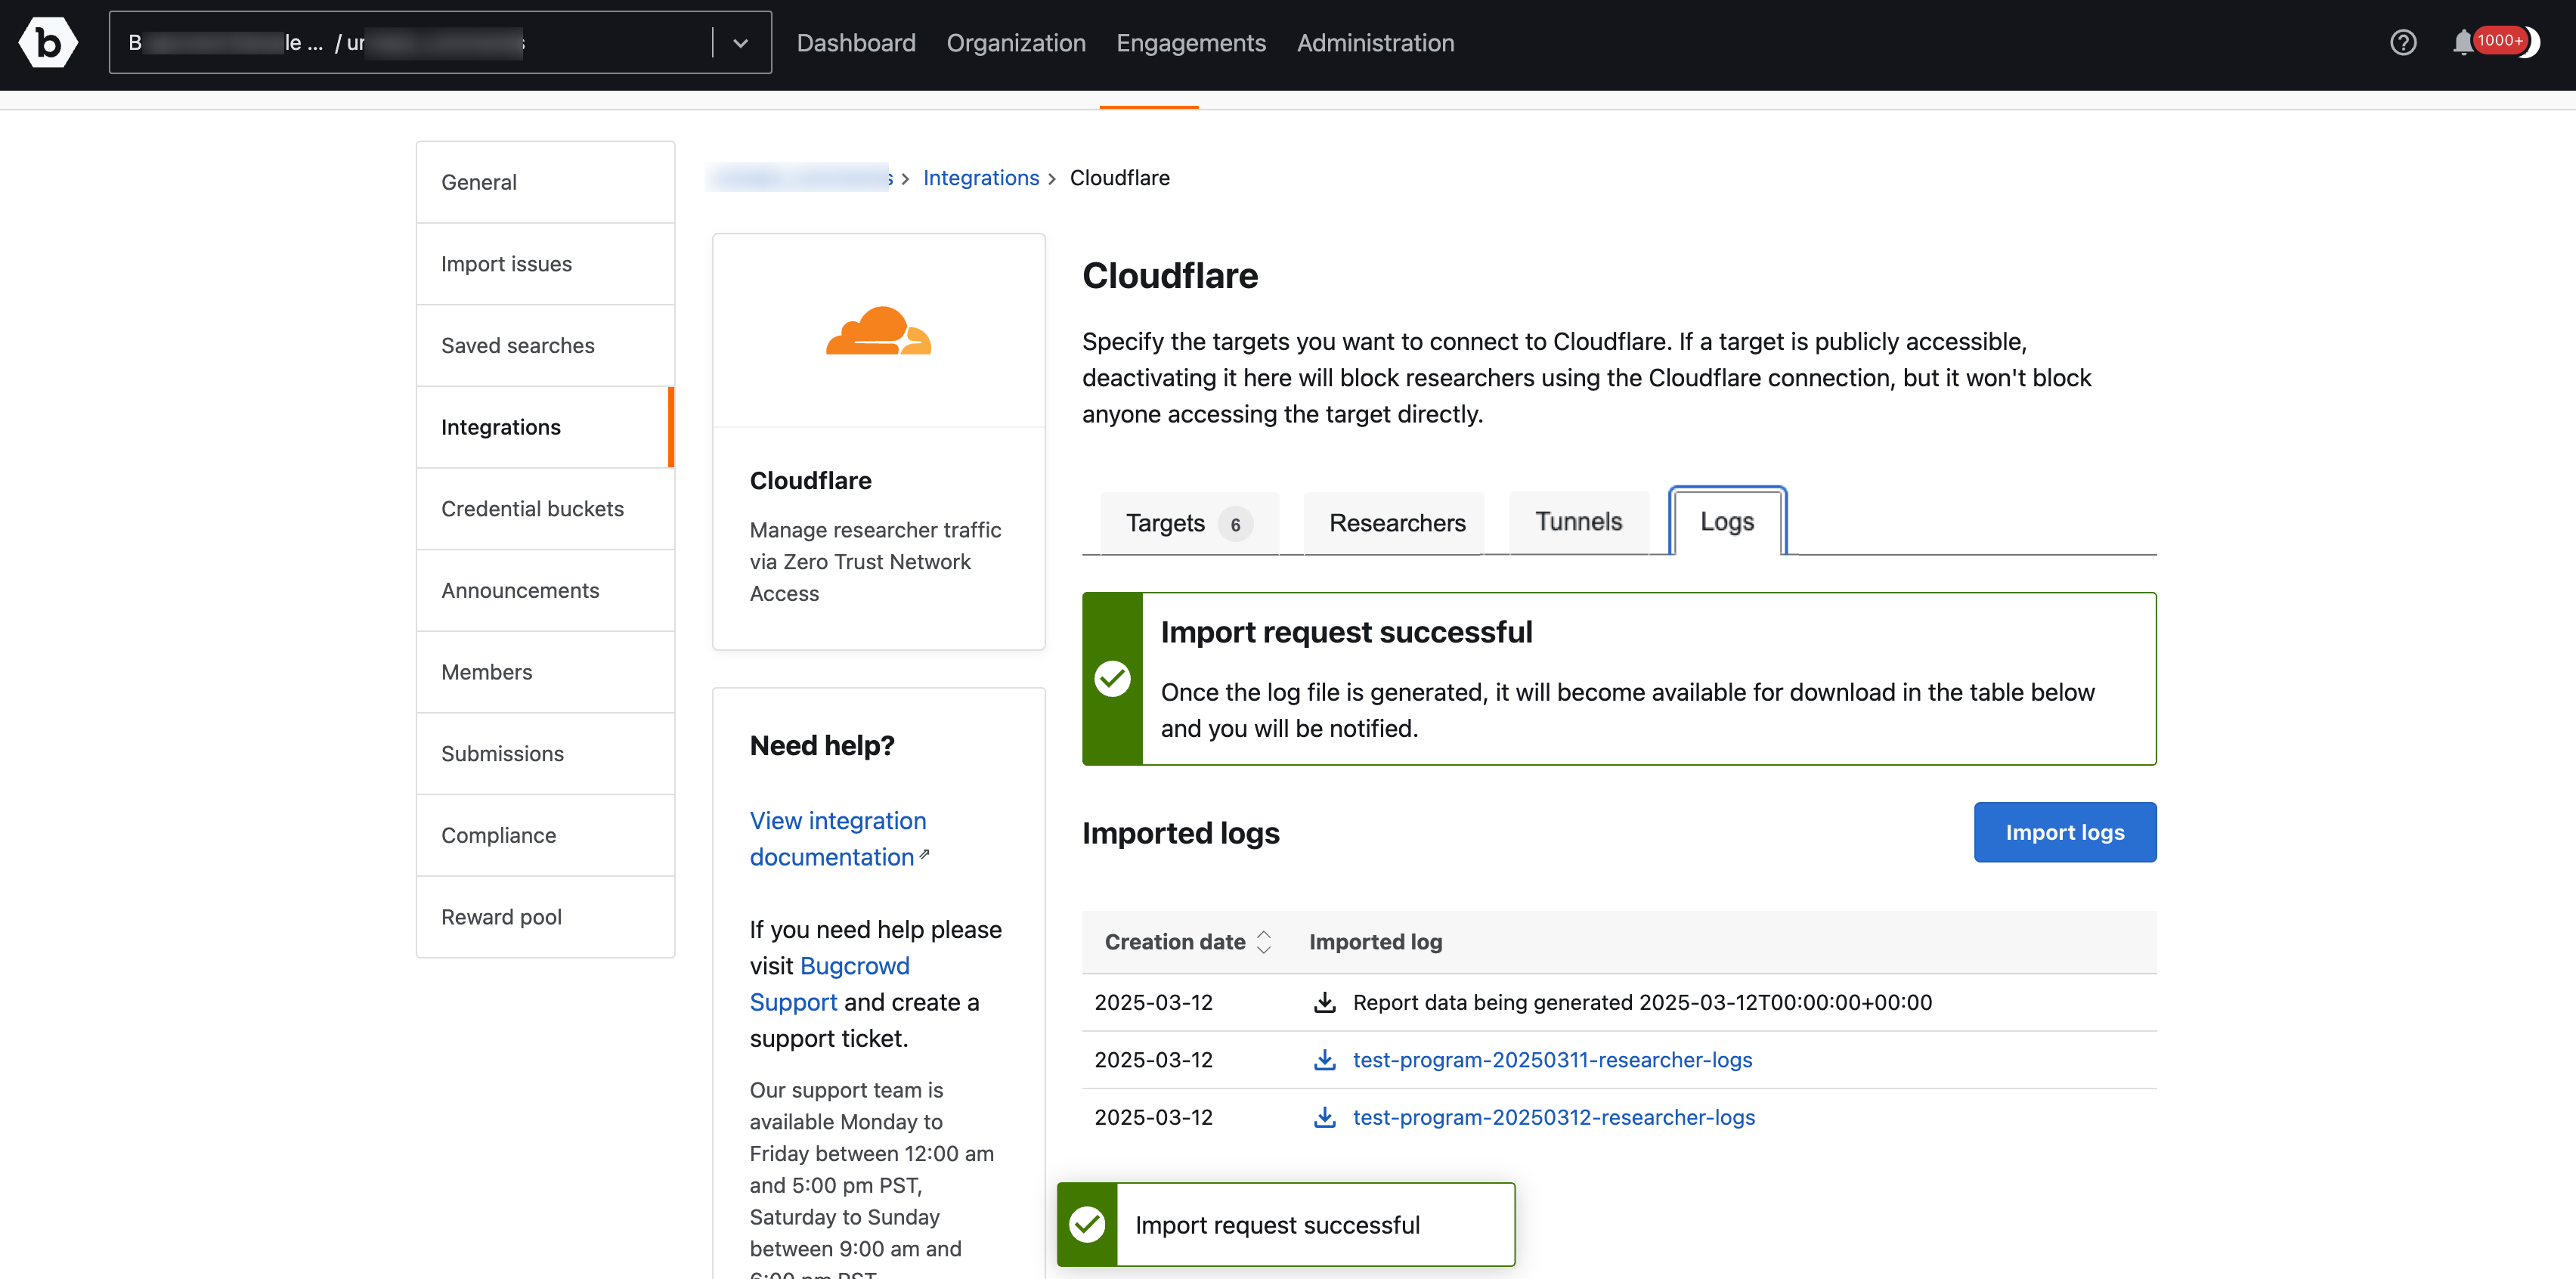
Select the date and click Import.

Once the log is imported, a Import request successful message is displayed.
-
Click on the Download icon to download the log file.
The downloaded log file contains the following log details:
Field in the Log file Details Datetime Date and Time of the HTTP request made URL Full URL for the HTTP request Email Email ID of the user who made the HTTP request, through the WARP client HTTP Host Hostname present in the HTTP header for the HTTP request Action Action taken based on the first rule that matched (for example Allow or Block) HTTP Version HTTP version of the origin connected to on behalf of the user HTTP Method HTTP method used for the request (for example, GET or POST) HTTP Status Code HTTP status code returned in the response Destination IP Public IP address of the destination requested Destination Port Port of the destination requested User Agent User agent header sent in the request by the originating device Untrusted Certificate Action What action should be taken if an untrusted origin certificate error occurs (e.g., invalid certificate chain, signed by non-public CA, expired certificate, etc.) none, error, block or pass-through Session ID The session identifier Referrer Referrer request header containing the address of the page making the request
Testing Internal Network using Cloudflare Zero Trust
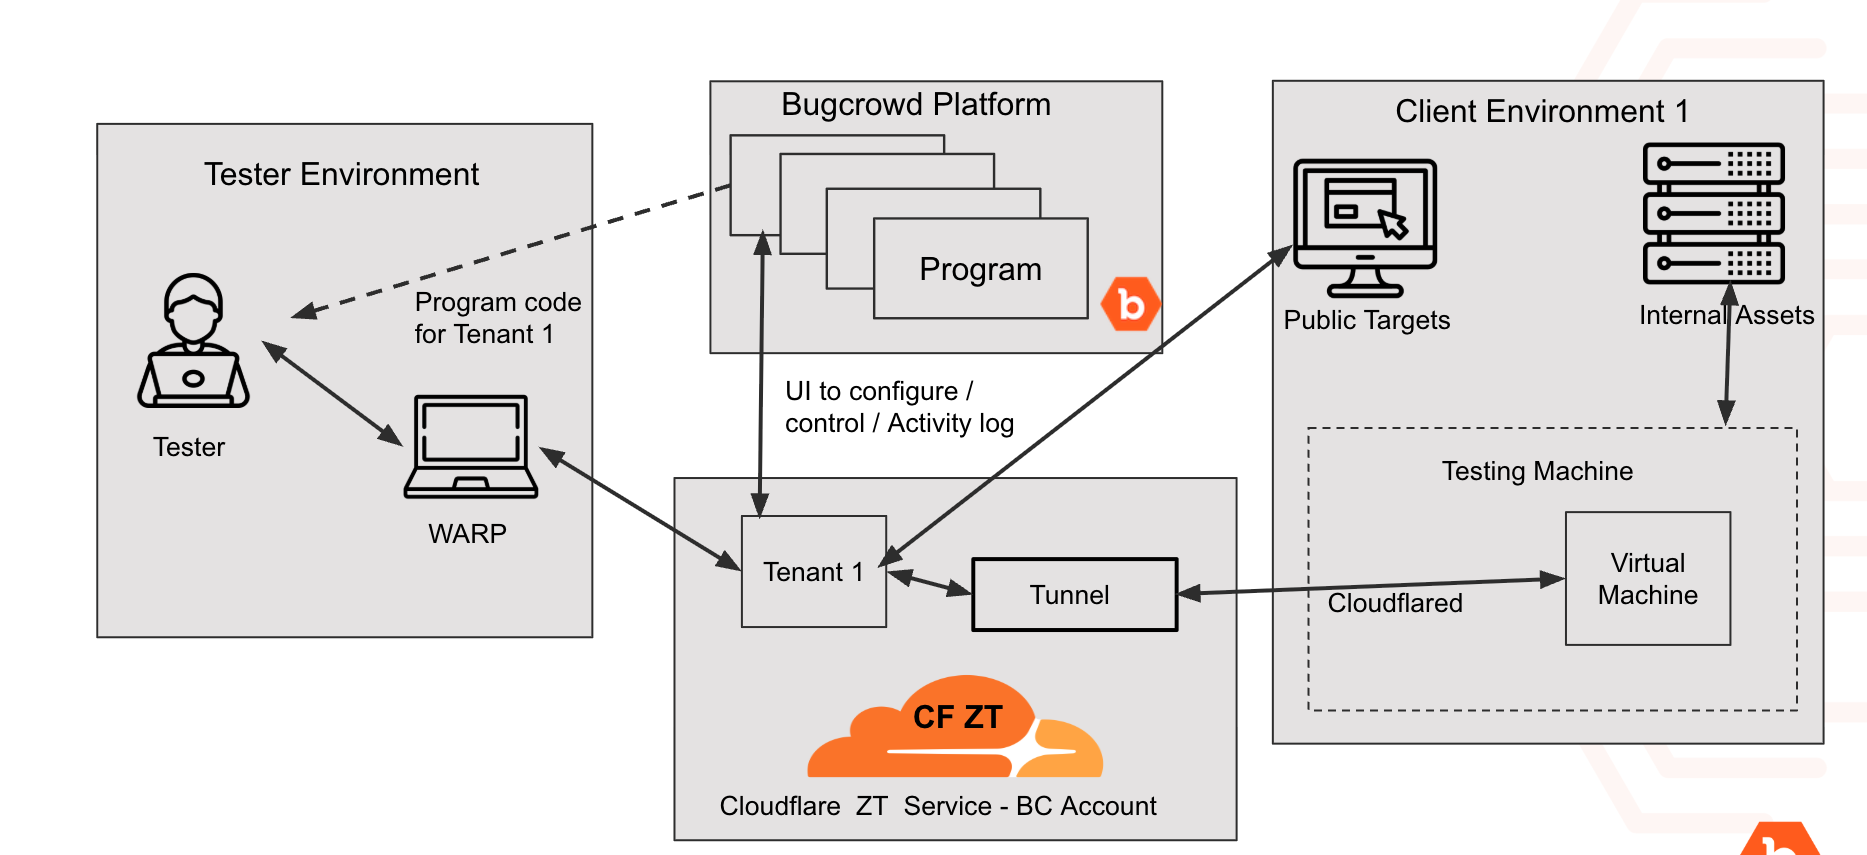
Cloudflare Zero Trust integration has been extended to support testing internal network targets. A secure tunnel using cloudflared is established between the Cloudflare account and the internal network. Using this secure tunnel, testers are able to access internal network targets when they access the Cloudflare account through the WARP client.
The following diagram describes how testers are able to access the internal network targets.
Please use the following steps to:
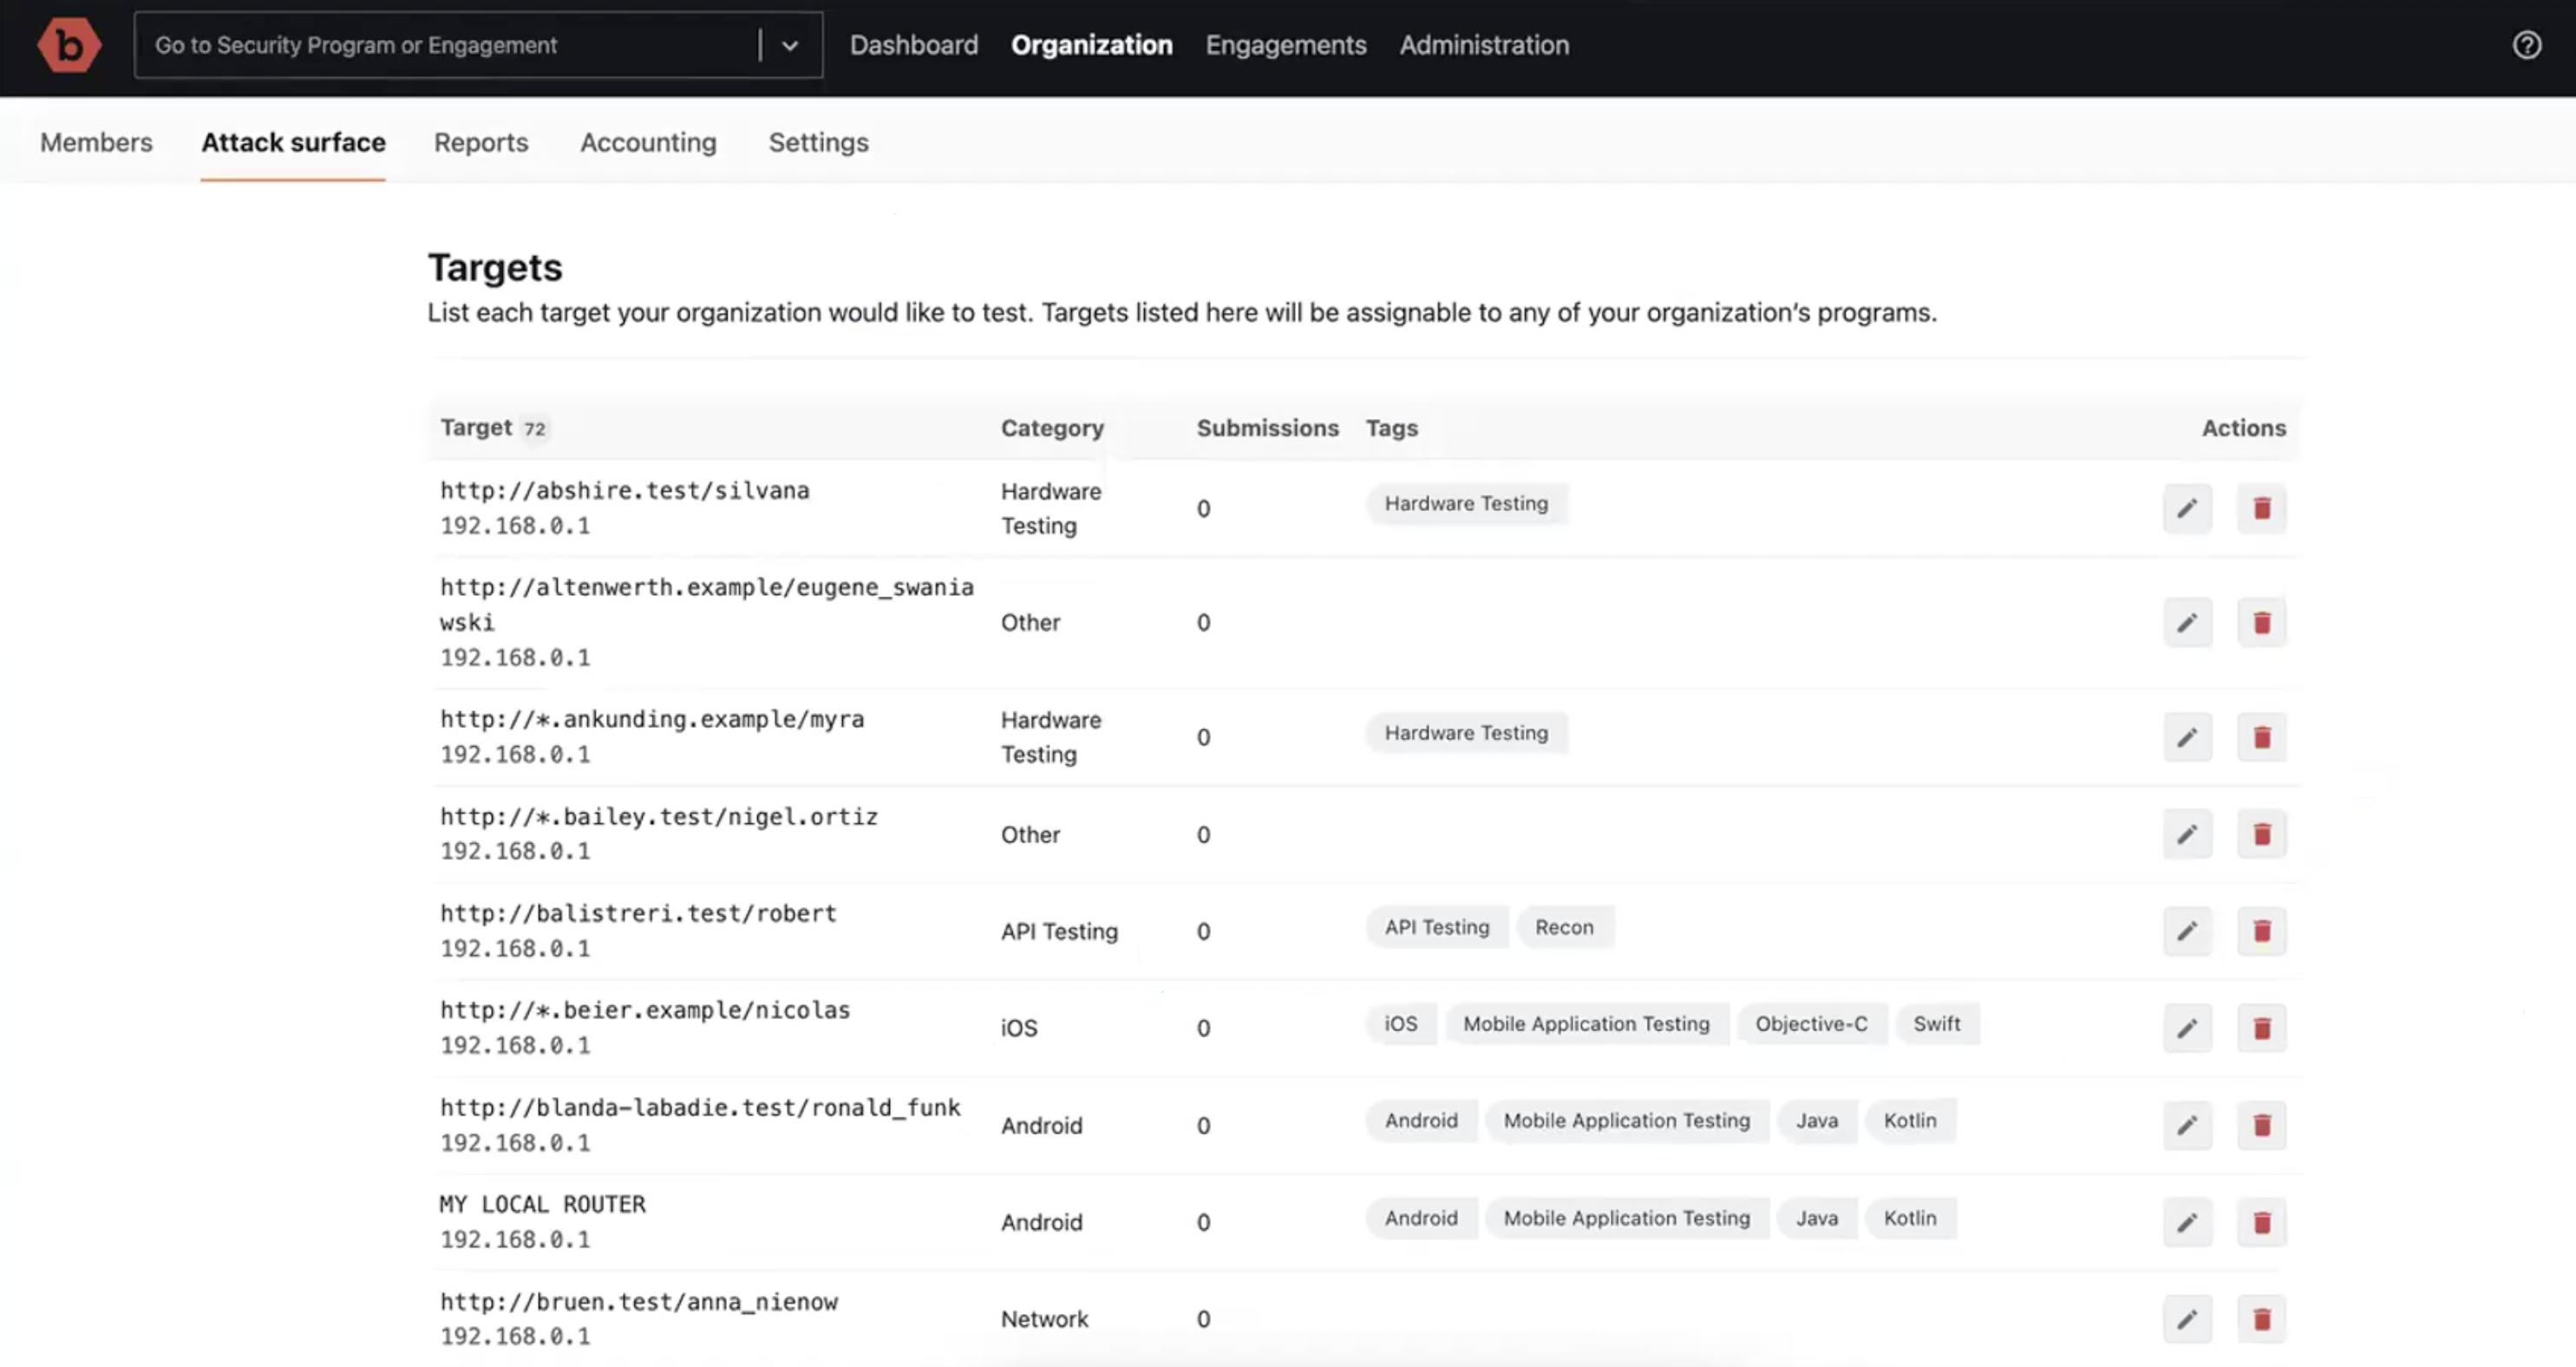
- Add the internal targets to the Organization
- Add the internal targets to the Cloudflare integration
- Establish a tunnel and add the internal targets to that tunnel
- Download, install, and configure
cloudflaredin a server inside the network and connect to the Cloudflare integration account
Note: To test internal targets, the targets must have an IP Address associated with them.
-
Add the internal targets to the list of targets to test under the Organization.
-
In the Cloudflare integration, in the Targets tab, make sure to add these internal targets to the list of targets to test.
If an internal target doesn’t have an IP address, it cannot be added to the target list.
-
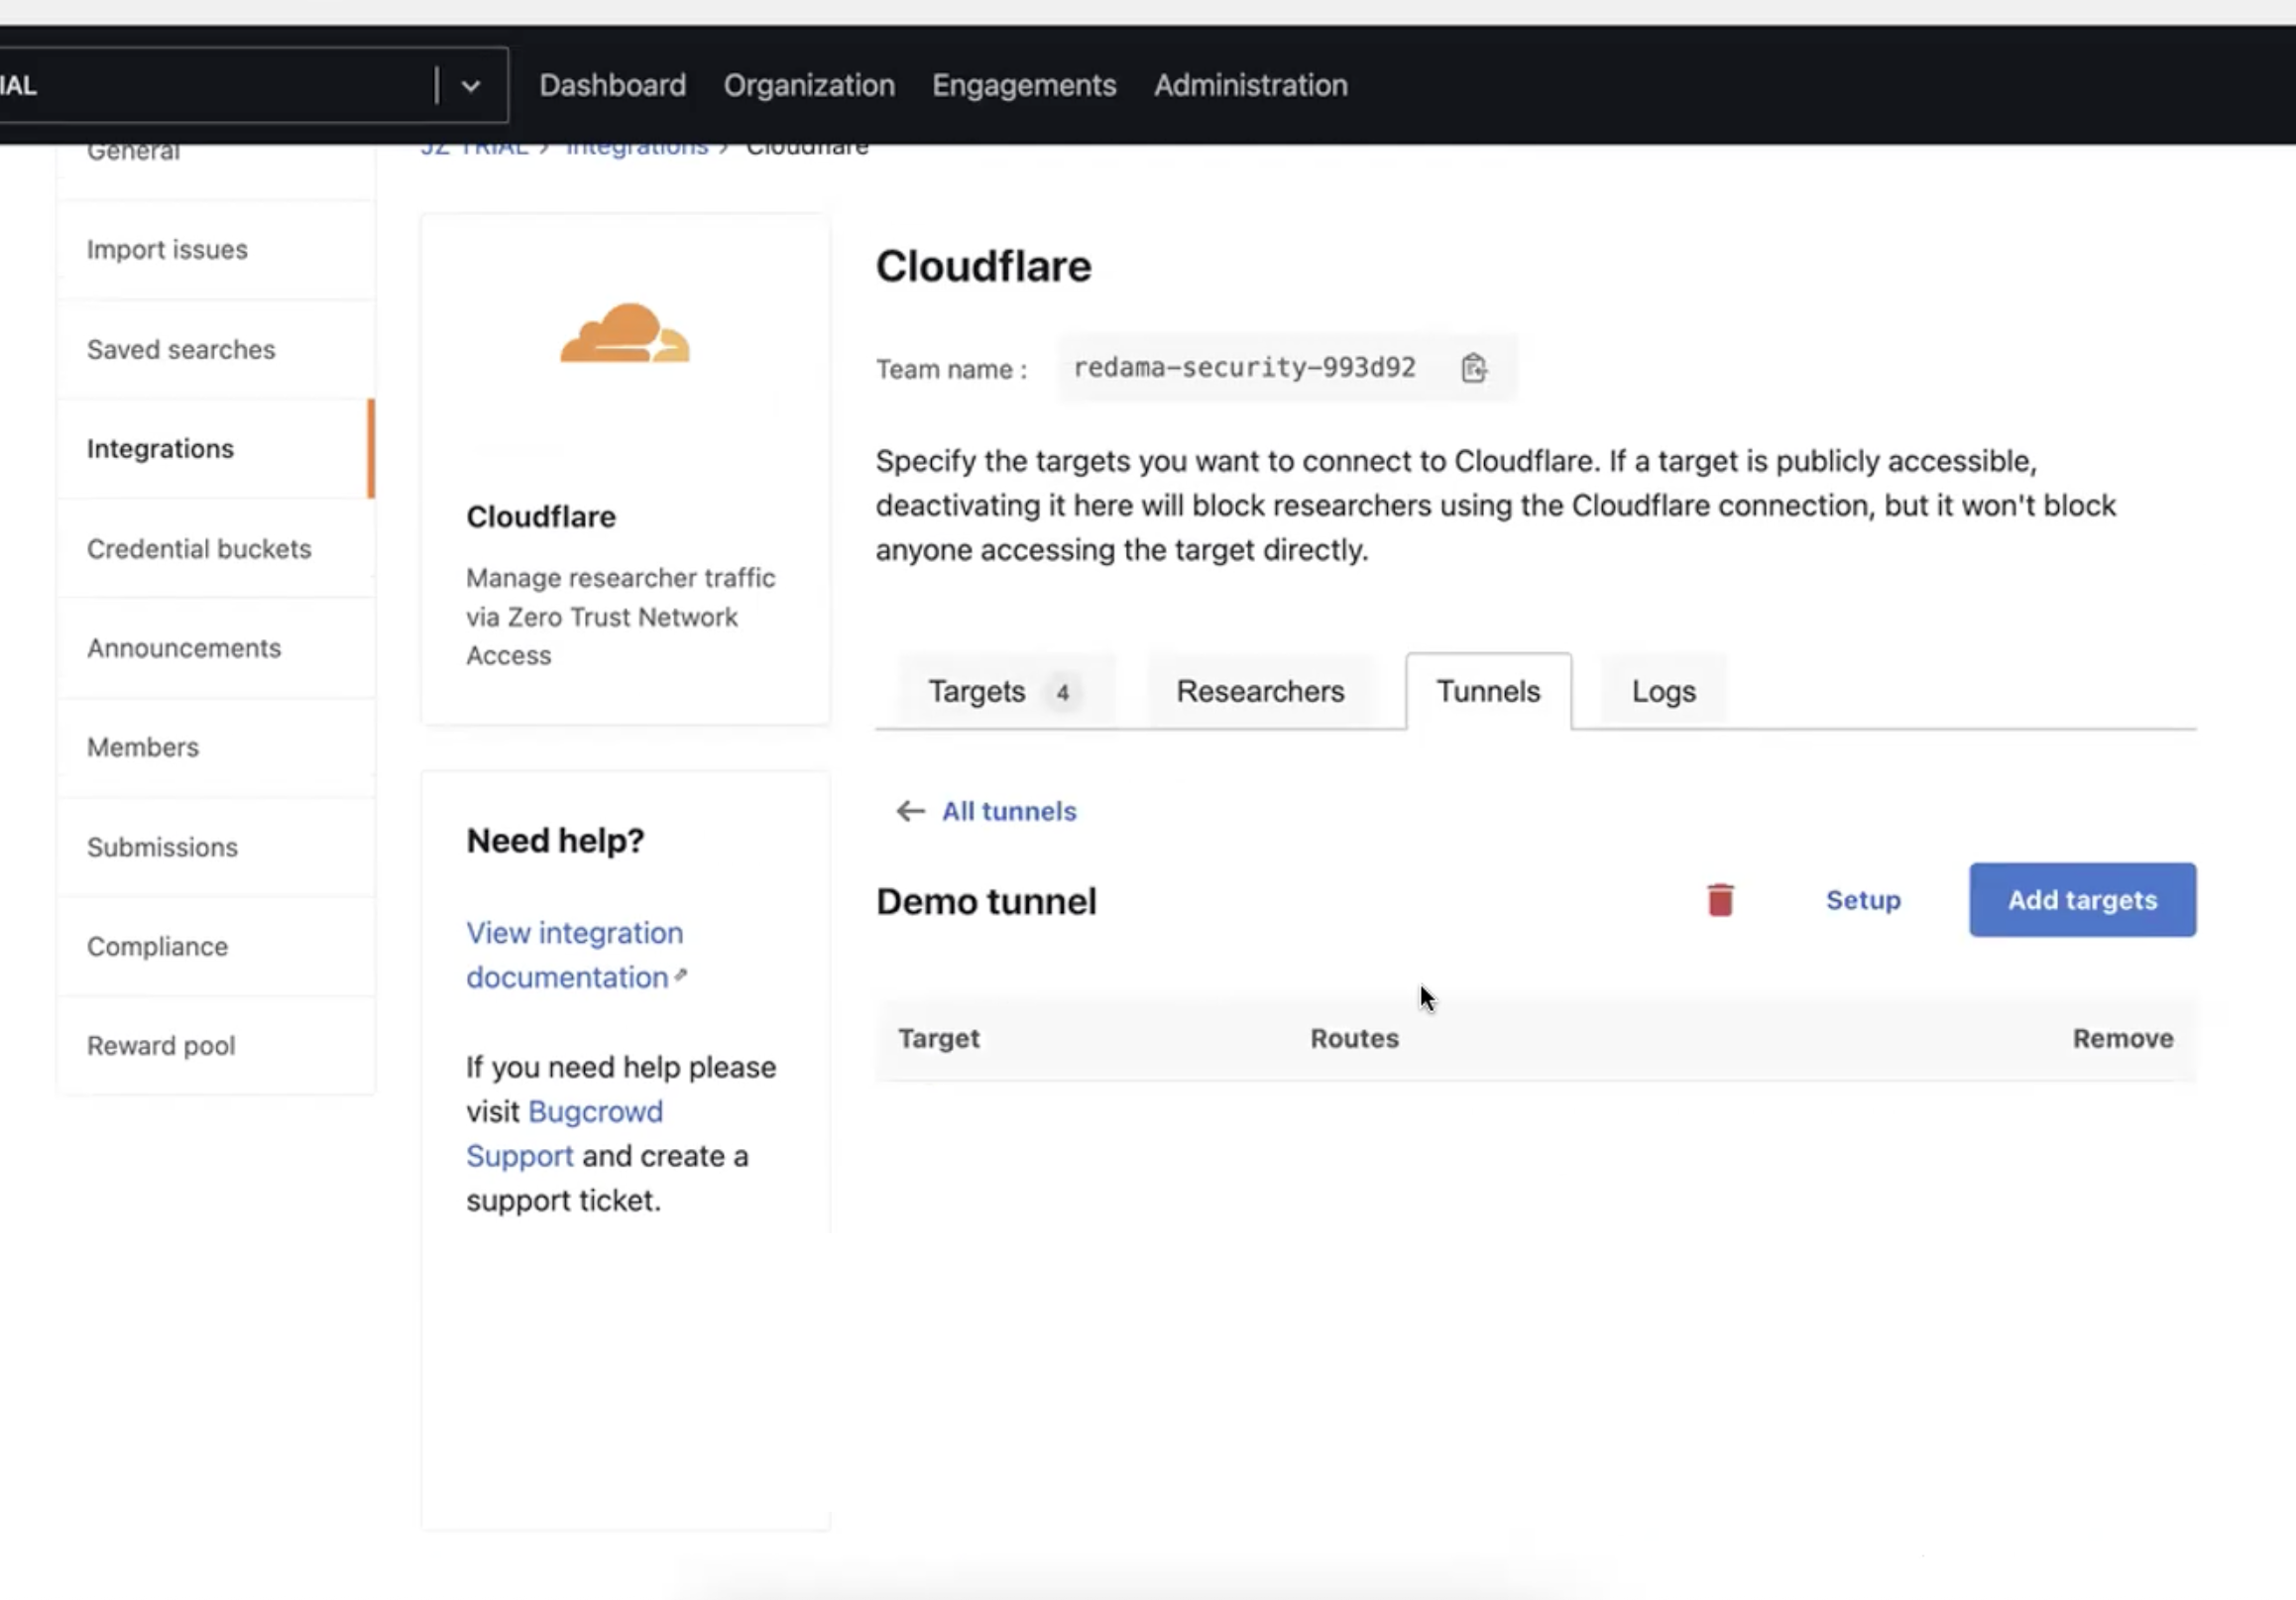
Go to the Tunnels tab and click on “Create a tunnel”. Click on that to create a new Tunnel and name the Tunnel.
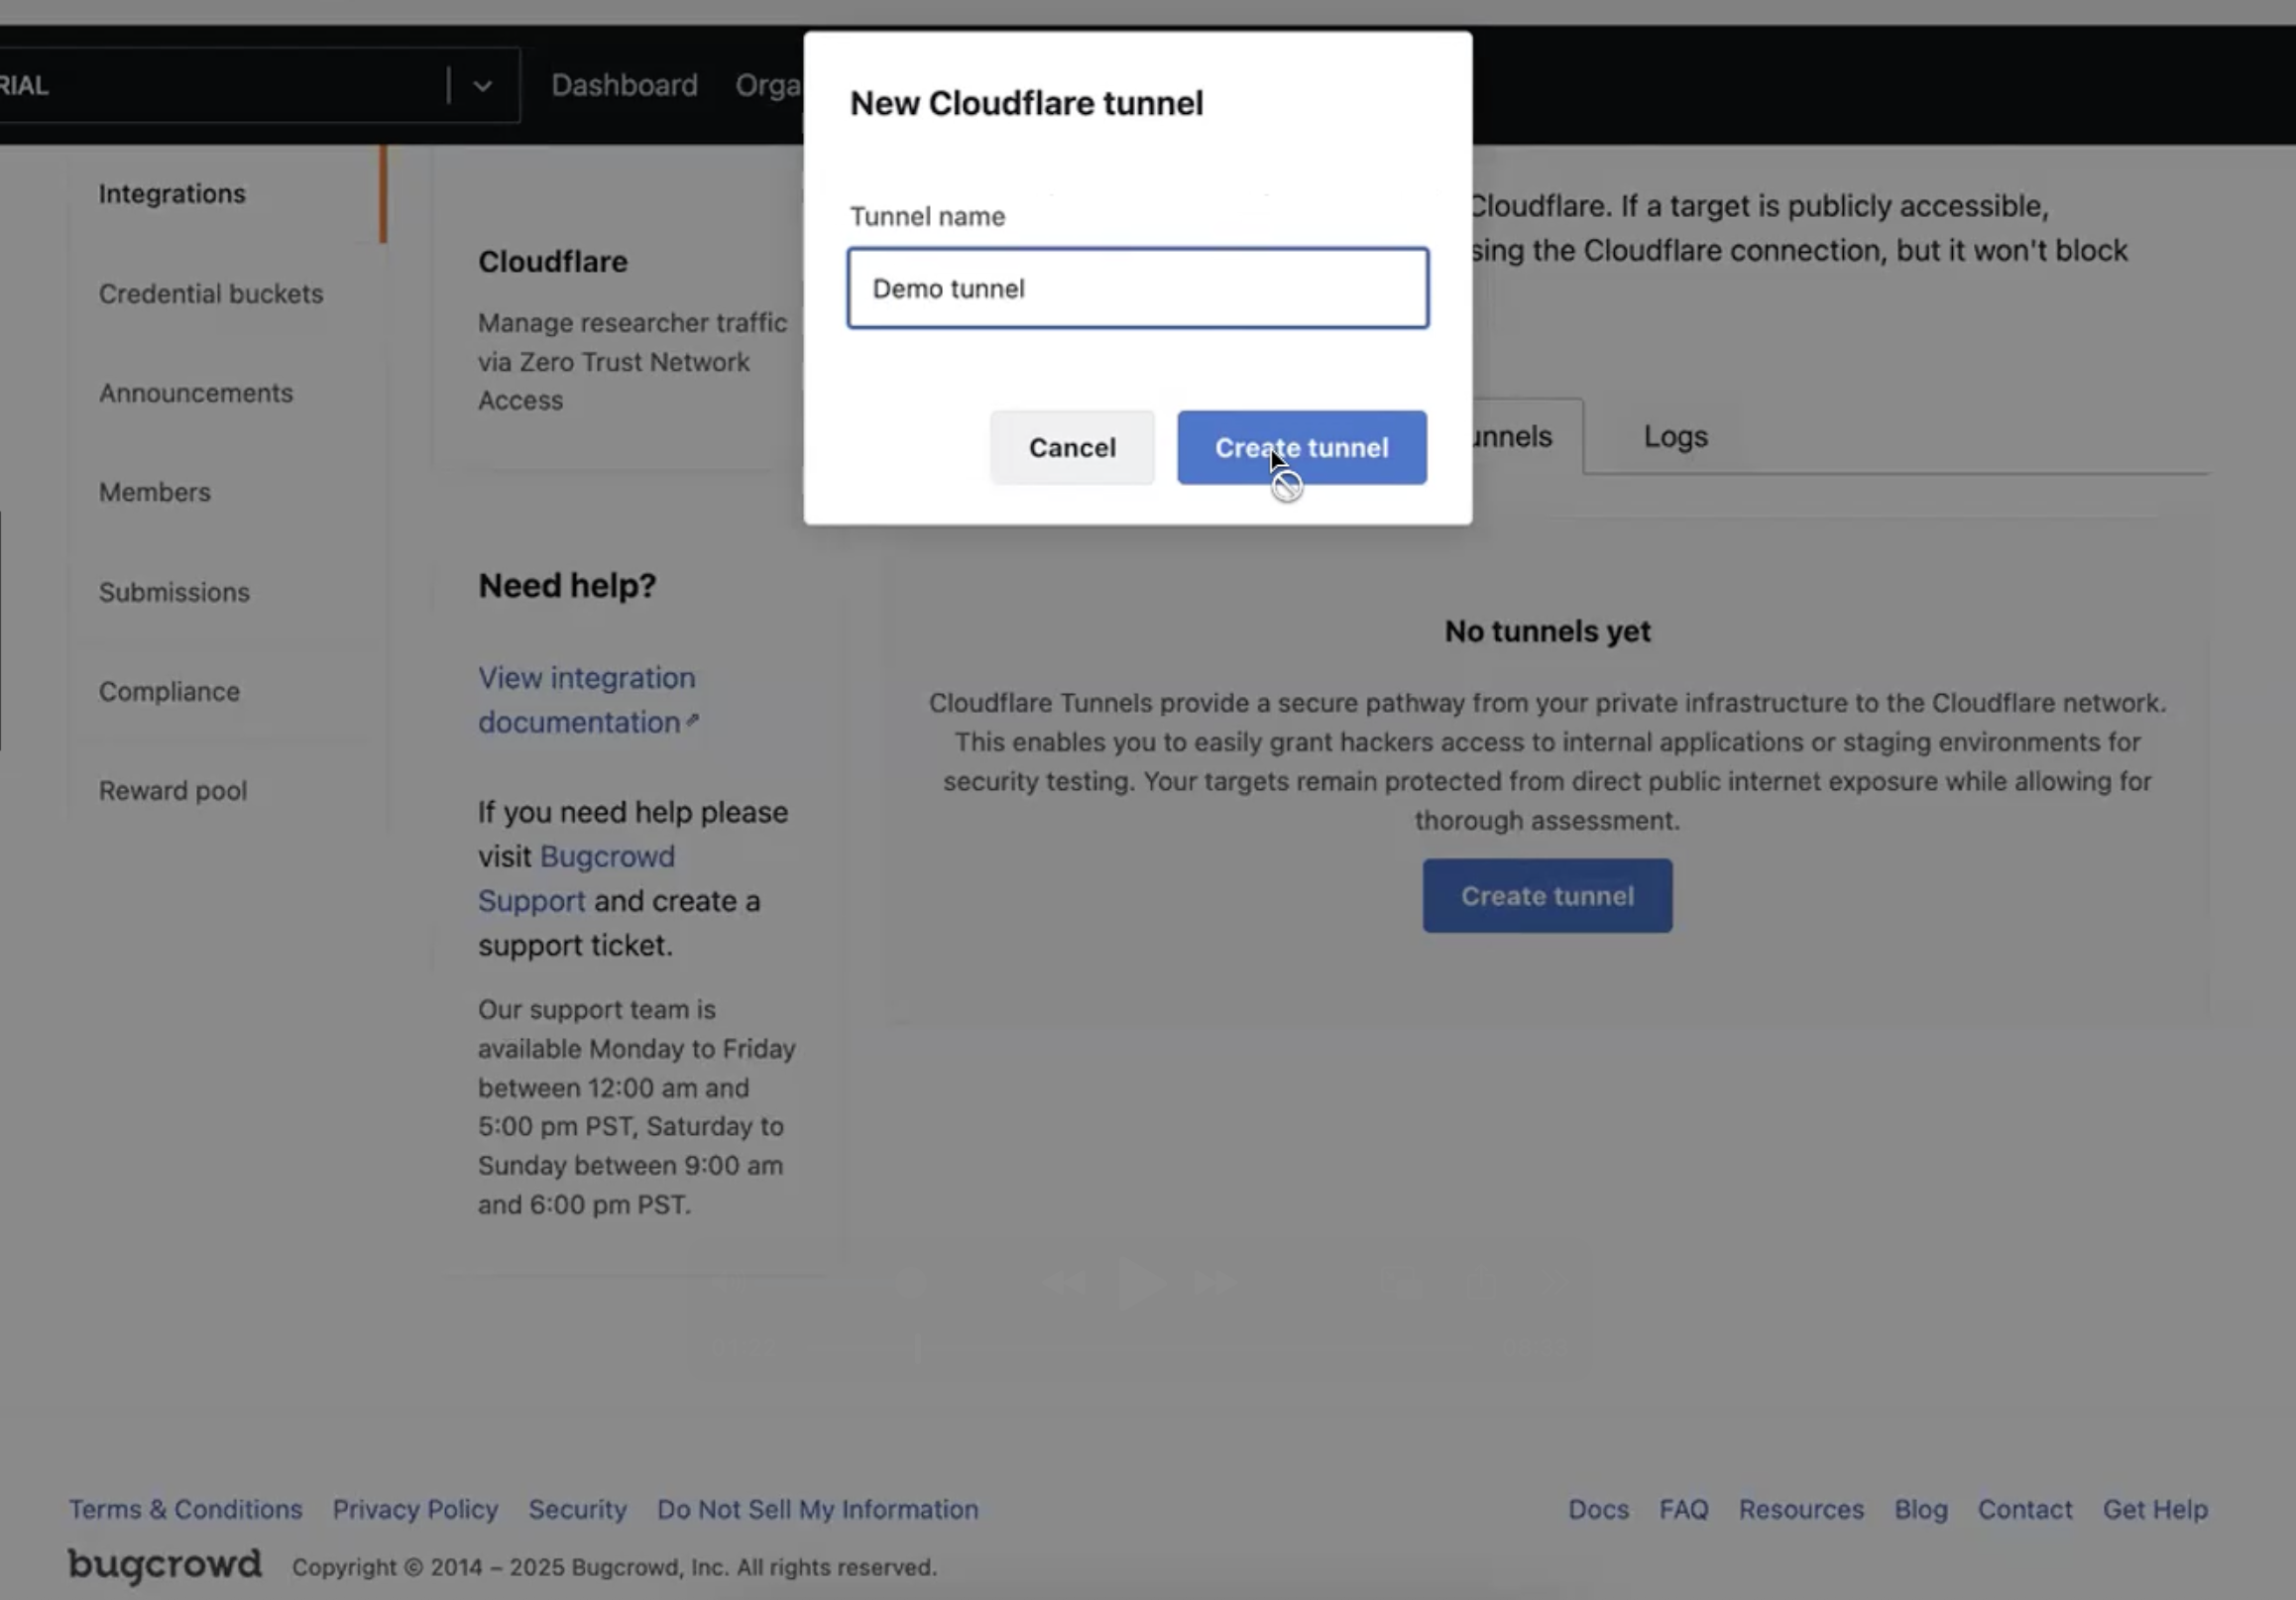
After naming the Tunnel, it might take a few minutes for the tunnel to appear in the list.
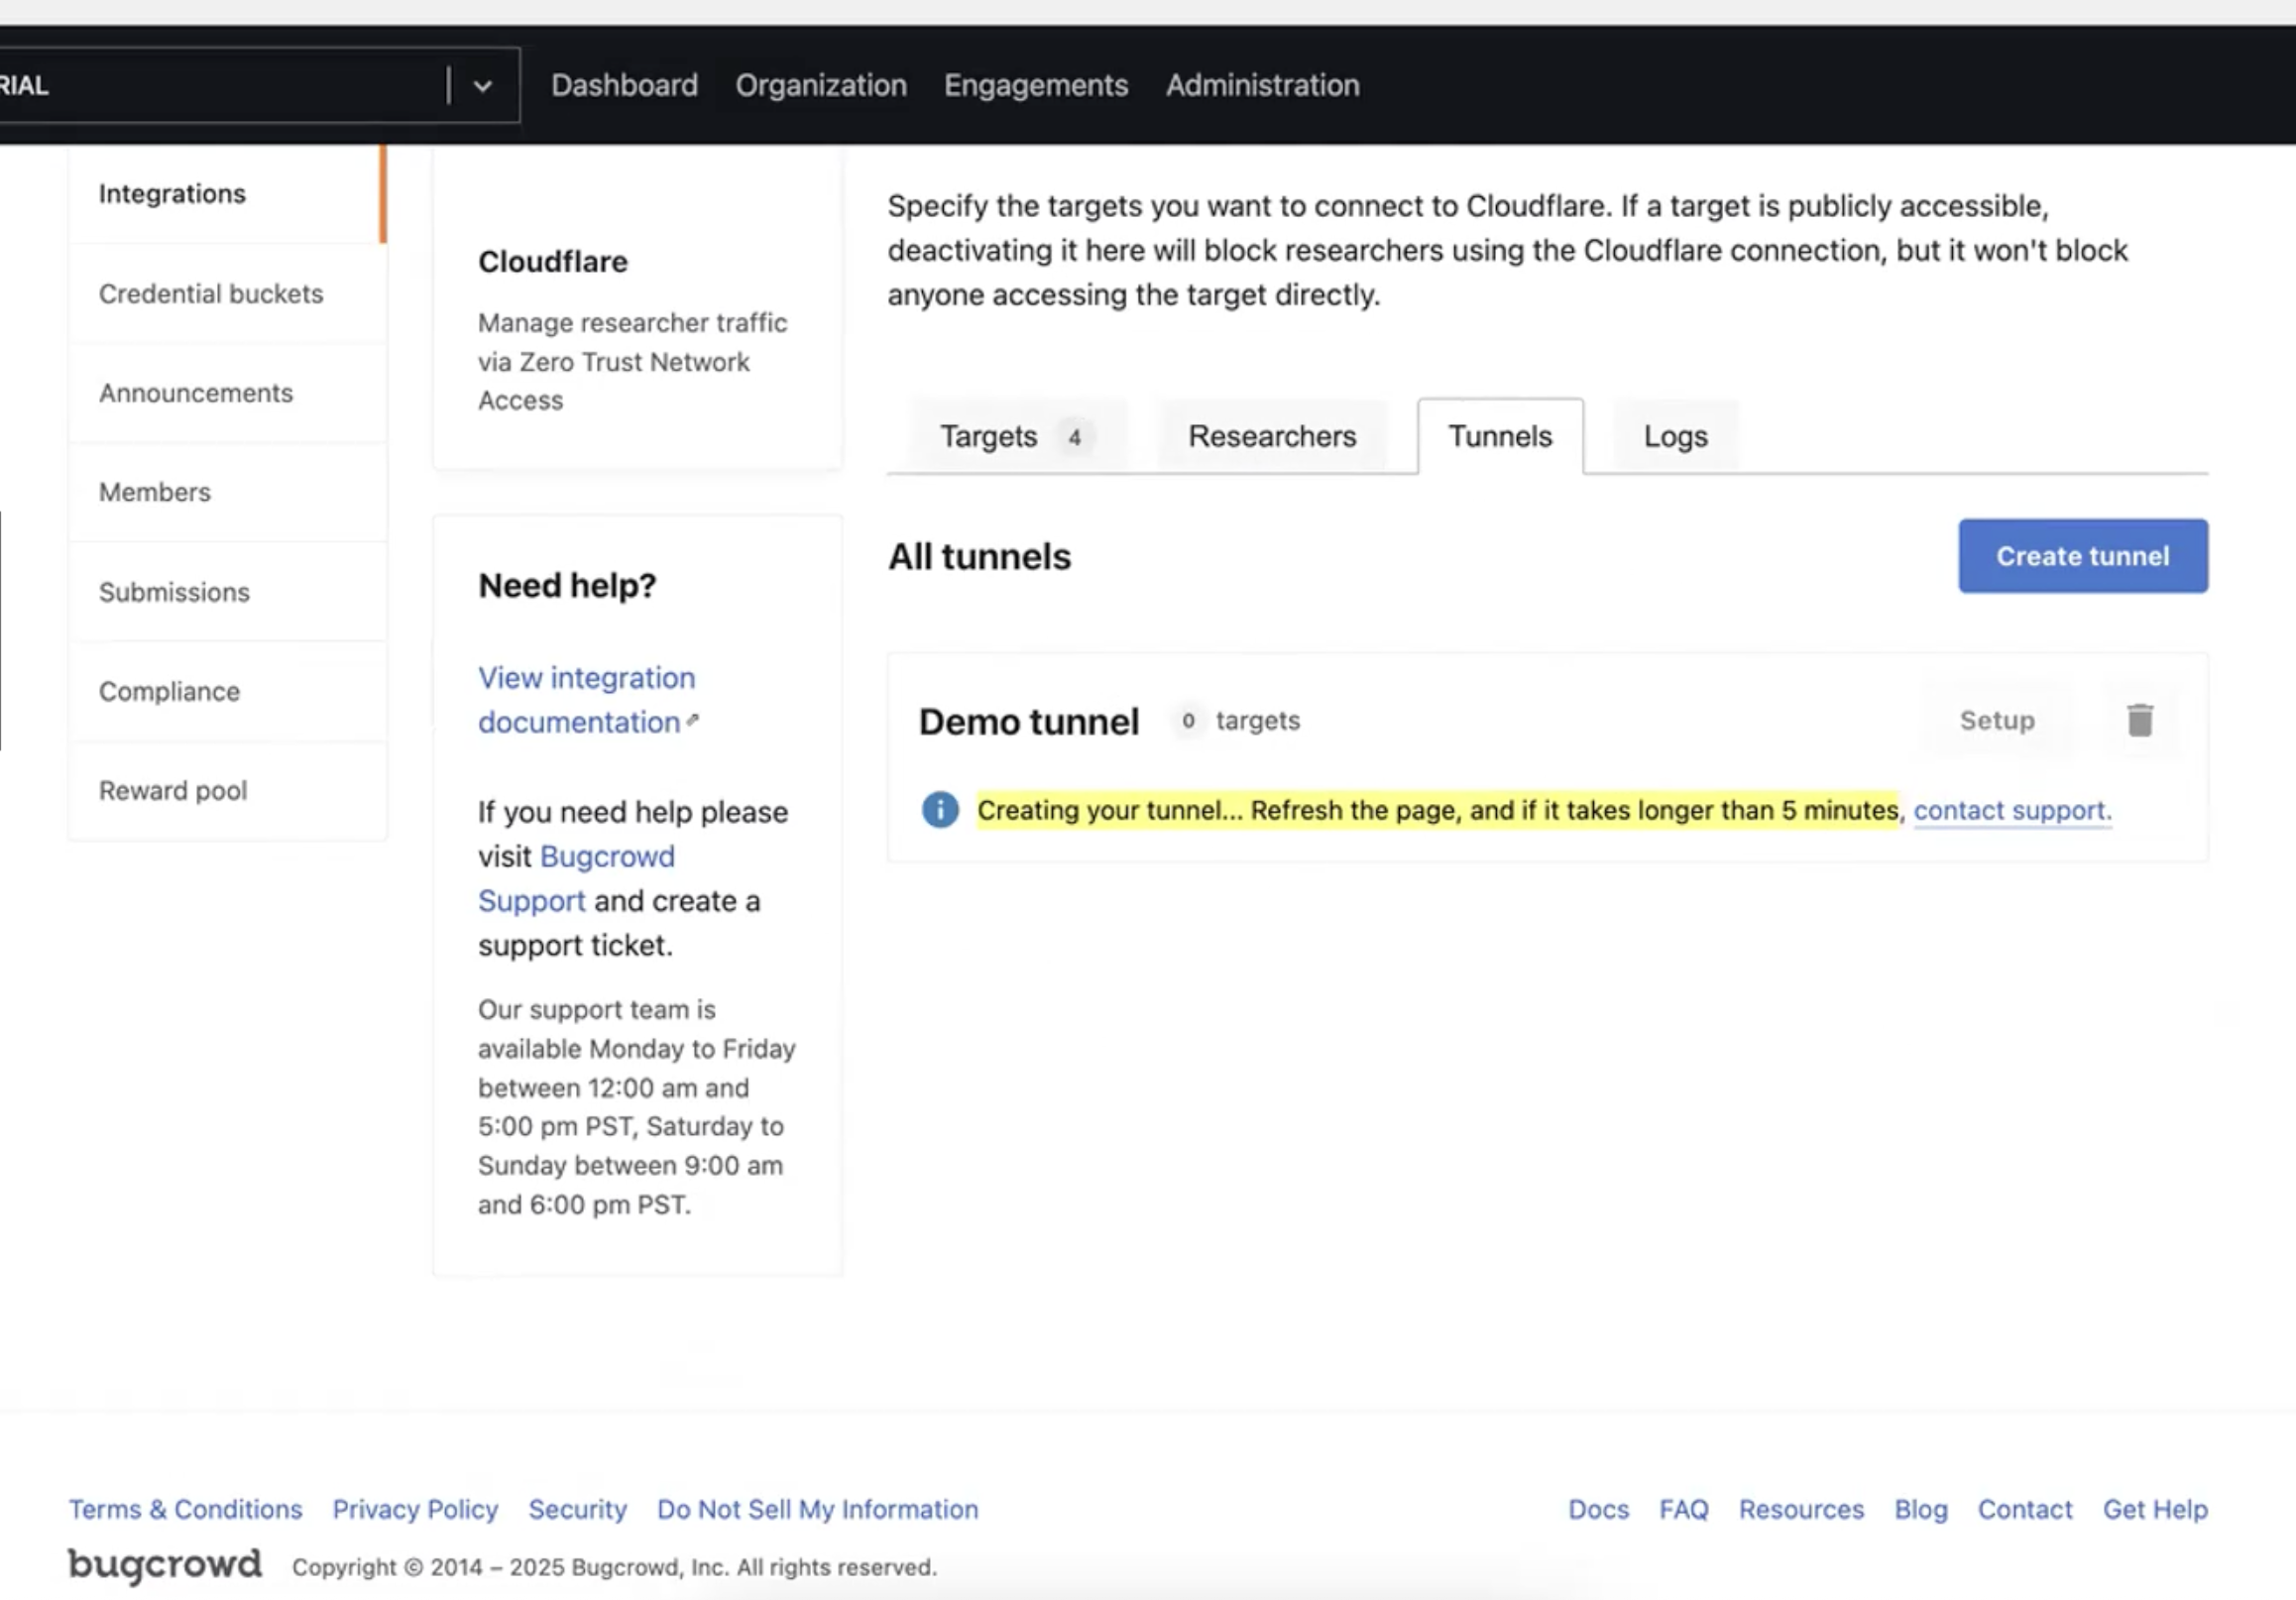
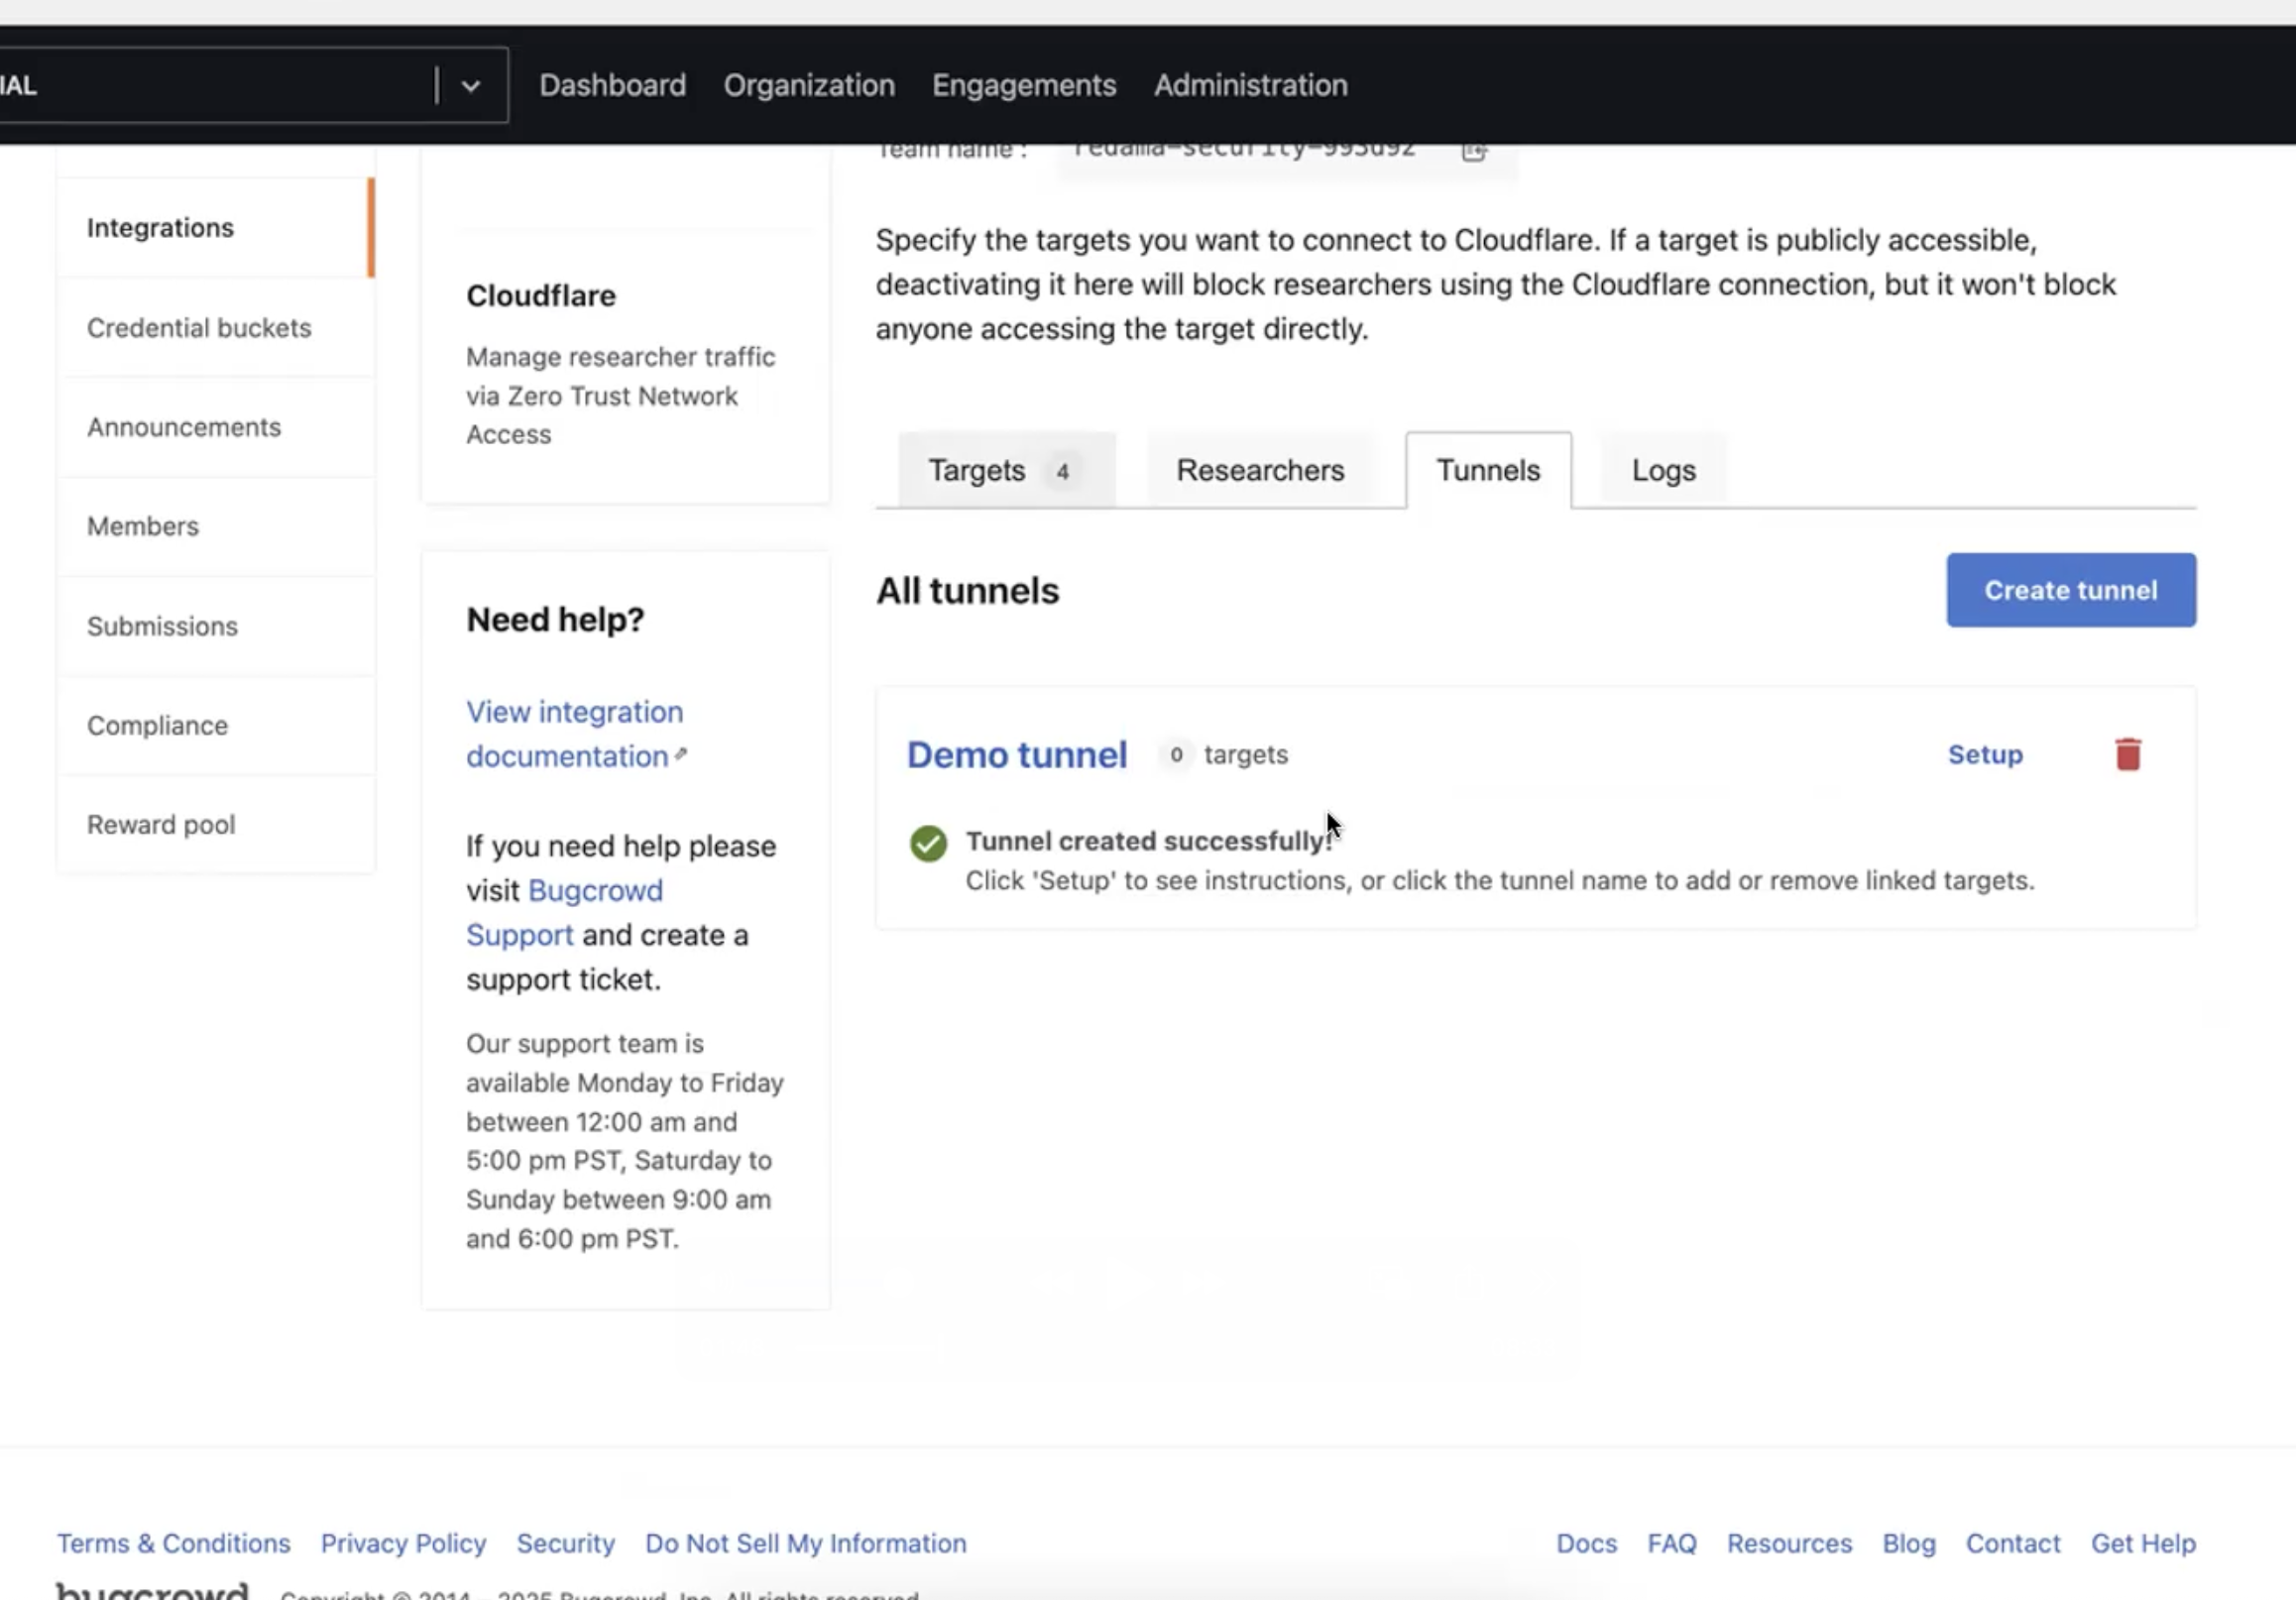
Once the Tunnel is created, a message “Tunnel created successfully” is shown next to that tunnel.
-
Now add the targets to this tunnel. Click on “Add Targets”.
Please note that the Targets that don’t have an IP Addresses are not listed in this page. Either the Bugcrowd staff or customer must view the organization target configuration page and set IP addresses on the targets that they want to see here, prior to adding them.
-
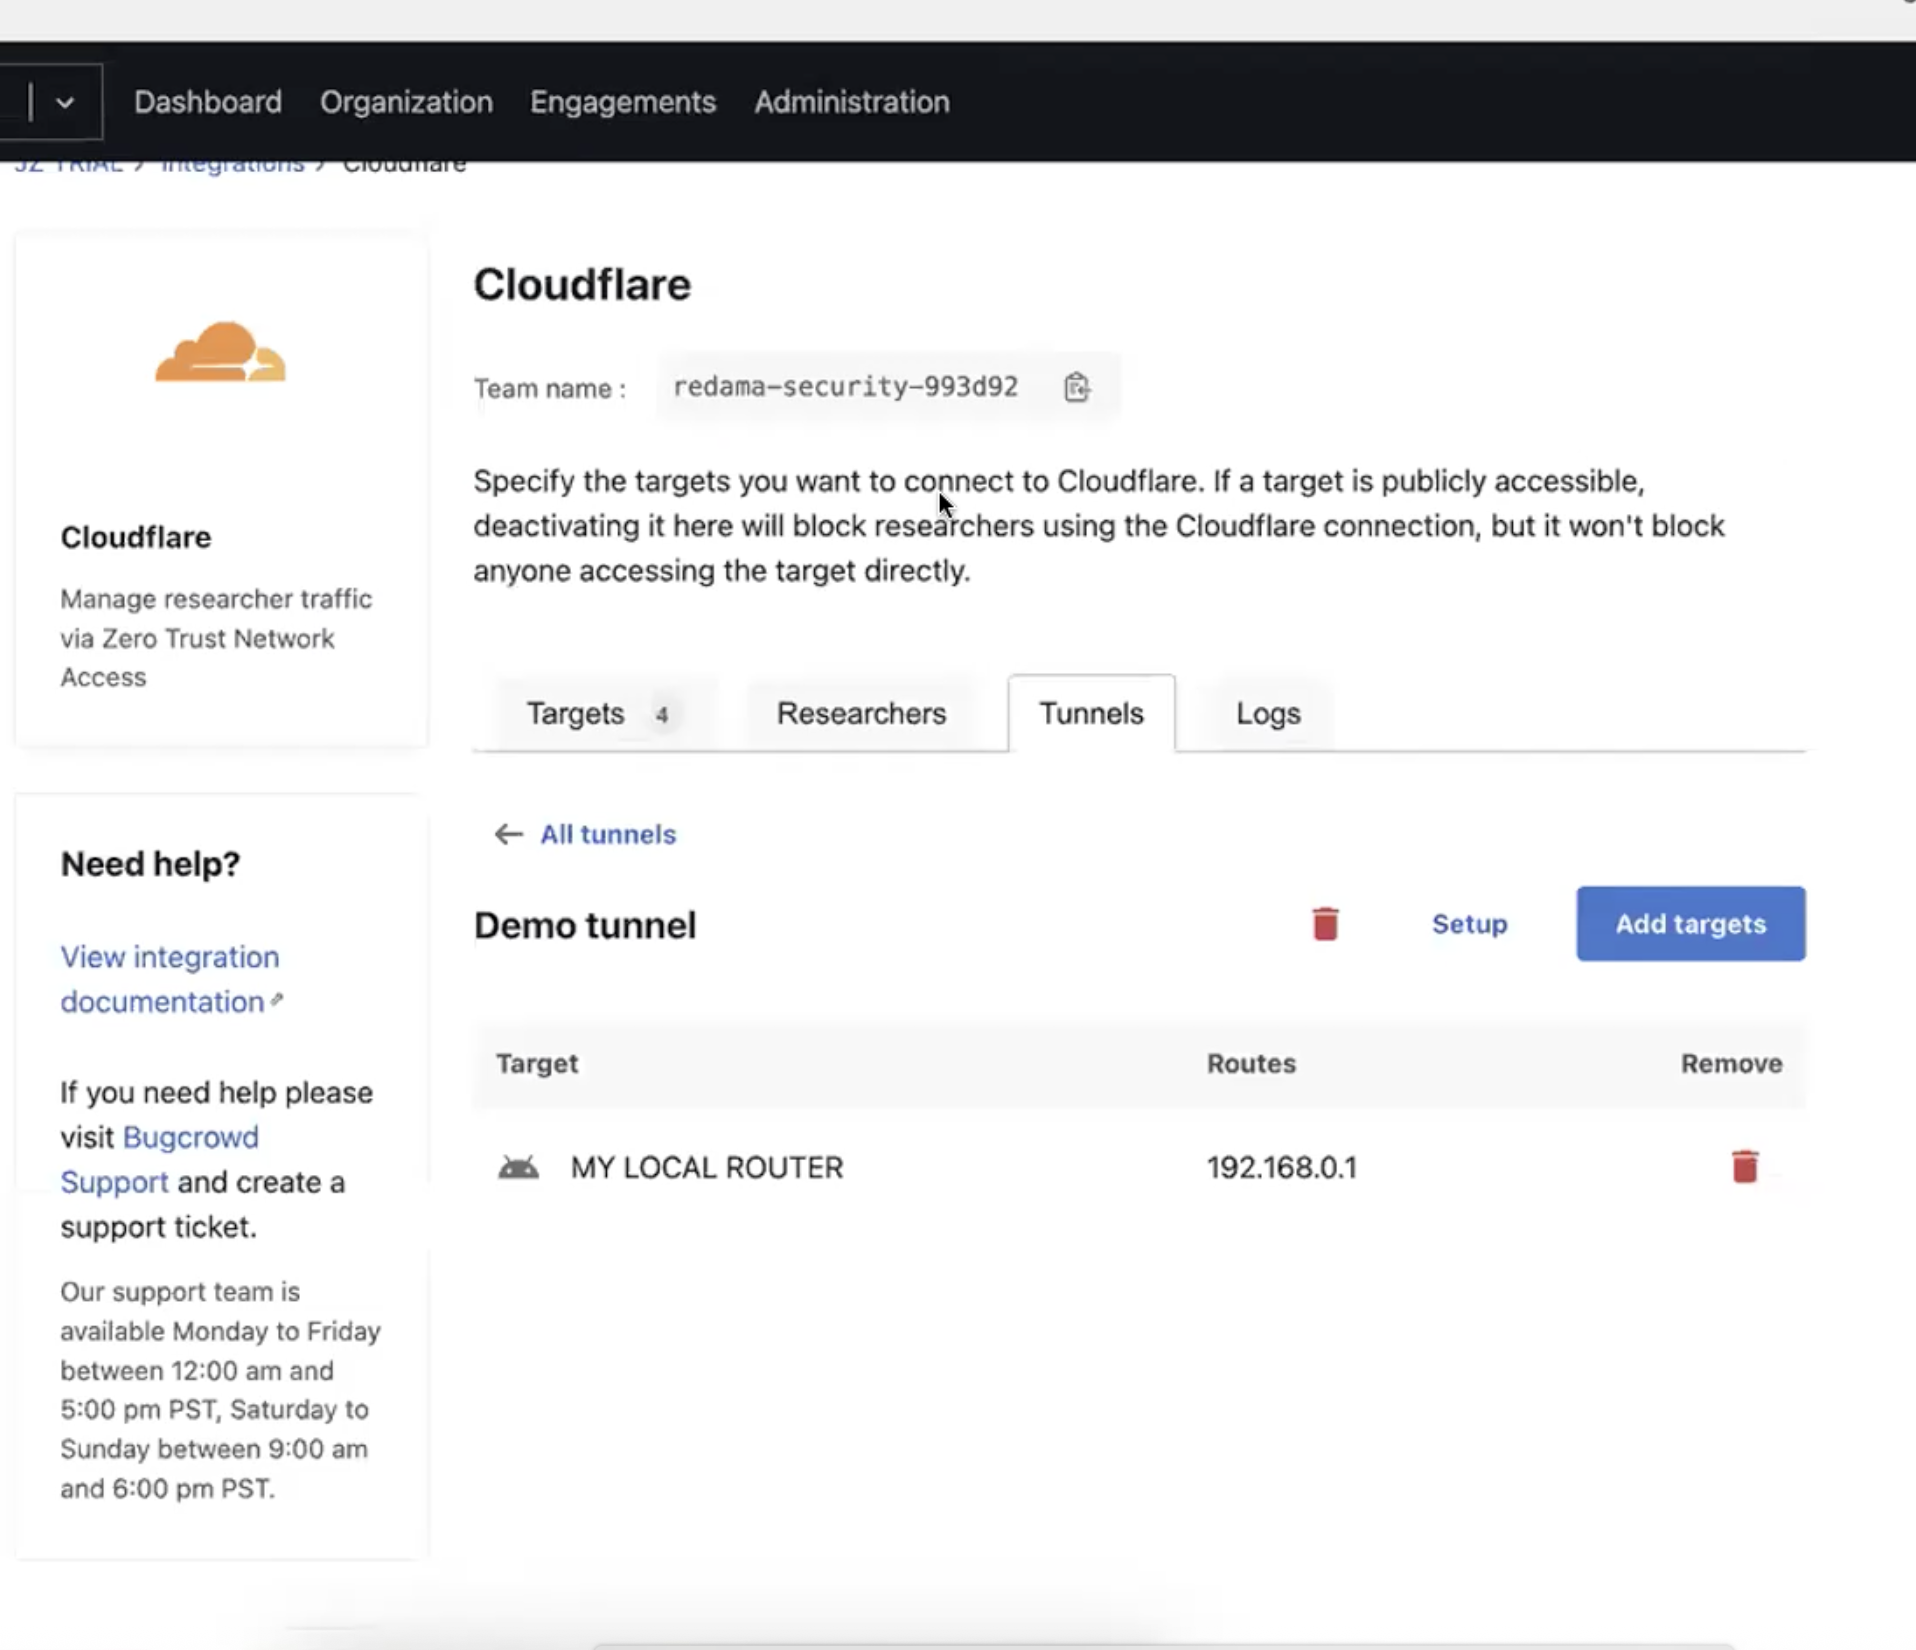
Select the internal Targets that need to be added to the Tunnel for testing.
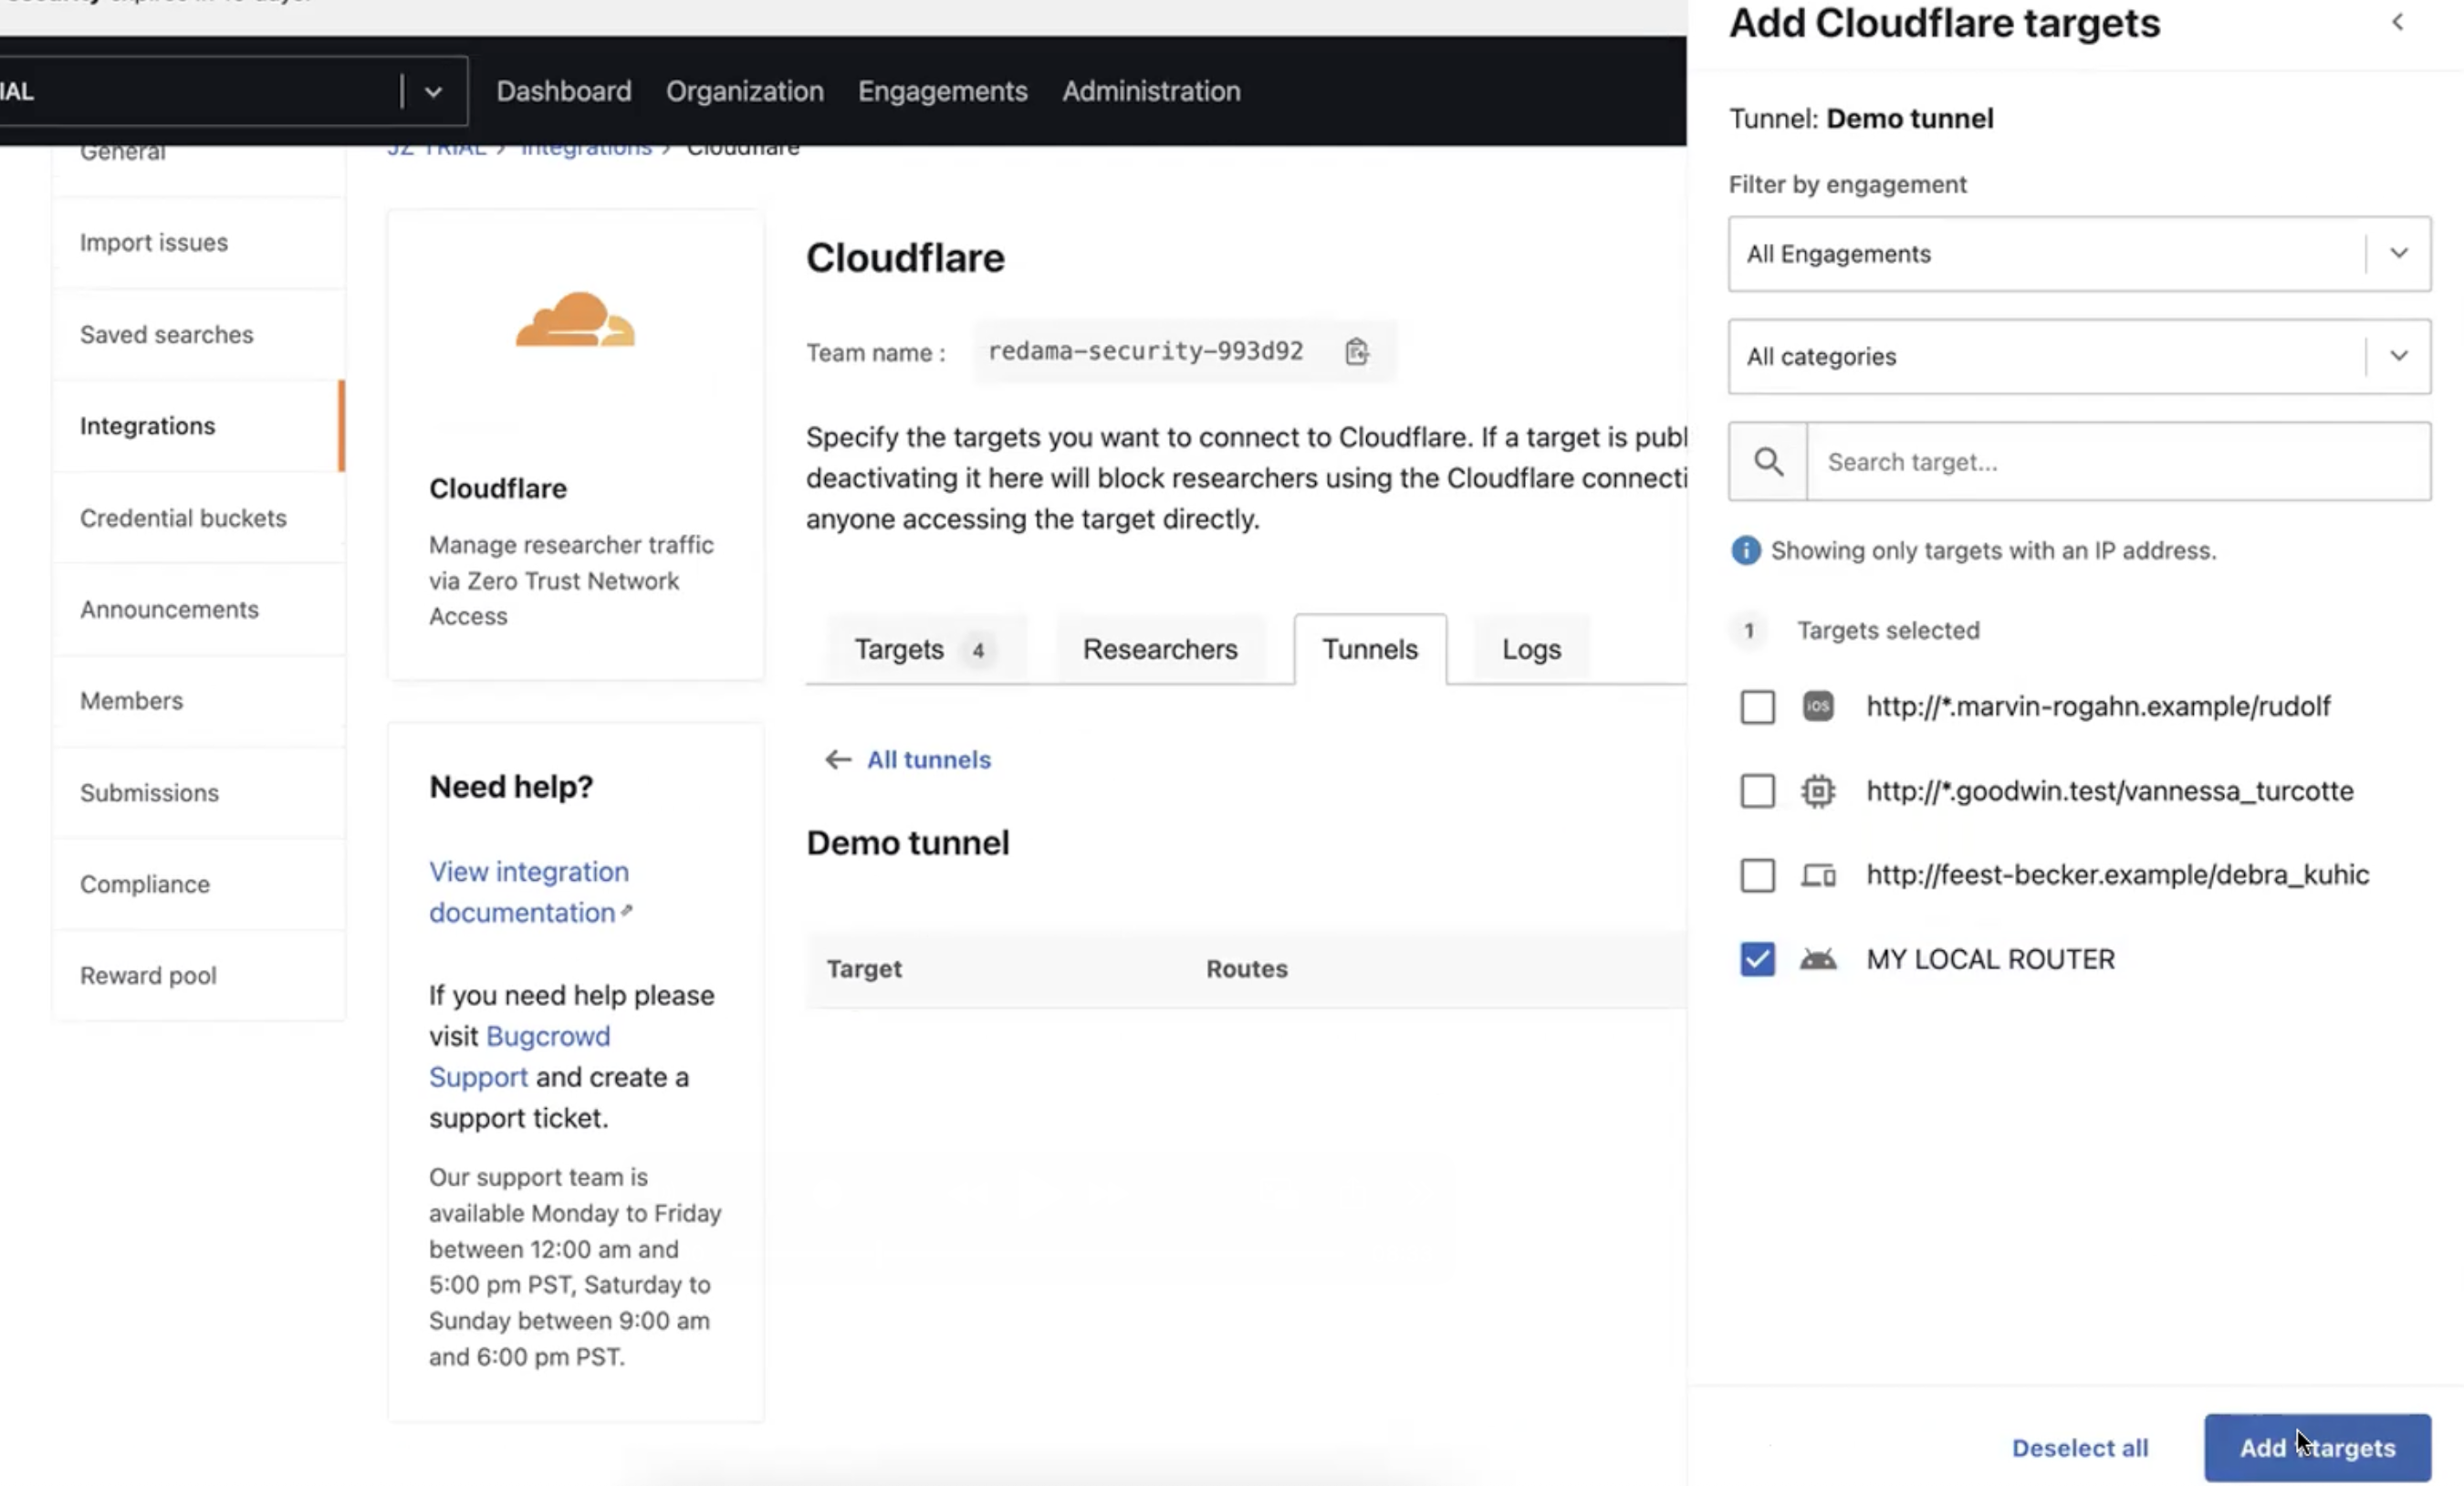
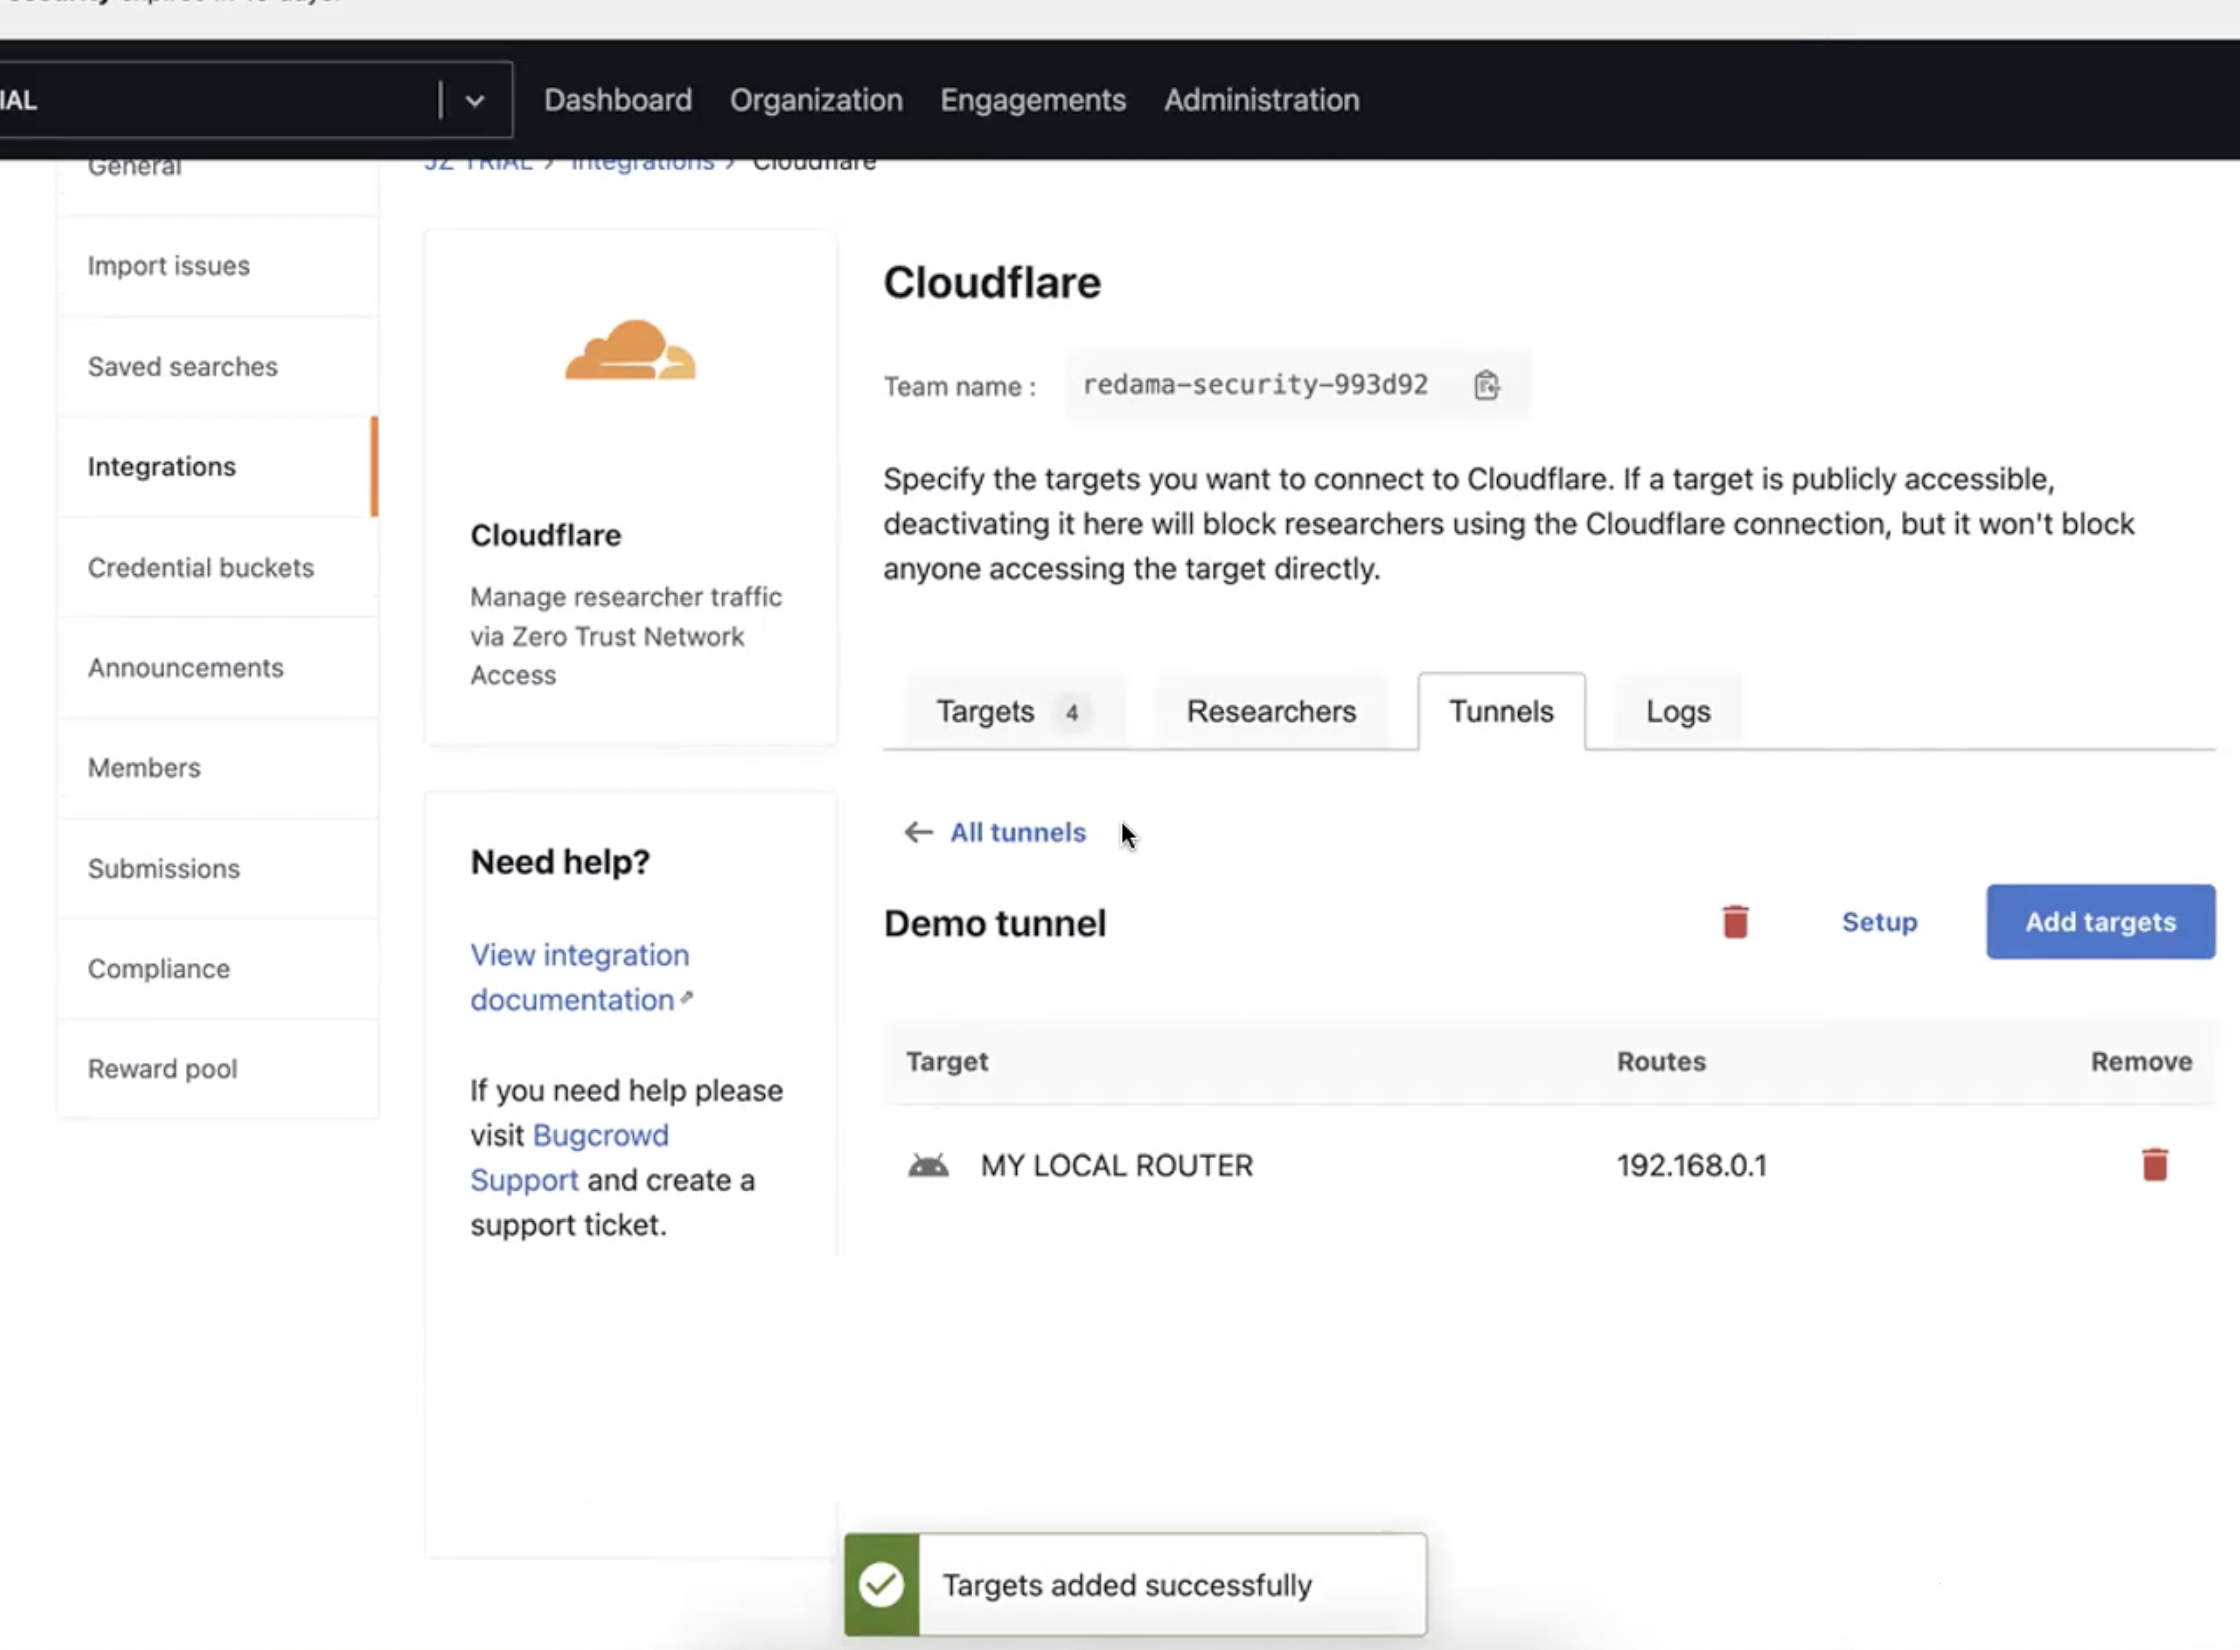
Once the targets are selected, click on “Add Targets”. This will add the targets to the tunnel.
-
After the targets are successfully added, a “Target added successfully” message is displayed.
-
To connect the tunnel to the internal network, click on “Setup”. This will display the tunnel setup instructions.
-
Tunnel setup instructions are displayed. Follow the instructions depending on the OS type to download, install, and configure
cloudflared.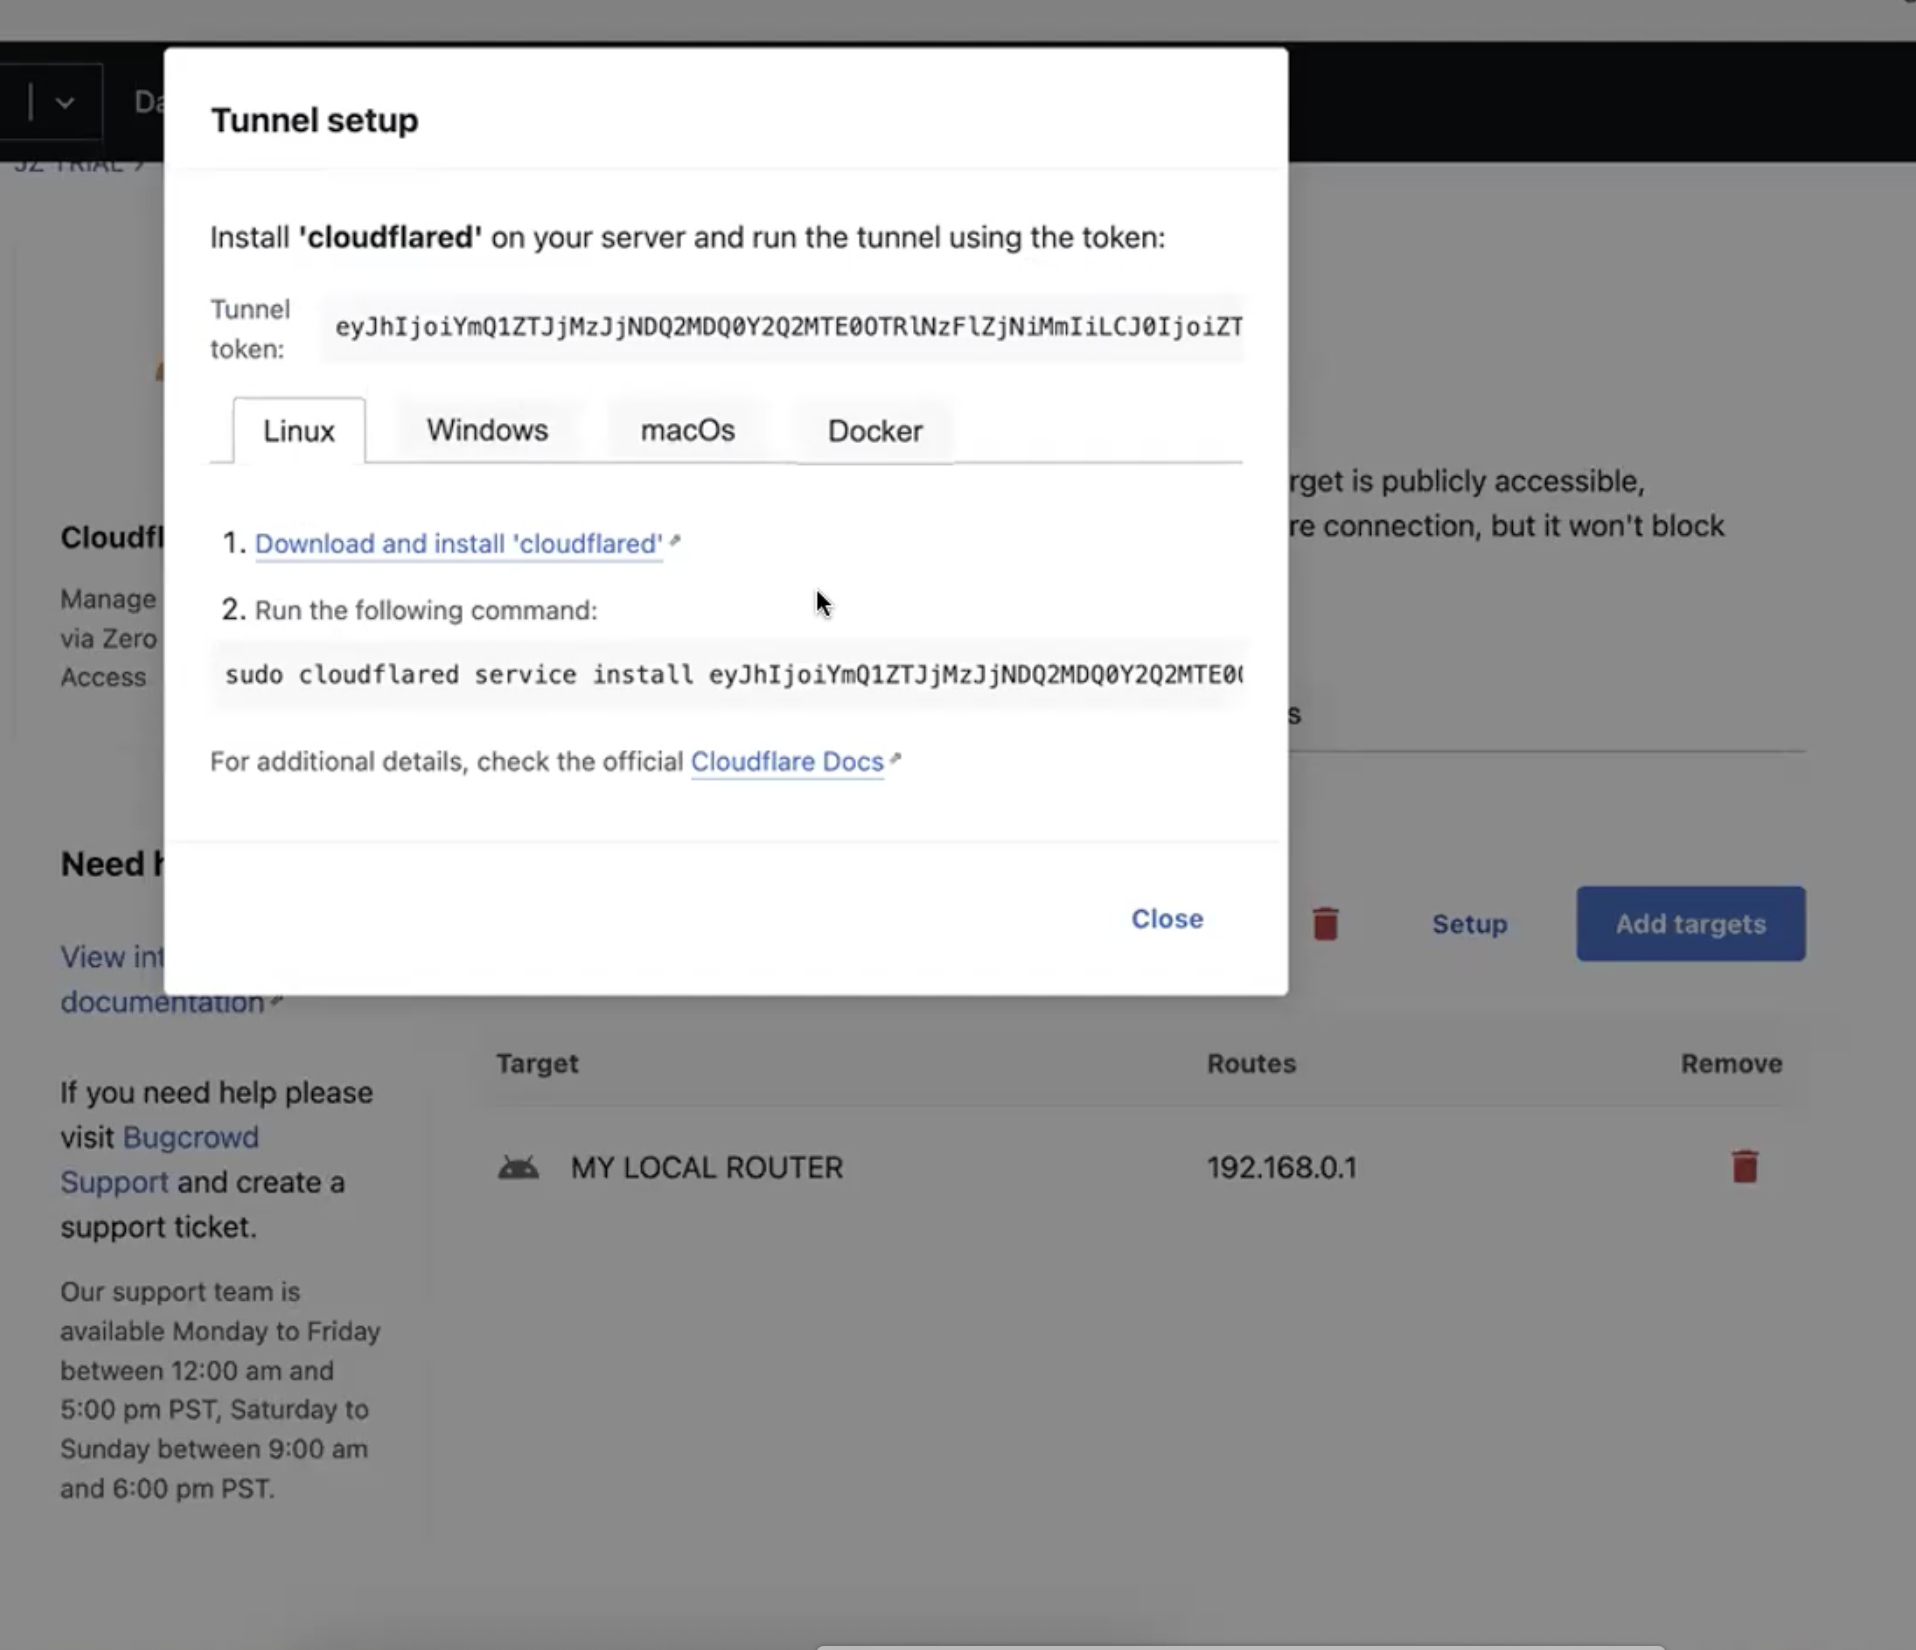
-
Copy and paste the command in a terminal and run it. This will install
cloudflaredand configure it to connect to the account. -
This completes the setup and configuration of
cloudflared. -
When a tester accesses the Cloudflare account through the WARP client, they will be able to access the internal network targets.