Security Program Targets Page
The Security Program Targets page will help you understand and utilize the features available to manage your security targets efficiently.
Overview
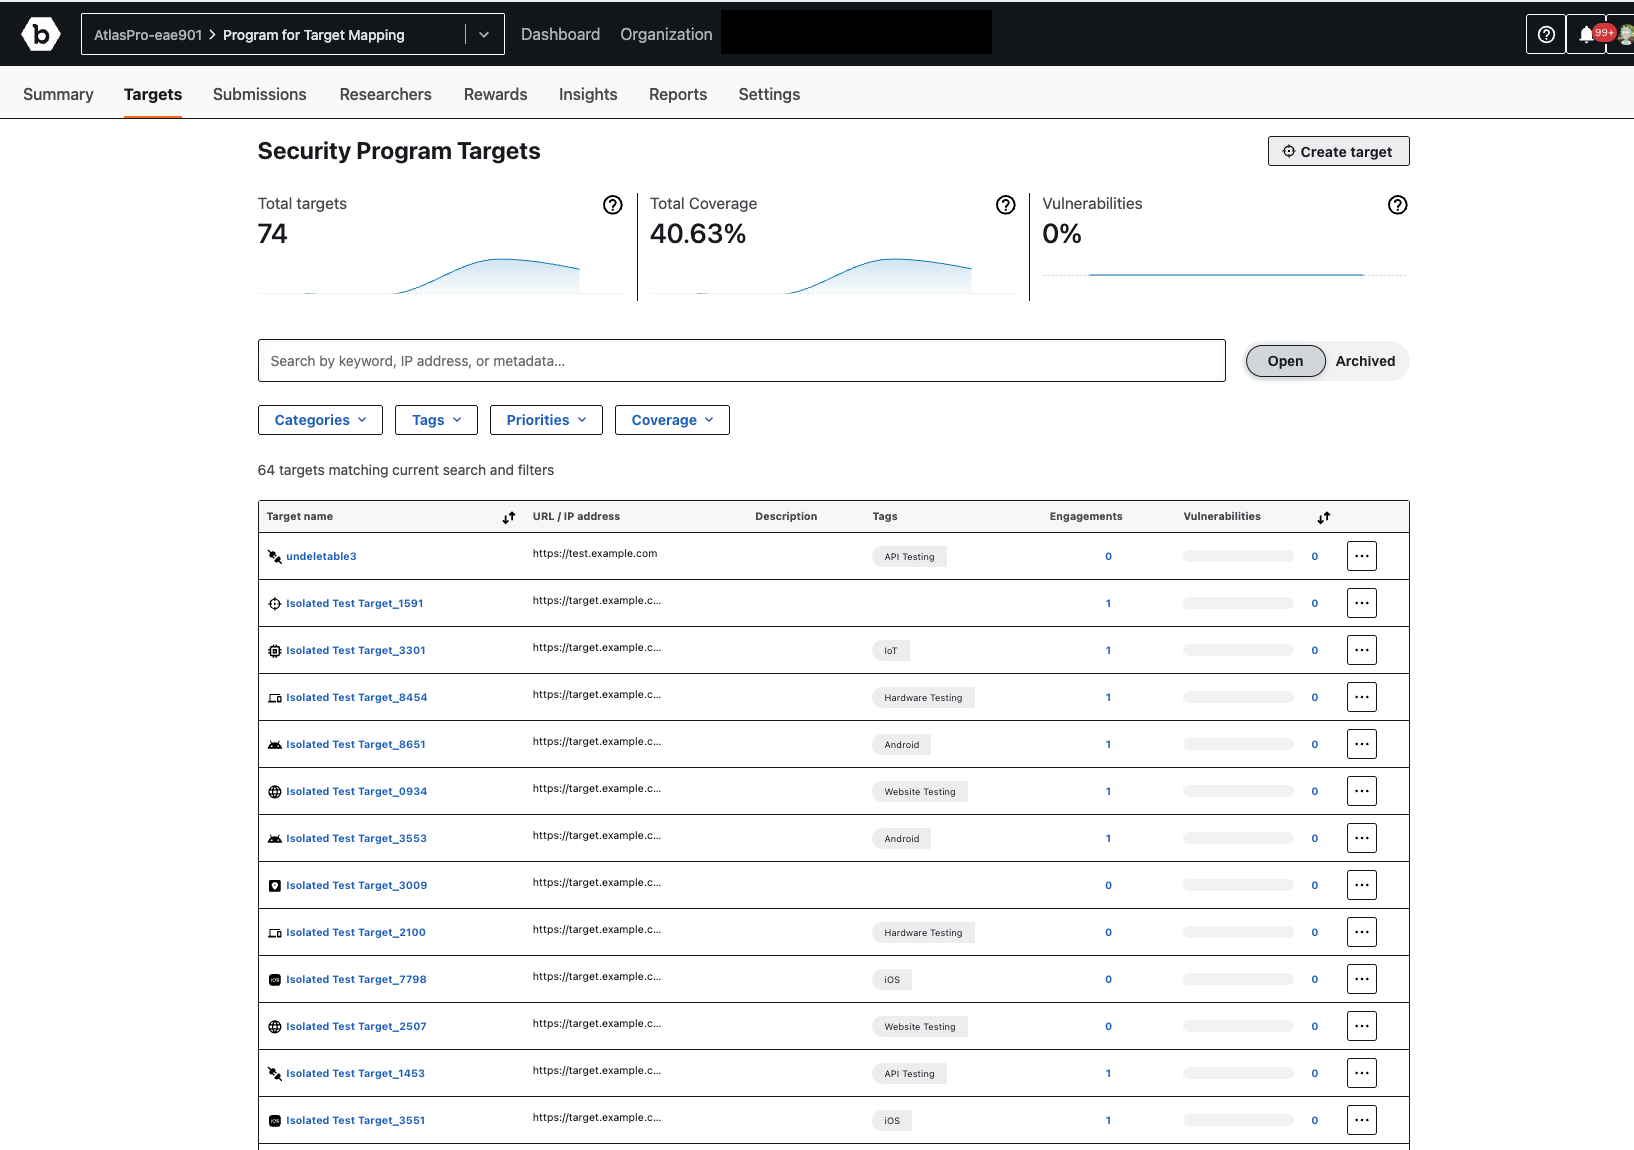
The Security Program Targets page provides a comprehensive view of your active targets, their coverage, and any associated vulnerabilities. At a glance, you can see:
- Total targets: The total number of security targets currently defined for the program.
- Total Coverage: The overall coverage percentage of your in-scope targets for the last three months.
- Vulnerabilities: The percentage of confirmed vulnerabilities across your targets for the last three months.
Key Features and How to Use Them
-
Creating a New Target
To add a new security target, click the “Create target” button located in the top right corner of the page. This will open the “Create a new target” form:“Create a new target” Form Fields:
- Name: Enter a descriptive name for your target. This name helps you and researchers easily identify the target.
- Asset category: Select the basic categorization of the asset from the dropdown list.
-
Target URL / Location / IP Address: Provide the full URL for researchers to access this target. This should be a valid example of an instance of this target. An IP address can be specified with a
/between ranges, for example, 192.168.1.0/24. - Tags (optional): Use tags to indicate the skills and technologies associated with the target. You can search for or select existing tags.
Once you have filled in the required information, click “Create target” to save your new target, or “Cancel” to discard the changes.
Note: Targets created here are not included in the Organization’s Asset Inventory.
-
Searching and Filtering Targets
You can easily find specific targets using the search bar and detailed filter options:- Search Bar: Use the search bar (labeled “Search by keyword, IP address, or metadata…”) to quickly find targets by name, IP address, or other relevant information.
-
Filters: Refine your search results using the dropdown filters. Click on a filter to open its selection menu:
-
Categories:
- Click the “Categories” dropdown.
- Select one or more categories (e.g., Android, API Testing, Hardware Testing, iOS, IoT, IP Address, Network, Web App, Other) by checking the corresponding boxes.
- Click “Select all” to choose all categories, or “Clear” to deselect all.
- Click “Apply” to filter your targets.
-
Tags:
- Click the “Tags” dropdown.
- Use the search bar to find and select specific tags.
- Click “Clear” to remove all selected tags.
- Click “Apply” to filter your targets.
-
Priorities:
- Click the “Priorities” dropdown.
- Select one or more priority levels (e.g., Critical (P1), Severe (P2), Moderate (P3), Low (P4)) by checking the corresponding boxes.
- Click “Select all” to choose all priorities.
- Click “Apply” to filter your targets.
-
Coverage:
- Click the “Coverage” dropdown.
- Select the desired coverage status (e.g., In-Scope, Out-of-Scope, Not Assigned) by checking the corresponding boxes.
- Click “Select all” to choose all coverage options.
- Click “Apply” to filter your targets.
-
Categories:
-
Managing Target Status
You can manage the visibility of your targets using the “Open” and “Archived” buttons next to the search bar.- Open: Displays all active and accessible targets.
- Archived: Displays targets that have been archived.
Note: For more information on Archiving programs and engagements, please see Archiving Programs and Archiving Engagements.
-
Understanding the Target List
The main section of the page displays a list of your targets with the following details for each:- Target name: The name assigned to your security target (e.g., “test target index”). Clicking on a target name provides more detailed information about that specific target.
- URL / IP address: The associated URL or IP address of the target (e.g., “https://www.bugcrowd.com”).
- Tags: Any tags associated with the target, helping with organization and filtering (e.g., “Android”).
- Engagements: The number of engagements linked to this target.
- Vulnerabilities: The number of vulnerabilities identified for this target.
- More Options (…): Click the three-dot icon to access additional actions for a specific target, such as editing or deleting it.
-
Viewing Individual Target Details
When you click on a target name from the Target List, you will be taken to a detailed view of that specific target. This page provides comprehensive information about the target and its associated security findings.At the top of this page, you will see the target’s name (e.g., “Isolated Test Target_3432”) and an “Unarchive” button if the target is currently archived.
This page is divided into the following sections:
-
Target information: This section provides core details about the target:
- URL/IP address: The primary access point for the target.
- Tags: Any relevant tags associated with the target (e.g., “Website Testing”).
- Added: The date and time when the target was first added.
- Last updated: The date and time when the target’s information was last modified.
-
Vulnerability Information: This section summarizes the vulnerabilities found on the target, broken down by severity:
- Total: The total number of vulnerabilities across all severity levels.
- Engagements: This section lists any engagements that are linked to this specific target. If there are no engagements, it will indicate “There are currently no engagements to show.”
-
Severity: Displays the count of vulnerabilities for each severity level:
- Critical
- Severe
- Moderate
- Low
-
Target information: This section provides core details about the target:
-
Summary Visualizations
Above the target list (on the main “Security Program Targets” page), you’ll find graphical representations of your security program’s health:- A bar graph illustrating the distribution or progress related to your targets.
- Indicators for “Total Coverage” and “Vulnerabilities,” showing their respective percentages, as defined above.