How to use Outgoing Webhooks
Webhooks are based on system events, so each webhook delivery will be for a single event resource.
Events are versioned and the schema for the data attribute is static within an API version. Note that the data attribute of an event resource is different from the data JSON keys that wrap API resources.
Make sure that your API token uses version 2021-10-28 or later to receive the event data attribute. You can specify the API version on the API credentials page.
Using the Outgoing Webhooks documentation
You will find information about the different parts of the request:
- What triggers the webhook to make a request
- Header parameters
- Request body schema
- Notes on the expected response
- Payload examples for the
event(on the right sidebar)
Getting Started
Setup an Outgoing Webhook integration
To create a new Outgoing Webhook endpoint:
-
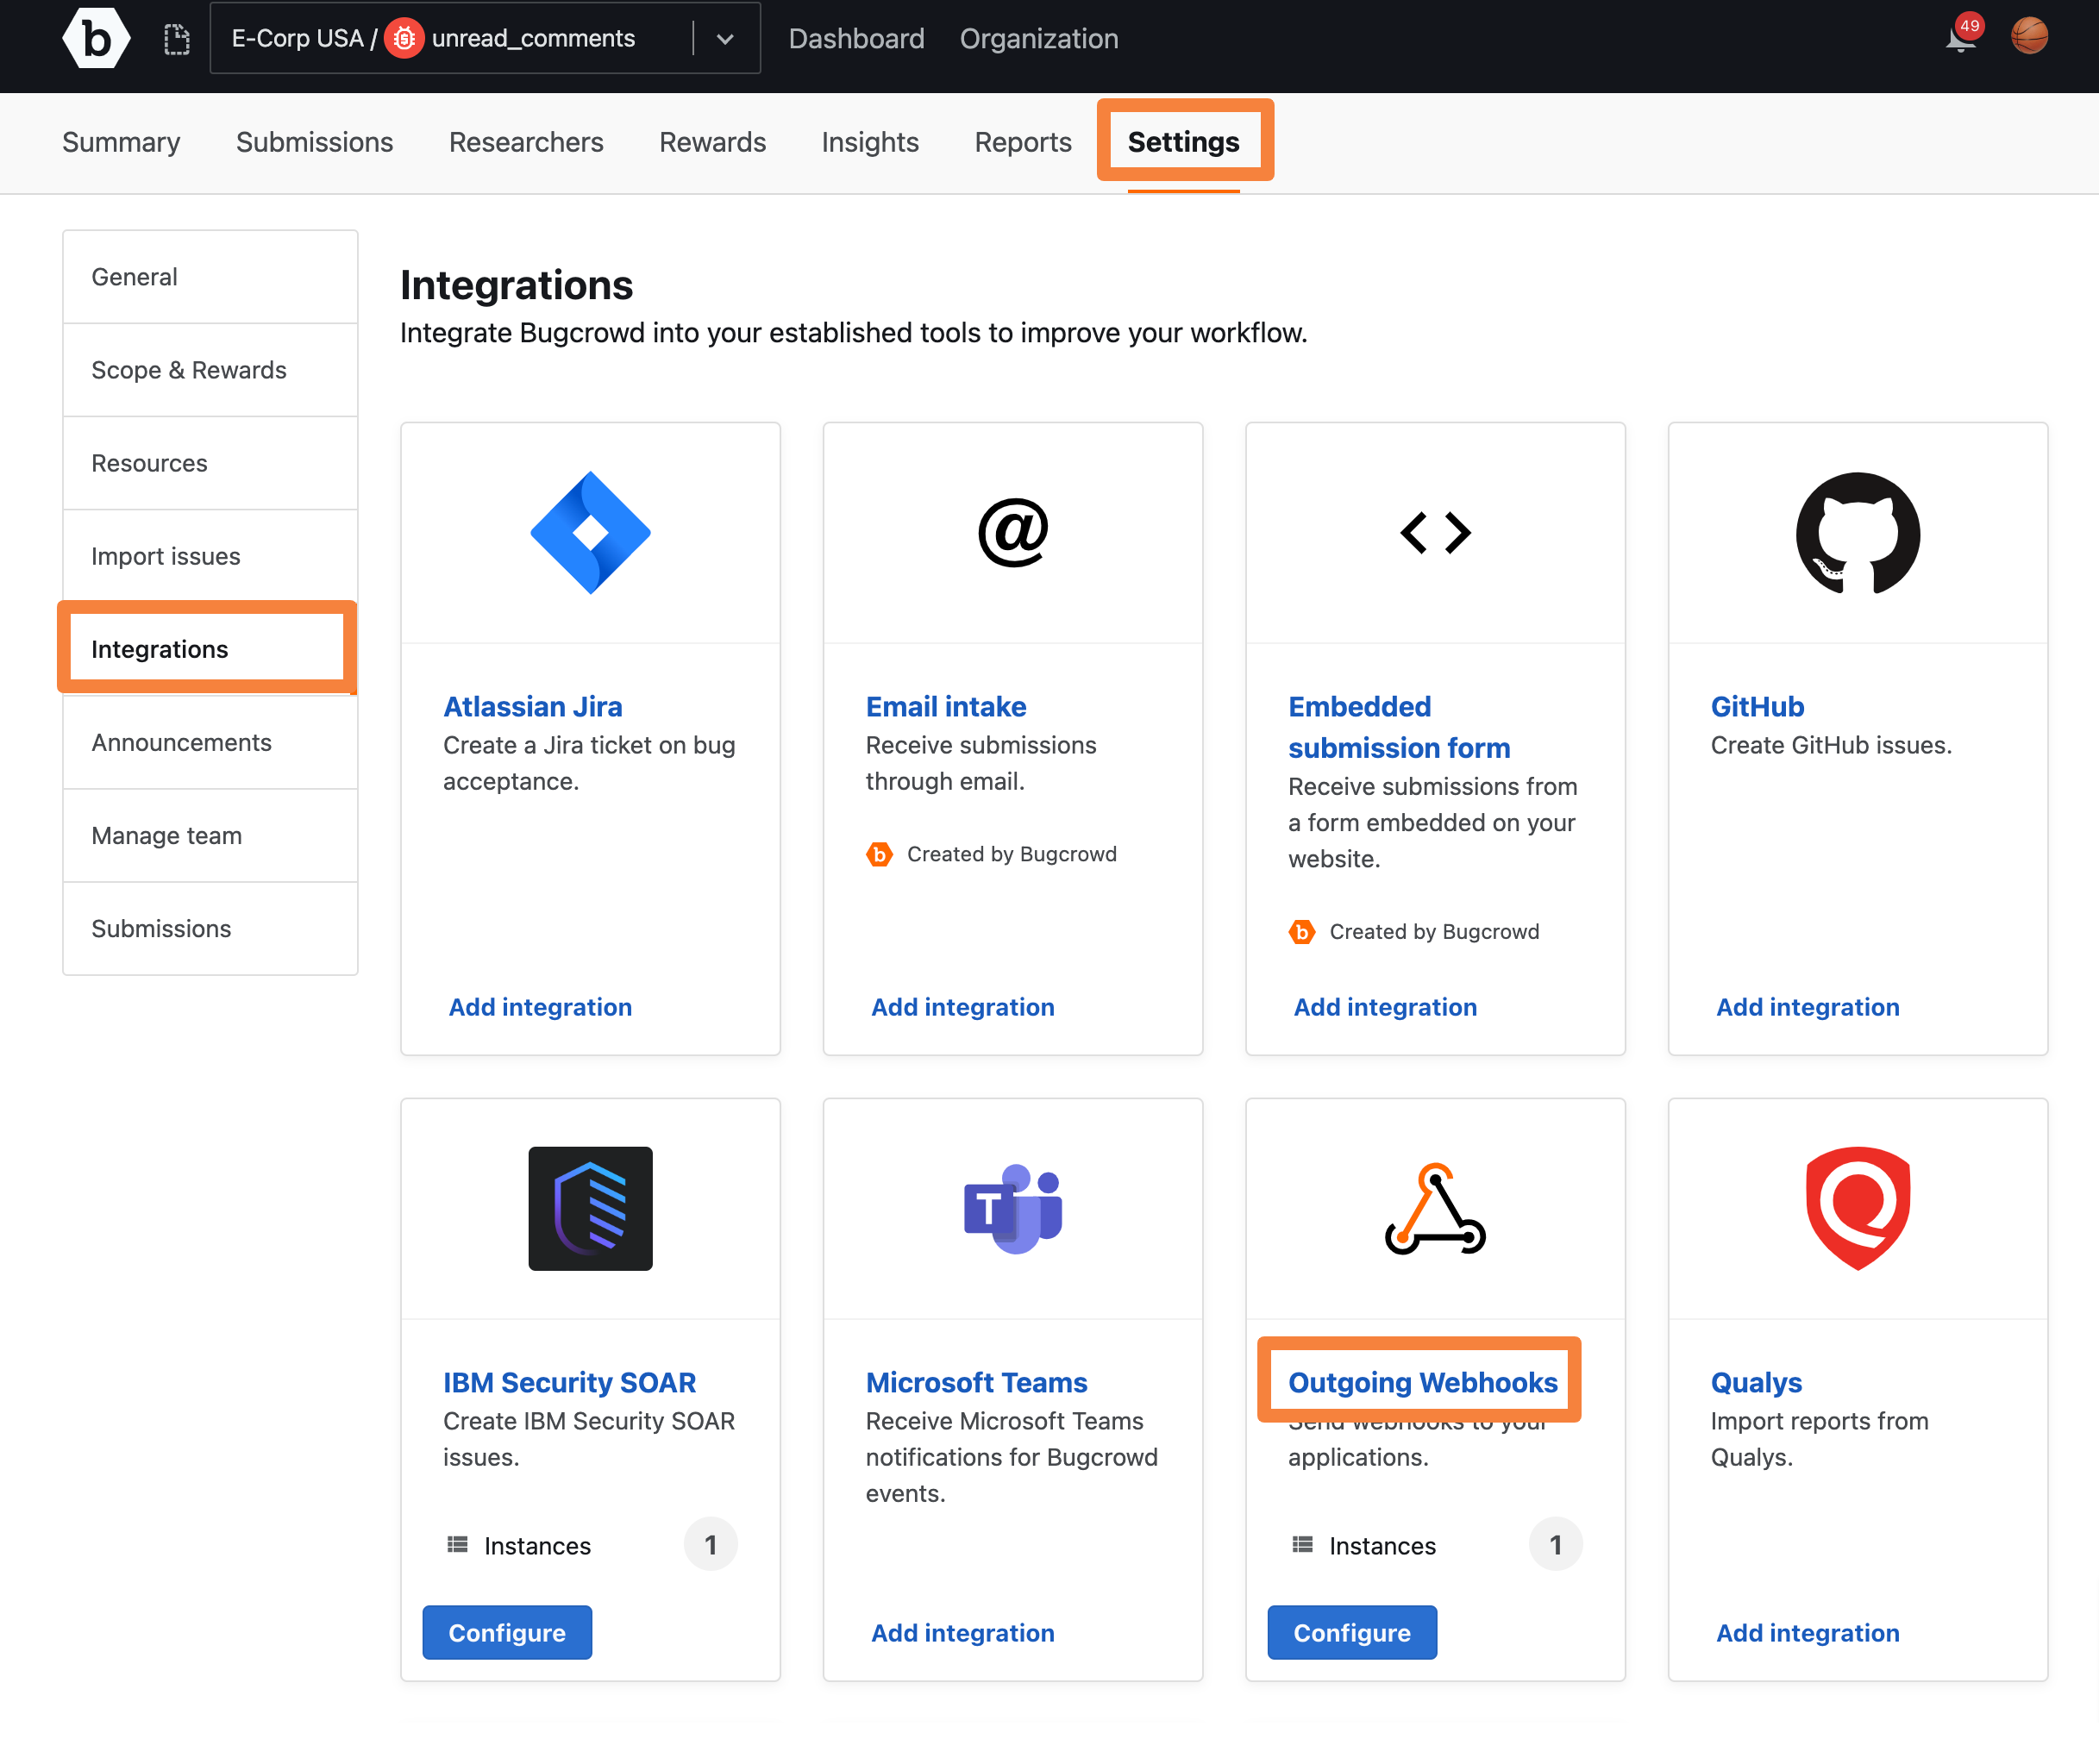
Go to the Settings tab for your program and click Integrations.
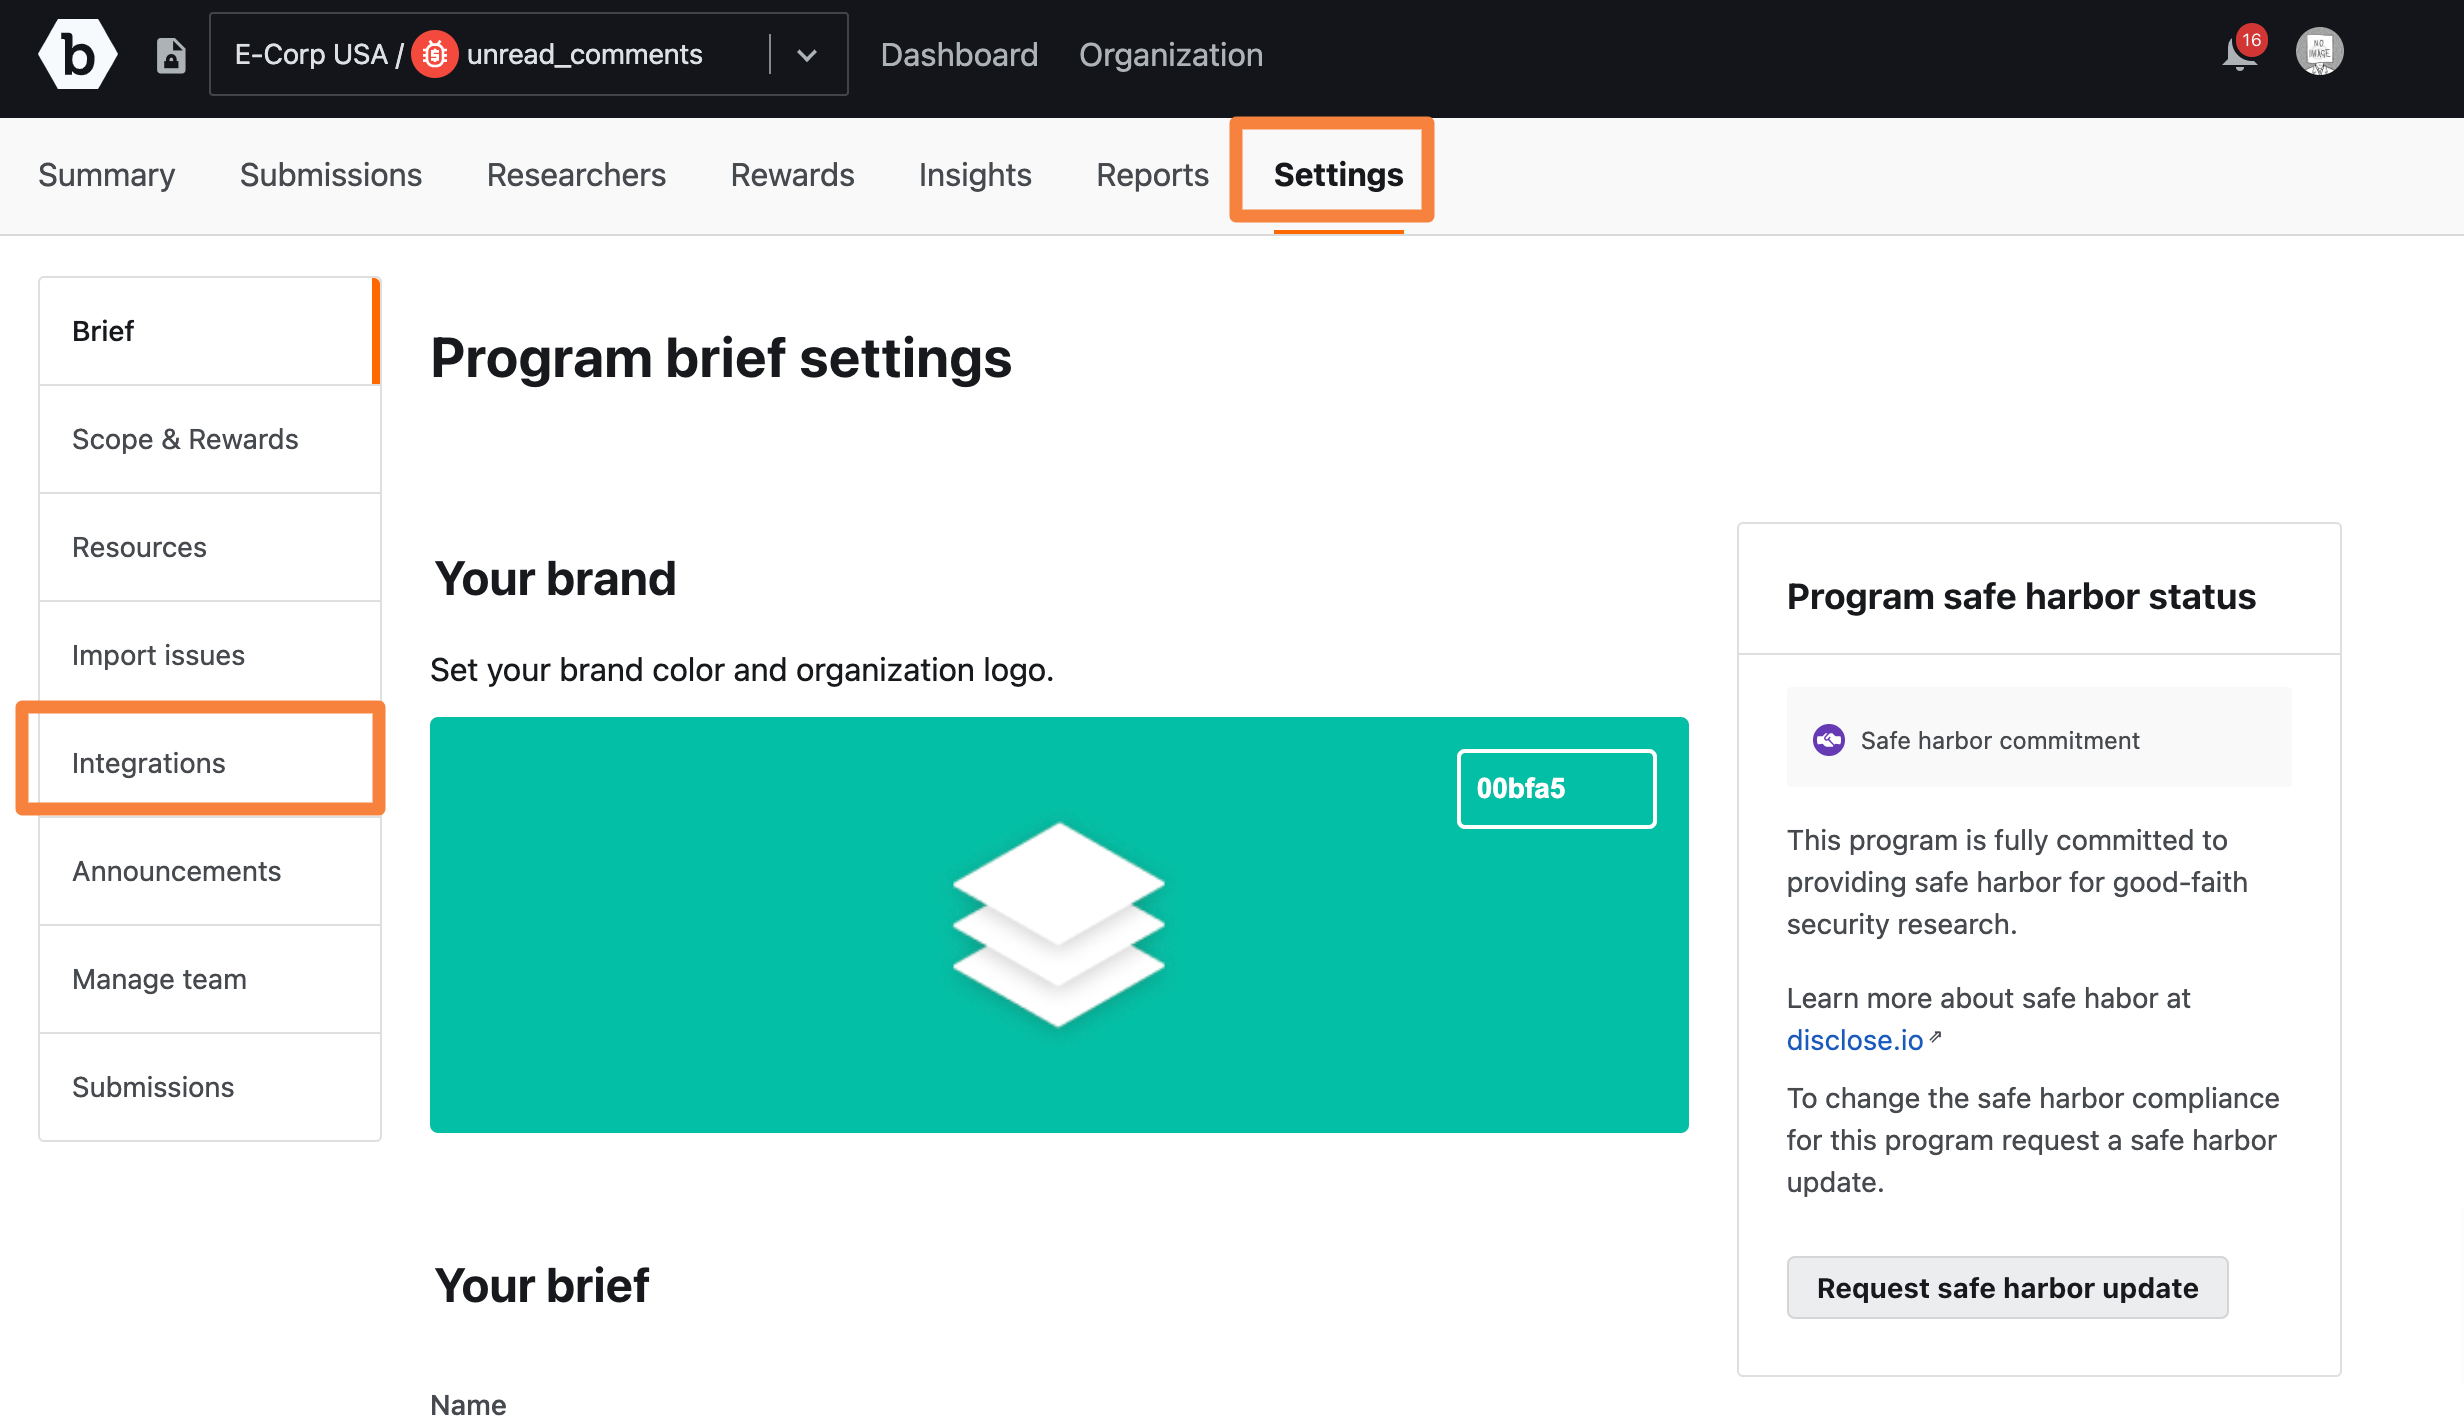
The Integrations page is displayed.
-
In Outgoing Webhooks, click Add integration.
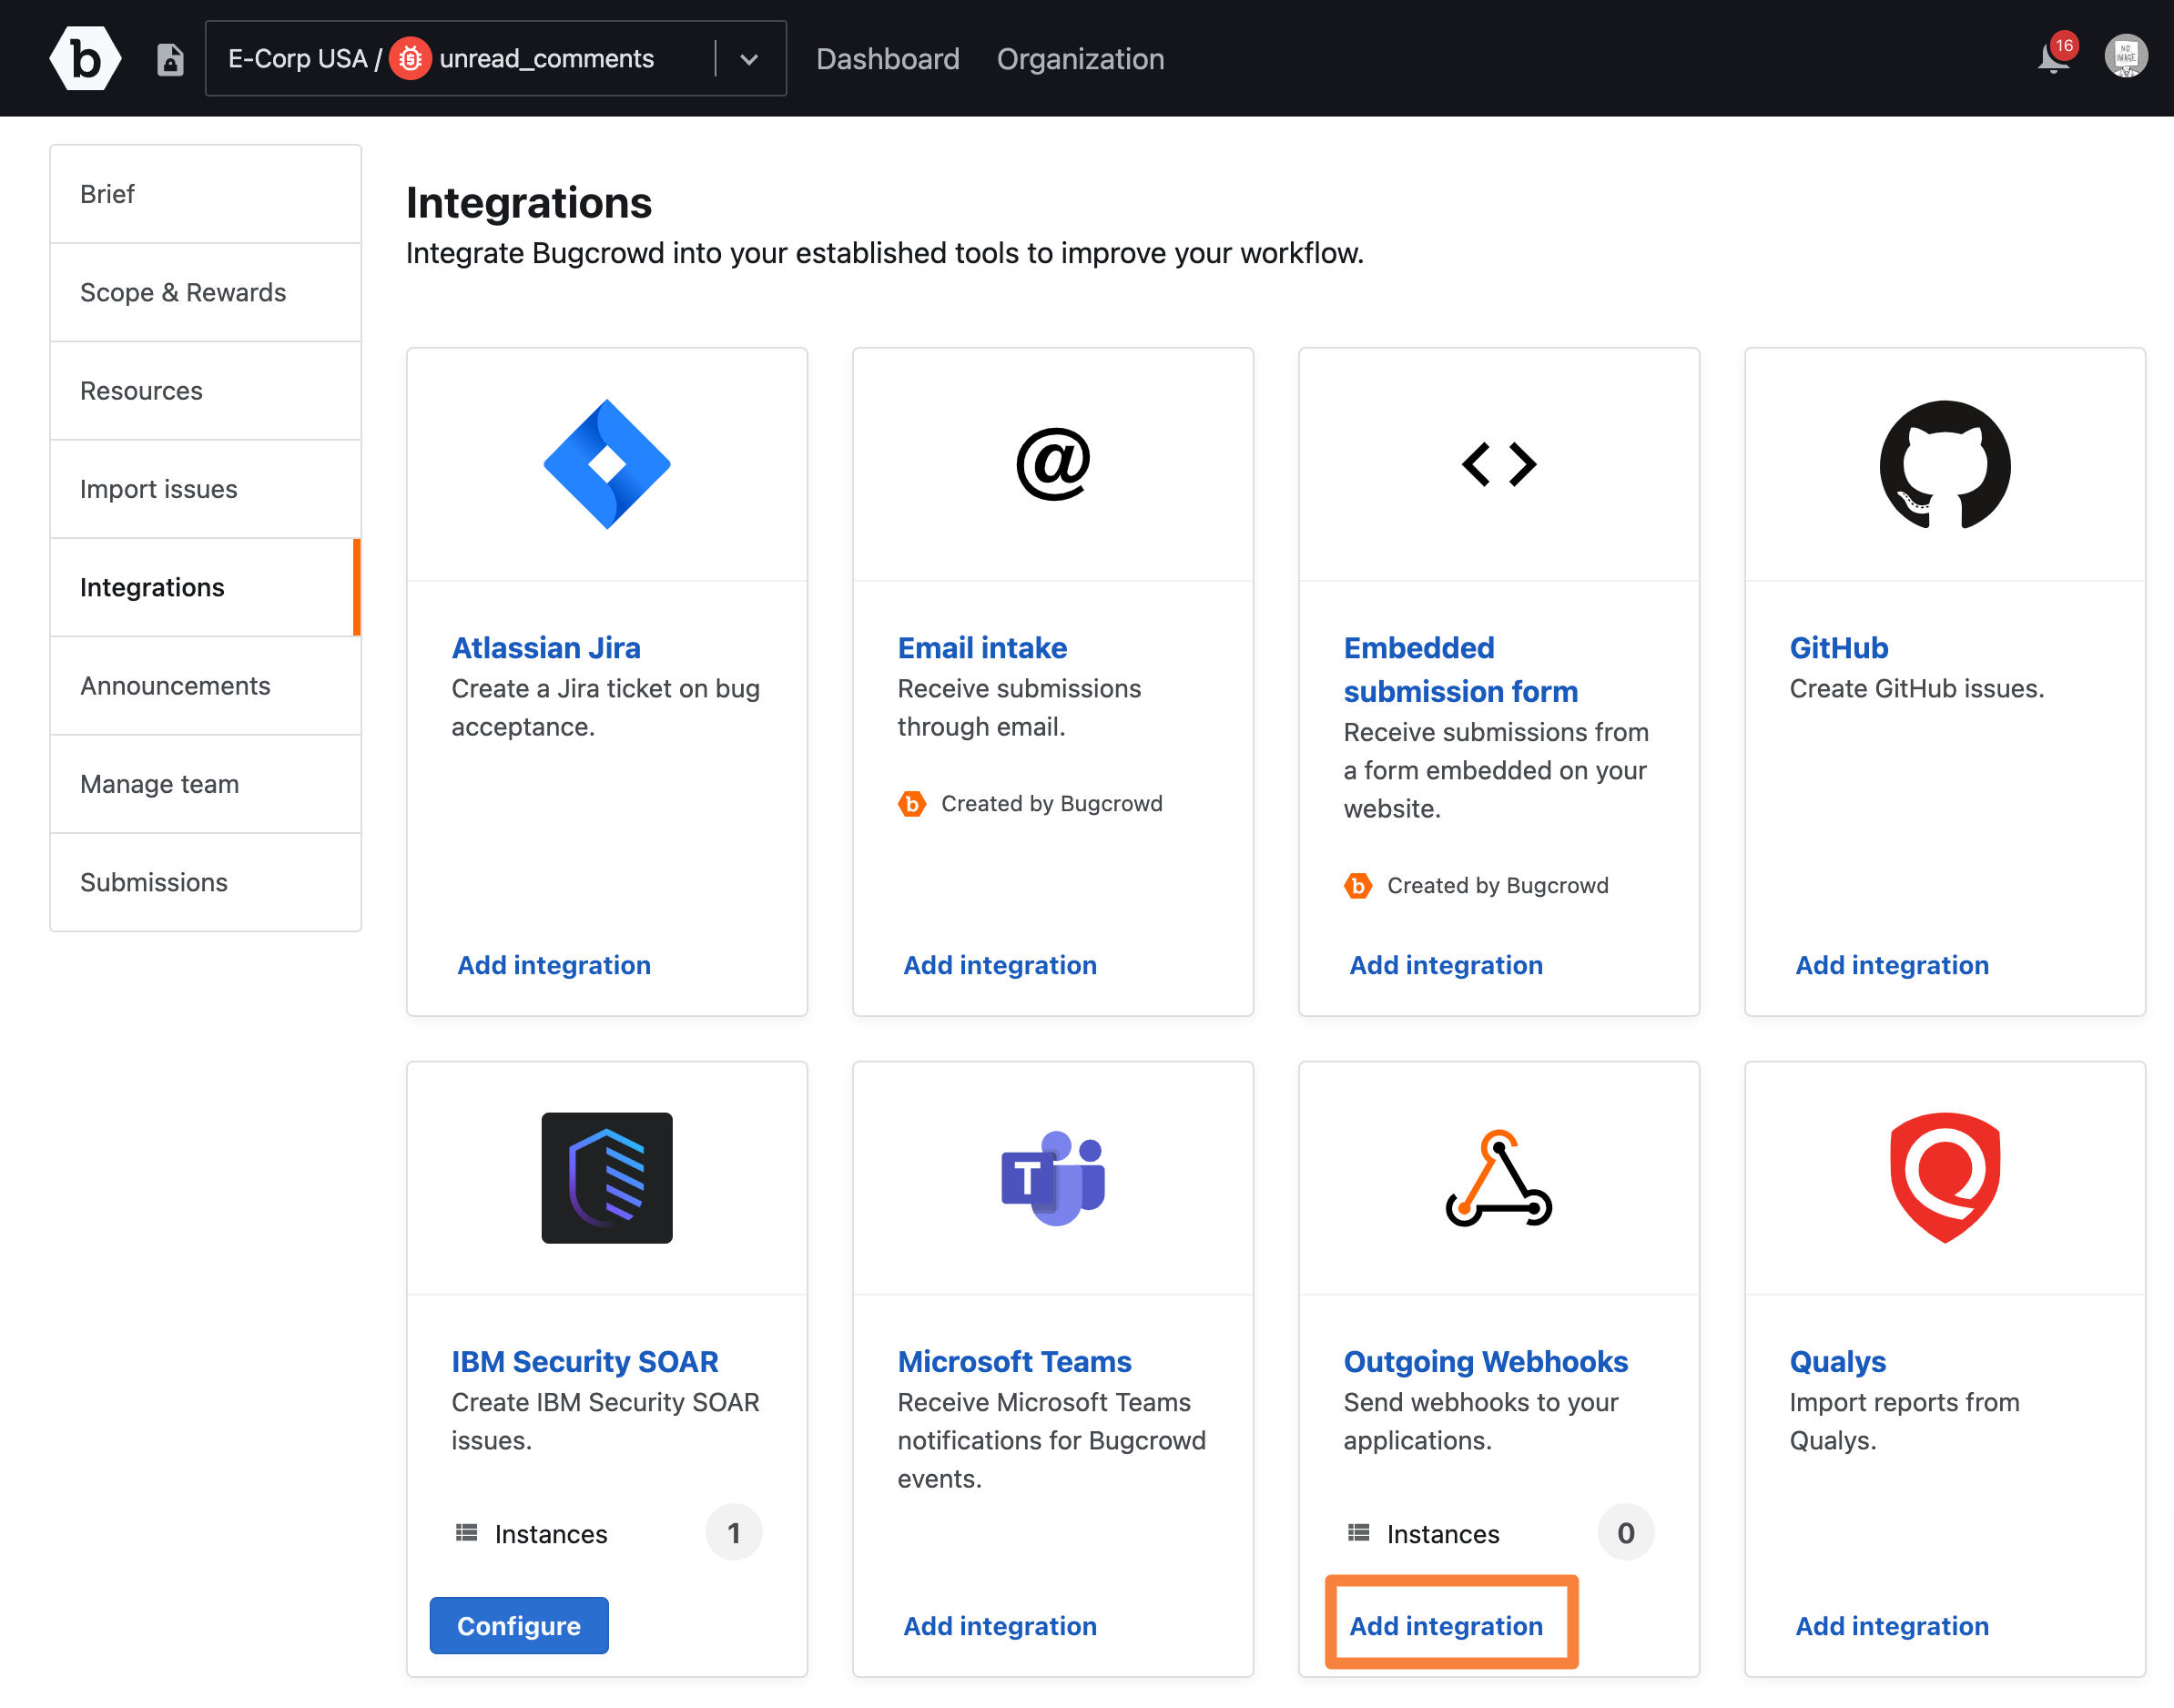
The Outgoing webhooks page is displayed.
-
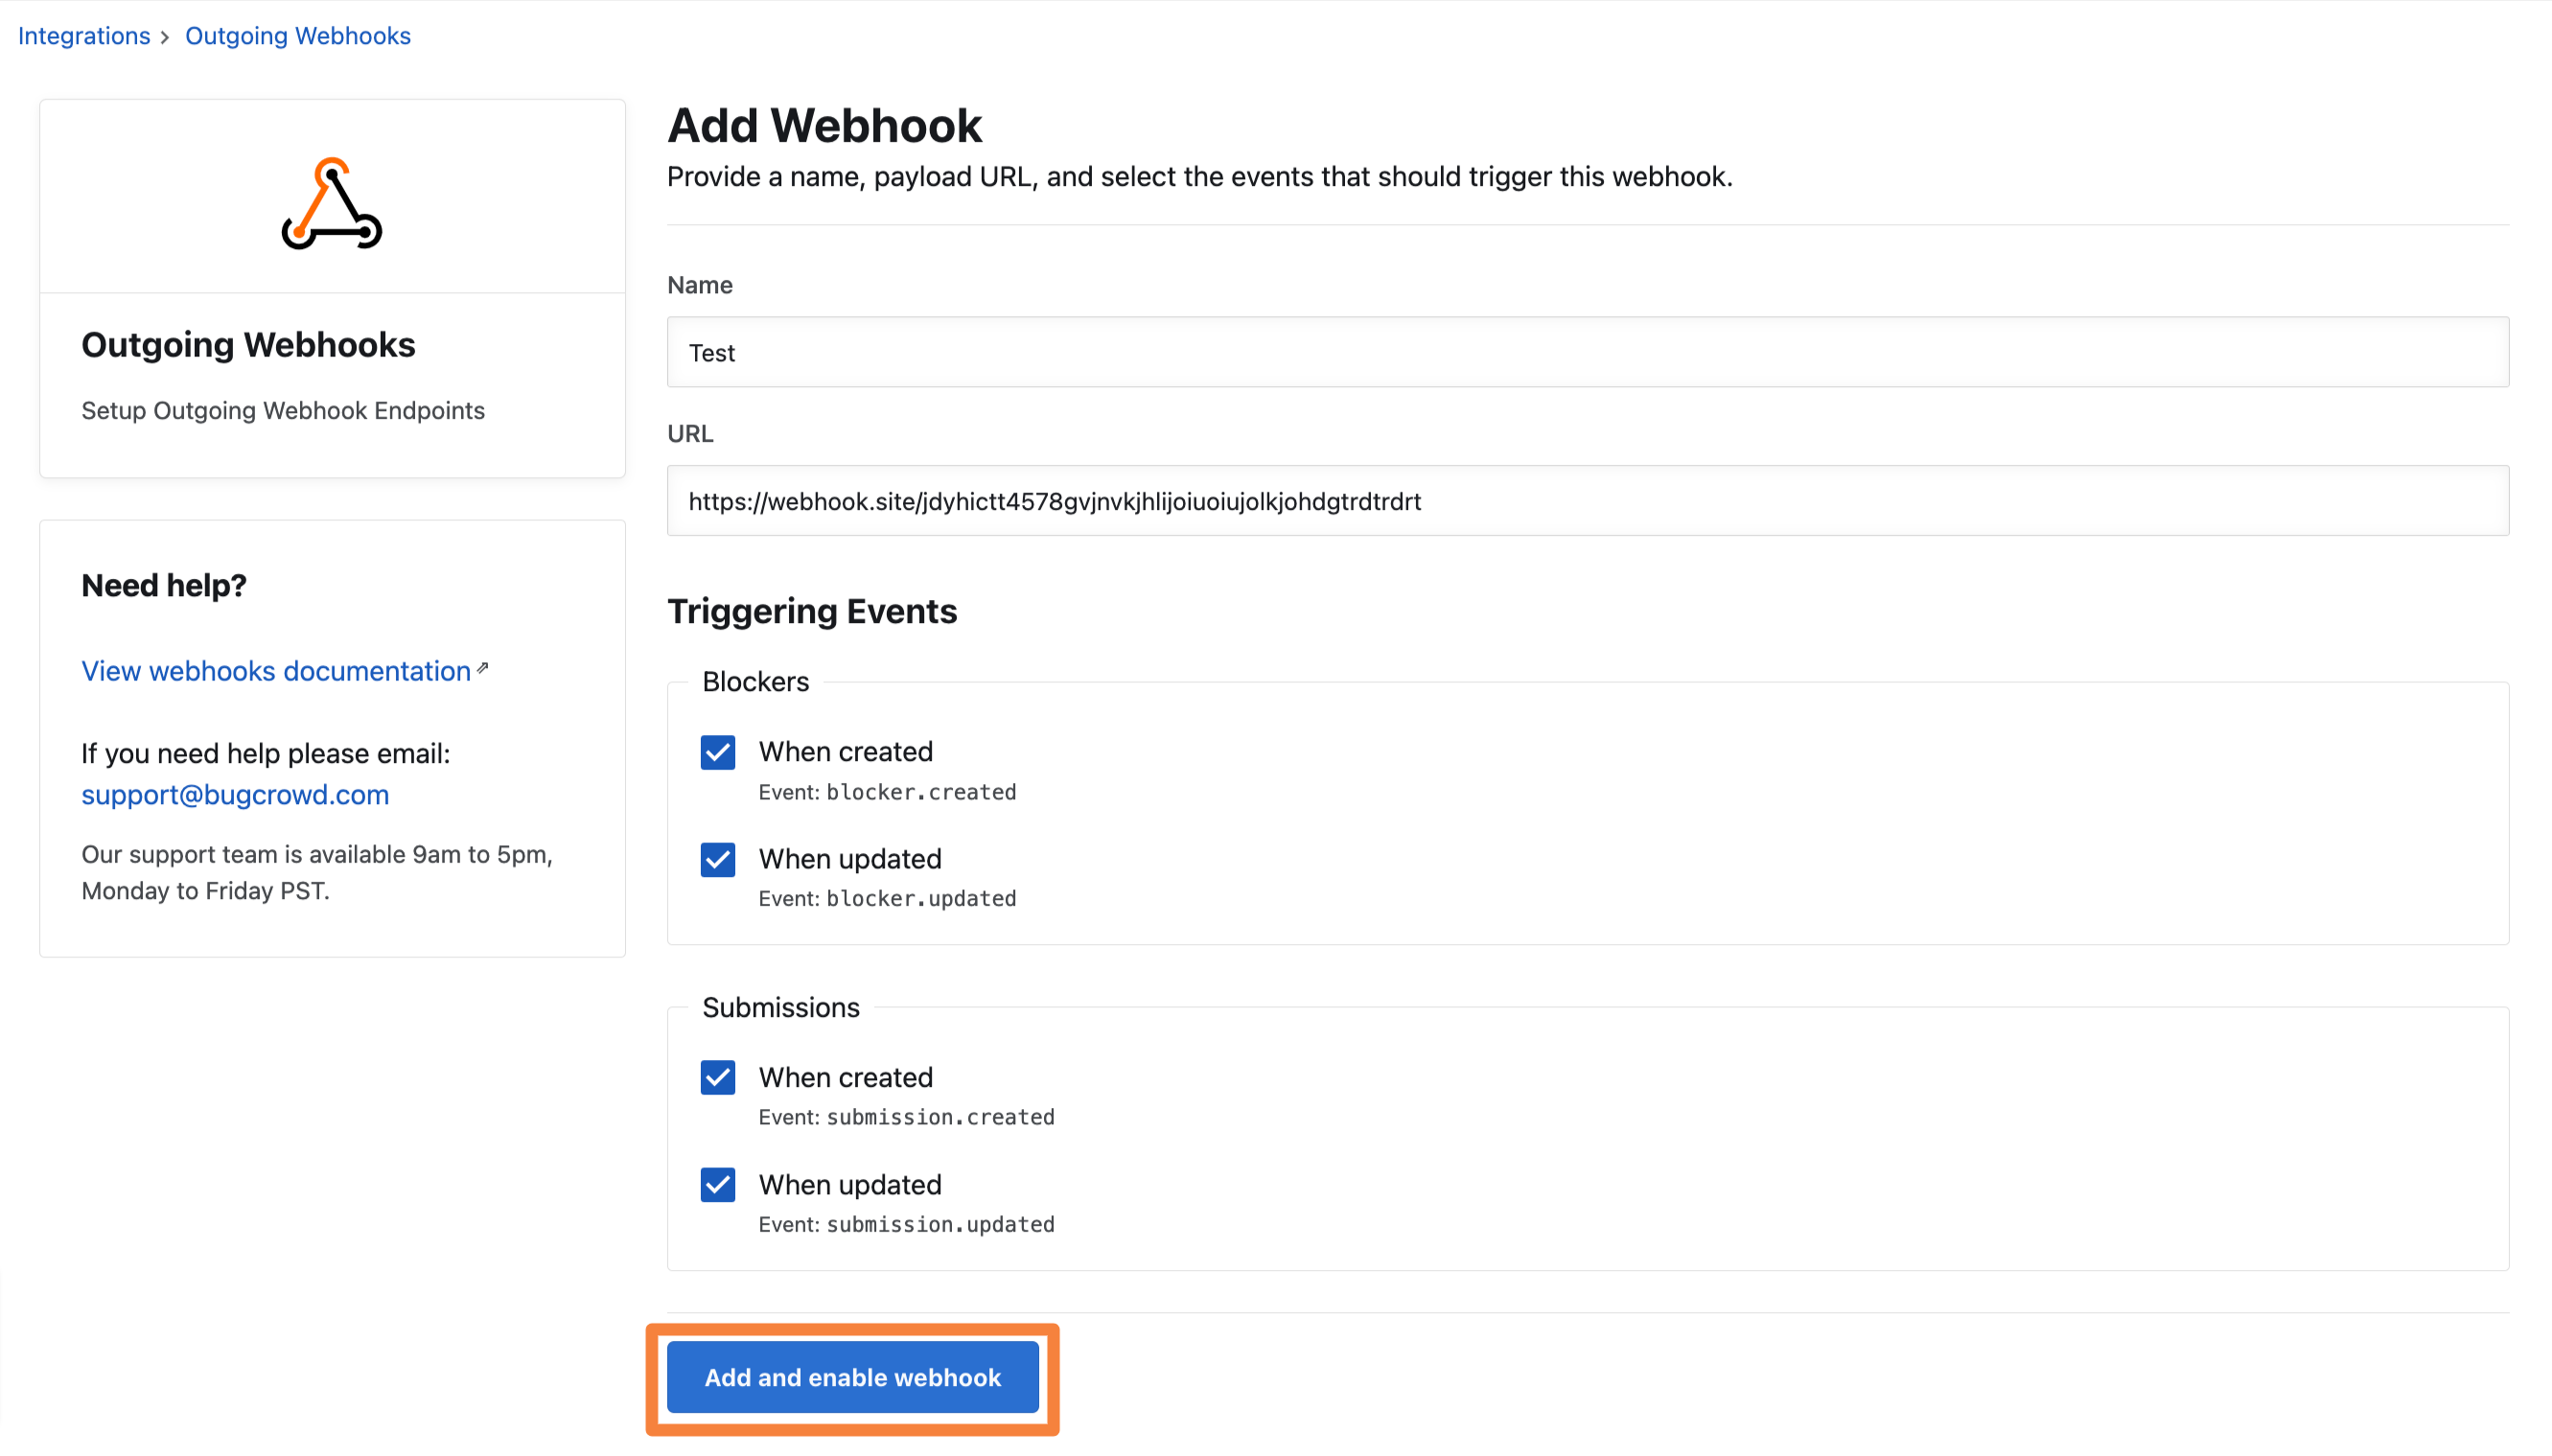
Click Add webhook.
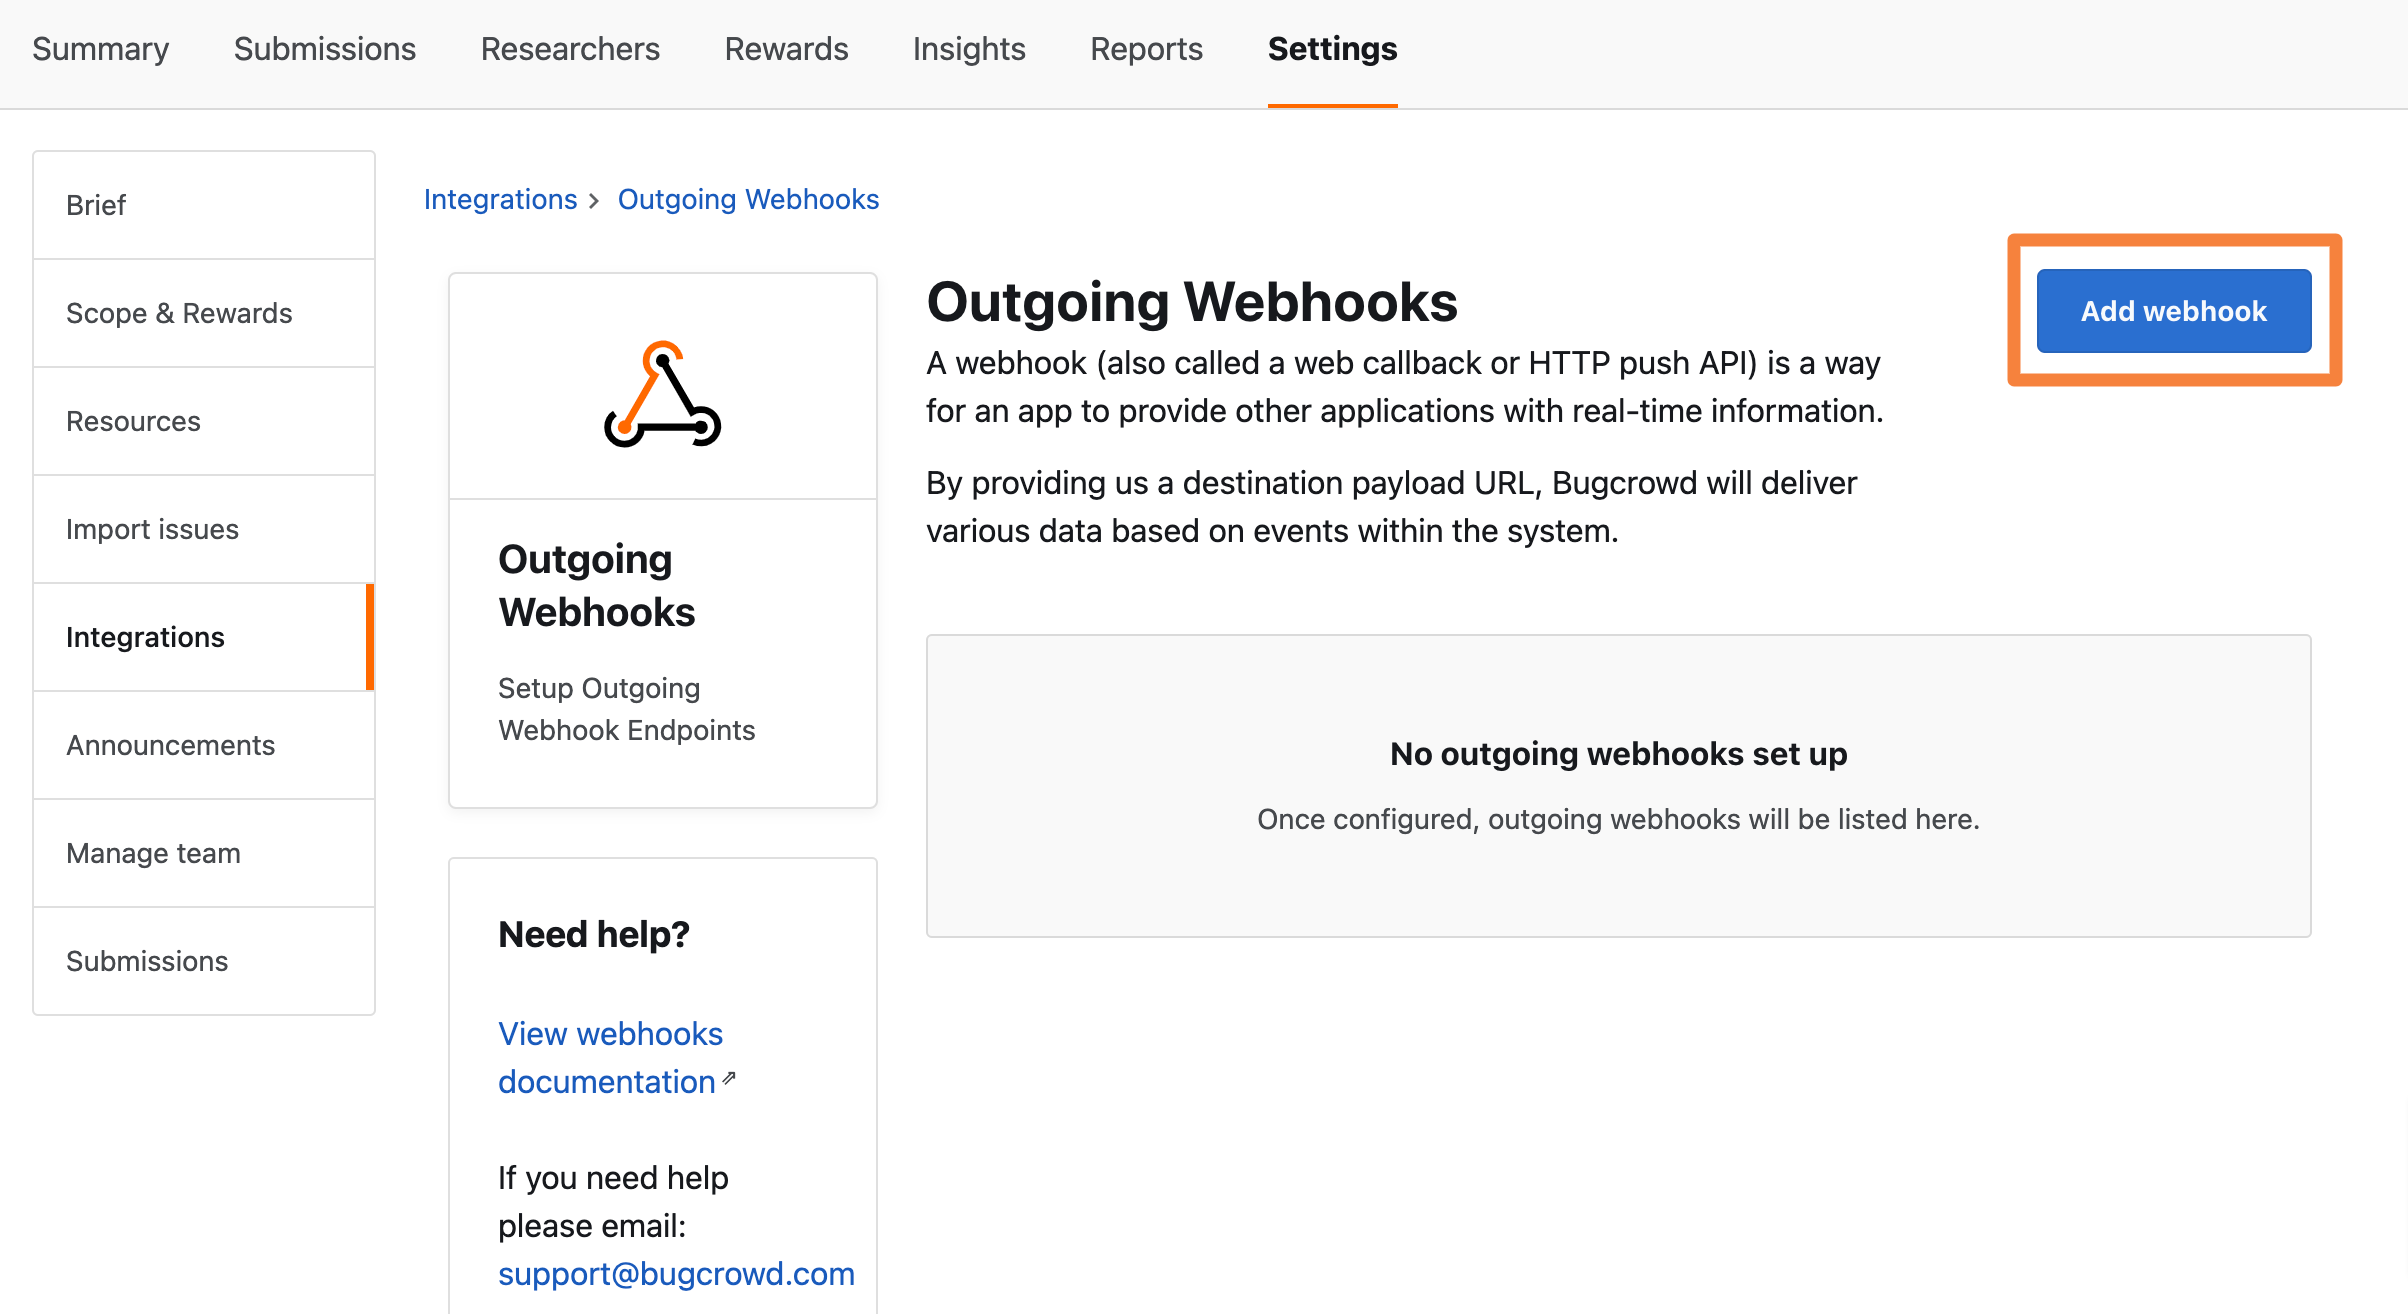
The Add webhook page is displayed.
-
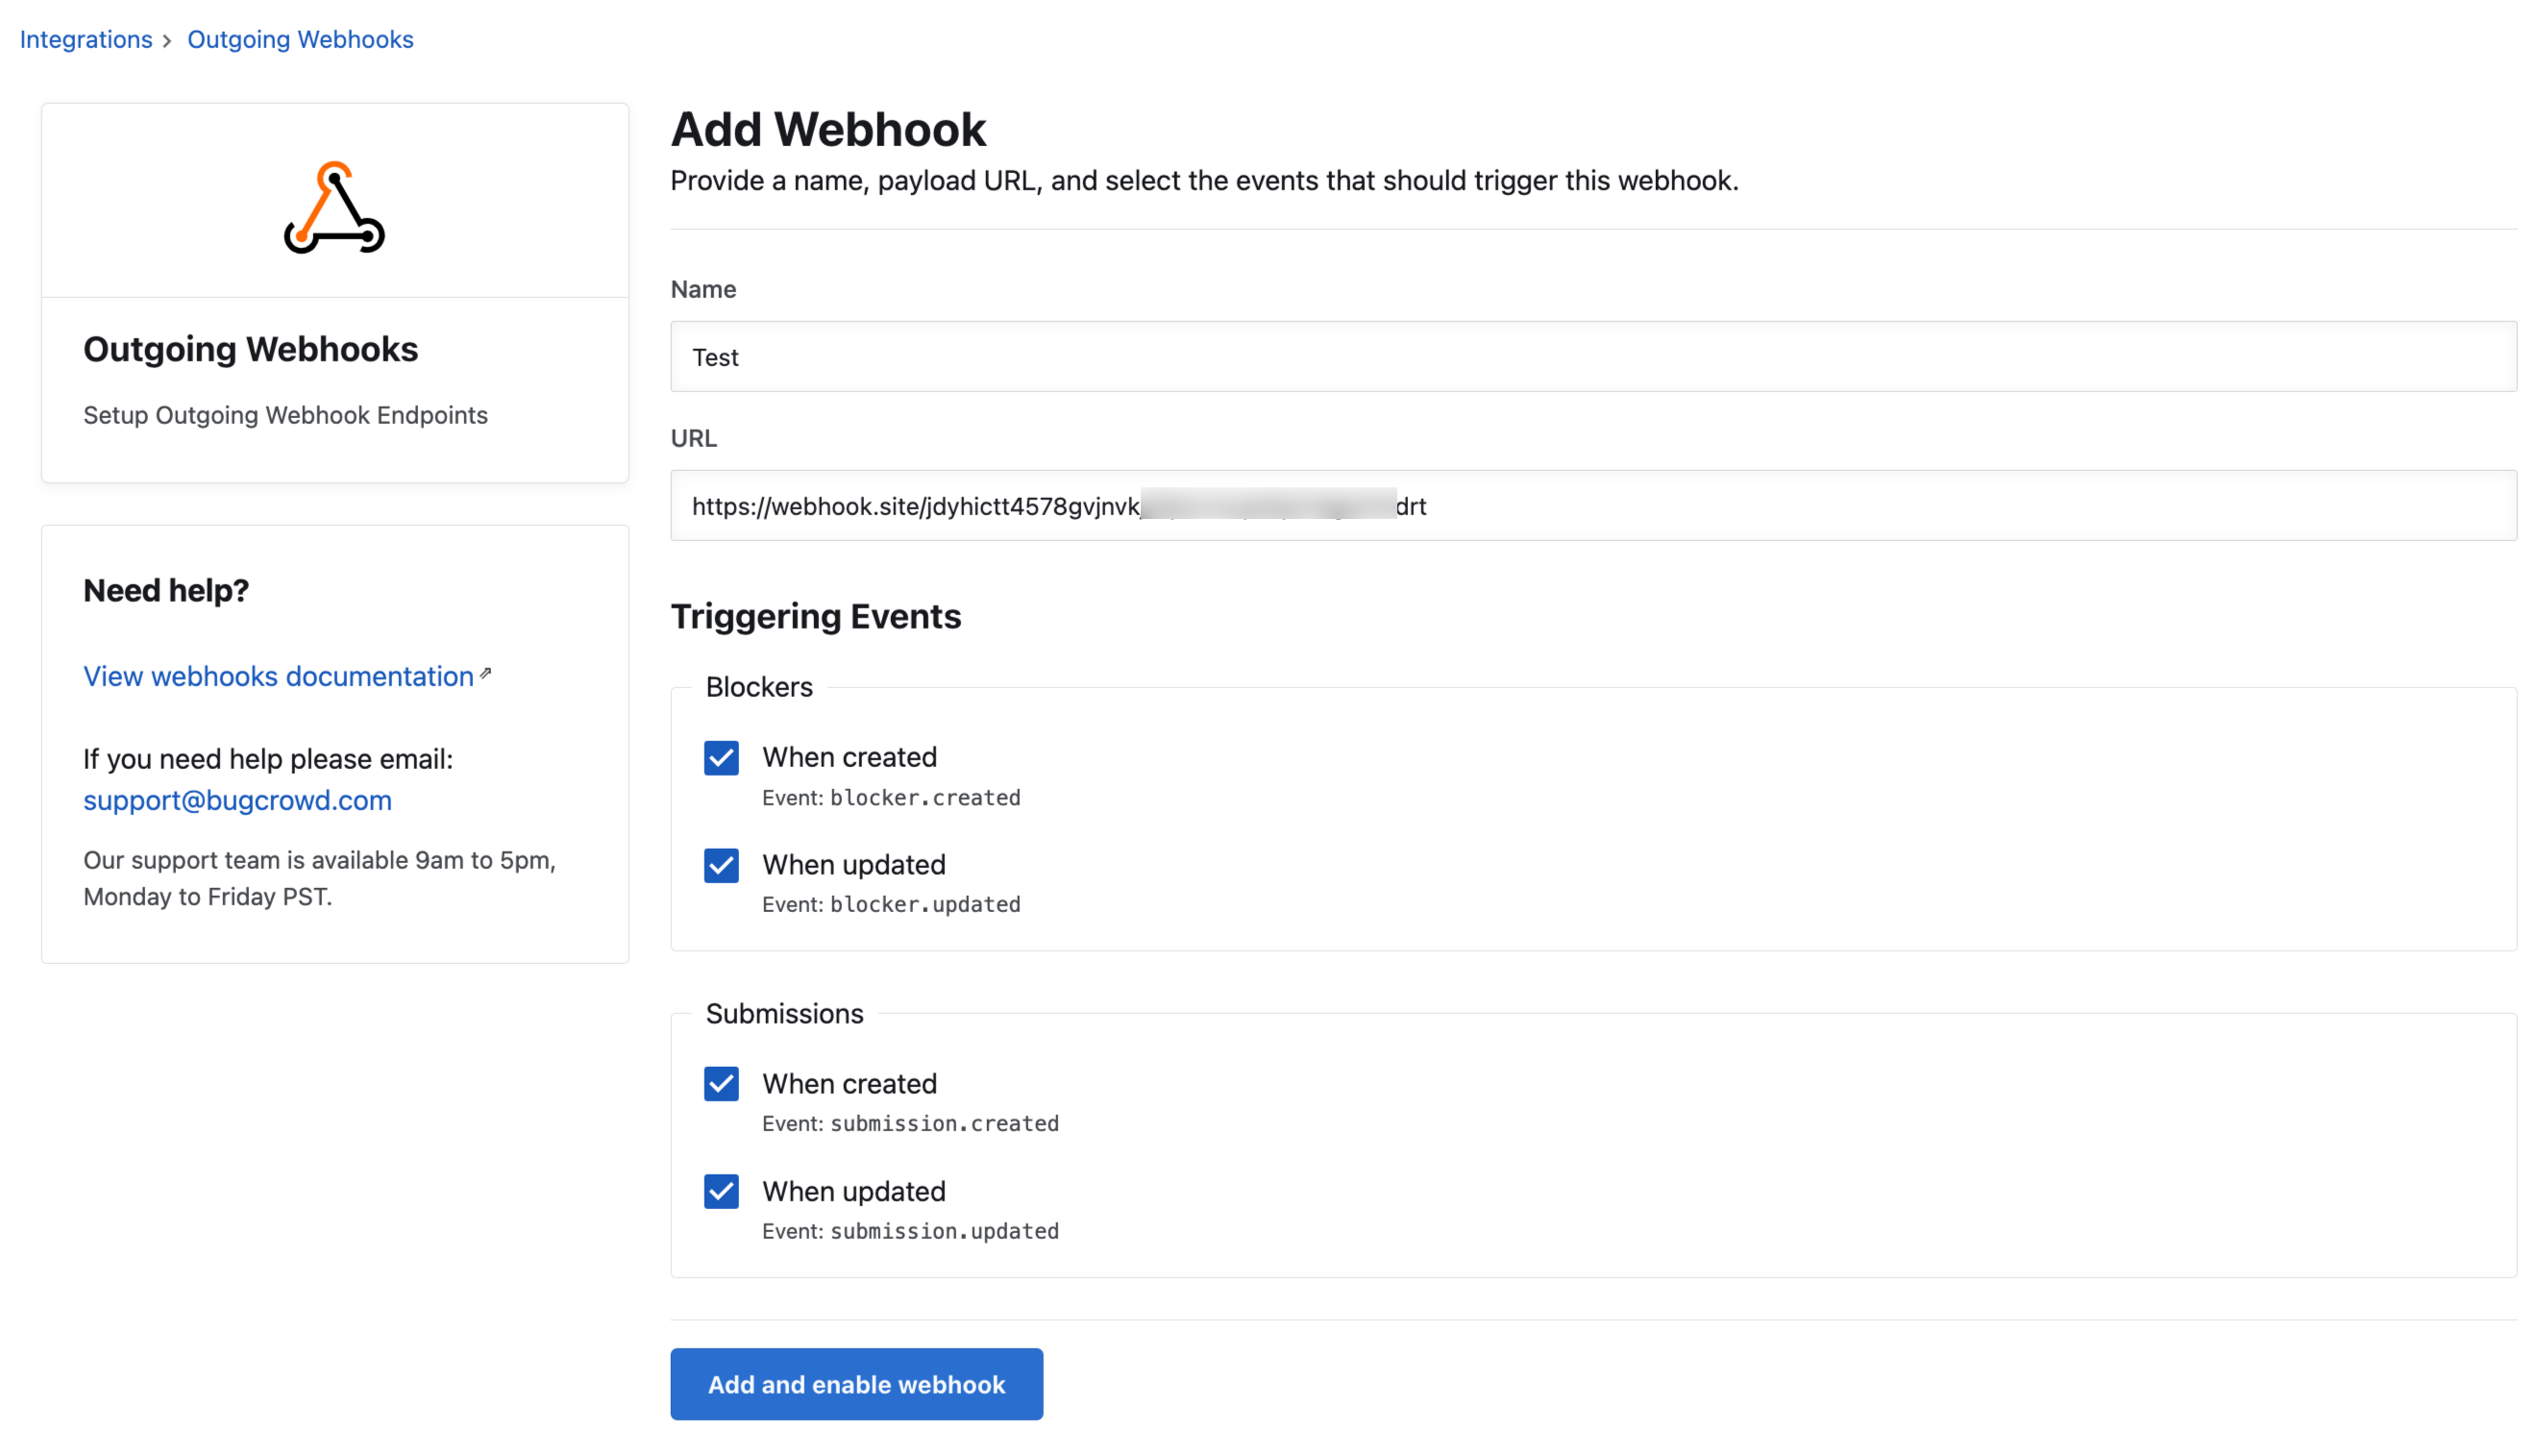
Specify the following information:
- Name: Provide a name for the webhook.
- URL: Provide the consumer URL of the webhook. This URL will be provided by your internal team.
- Triggering Events: Select the desired events that will trigger a webhook. For example, when a submission is created.
-
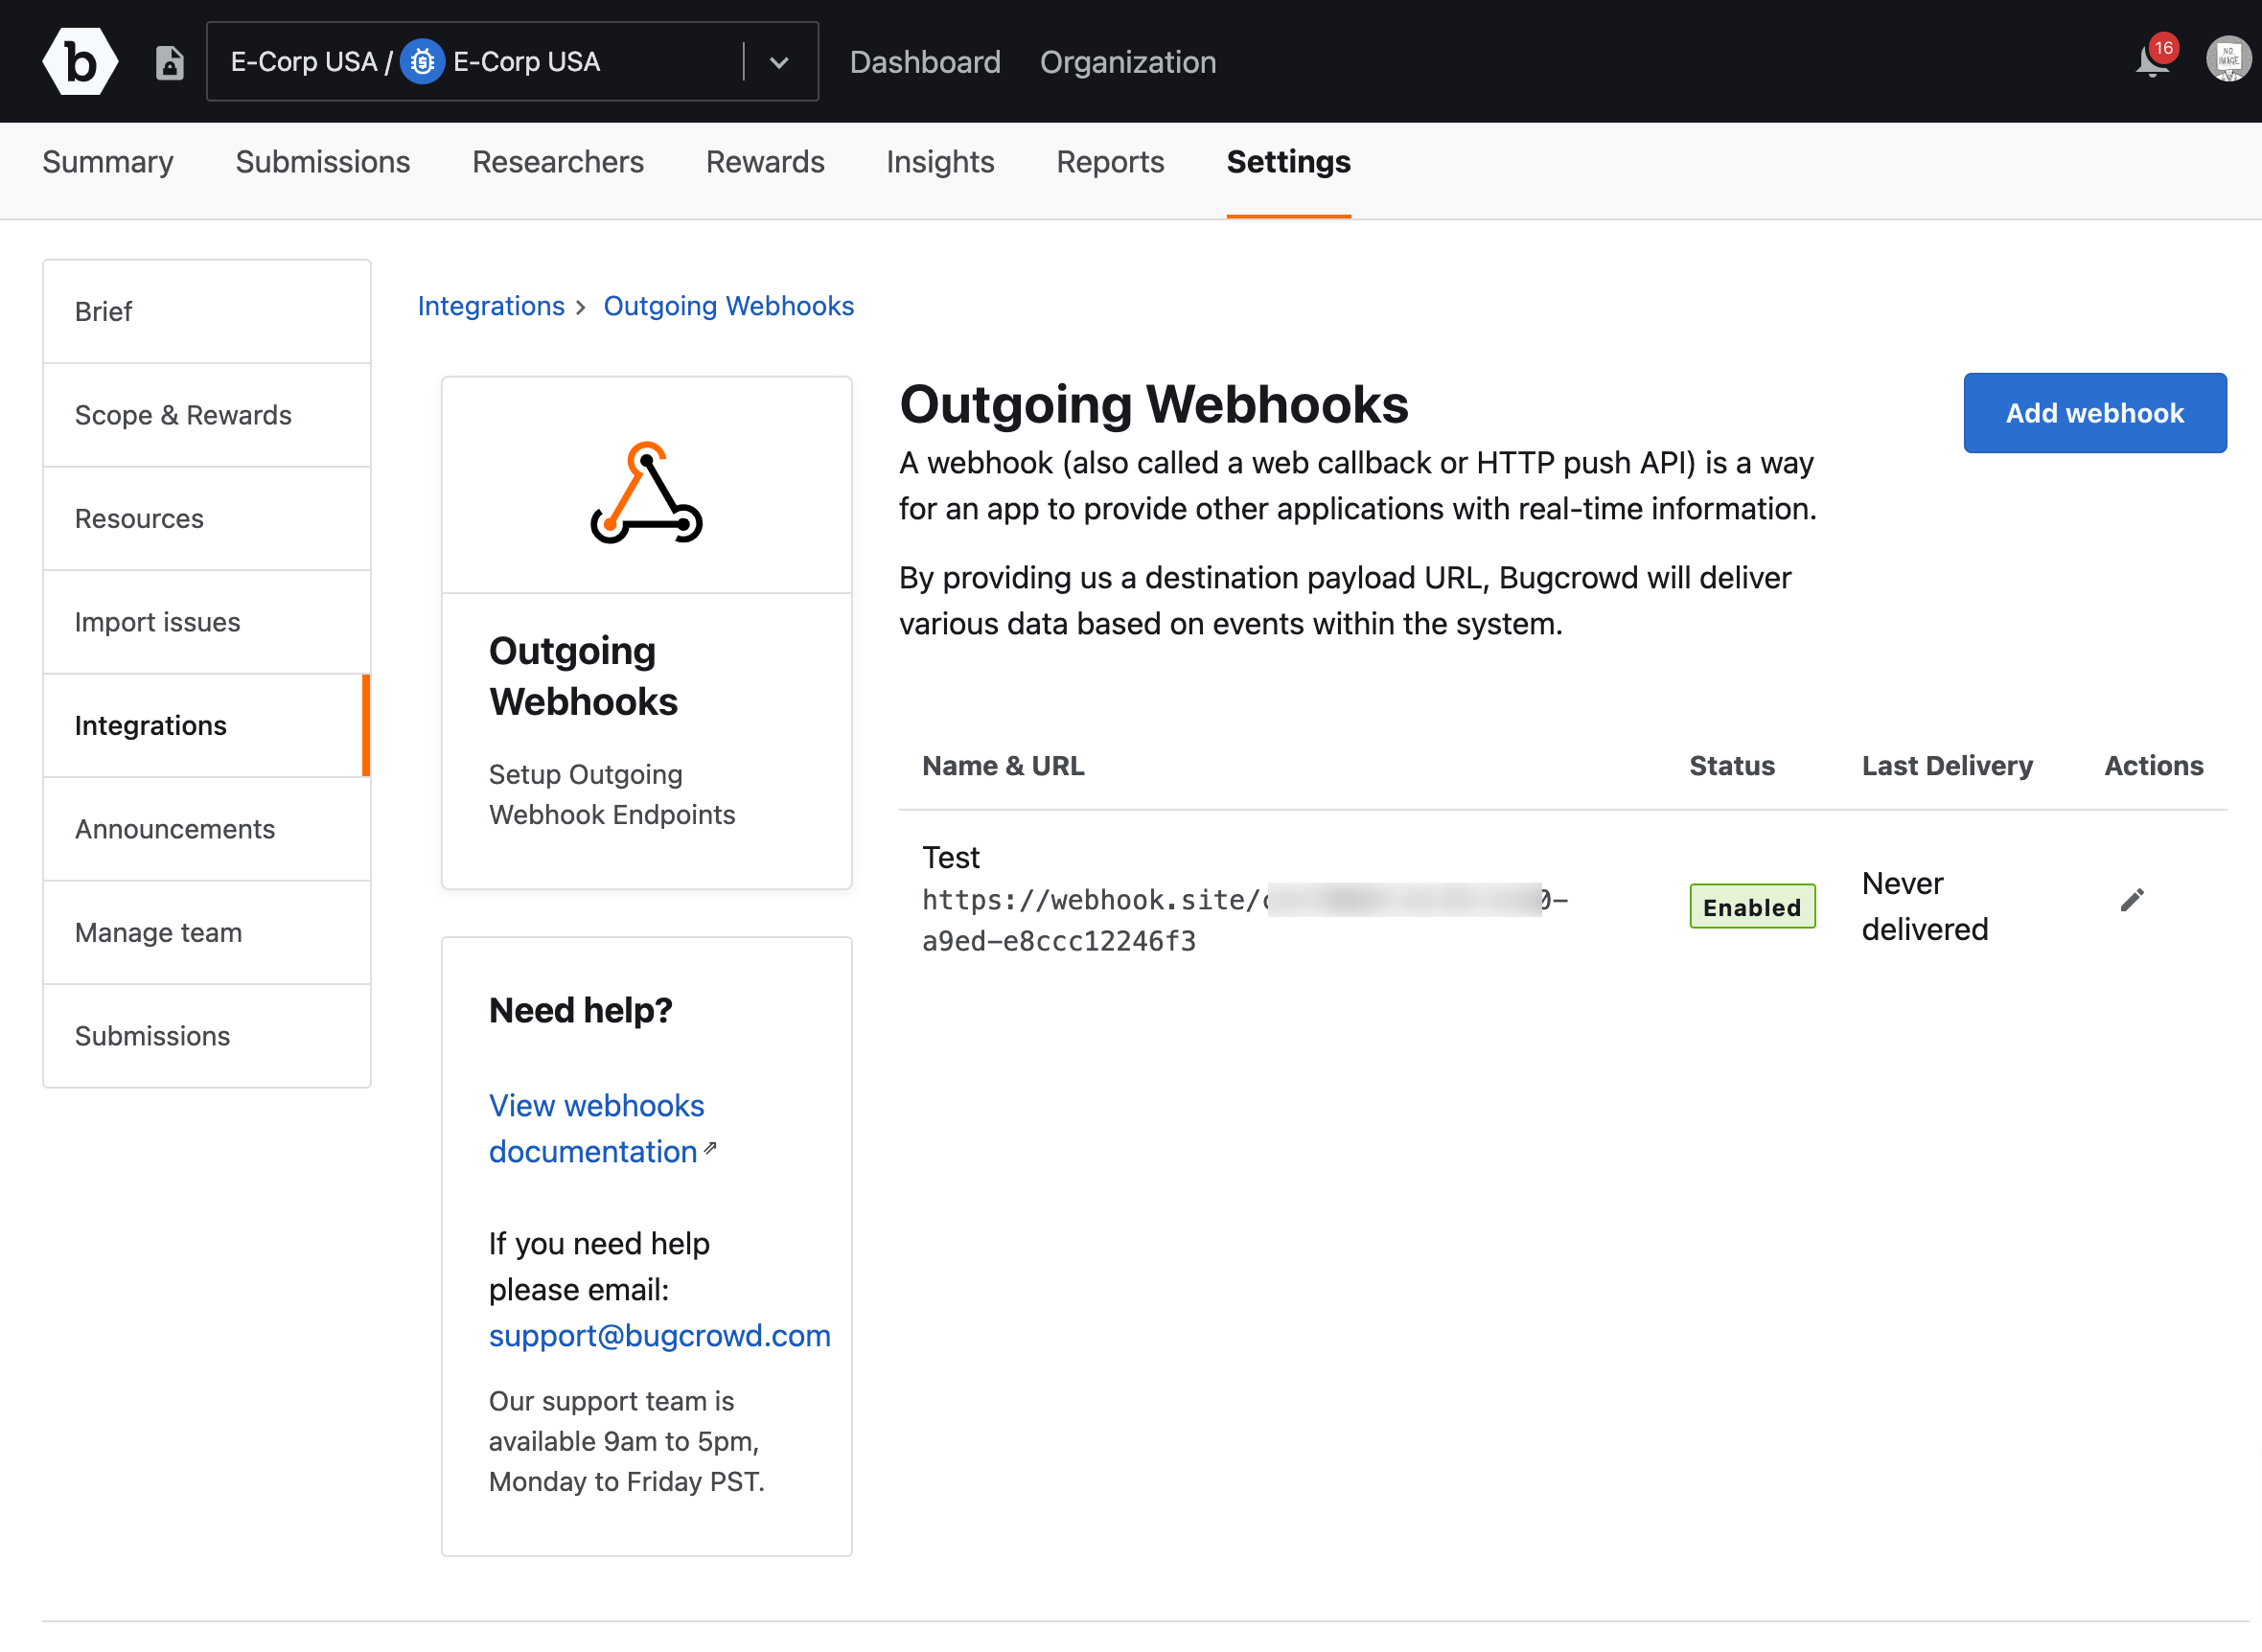
Click Add & enable webhook.
The webhook is created and displays the Edit webhook page.
The webhook instance is saved and displays on the Outgoing webhook page.
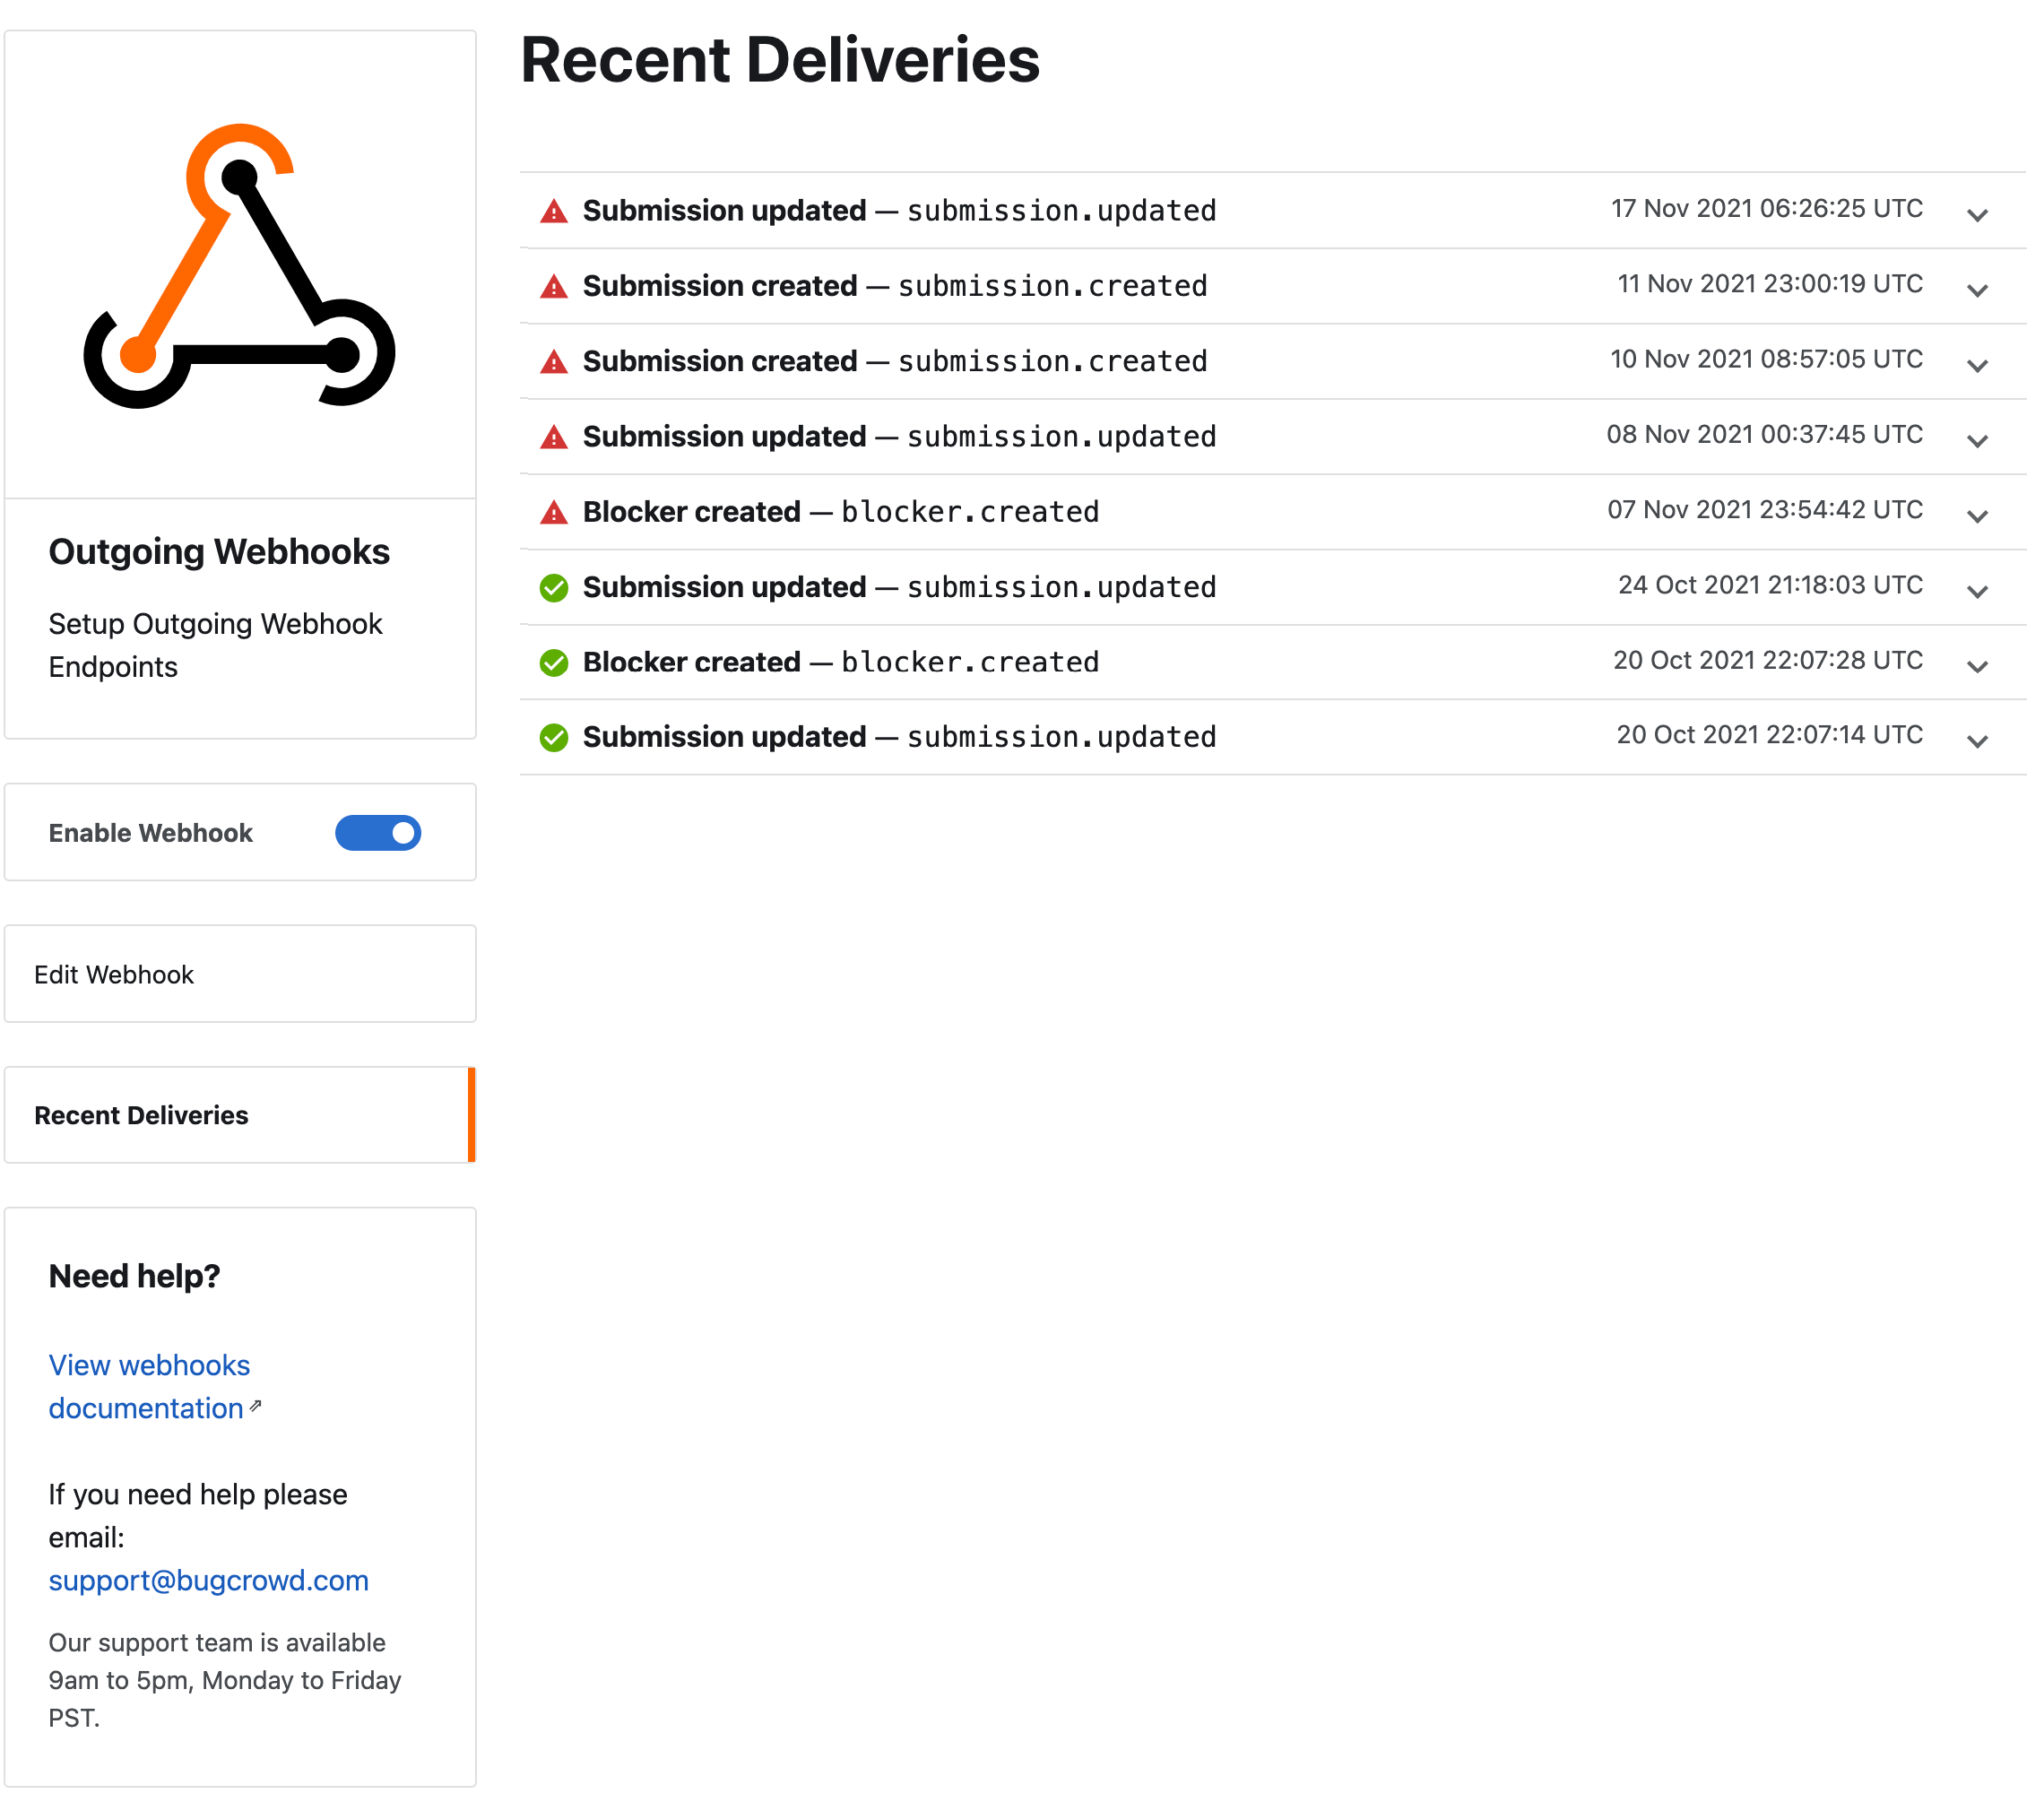
Viewing Recent Deliveries
Within the Outgoing webhooks integration, you can view past deliveries (failed or successful). This page will provide request headers, request bodies, and response data. Click Recent Deliveries to view the past deliveries.
Deleting Outgoing Webhooks
To delete an existing Outgoing Webhook:
-
Go to the Settings tab for your program, click Integrations and then click Outgoing Webhooks.
-
On the Outgoing Webhooks page, click the red bin icon in the Actions column.
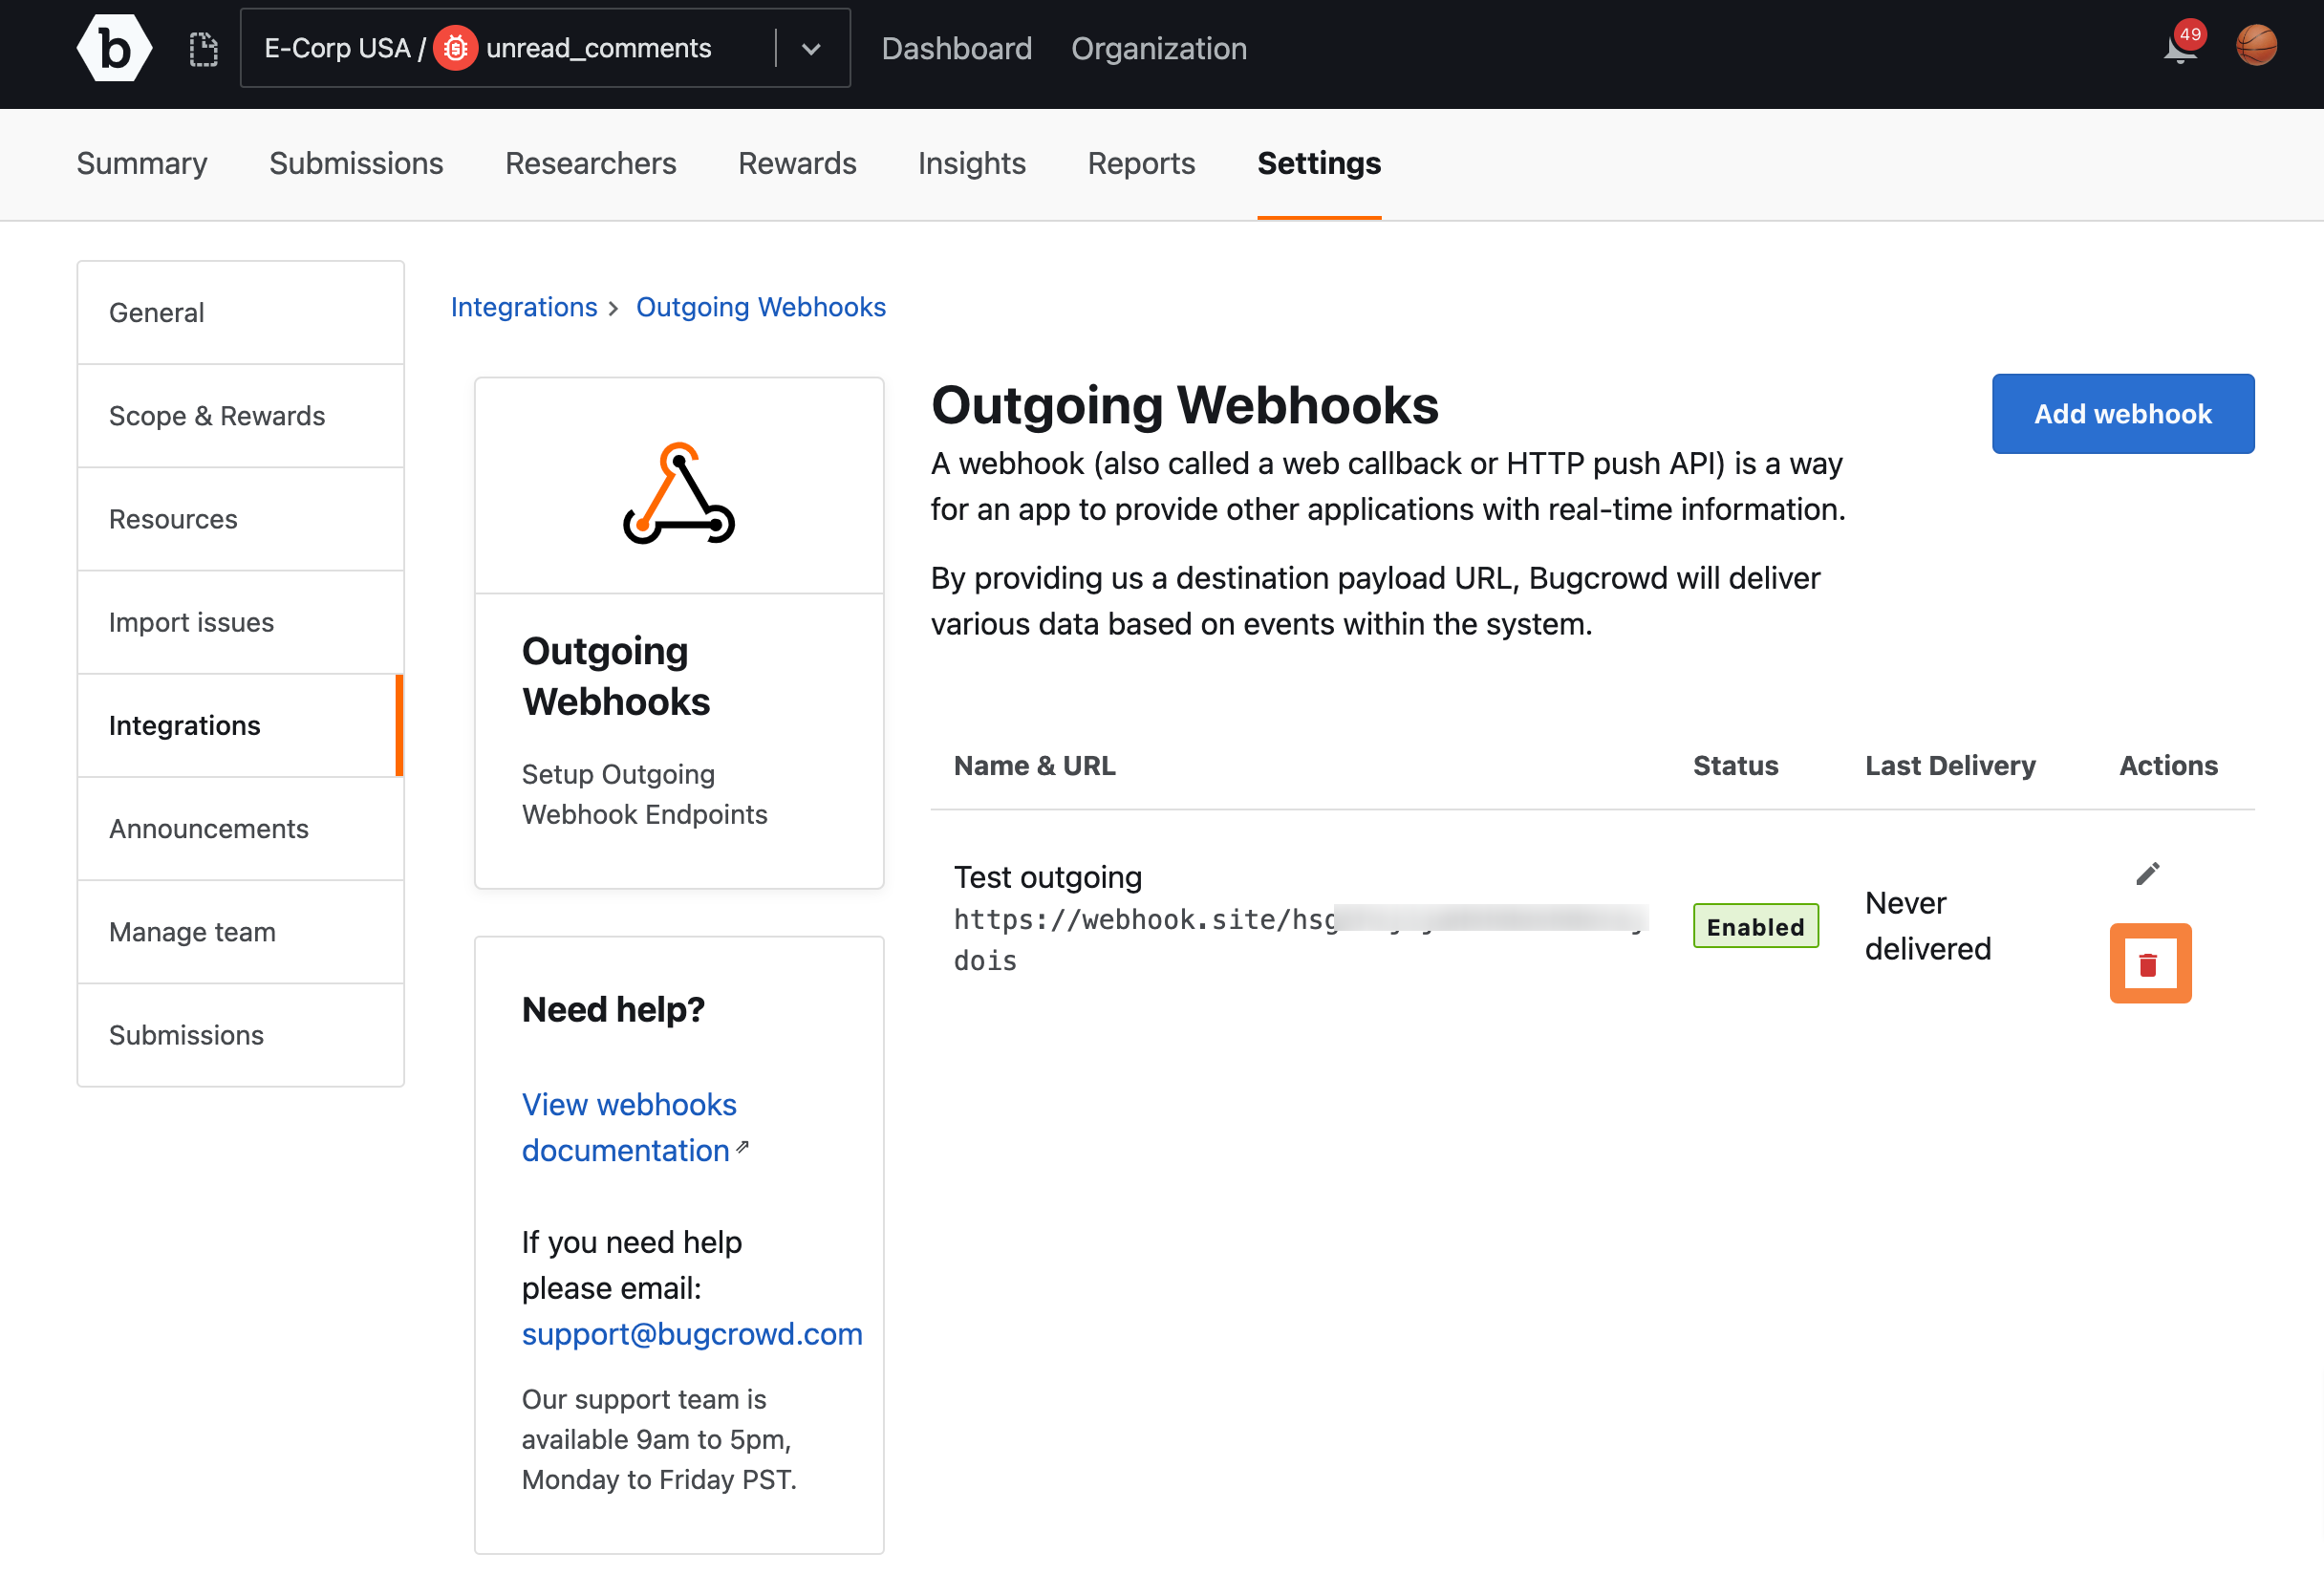
A pop-up appears to confirm if you wish to delete the webhook.
-
Click Delete to confirm.
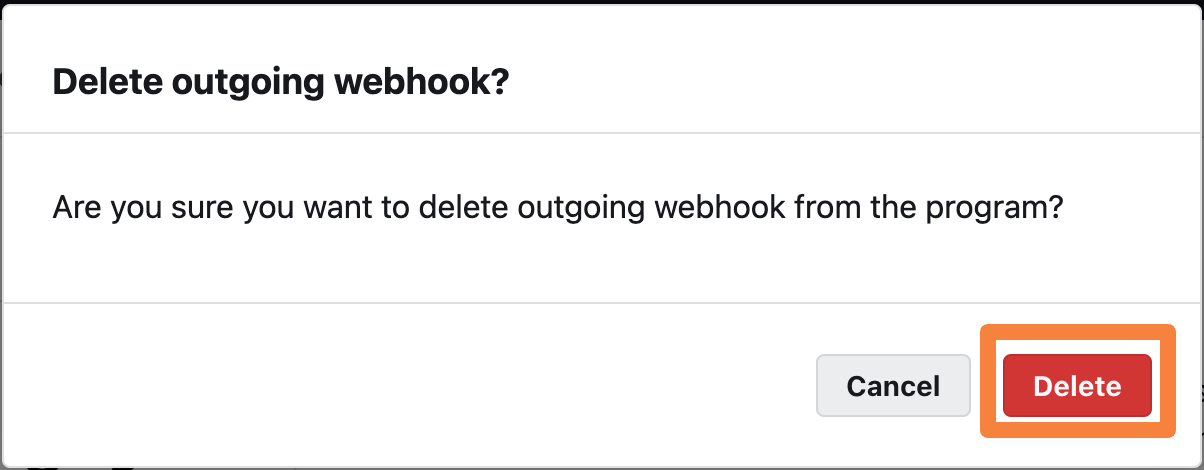
The outgoing webhook and all the linked recent deliveries are deleted.
Example Use Case
- Submission’s severity is updated to P1
- Webhook consumer receives
submission.updatedwebhook request - Webhook consumer looks at change data to see Submission’s severity was updated to P1
- Webhook consumer creates an urgent Jira ticket and sends a Slack message for investigation
Validating the Signature
-
On the Outgoing webhooks page, click the Edit icon under Actions.
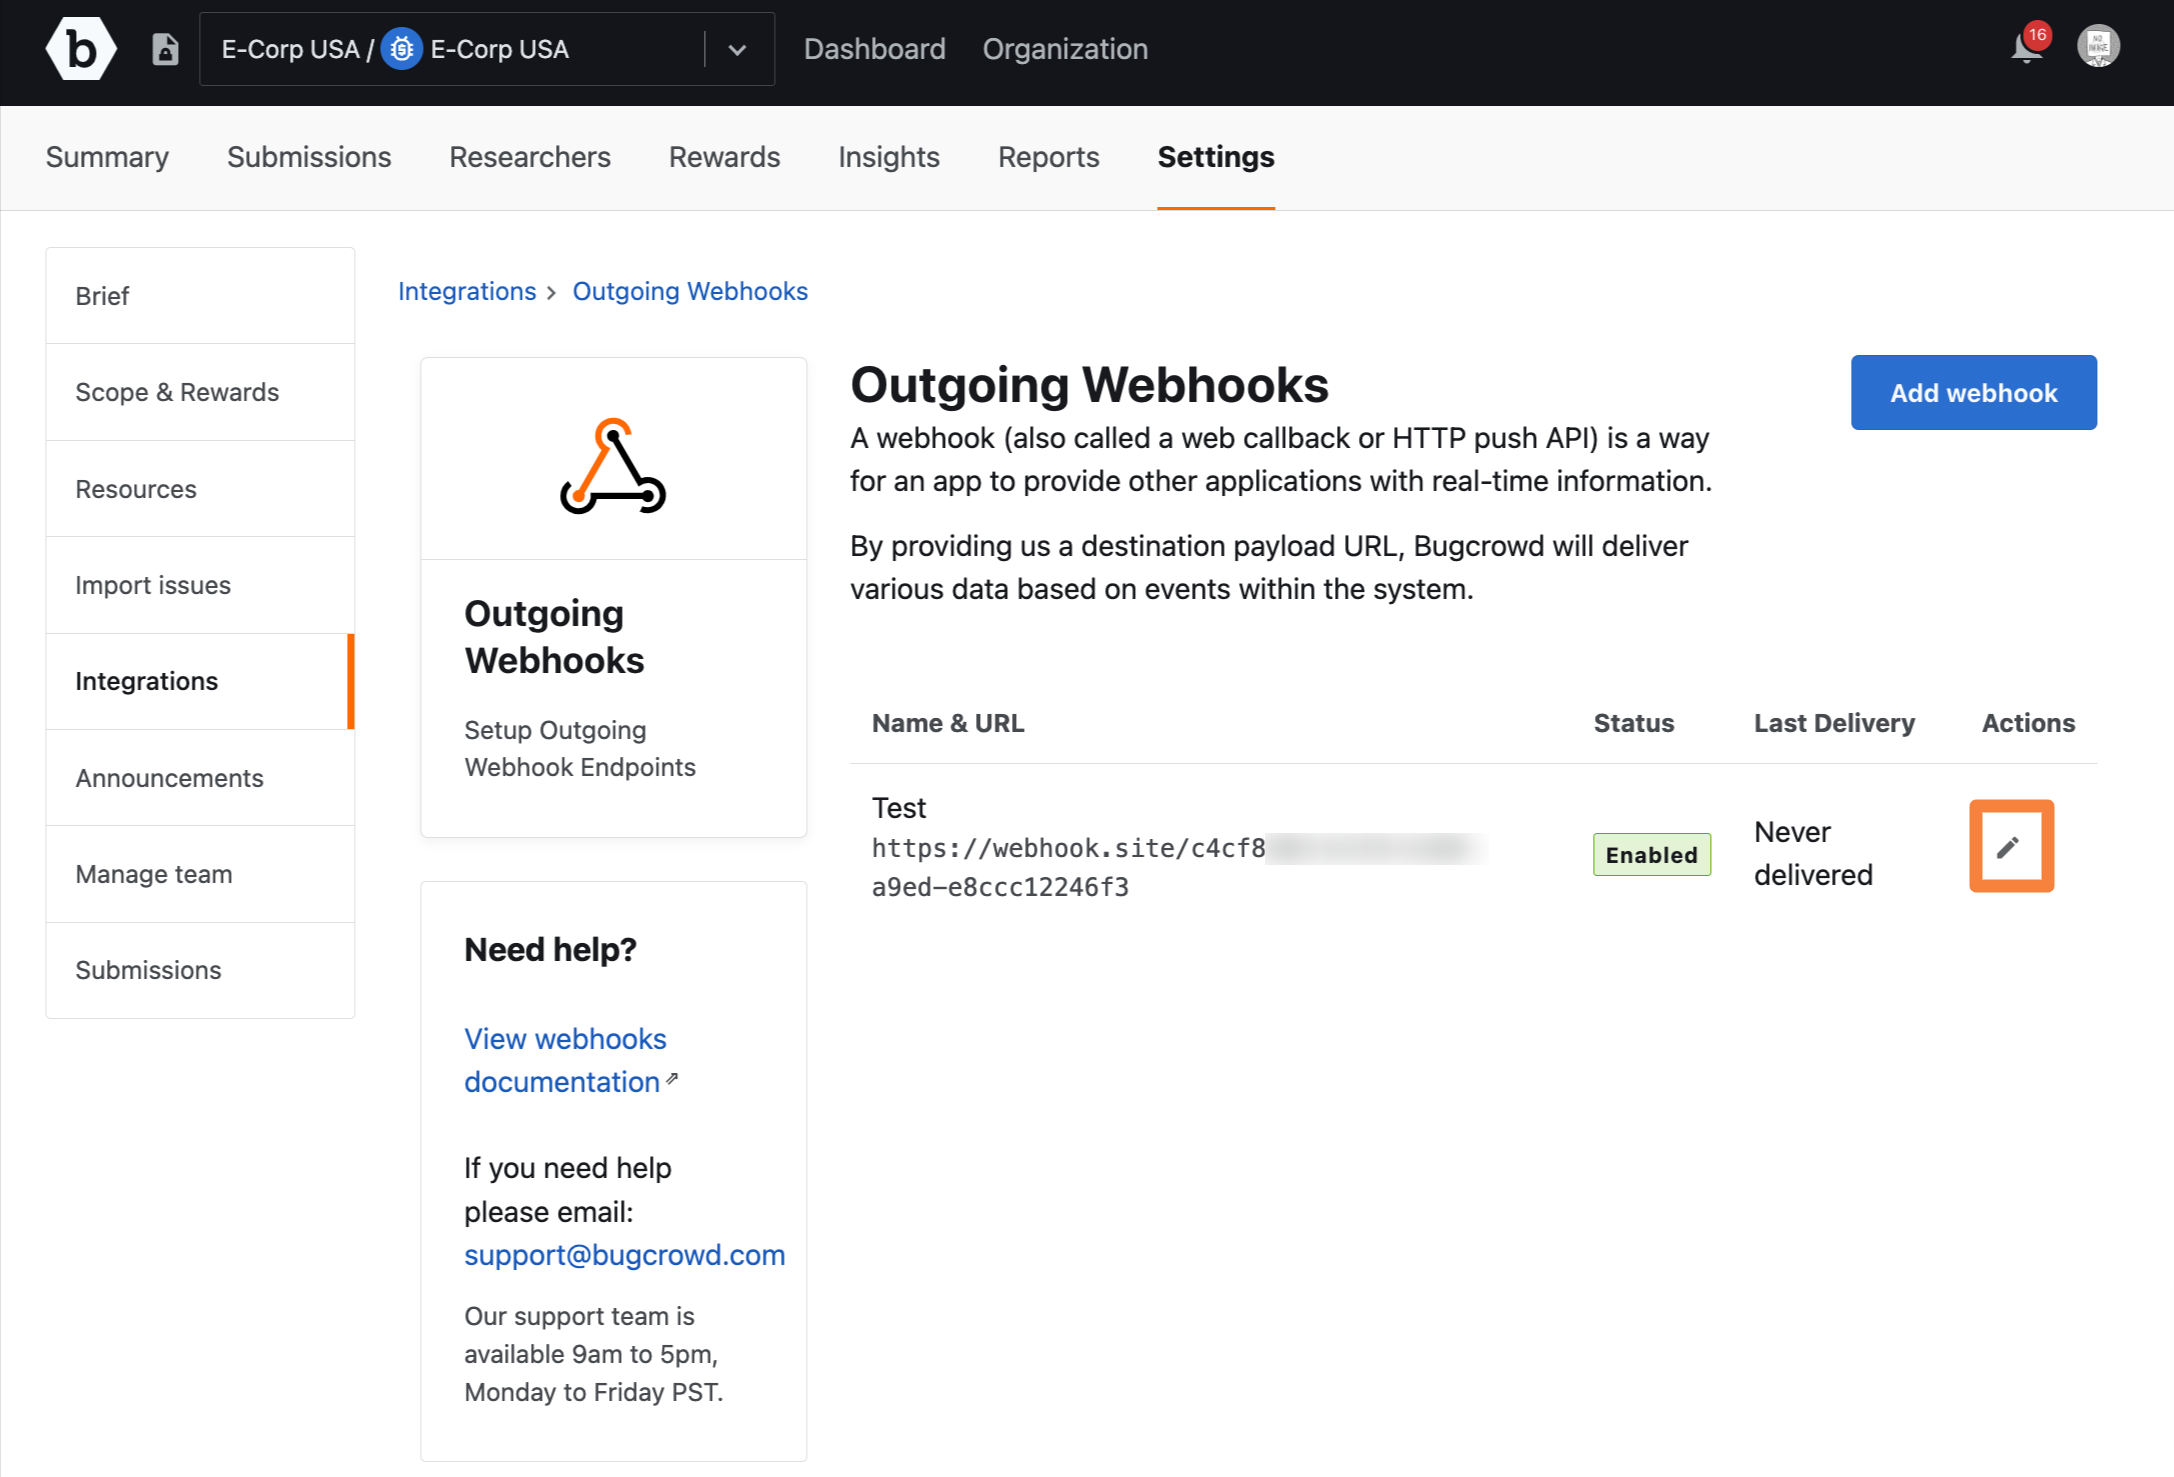
The Edit webhook page is displayed.
-
Copy the secret code.
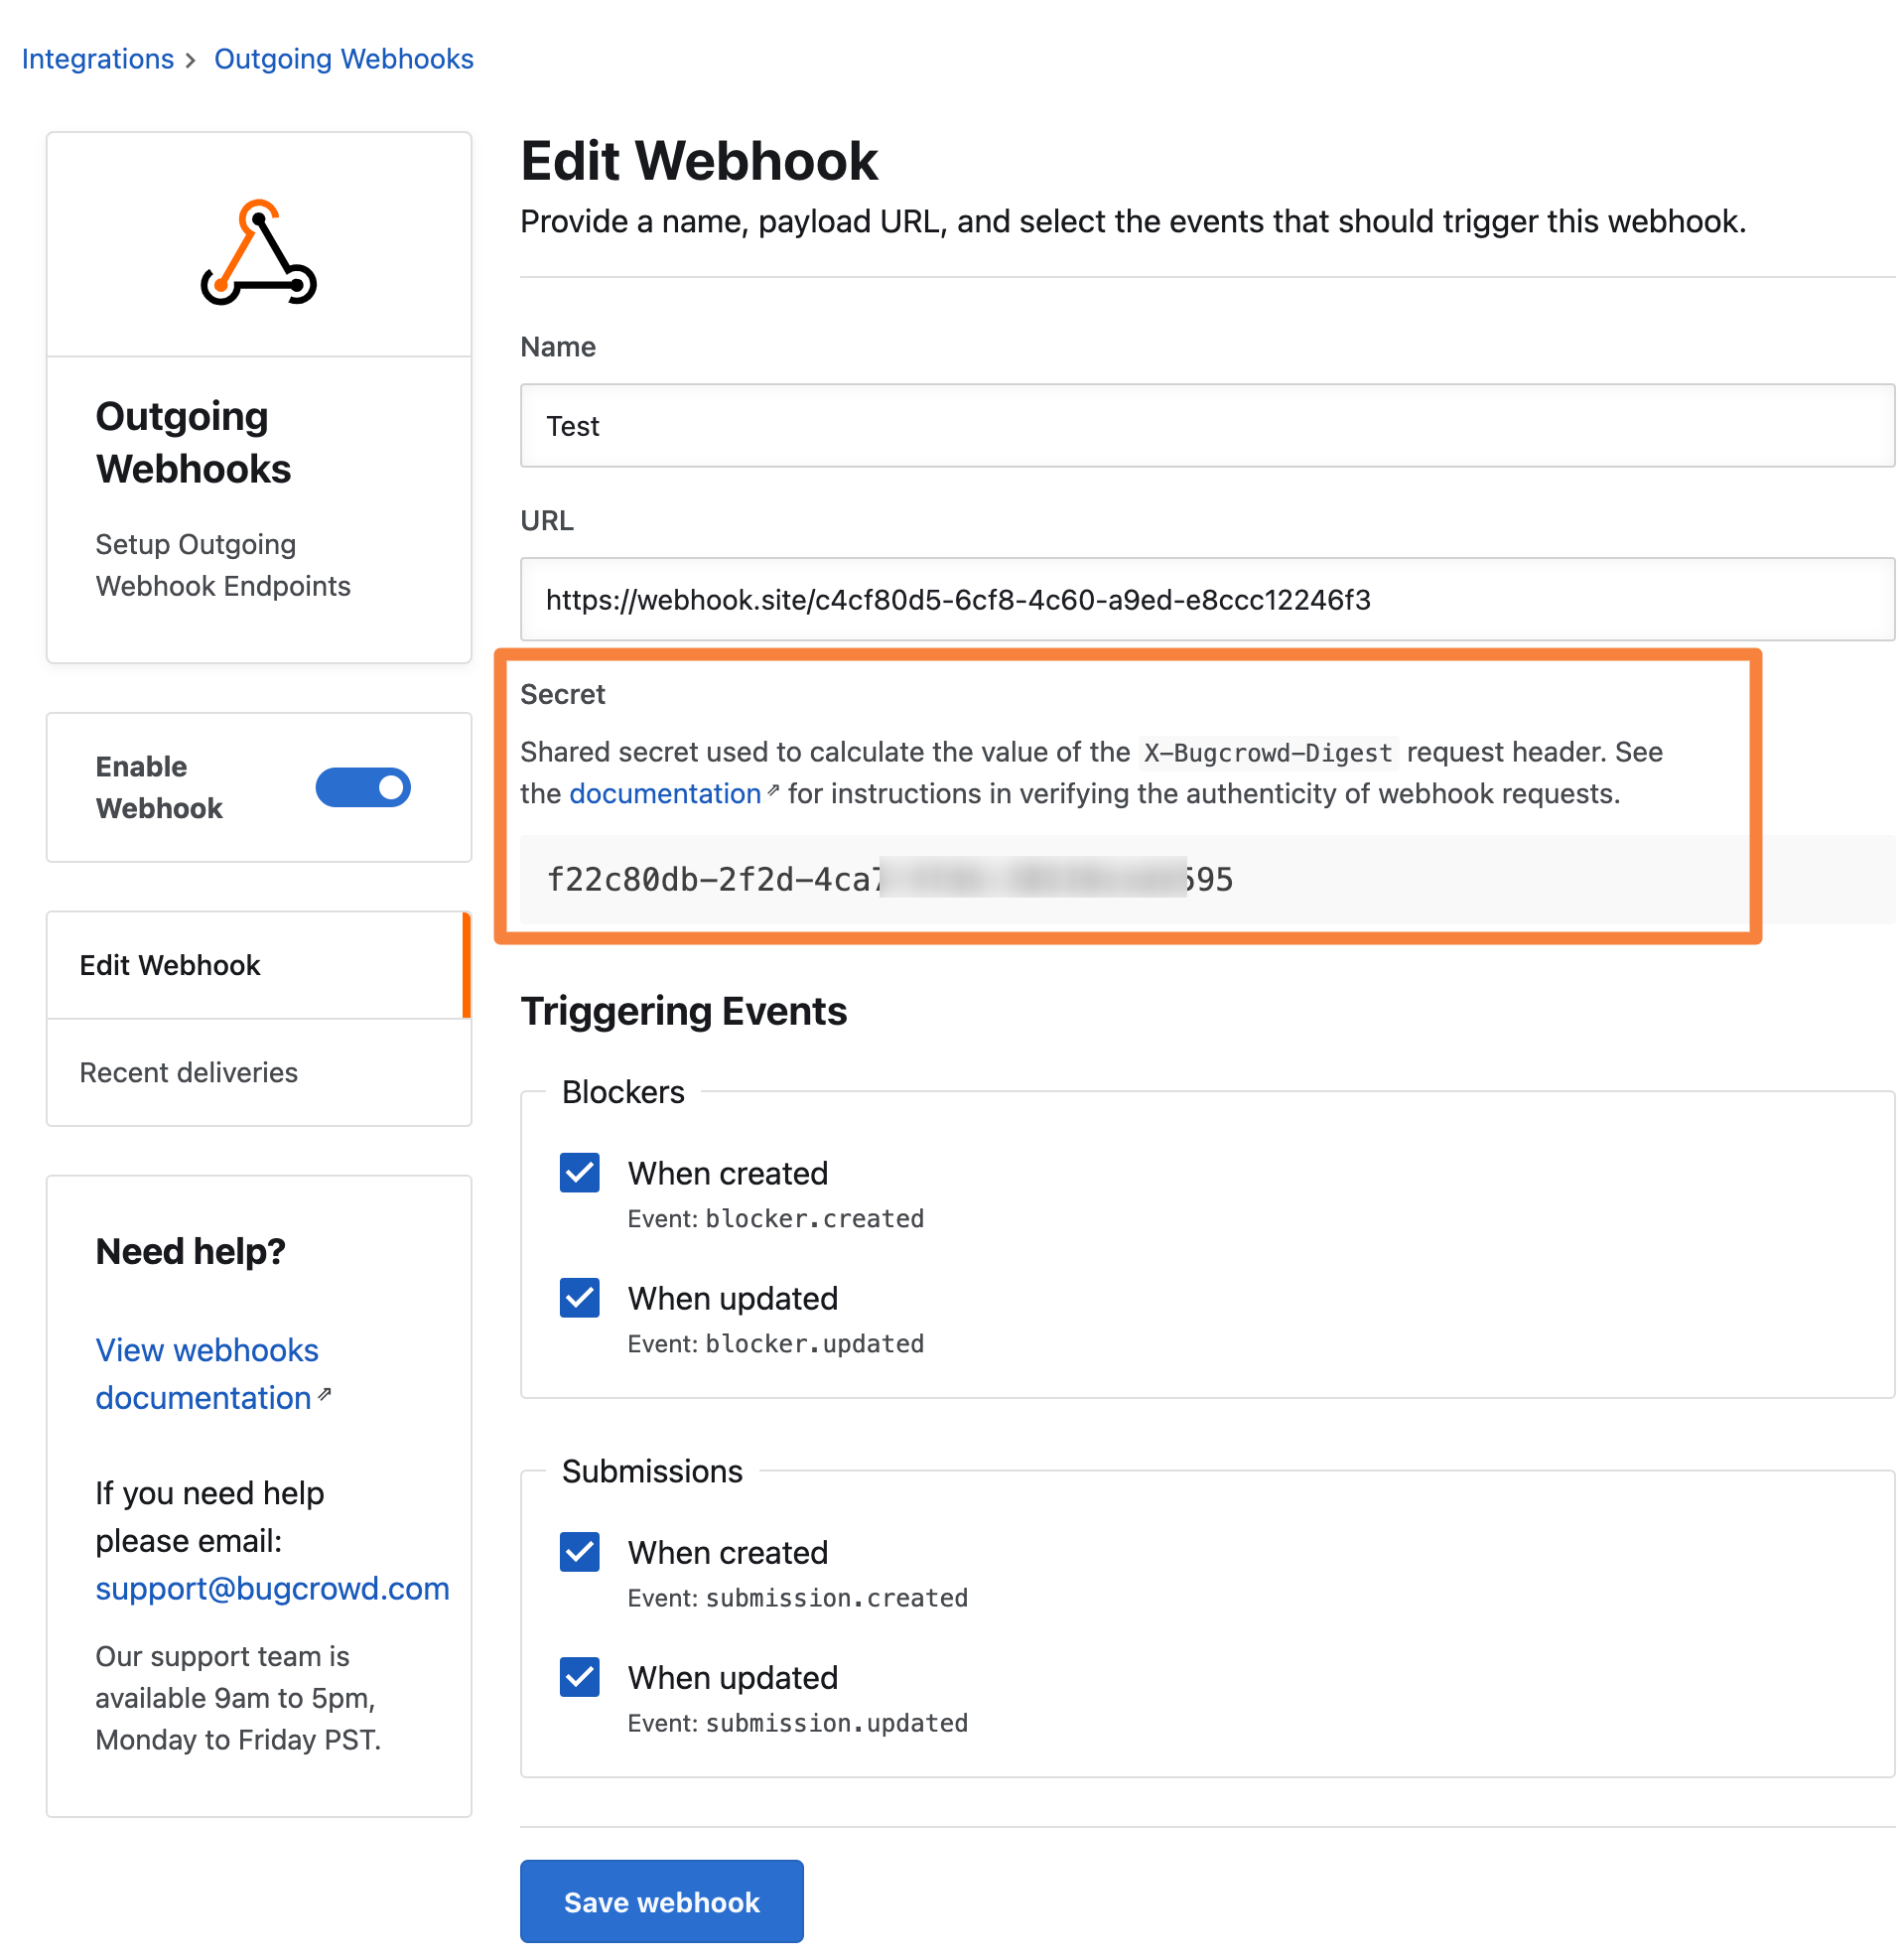
-
Store the secret securely in your application and use it to verify the webhook request.
Note: Deleting a webhook is not supported.
Ruby Example
Replace the values where applicable.
require 'openssl'
require 'rack'

# Secret from Outgoing Webhooks integration settings page in Crowdcontrol
secret = "replace with your integration's secret"

# Raw digest from the request header `X-Bugcrowd-Digest`
raw_digest = "replace with the digest from the `X-Bugcrowd-Digest` header"

# Raw body from the request - can use "copy to clipboard" from the deliveries page
raw_body = "replace with your webhook's body"

# Separate the timestamp
at_time = raw_digest.split(';').first.tr('timestamp=', '')

# Separate the digest string
digest = raw_digest.split(';').last

# Generate a new signature
signature = 'sha256=' + OpenSSL::HMAC.hexdigest(OpenSSL::Digest.new('sha256'), secret, (raw_body + at_time))

# Compare the new signature with the digest from the request
Rack::Utils.secure_compare(signature, digest)

# _To avoid timing attacks, always use `secure_compare` (which performs comparisons in constant time) instead of an equality operator like `=`._
Python Example
Replace the values where applicable.
import hmac
import json

secret = "replace with your integration's secret"
raw_digest = "replace with the digest from the `X-Bugcrowd-Digest` header"

# To get the raw body into the correct format from a non-compacted server, you need to specify compact formatting when dumping it to JSON:
# raw_body = json.dumps(payload, separators=(',', ':'))
# Alternatively can copy from the deliveries page
raw_body = "replace with your webhook's body"

digest = raw_digest.split(';')[1]
at_time = raw_digest.split(';')[0].split('=')[1]
signature = 'sha256=' + hmac.new(secret.encode('utf8'), (raw_body + at_time).encode('utf8'), digestmod='SHA256').digest().hex()
hmac.compare_digest(digest, signature)